
Pioneer NEX (Networked Entertainment eXperience) car receivers are renowned for their advanced features and seamless smartphone integration, including Apple CarPlay and Android Auto. To ensure your Pioneer NEX unit runs smoothly and you can enjoy the latest functionalities, keeping its firmware updated is crucial. While USB updates are common, updating your Pioneer NEX firmware using your iPhone offers a convenient, cable-free alternative. This guide will walk you through the process, ensuring your system is up-to-date using the Car AV Assist app.
Why Update Your Pioneer NEX Firmware?
Firmware updates are essential for any electronic device, and your Pioneer NEX car receiver is no exception. These updates bring a host of benefits, including:
- Enhanced Features: Firmware updates often introduce new features, like the Amazon Alexa functionalities, Spotify integration, and expanded language support mentioned in previous Pioneer updates.
- Bug Fixes: Updates address software glitches and bugs that might affect performance, ensuring a smoother and more reliable user experience.
- Improved Compatibility: Updates maintain and improve compatibility with the latest smartphones and apps, including Apple CarPlay and Android Auto.
- Performance Optimization: Firmware updates can optimize the overall performance of your receiver, leading to faster response times and improved stability.
Keeping your Pioneer NEX firmware updated ensures you get the most out of your investment and enjoy a cutting-edge in-car entertainment experience.
Preparing for the Update: What You Need
Before you begin the firmware update process using your iPhone, make sure you have the following:
- Pioneer NEX In-Dash AV Receiver: This guide applies to Pioneer NEX wireless models.
- iPhone: An iPhone with a stable Wi-Fi and Bluetooth connection.
- Car AV Assist App: Download and install the “CarAVAssist” app from the Apple App Store on your iPhone.
- Pioneer Account: Ensure you have a Pioneer account and are logged into the Car AV Assist app.
- Stable Power Supply: Keep your car engine running or ensure the car battery has sufficient charge throughout the update process to prevent interruptions.
Step-by-Step Guide: Updating Pioneer NEX Firmware via iPhone (Car AV Assist App)
The Car AV Assist app provides a streamlined method to update your Pioneer NEX firmware wirelessly using your iPhone. Follow these steps:
1. Checking Compatibility and App Installation
First, ensure that your Pioneer NEX model is compatible with the Car AV Assist app for firmware updates. Most newer Pioneer NEX wireless models support this feature, including the DMH-WT7600NEX and similar models.
Download and install the “CarAVAssist” app from the Apple App Store if you haven’t already.
2. Connecting Your iPhone to Your Pioneer NEX
To establish a connection between your iPhone and your Pioneer NEX receiver, follow these steps:
-
Enable Bluetooth and Wi-Fi on your iPhone: Make sure both Bluetooth and Wi-Fi are turned on in your iPhone’s settings.
-
Pair your iPhone with the Pioneer NEX unit via Bluetooth:
- On your Pioneer NEX receiver, go to the Settings menu.
- Navigate to Bluetooth settings.
- Enable Bluetooth and make your unit discoverable.
- On your iPhone, find your Pioneer NEX unit in the Bluetooth devices list and pair them.
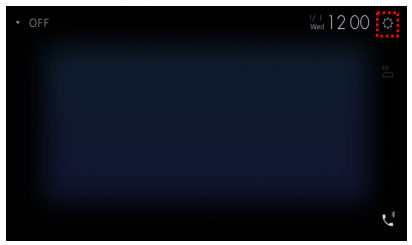 step 1
 -
Connect to Wi-Fi:
- On your Pioneer NEX unit, go to Settings and then Wi-Fi.
- Connect to your iPhone’s personal hotspot or a local Wi-Fi network that your iPhone is also connected to. Ensure both devices are on the same network.
Alt Text: Step 2: Scrolling down to System Information in the Pioneer NEX Settings menu.
3. Initiating the Firmware Update Process via Car AV Assist
Once your iPhone is connected to your Pioneer NEX unit via Bluetooth and Wi-Fi, you can initiate the firmware update through the Car AV Assist app:
-
Open the CarAVAssist App on your iPhone: Launch the Car AV Assist app and ensure you are logged in with your Pioneer account.
-
Navigate to Firmware Update: Within the app, look for a section related to “Firmware Update” or “System Update.” The exact location might vary slightly depending on the app version.
-
Check for Updates: The app should automatically detect your connected Pioneer NEX receiver. Tap on the option to check for firmware updates.
-
Download and Install: If an update is available, the app will display the firmware version and release notes. Follow the on-screen prompts to download the update to your iPhone and then transfer it to your Pioneer NEX unit for installation.
-
Follow On-Screen Instructions: Your Pioneer NEX receiver will guide you through the installation process. This may involve restarting the unit and waiting for the update to complete. Do not turn off the power during the update process.
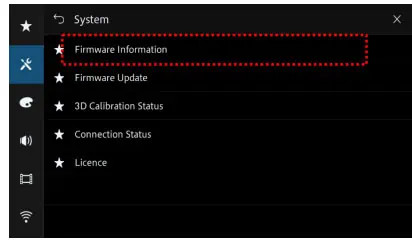 Step 3
 -
Verify Update: After the update is complete, verify the new firmware version in the System Information menu on your Pioneer NEX unit to confirm successful installation.
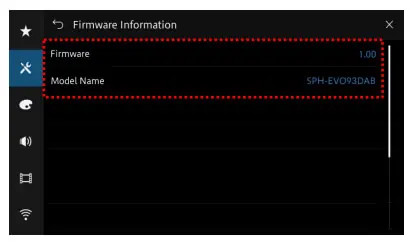 Step 4
Alternative Method: Updating via USB (For Reference)
While this guide focuses on iPhone updates, it’s helpful to know the traditional USB method is also available. This method is detailed in the original article and involves:
- Downloading the Firmware: Download the latest firmware file from the official Pioneer website onto your computer.
- Preparing a USB Drive: Format a blank USB drive (512MB or larger, FAT32 or NTFS) and copy the downloaded firmware file to it.
- Connecting USB and Updating: Plug the USB drive into the USB port of your Pioneer NEX receiver. Access the System Update menu in settings and choose the USB option to initiate the update.
The USB method can be quicker for some users, but the iPhone method offers wireless convenience.
Troubleshooting Common Issues
- Connection Problems: Ensure both your iPhone and Pioneer NEX are on the same Wi-Fi network and properly paired via Bluetooth. Restart both devices if needed.
- App Issues: Make sure you have the latest version of the Car AV Assist app installed. Reinstall the app if you encounter persistent problems.
- Update Failure: If the update process fails, check the Pioneer support website for troubleshooting steps specific to your model or contact Pioneer customer support.
Explore the Enhanced Features of Your Updated Pioneer NEX
Once you’ve successfully updated your Pioneer NEX firmware, take some time to explore the new features and improvements. You might find enhanced Alexa functionalities, smoother Apple CarPlay or Android Auto performance, or new customization options. Regularly check for updates to keep your system running at its best.
Conclusion
Updating your Pioneer NEX firmware using your iPhone and the Car AV Assist app is a straightforward way to ensure your in-car entertainment system remains cutting-edge. By following these steps, you can enjoy the latest features, bug fixes, and performance improvements without the need for USB drives. Keep your firmware updated and continue to enjoy the premium experience that Pioneer NEX wireless models offer.
Ready to enhance your car audio experience? Visit Santa Clarita Autosound in California for expert advice and installation, or explore our wide selection of Pioneer car radios online at https://shop.santaclaritaautosound.com/collections/car-stereo-receivers/brand_pioneer. Upgrade your drive today!