
Making perfect hard boiled eggs that peel effortlessly can feel like a kitchen myth. Countless home cooks face the frustration of shells sticking stubbornly, tearing away chunks of egg white and leaving you with mangled eggs. But what if we told you there’s a method, championed by none other than the Pioneer Woman herself, that promises easy-peel perfection every single time?
For years, hard boiled eggs have been a staple in kitchens everywhere – a go-to healthy snack, a protein boost for salads, and the foundation for beloved dishes like egg salad and deviled eggs. Like many, I’ve cooked thousands of hard boiled eggs, constantly seeking that elusive foolproof technique. Inspired by the wisdom shared on the Pioneer Woman’s blog, and through my own kitchen experiments, I’ve refined a method that consistently delivers easy-to-peel, perfectly cooked hard boiled eggs, free from that dreaded gray ring around the yolk. This isn’t just about boiling eggs; it’s about mastering the art of the perfect hard boiled egg, the Pioneer Woman way and beyond.
 Hard Boiled Eggs Sliced in Half on Wooden Board
Why This Hard Boiled Egg Method Stands Out
This method isn’t just another way to boil eggs; it’s a carefully crafted approach designed for consistent, frustration-free results. Here’s why it’s the best choice for your kitchen:
Effortless Peeling, Guaranteed: The secret lies in the “hot start, cold finish” technique. Starting the eggs in boiling water and then shocking them in an ice bath is the key to shells that release cleanly and easily. Say goodbye to picking at tiny shell fragments!
Preserves Egg White Perfection: No more sacrificing precious egg white to stubborn shells. The ice bath step is crucial for gently separating the egg white from the inner membrane, ensuring smooth, intact eggs every time.
Cook Any Amount, Perfectly: Whether you need a couple of eggs for a quick snack or a dozen for a big batch of egg salad, this method adapts seamlessly. As long as your eggs are in a single layer in the pot, the cooking time remains consistent.
No Need for Room Temperature Eggs: Forget the fuss of bringing eggs to room temperature beforehand. This method is designed for convenience – simply grab your eggs straight from the refrigerator and you’re ready to cook.
Remember that satisfying feeling of large pieces of shell coming away in your hand? This method makes that a reality, not just a dream. The Pioneer Woman’s blog highlighted a similar technique back in 2015, and the rave reviews speak for themselves. This updated guide builds upon that foundation, incorporating minor tweaks and improvements for even better results. So, ditch the guesswork and let’s dive into making truly perfect, easy-to-peel hard boiled eggs, inspired by the Pioneer Woman’s trusted approach.
Essential Tips for the Best Hard Boiled Eggs
While the core method is straightforward, a few key tips will elevate your hard boiled egg game from good to exceptional:
The Age of Your Eggs Matters (Slightly): While this method works beautifully with eggs of any age, slightly older eggs tend to peel just a tad easier. As eggs age, the pH of the egg white (albumen) increases, weakening the bond between the inner membrane and the egg white. Food science expert Harold McGee delves into this fascinating detail in his book, On Food and Cooking. However, don’t feel you need to use week-old eggs; even fresh-from-the-store eggs will peel easily with this technique. Save those super-fresh farm eggs for poaching!
Single Layer is Key: Avoid overcrowding the pot. For even cooking, ensure your eggs are arranged in a single layer. If you’re cooking a large batch, opt for a wider pan over a deep one to maintain that single layer. A wide skillet can even work wonders for larger quantities.
Peel Promptly for Easiest Results: Don’t let your cooked eggs sit for too long before peeling. The “magic window” for easy peeling is right after the ice bath, while the eggs are still slightly warm. If you leave them to cool completely, the peeling process can become more challenging. Peel them soon after cooking for the best, easiest results.
Let’s walk through the simple steps to perfectly cooked, easy-to-peel hard boiled eggs!
Step-by-Step Guide: Pioneer Woman Inspired Hard Boiled Eggs
The beauty of this method is its simplicity. Starting with boiling water ensures precise cooking from the moment the eggs enter the pot. To gently introduce the eggs to the boiling water, a simple tool is helpful.
In the past, I used a wire basket to lower the eggs, but occasionally, a slight crack would occur if an egg bumped too hard. Now, I find using tongs to be the gentlest and most effective method.
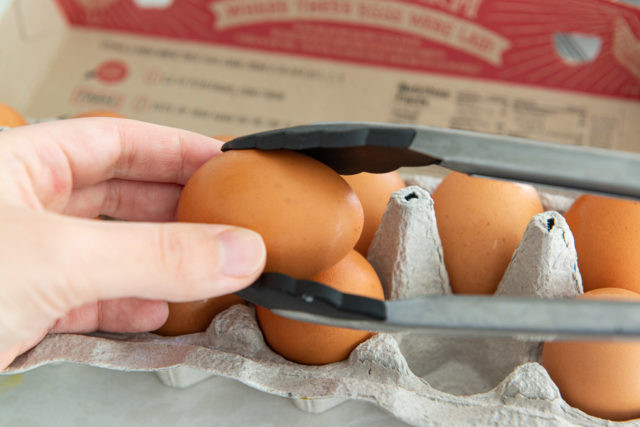 Holding a Brown Vital Farms Egg in Nylon Tongs
Using tongs, carefully cradle each egg and gently lower it into the boiling water, one at a time. A slotted spoon can also work in a pinch.
This gentle approach takes only about 30 seconds to load and place a dozen eggs into the pot, minimizing the risk of cracking. Plus, using tongs allows you to use less water, as you don’t need to submerge a bulky basket.
Once all the eggs are in the water, set your timer and adjust the heat to maintain a gentle boil. The water should be actively simmering, but not so violently that the eggs are bouncing around excessively, which could lead to cracking. A gentle boil is perfect for even cooking and preventing premature cracking.
Hard Boiled Egg Cooking Times
Cooking time is crucial for achieving that perfect balance of a fully cooked yolk without the dreaded gray ring. The ideal cooking time depends slightly on egg size:
Large Eggs (most common): 13 minutes
Medium Eggs: 12 minutes
Extra Large/Jumbo Eggs: 14 minutes
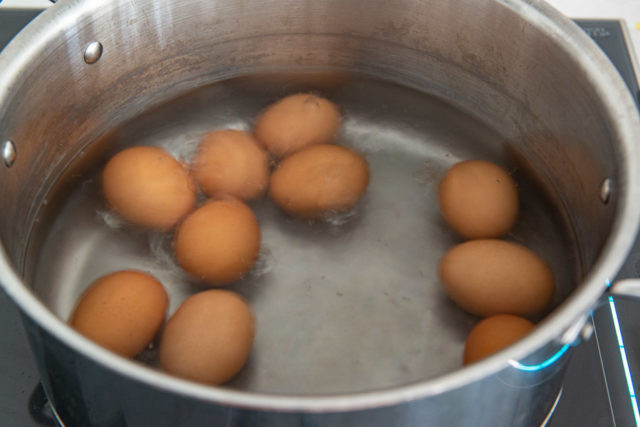 How to Hard Boil Eggs – By Cooking in a Saucepan in Simmering Water
Once the timer goes off, immediately drain the hot water and transfer the eggs to a large bowl filled with ice water for just one minute.
This short ice bath is precisely timed to halt the cooking process and make peeling a breeze, without chilling the eggs completely.
The Ice Bath: A Non-Negotiable Step?
For truly perfect, easy-to-peel hard boiled eggs, the ice bath is absolutely essential. It’s not just an extra step; it’s a game-changer.
Why the Ice Bath is Crucial:
- Stops Cooking Instantly: The ice bath immediately halts any residual cooking, preventing overcooked yolks and that undesirable gray ring.
- Easy Peeling Power: Rapidly cooling the shell while keeping the egg white slightly warm creates a slight contraction and separation between the shell and the egg white membrane. This is what makes the shells practically slide off.
If you don’t have ice readily available, don’t worry! You can improvise: drain the hot water and place the eggs in a bowl under a constant stream of cold running water for a few minutes. Similar to quickly thawing seafood, the key is to keep the water running to ensure a continuous supply of cold water to cool the eggs rapidly.
While a longer ice bath won’t hurt, it’s really unnecessary. A quick one-minute “shock” is all it takes to stop the cooking and work its easy-peeling magic.
After the ice bath, peel the eggs right away while they are still slightly warm to the touch. This is when the separation between the shell and egg white is at its maximum, making peeling incredibly easy.
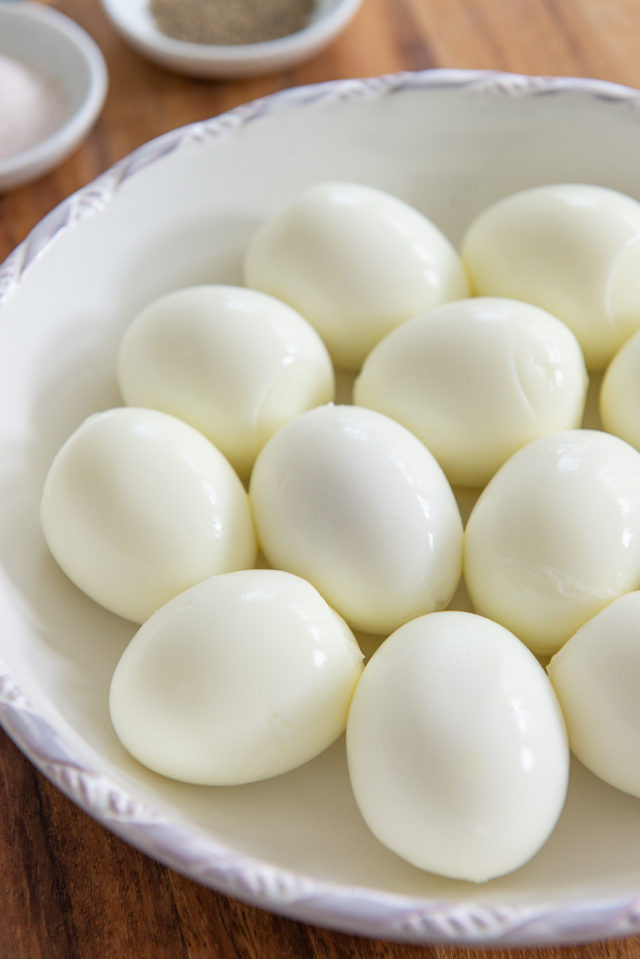 Boiled Eggs – Peeled in a White Ceramic Bowl
Ways to Enjoy Your Perfectly Cooked Hard Boiled Eggs
Once peeled, your perfectly cooked hard boiled eggs are ready to be enjoyed in countless ways: eat them warm, chill them for later snacking, or transform them into delicious dishes.
Deviled Eggs Delights: Elevate your appetizer game with deviled eggs! Get creative with variations like Smoked Salmon Deviled Eggs, Bacon and Crispy Shallot Deviled Eggs, or Chile Scallion Deviled Eggs.
Egg Salad Perfection: Classic egg salad is always a winner, and this Egg Salad recipe is a must-try. Hard boiled eggs also add protein and creaminess to Red Potato Salad and Cranberry Chicken Salad.
Salad Superstar: Hard boiled eggs are a fantastic addition to virtually any green salad for a protein boost. They are especially delicious in Cobb Salad, Kale Salad, or Wild Rice Salad.
Breakfast Powerhouse: Pair hard boiled eggs with Hash Browns and crispy Oven Bacon for a satisfying breakfast. For a special treat, serve them alongside Cheddar Scallion Biscuits or Bacon Cheddar Waffles.
And there you have it – perfectly cooked hard boiled eggs with no green ring around the yolks, ready to be devoured!
For more egg-cellent inspiration, explore these recipes: How to Poach an Egg, Croque Madame, and Herbed Baked Eggs. Enjoy!
Hard Boiled Egg FAQs
How should I store hard boiled eggs and for how long?
Store cooked hard boiled eggs in the refrigerator for up to 5 days in an airtight container to prevent them from absorbing odors. Never leave hard boiled eggs at room temperature.
Can hard boiled eggs be frozen?
Freezing hard boiled eggs isn’t recommended. The egg whites become rubbery and unappetizing after thawing. It’s best to cook only the amount you plan to use within a week.
What’s the best way to reheat hard boiled eggs?
If you want to warm pre-cooked hard boiled eggs, keep the shells on and submerge them in boiling water for about 5 minutes to gently heat them through. Avoid microwaving hard boiled eggs, as they can explode.
Are older eggs really better for easy peeling?
While slightly older eggs can be a bit easier to peel, this method works wonderfully with eggs of any age. Most eggs you buy at the store are already a few days old.
What is the secret to making eggs easy to peel?
The hot start and cold finish – boiling the eggs and then shocking them in an ice bath – consistently delivers the easiest peeling results.
How long should I boil eggs for hard boiled?
For large eggs, boil for 13 minutes. Medium eggs need 12 minutes, and extra-large or jumbo eggs require 14 minutes.
How do I prevent the gray ring around the yolk in hard boiled eggs?
The gray ring indicates overcooking. The ice bath is key to stopping the cooking process and preventing this discoloration.
Can I use an Instant Pot for this recipe?
Yes! For Instant Pot hard boiled eggs, add 1 cup of water to the pot, place a single layer of large eggs on the trivet, and cook on high pressure for 6 minutes. Quick release the pressure, then shock the eggs in an ice bath and peel immediately. For soft-boiled eggs in the Instant Pot, cook for only 4 minutes.
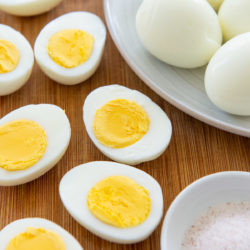 Hard Boiled Eggs Sliced on a Wooden Board
Easy Peel Hard Boiled Eggs Recipe
Servings: 12 eggs
Prep Time: 0 minutes
Cook Time: 13 minutes
Ice Bath Time: 1 minute
Total Time: 14 minutes
These Hard Boiled Eggs are consistently easy to peel and perfectly cooked every time, using a method inspired by the Pioneer Woman’s approach to simple, reliable cooking.
Print Recipe Pin Recipe
6 reviews Leave a Review »
Ingredients
- 12 large eggs *
Instructions
- Bring a pot of water to a rolling boil over high heat. Ensure the water level is at least two inches up the side of the pot.
- Using tongs, gently and quickly place the eggs into the boiling water one at a time. Briefly shake off the tongs after each egg is placed to avoid dripping hot water.
- Adjust the heat to maintain a gentle but active boil. If cooking a large batch, you might need to slightly increase the heat. If the boil is too vigorous and eggs are bouncing excessively, reduce the heat slightly.
- Cook for precisely 13 minutes. Use a timer to ensure accuracy. While the eggs cook, prepare an ice bath by filling a bowl with ice water.
- After 13 minutes, drain the boiling water from the pot and immediately transfer the eggs to the ice bath. Let them sit in the ice bath for 1 minute to stop the cooking process.
- Promptly peel the eggs while they are still warm for the easiest peeling. Enjoy immediately or store for later!
Recipe Notes
*You can adjust the batch size as needed without changing the cooking time. Just ensure the water is boiling and adjust heat to maintain a gentle boil as described. Eggs are cooked straight from the refrigerator, no need to bring them to room temperature. If starting with room temperature eggs, you may need to slightly reduce the cooking time.
Nutrition
Serving: 1g, Calories: 72kcal, Carbohydrates: 1g, Protein: 6g, Fat: 5g, Saturated Fat: 2g, Trans Fat: 1g, Cholesterol: 186mg, Sodium: 71mg, Potassium: 69mg, Sugar: 1g, Vitamin A: 270IU, Calcium: 28mg, Iron: 1mg
Nutritional information is an estimate and for informational purposes only, calculated using a food database.
Course: Breakfast
Cuisine: American
Author: Fifteen Spatulas
Posted in: All Recent Posts, Breakfast and Brunch, Dairy-free, Gluten-free, Low Carb, Snacks, Whole30 Compliant 8 comments