Like many, my journey into the world of coffee was gradual. Growing up, despite my parents’ love for coffee, it didn’t appeal to me much beyond its comforting aroma. That changed during a trip to Italy in 2008. The need for a morning energy boost led me to discover the magic of cappuccino, and I’ve been a coffee enthusiast ever since.
At work, I usually opt for Nespresso with a touch of raw sugar. Sometimes, when a hot brew doesn’t cut it, I’ve tried making iced coffee with Keurig machines. However, the result was often disappointing – watered down and just not quite right. That’s when I stumbled upon the Pioneer Woman’s cold brew coffee recipe, and it all clicked. After trying it a few times, I can confidently say it’s fantastic. Plus, I’ve discovered a couple of tweaks that make it even better for my taste.
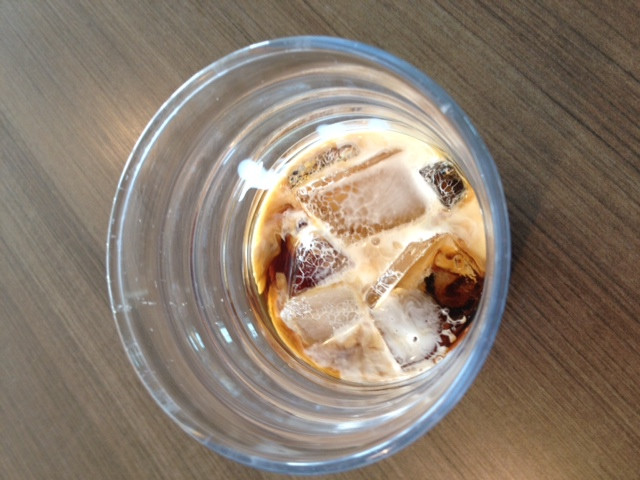 Cold brew coffee served with a splash of cold cream, enhancing its rich and smooth flavor
The best part about making your own cold brew? It’s incredibly cost-effective. For about the price you’d pay for a single venti Starbucks iced latte, you can make enough cold brew to last you for 2-3 weeks. Just a few dollars for coffee grounds, a little milk and sugar if you prefer, and you’re all set for days of refreshing iced coffee.
Learn more about milk frothers for at-home use to elevate your cold brew experience
You can find the original Pioneer Woman recipe here. Her food photography is also fantastic!
Discover an even more loved iced coffee recipe using the Aeropress for a different brewing method
The first time I made this cold brew, I used coffee beans I had brought back from Puerto Rico (pictured above). Last weekend, I used Cafe Bustelo, the brick kind, from my local grocery store. The beauty of this recipe is that almost any coffee works, but I find it’s best with a rich, strong blend. I’m even considering trying it with hazelnut coffee soon.
Explore gift ideas for the coffee lover in your life, perfect for any occasion
To get started, you’ll need a large container or two. I had to improvise and use the only container large enough in my kitchen. Pour all your coffee grounds into a large tub or a giant mixing bowl. Then, add water – about half a gallon to a gallon for every pound of coffee. I usually make a pound with a half gallon of water at a time simply because my kitchen and fridge are small. However, using a pound of coffee per gallon of water won’t make it too weak. (Updated Tip: I realized that a pound of coffee to a half gallon of water is actually TOO STRONG. Stick to a pound per gallon, or half pound per half gallon. Now, back to my caffeine buzz…)
Depending on your coffee consumption, this batch should last you a couple of weeks or even longer.
I felt a bit like I was conducting a science experiment! Stir everything thoroughly to ensure all the grounds are fully saturated. It resembles mud pies or brownie mix – like stirring caffeinated dirt.
Doesn’t that look fantastic? Seal the container with plastic wrap, or use a lid if your container has one. Refrigerate for at least eight hours to allow it to steep. This is what makes it cold brew, after all! 🙂
Next, set up your straining station. You’ll need something to strain the coffee into and a sieve or strainer that fits well. I bought one from Target for around $5 and strain the coffee into a bowl. It’s a bit awkward, but it works with the dishes I have.
The Pioneer Woman recommends lining the strainer with a couple of layers of cheesecloth, which I’m sure works perfectly. Since cheesecloth isn’t a staple in my kitchen, I use paper towels, and they work just fine. Coffee filters could also work, though that might become a bit costly. Whatever you choose, line your strainer to prevent excess grounds from ending up in your coffee – unless you prefer it that way.
Then, using a ladle or something similar, start transferring the coffee mixture into the strainer. It will take some time to filter through, so patience is key. If you’re using paper towels, you might need to replace them a few times as they get saturated.
Et voilà! You now have cold-brew coffee concentrate ready for all your caffeine needs. Refrigerate it in a sealed container.
It can get a bit messy during straining. Now, Pioneer Woman suggests sweetening your cold brew by stirring in sugar or using sweetened condensed milk. While sweetened condensed milk sounds incredibly delicious, it’s also packed with fat, sugar, and calories that I try to avoid. The first time I made iced coffee with this concentrate, I just added raw sugar as usual. Big mistake. Sugar doesn’t dissolve well in cold liquids, and nobody wants crunchy coffee.
Yes, my only sealing pitcher is Winnie the Pooh-themed – so what? To solve the sweetener issue, I decided to make a simple syrup. I boiled sugar and water on the stove – not too much of either, adjust to your taste. Bring it to a boil, then reduce the heat slightly and let it simmer, stirring constantly to prevent burning. It should reduce and thicken slightly. Let it cool completely, and then you can add it to your coffee concentrate (which is what I do) or keep it separate and add it to your iced coffee as needed. I’m not sure if adding it to the concentrate affects its shelf life, but mine has been fine for at least a week or two, and honestly, I use it up pretty quickly anyway.
Let me know if you try this recipe and how it turns out for you!