
Discovering your child needs a pioneer outfit can spark a mix of excitement and slight panic. While dresses and boots might be straightforward finds, the bonnet and apron often present a delightful DIY challenge. But don’t worry! These quintessential accessories are key to achieving that authentic pioneer look. This guide will walk you through creating your own adorable pioneer bonnet using a simple pillowcase, ensuring your little one is perfectly styled for their historical adventure.
After this tutorial, and our upcoming guide on aprons, you’ll be well-equipped to sew a matching bonnet and apron set with ease, all starting with an ordinary pillowcase. Let’s embark on this creative journey!
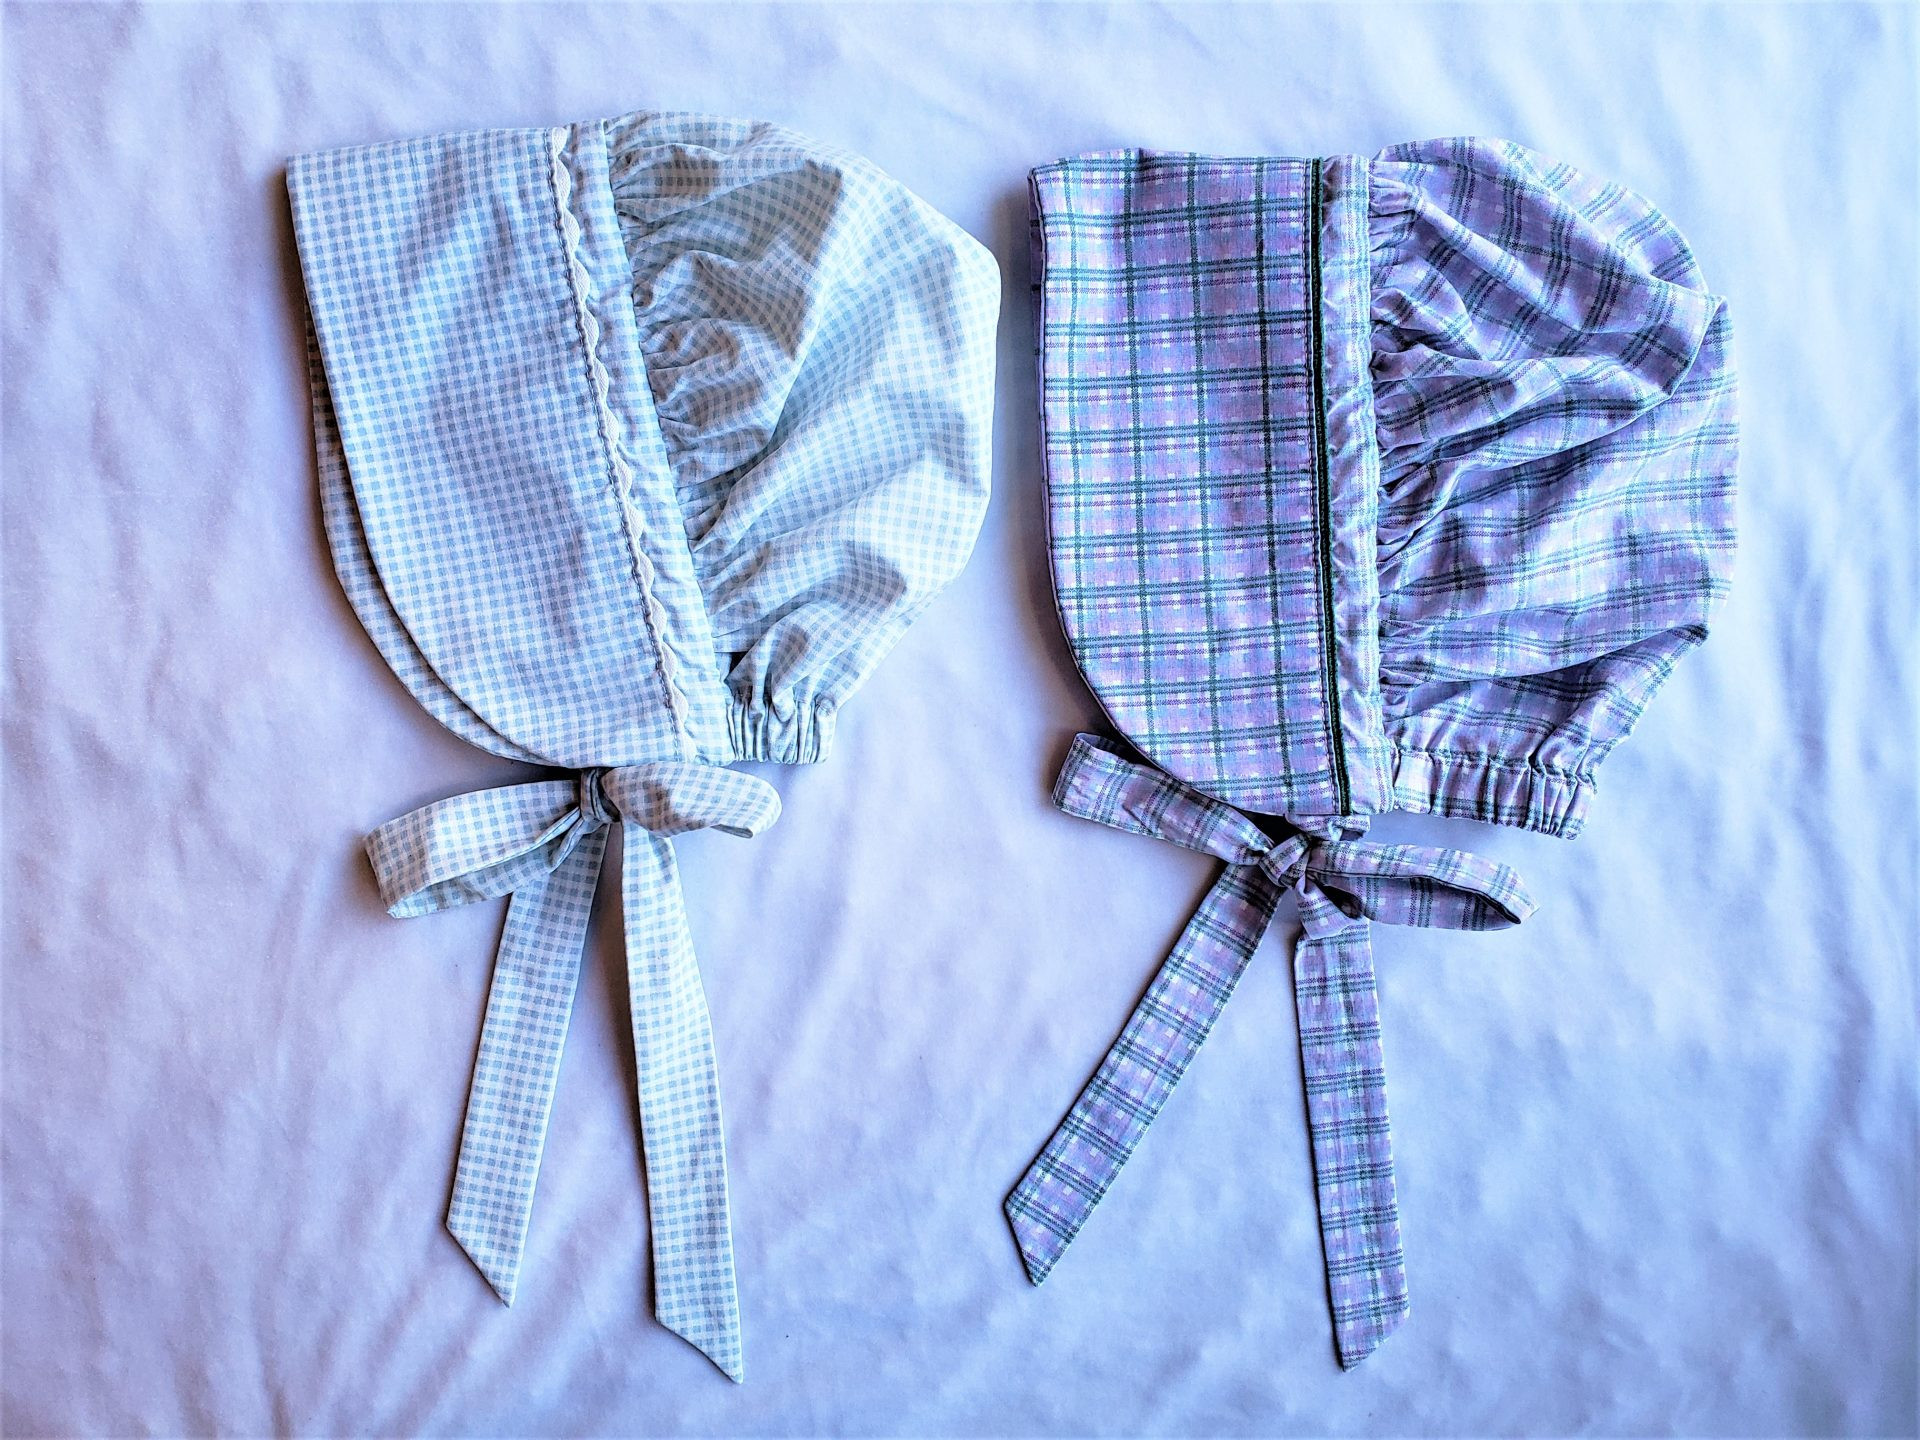 Two girls wearing handmade pioneer bonnets and dresses
Materials You’ll Need to Sew a Pioneer Bonnet
Before we begin, gather these simple supplies:
- Fabric (1/2 yard, or a standard pillowcase): A pillowcase is an economical and readily available option, often found in thrift stores.
- 3/4 inch-wide elastic: Approximately 7 inches long for comfortable fitting.
- Stiff, sew-in stabilizer (optional): For adding structure to the bonnet brim.
- Matching thread
- Scissors
- Two safety pins
- Paper for pattern making
- Tape
- Pencil
- Ruler and a rounded object (like a plate or bowl) for curves
- Sewing machine (though hand-sewing is possible)
- Sewing needle
 Collage of materials needed to make a pioneer bonnet, including pillowcase, scissors, and sewing tools
Why Choose a Pillowcase for Your DIY Bonnet?
Pillowcases are surprisingly perfect for crafting projects for several compelling reasons:
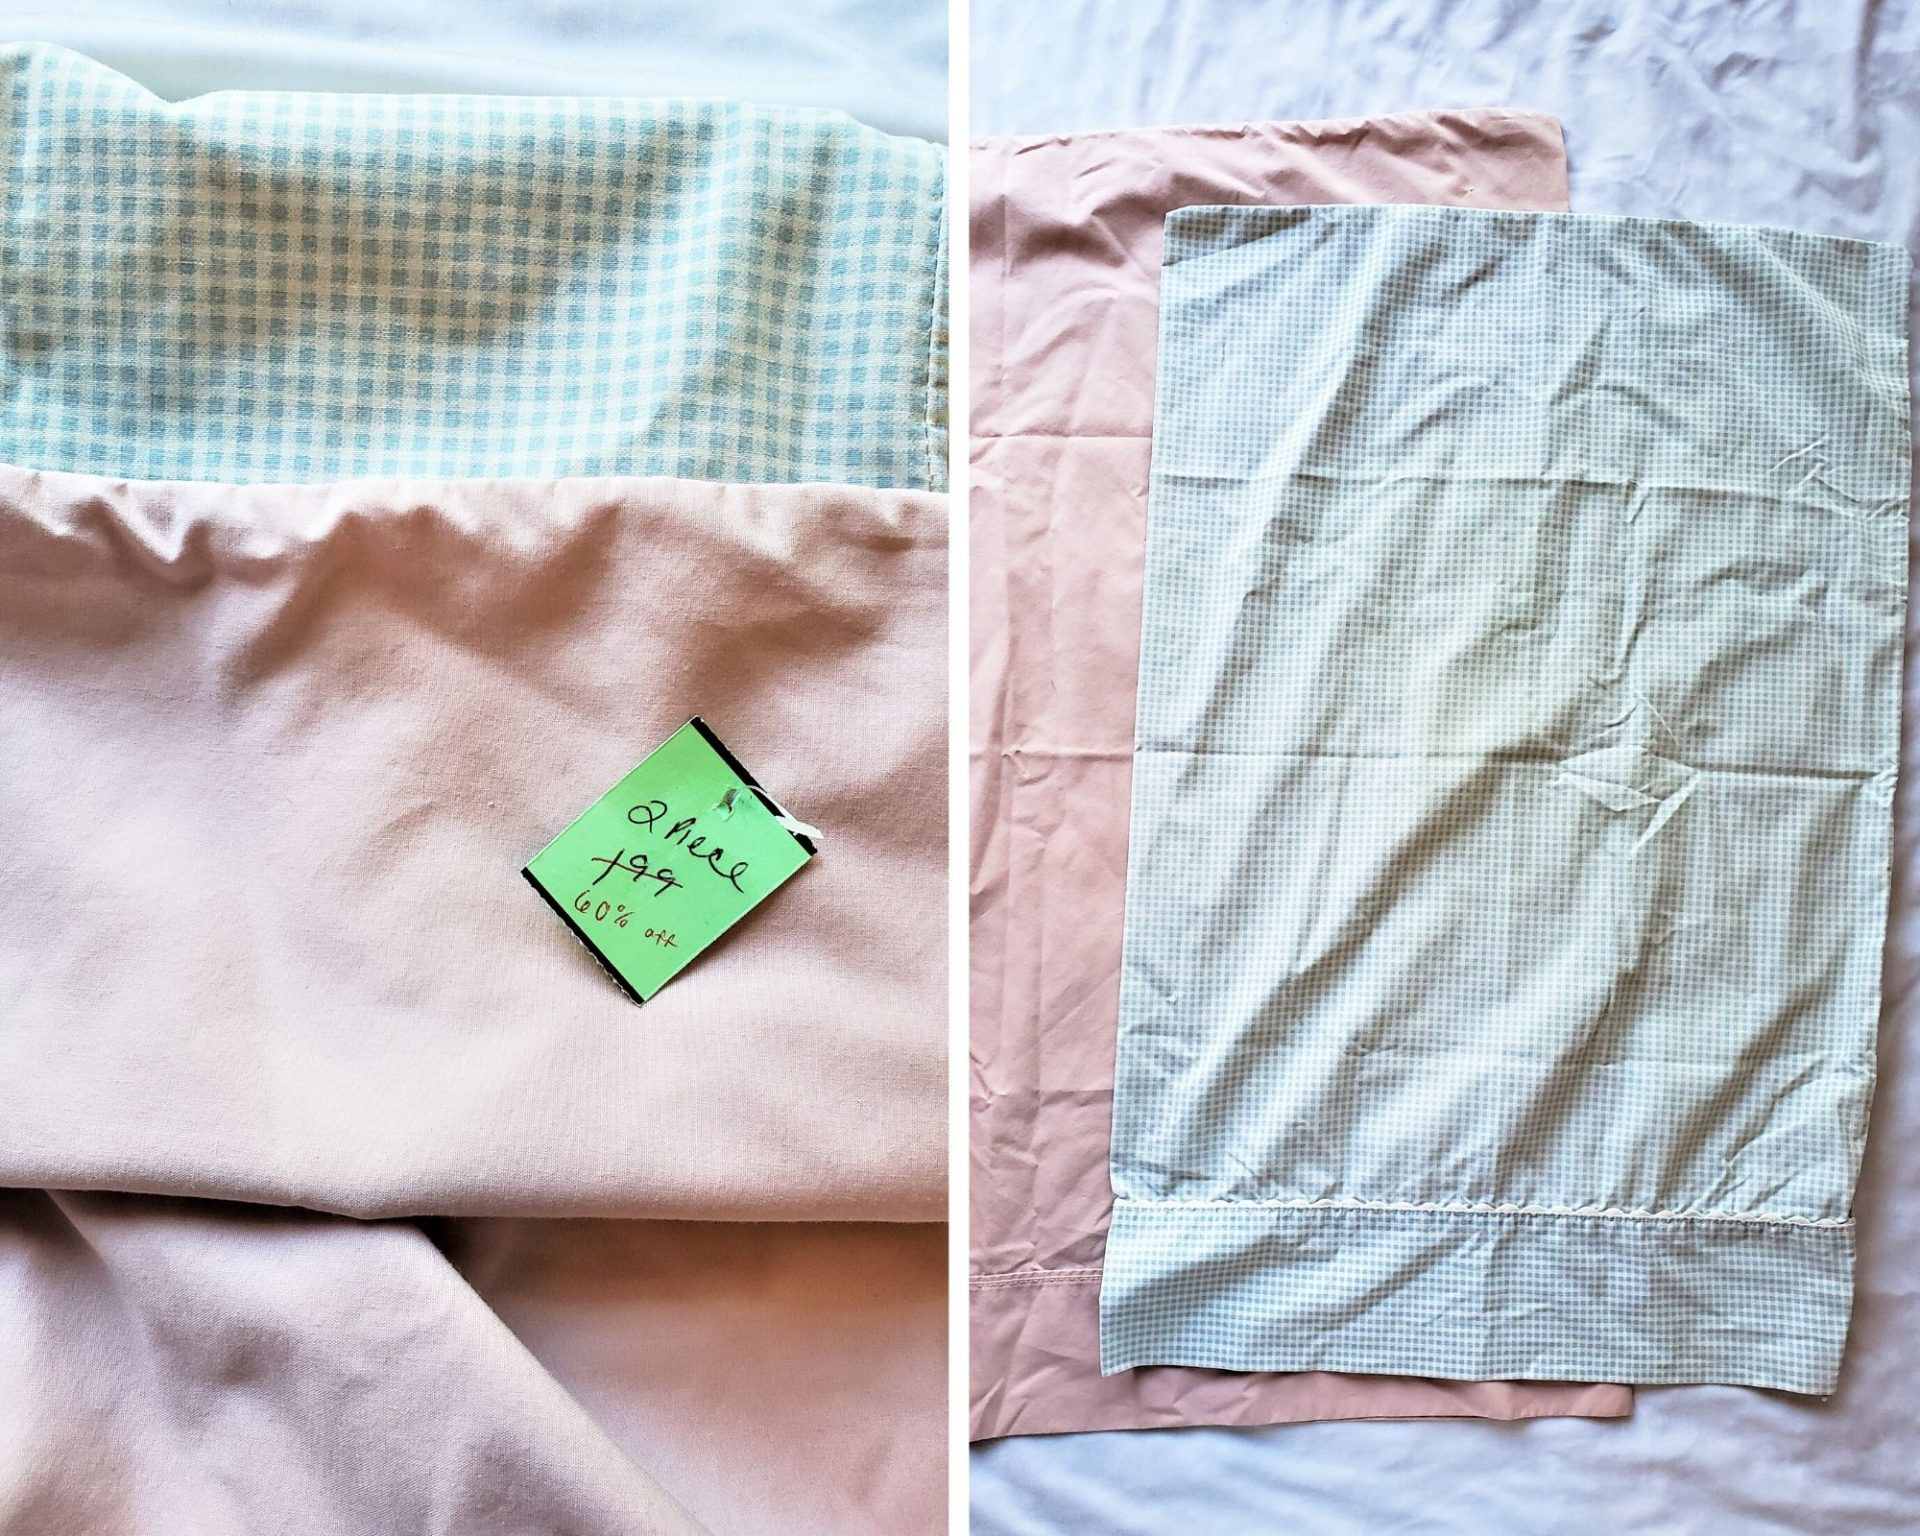
- Budget-Friendly: They are incredibly affordable, especially when sourced from thrift stores.
- Pre-Decorated Edges: Many pillowcases come with charming trims like lace or piping, adding a touch of detail without extra effort.
- Pre-Cut Fabric Size: They eliminate guesswork about fabric quantity – one pillowcase is often just right for a child’s bonnet.
- Creative Constraint: Working within the fabric limitations of a pillowcase can spark unique and resourceful creativity.
 Collage showcasing different pillowcase trim details suitable for pioneer bonnets
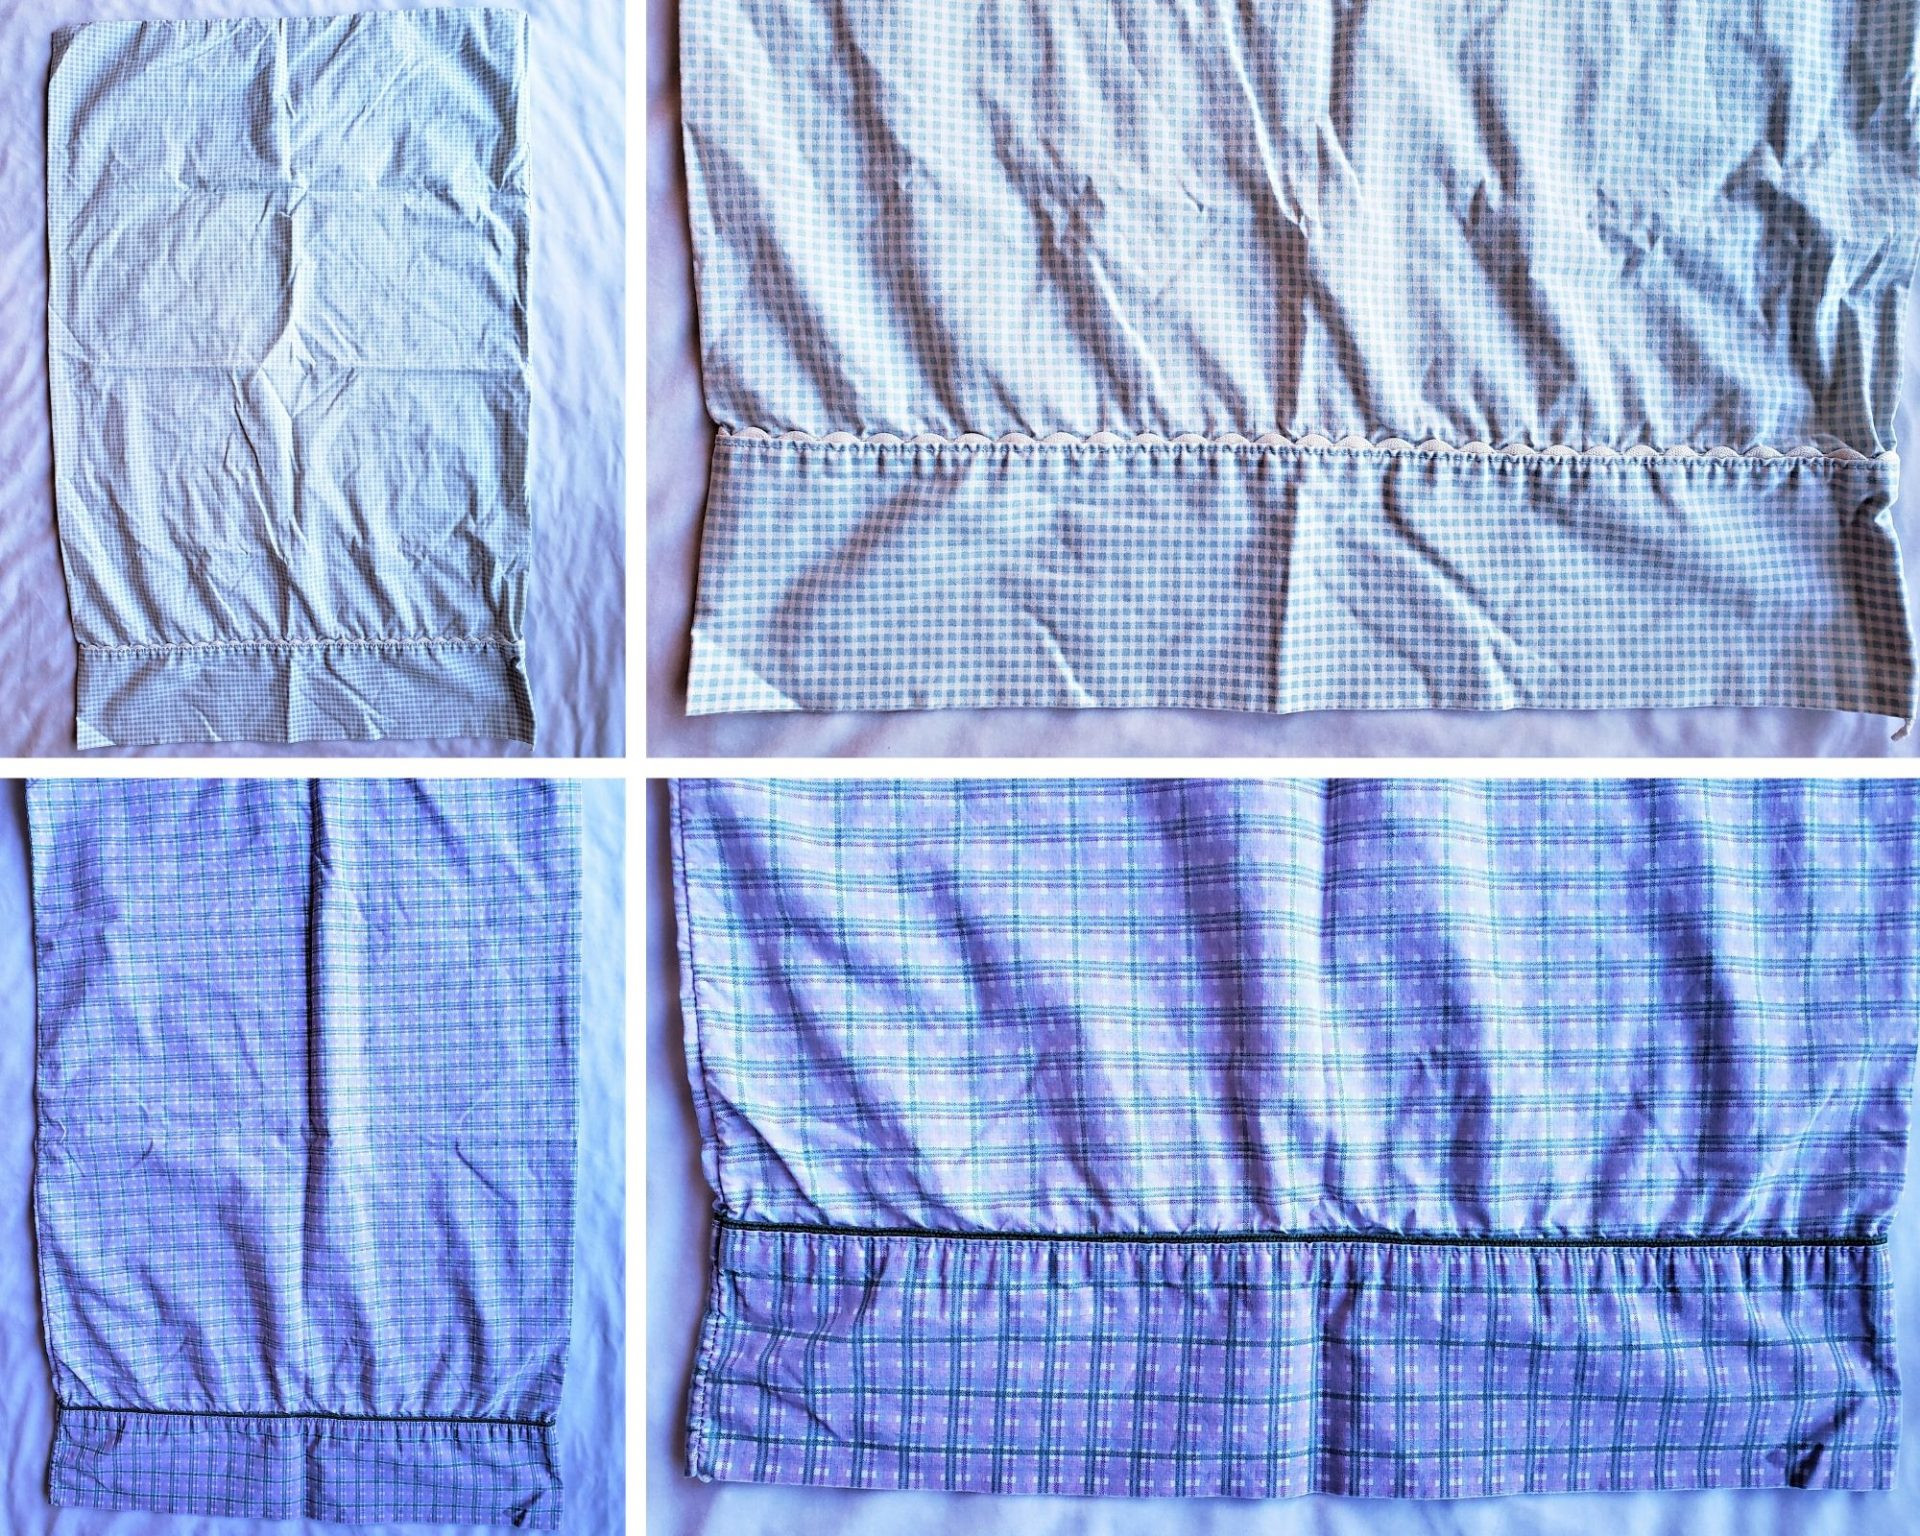
While finding patterned pillowcases reminiscent of historical fabrics like gingham or calico might take a bit of searching, solid colors are widely available. For this project, plaid pillowcases were chosen to create a delightful contrast with floral pioneer dresses.
 Close-up of plaid pillowcases used to make pioneer bonnets
Creating Your Pioneer Bonnet Pattern
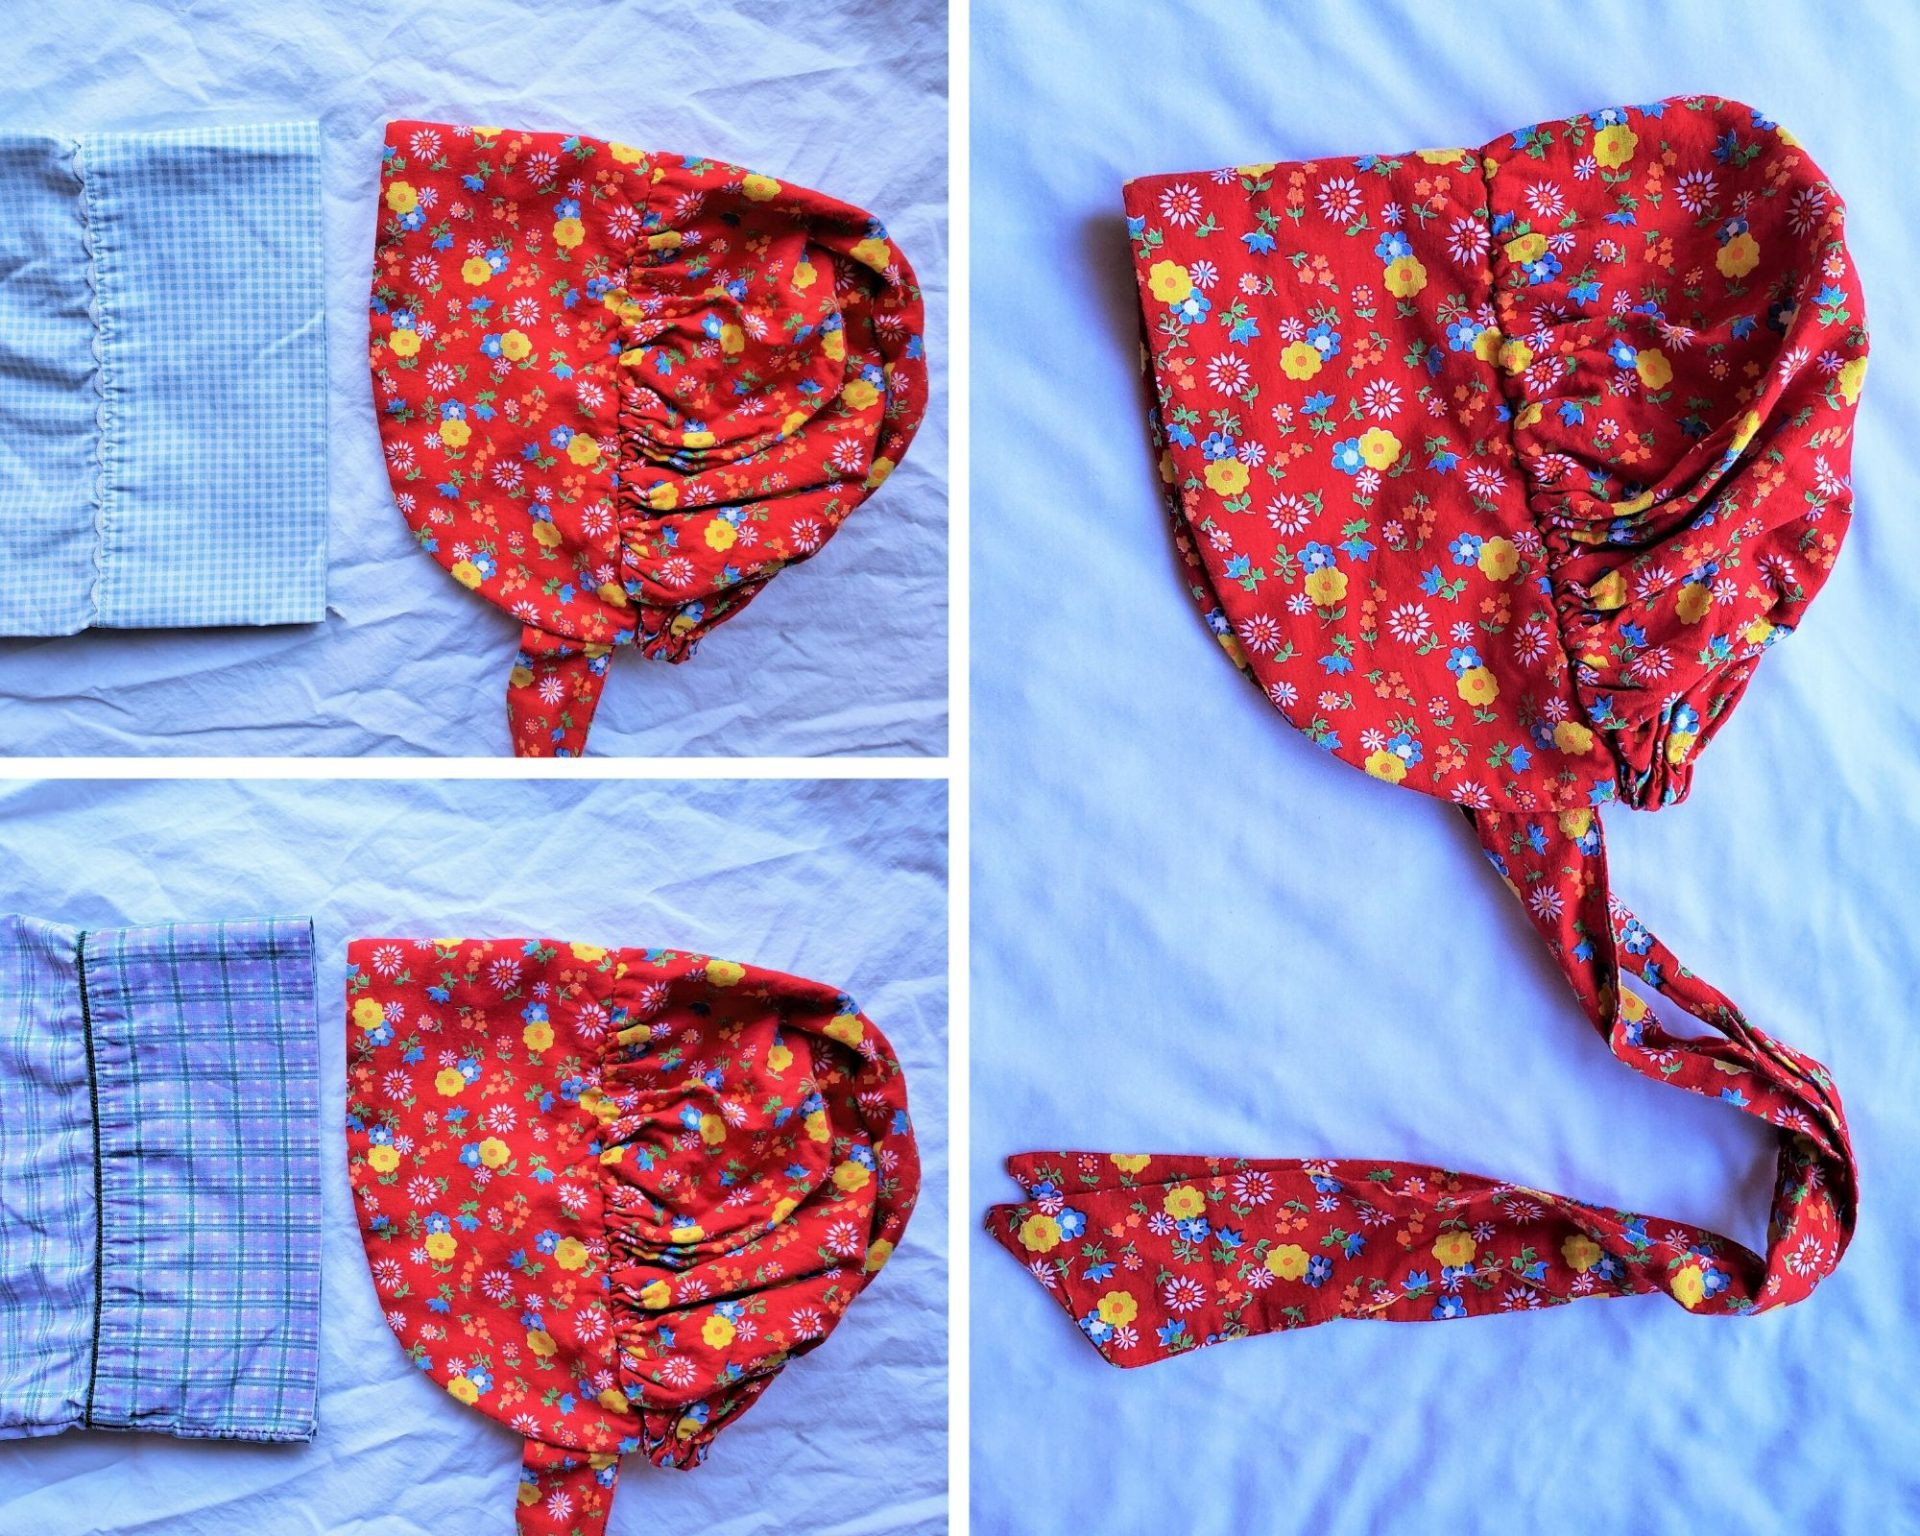
To create an authentic shape, a vintage bonnet was used as inspiration for this DIY pattern. Though beautifully vintage, its 1970s color palette isn’t quite right for a pioneer era aesthetic. The finished hem of the pillowcase aligns almost perfectly with the brim dimensions of the vintage bonnet, making it an ideal starting point for our pattern.
 Vintage bonnet used as a template for creating a pioneer bonnet pattern
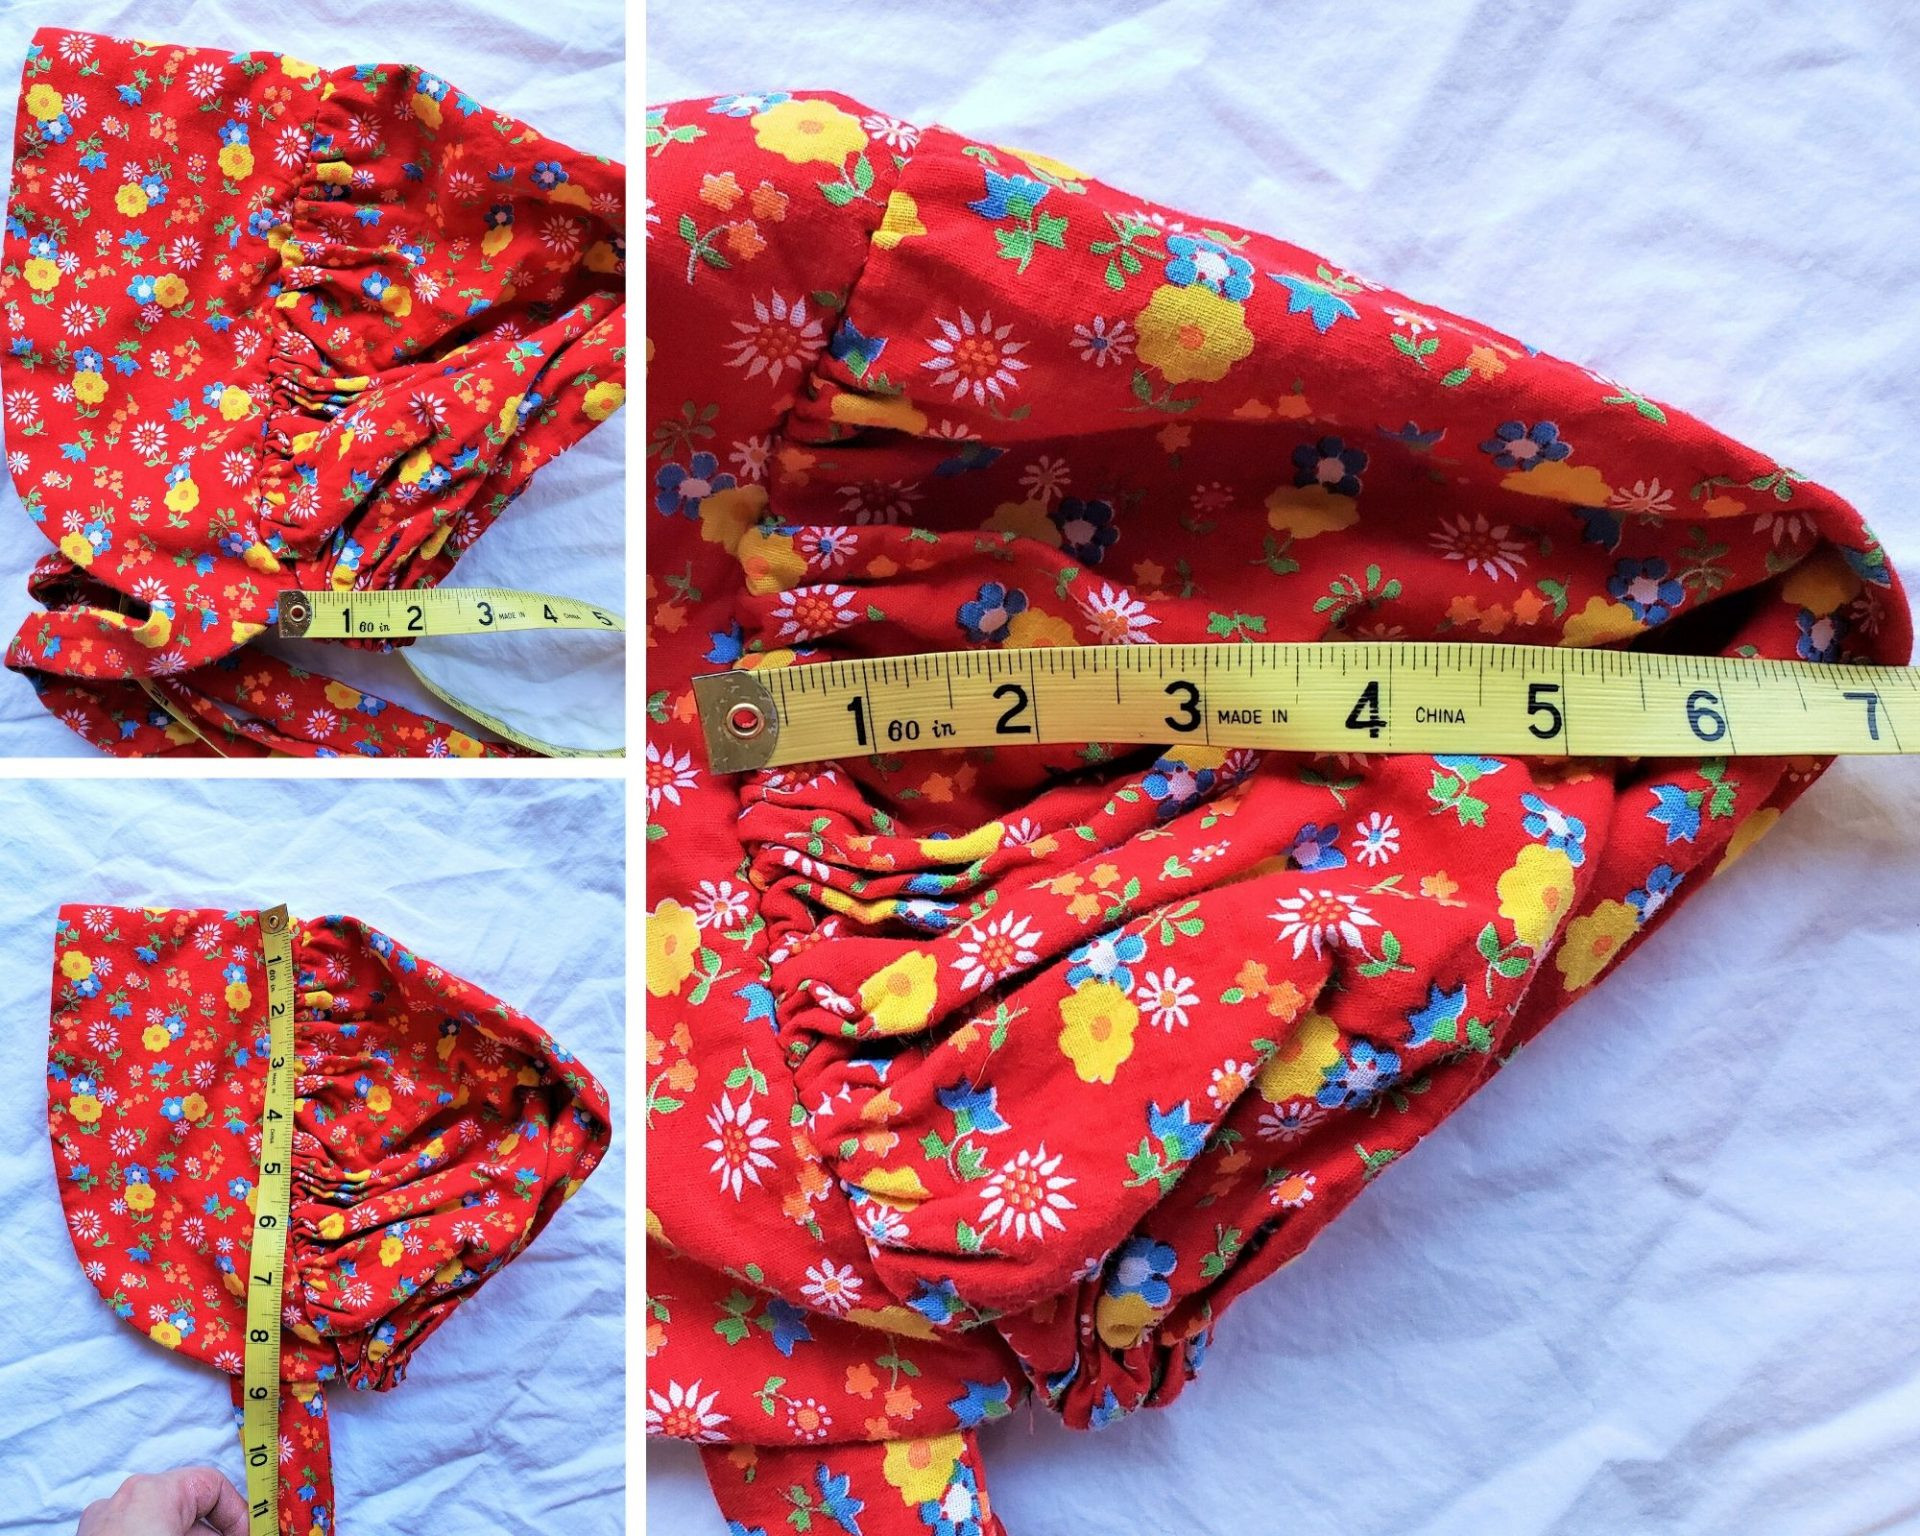
Measuring a three-dimensional bonnet to create a two-dimensional pattern requires a bit of ingenuity. The next steps outline a simple approach to drafting your bonnet pattern.
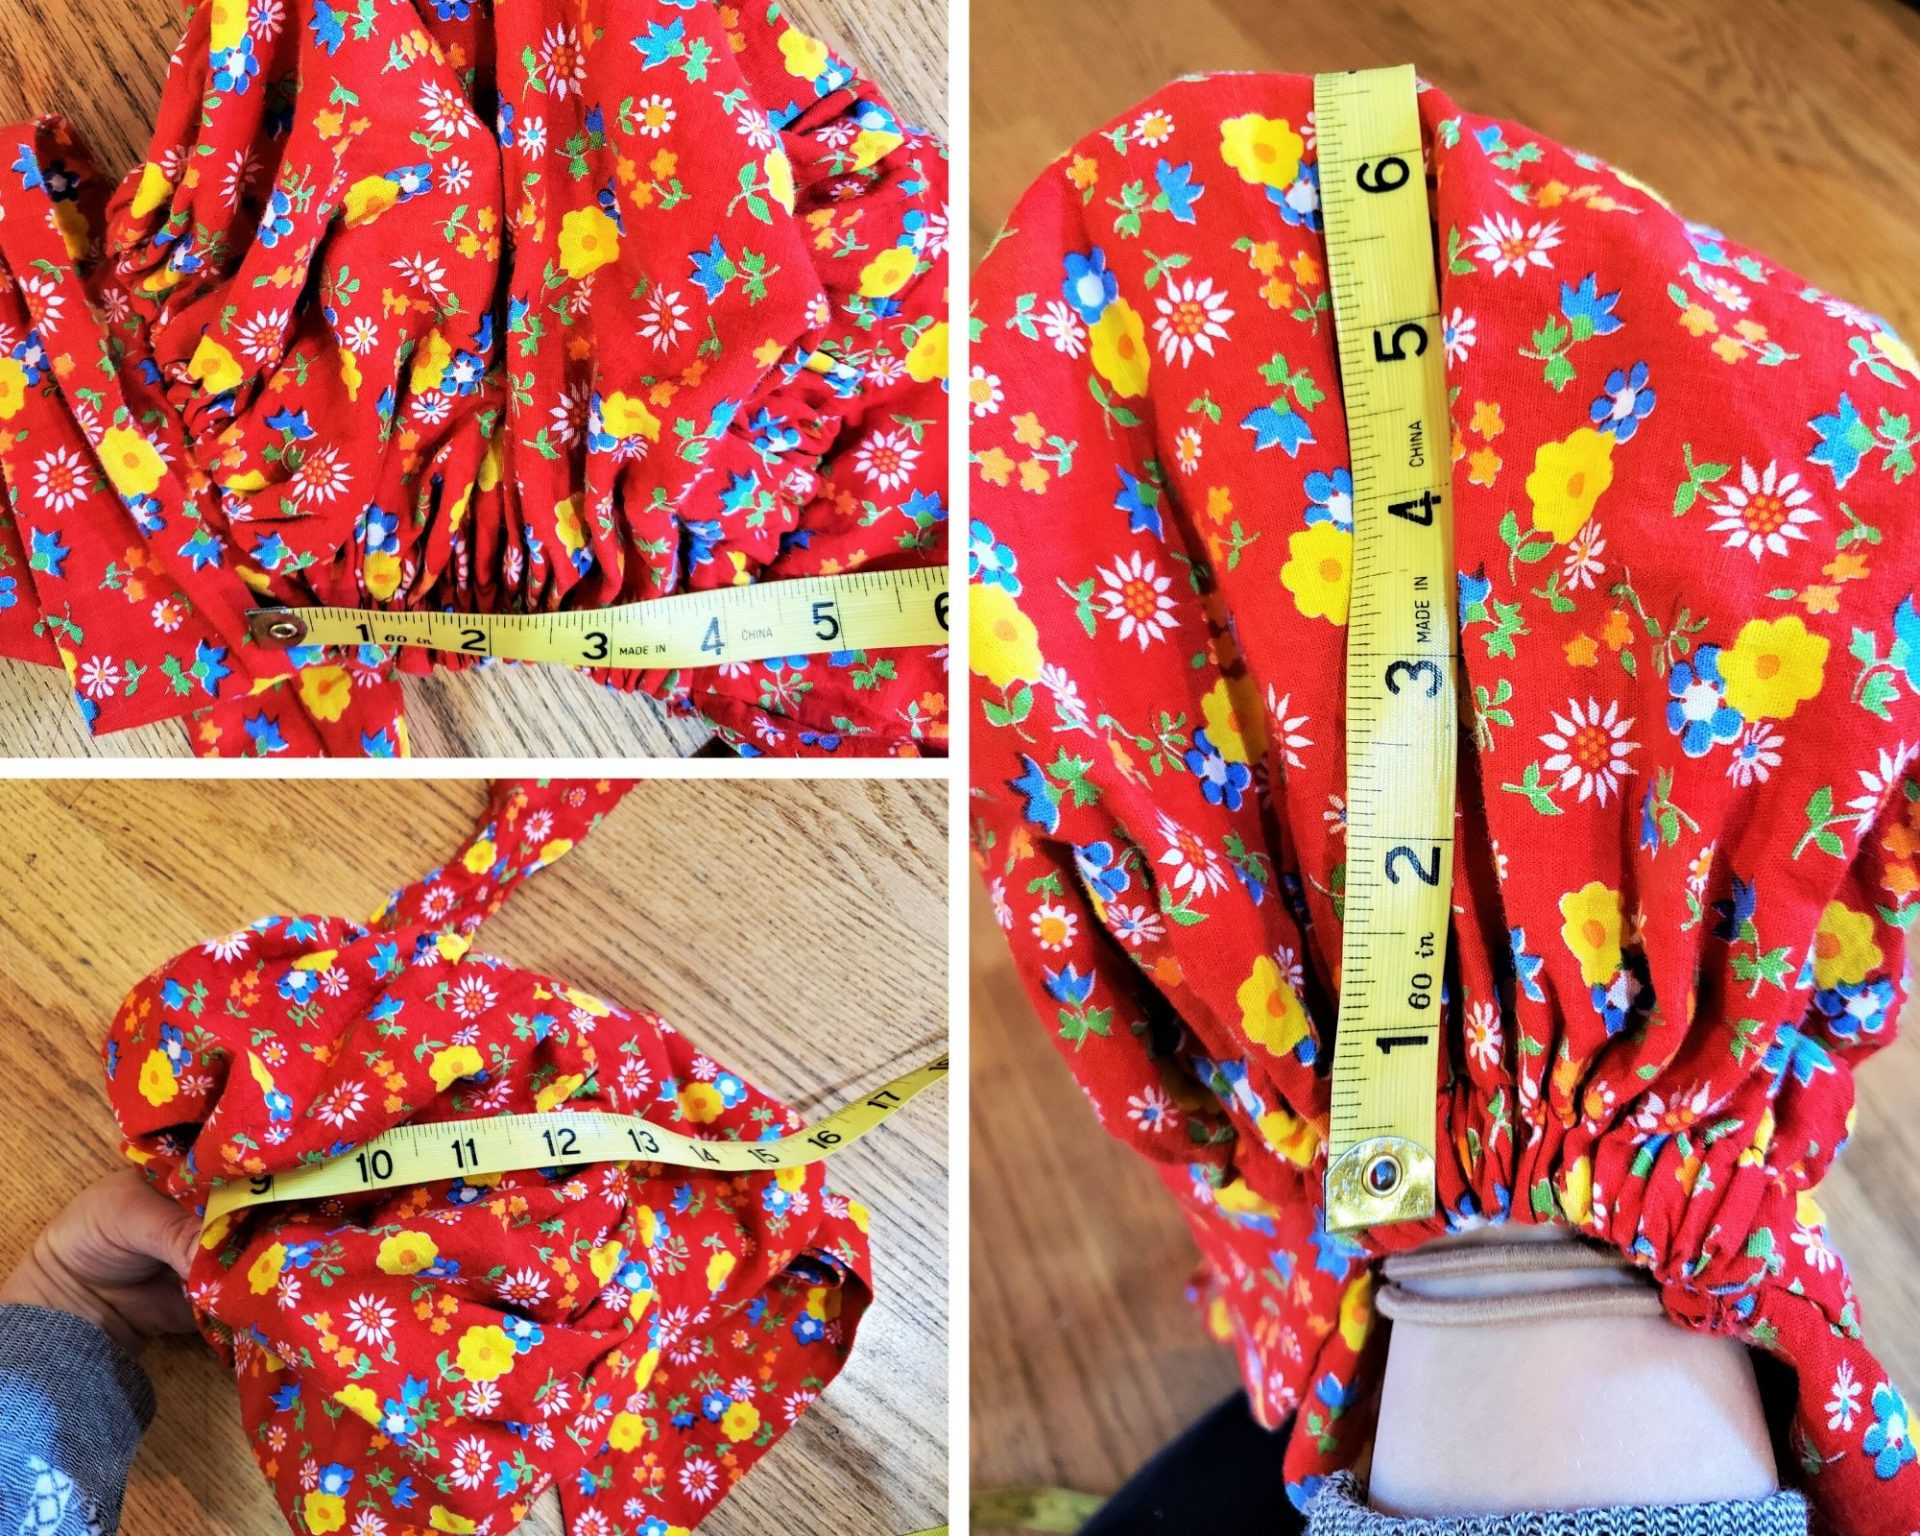 Measuring a vintage bonnet to create a paper pattern
Measuring and Drafting the Crown Pattern
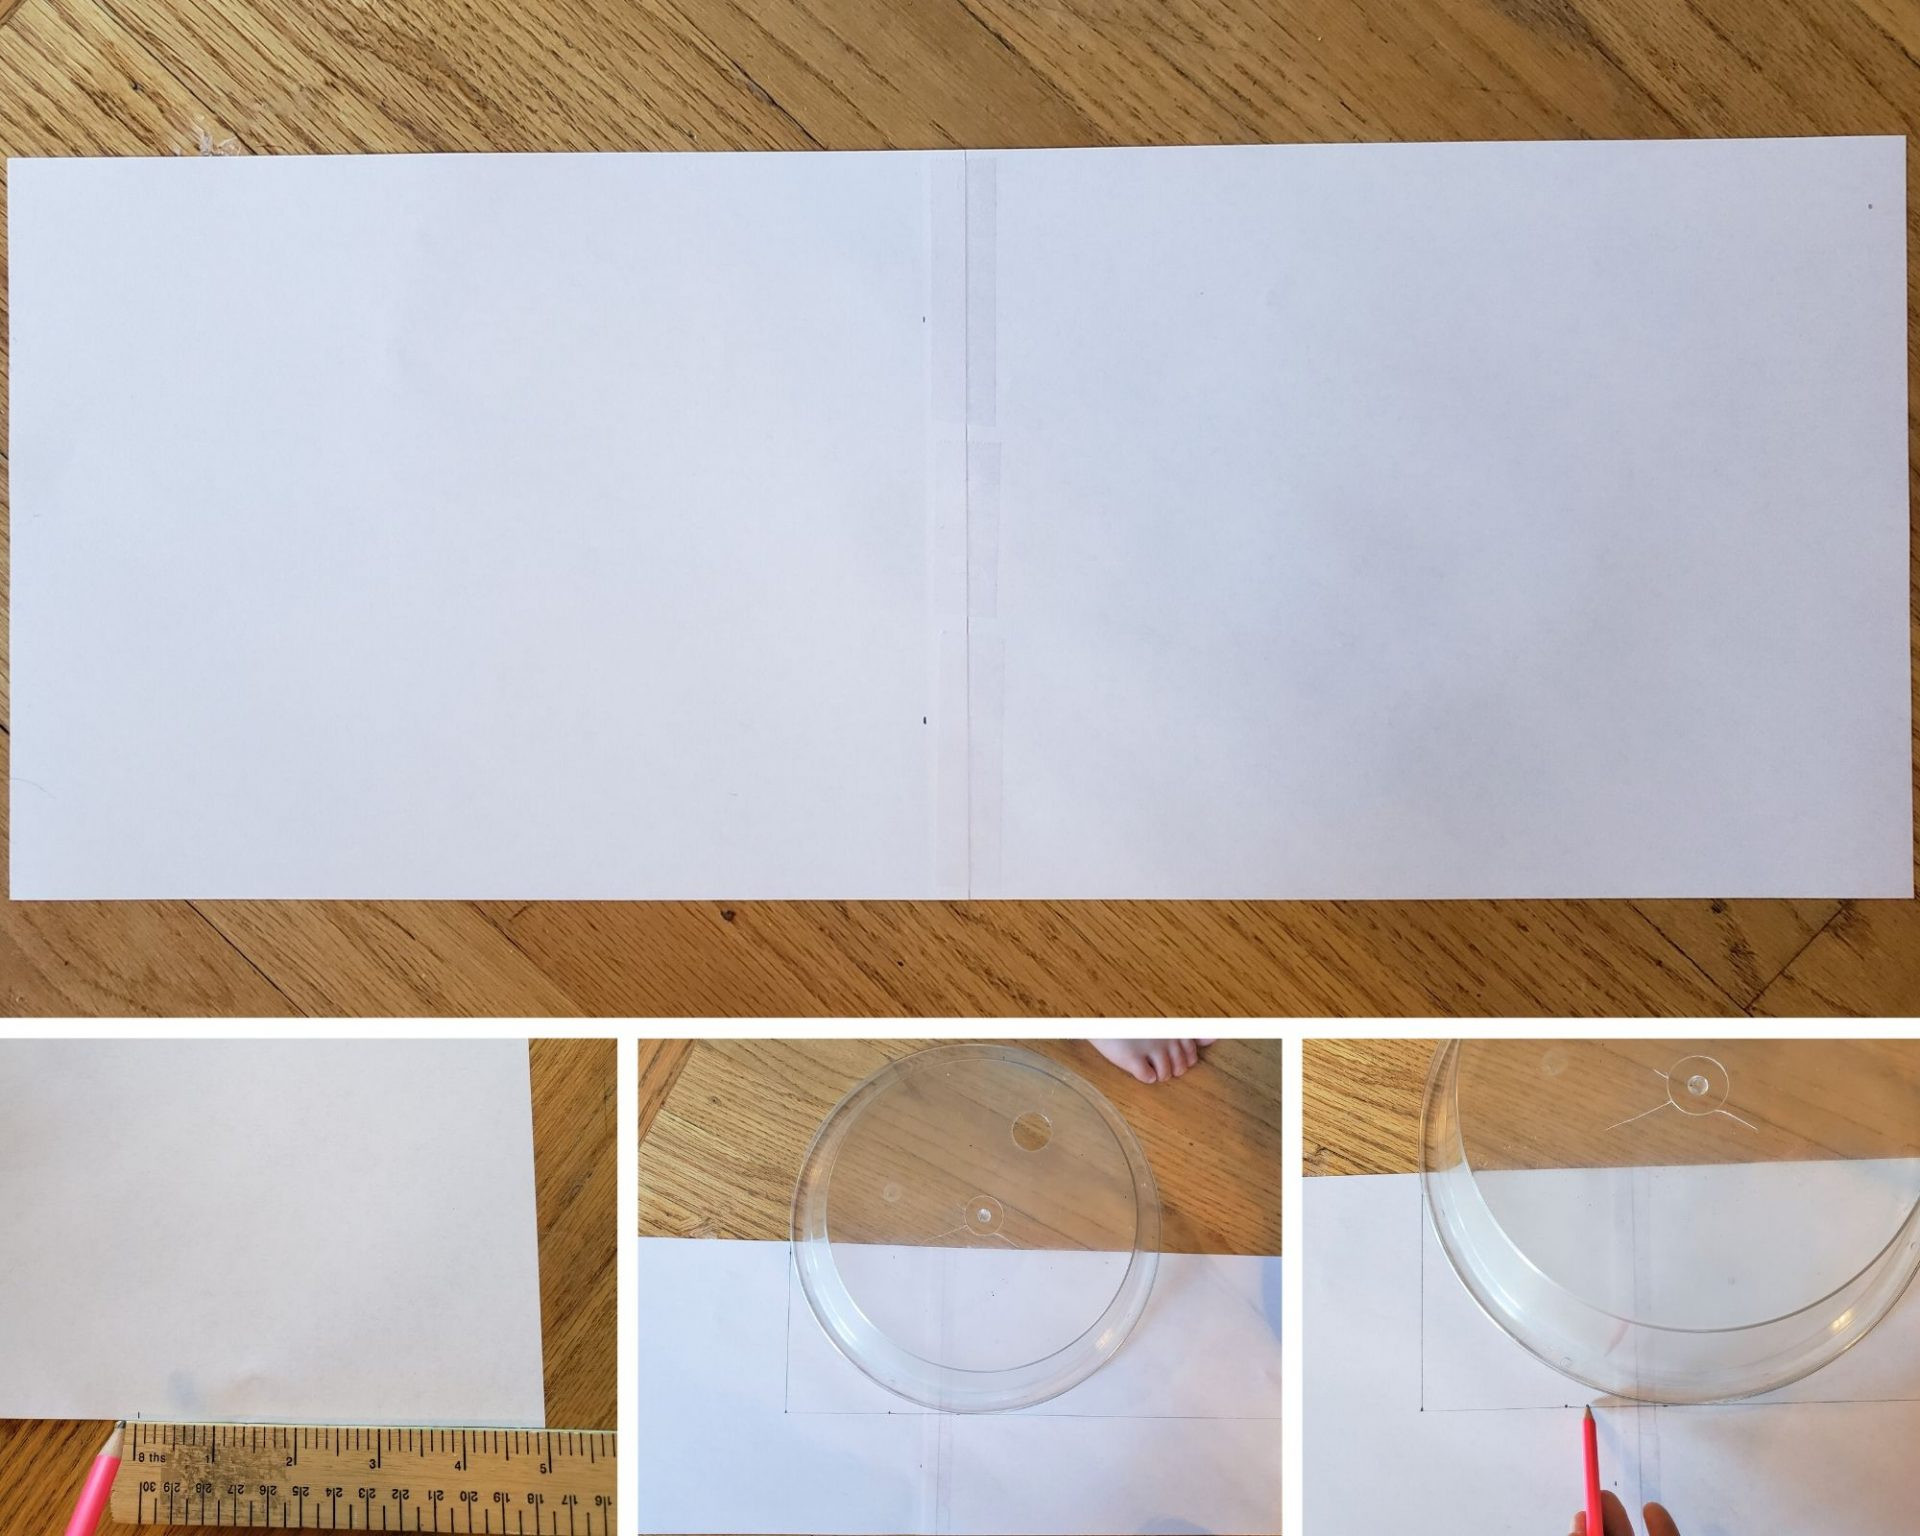
Let’s get started on the pattern. Begin with basic household items to craft your bonnet pattern. Tape two pieces of printer paper together to create a larger surface.
 Taping two pieces of paper together to create a pattern surface
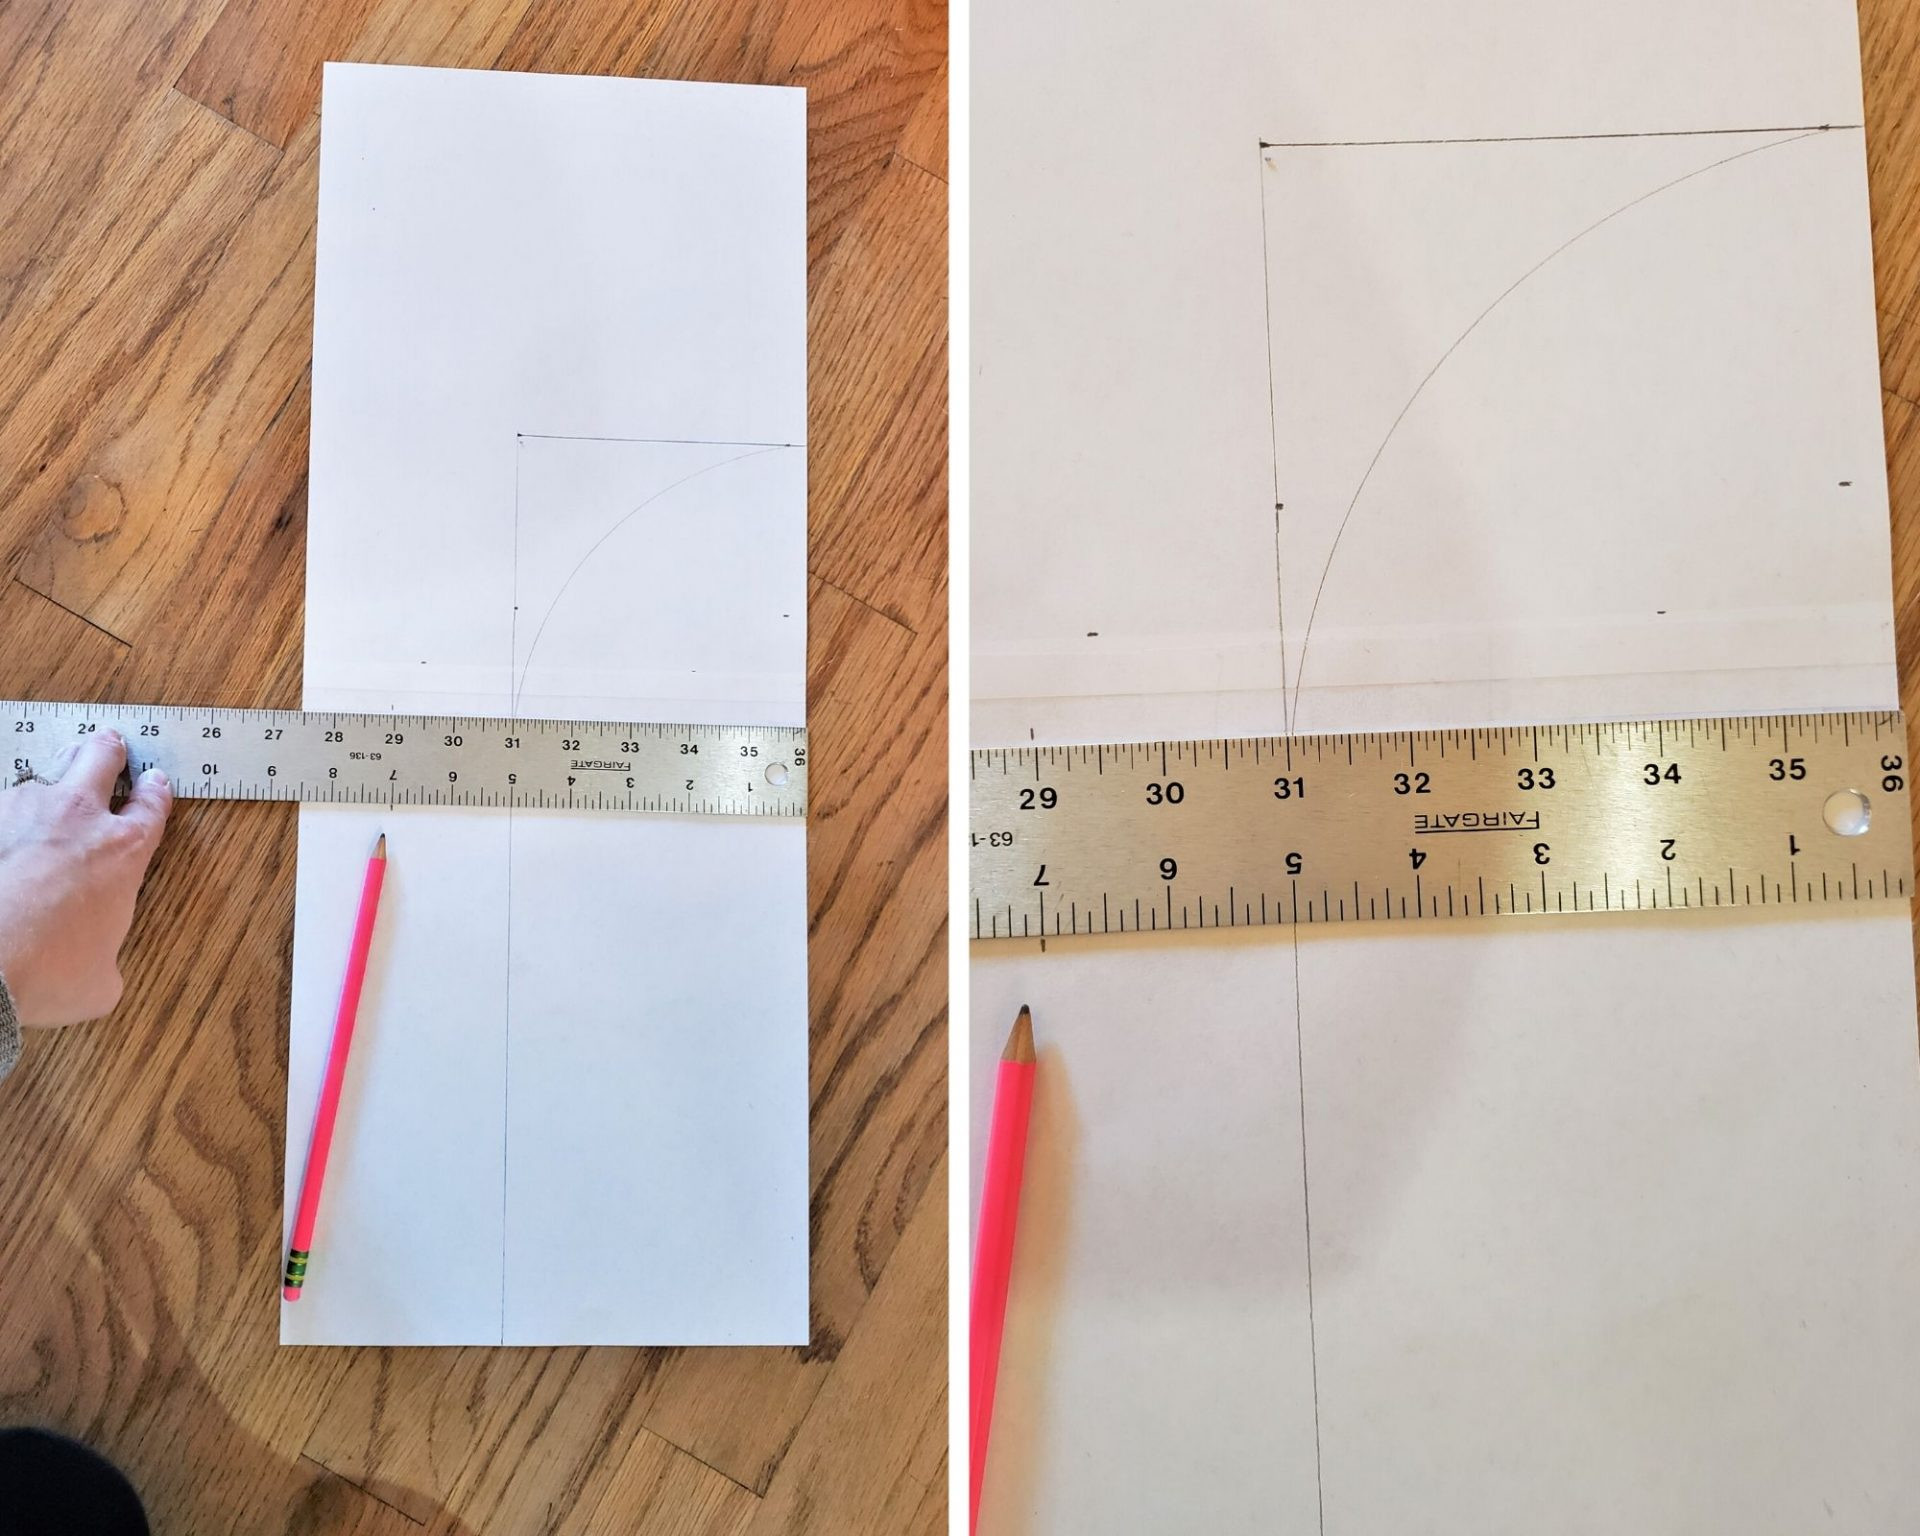
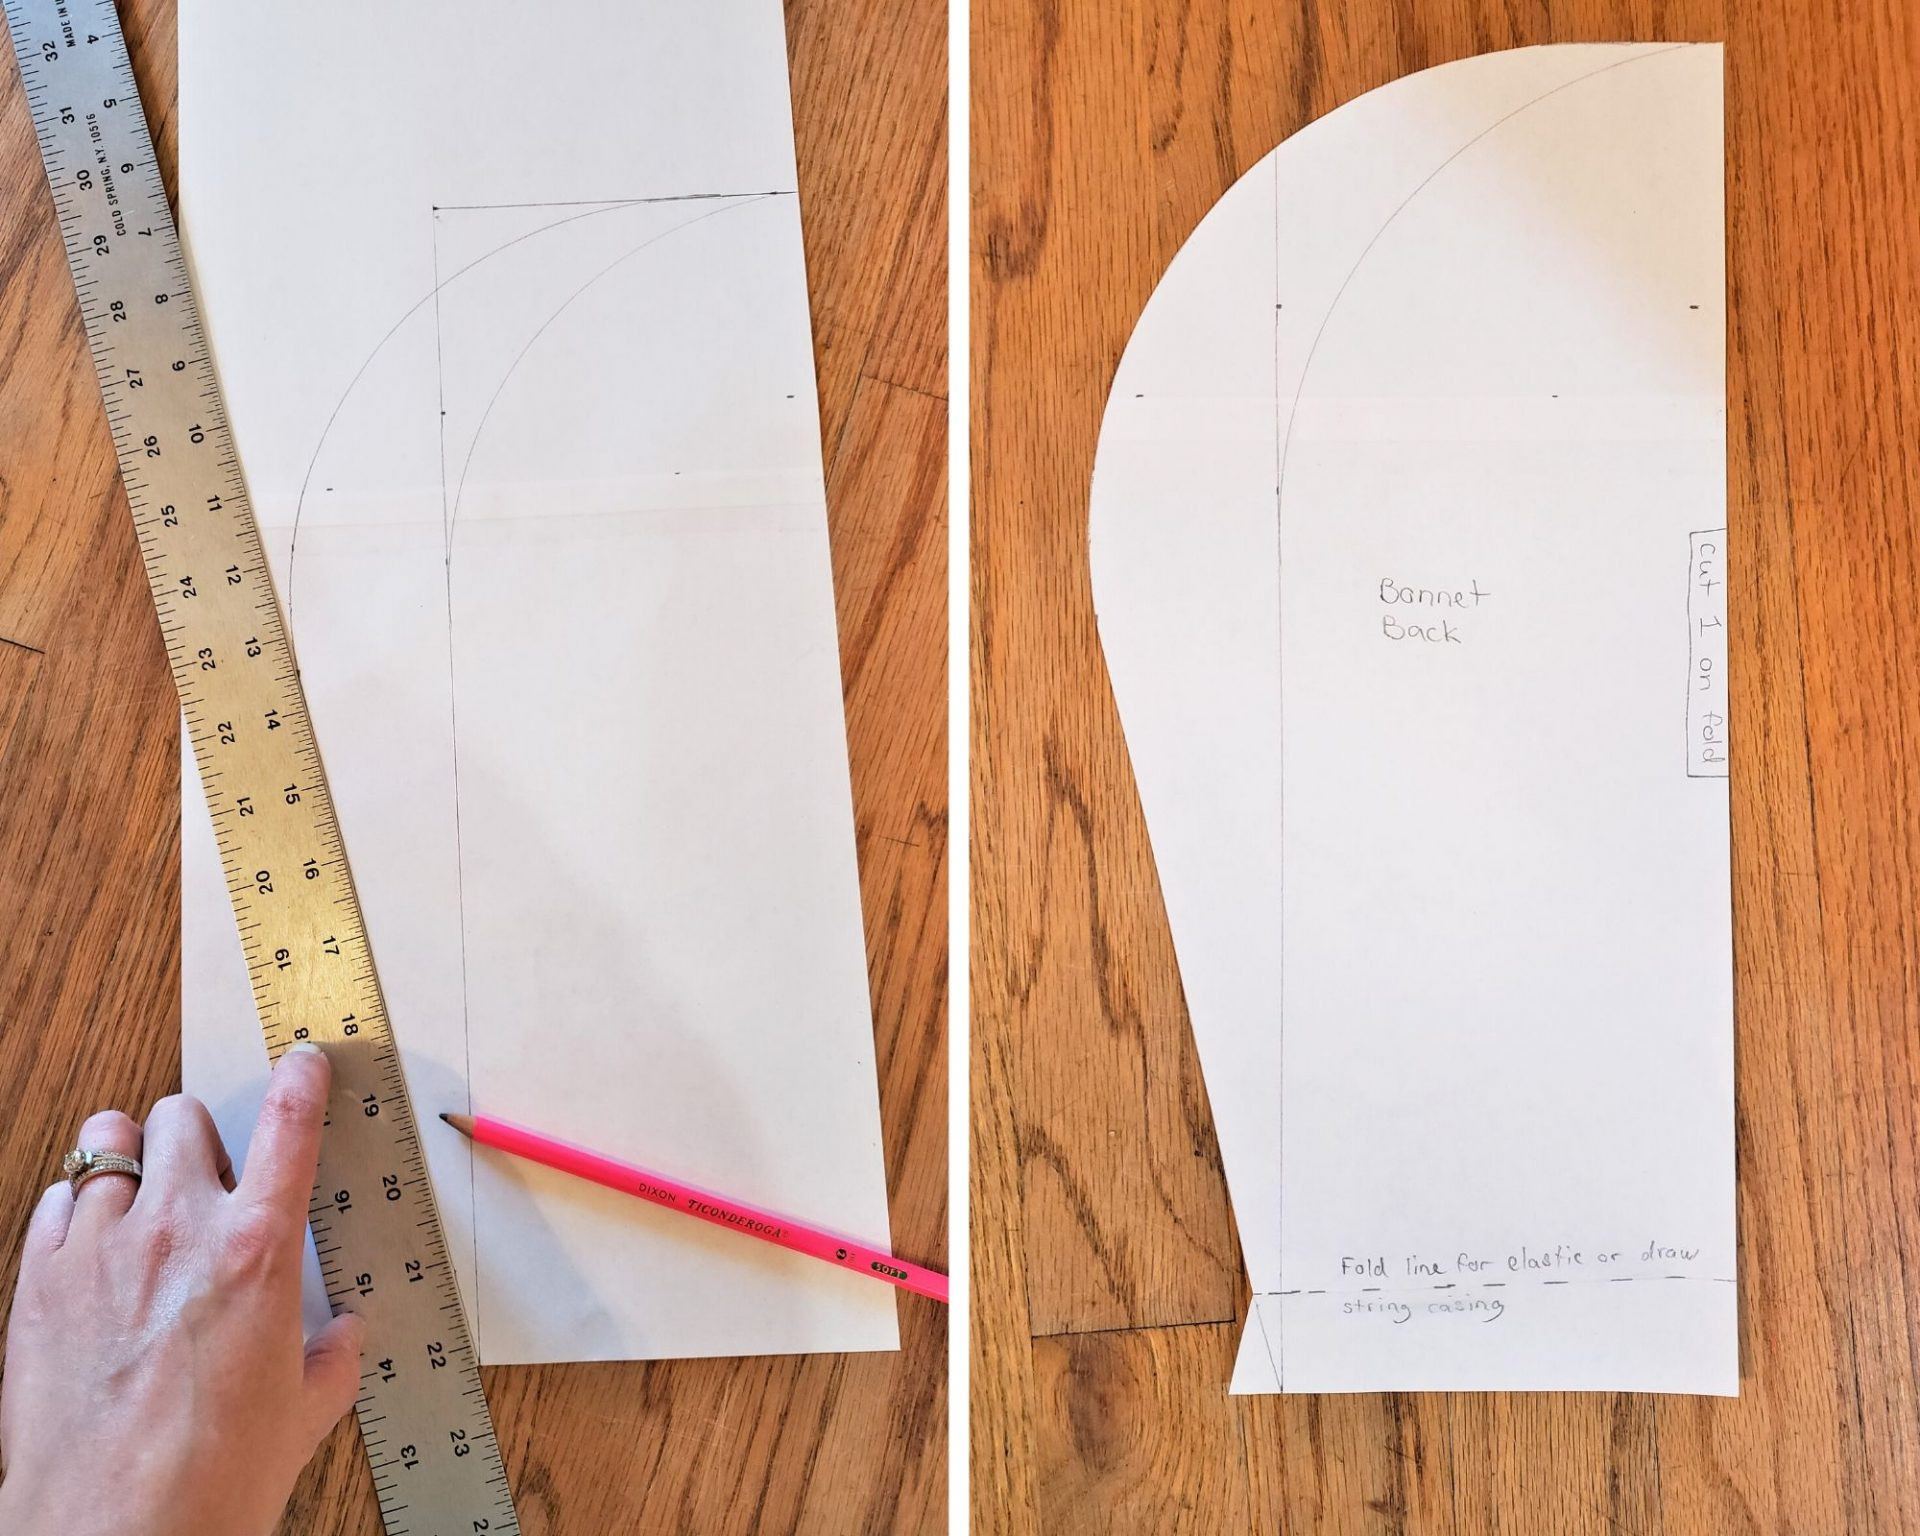
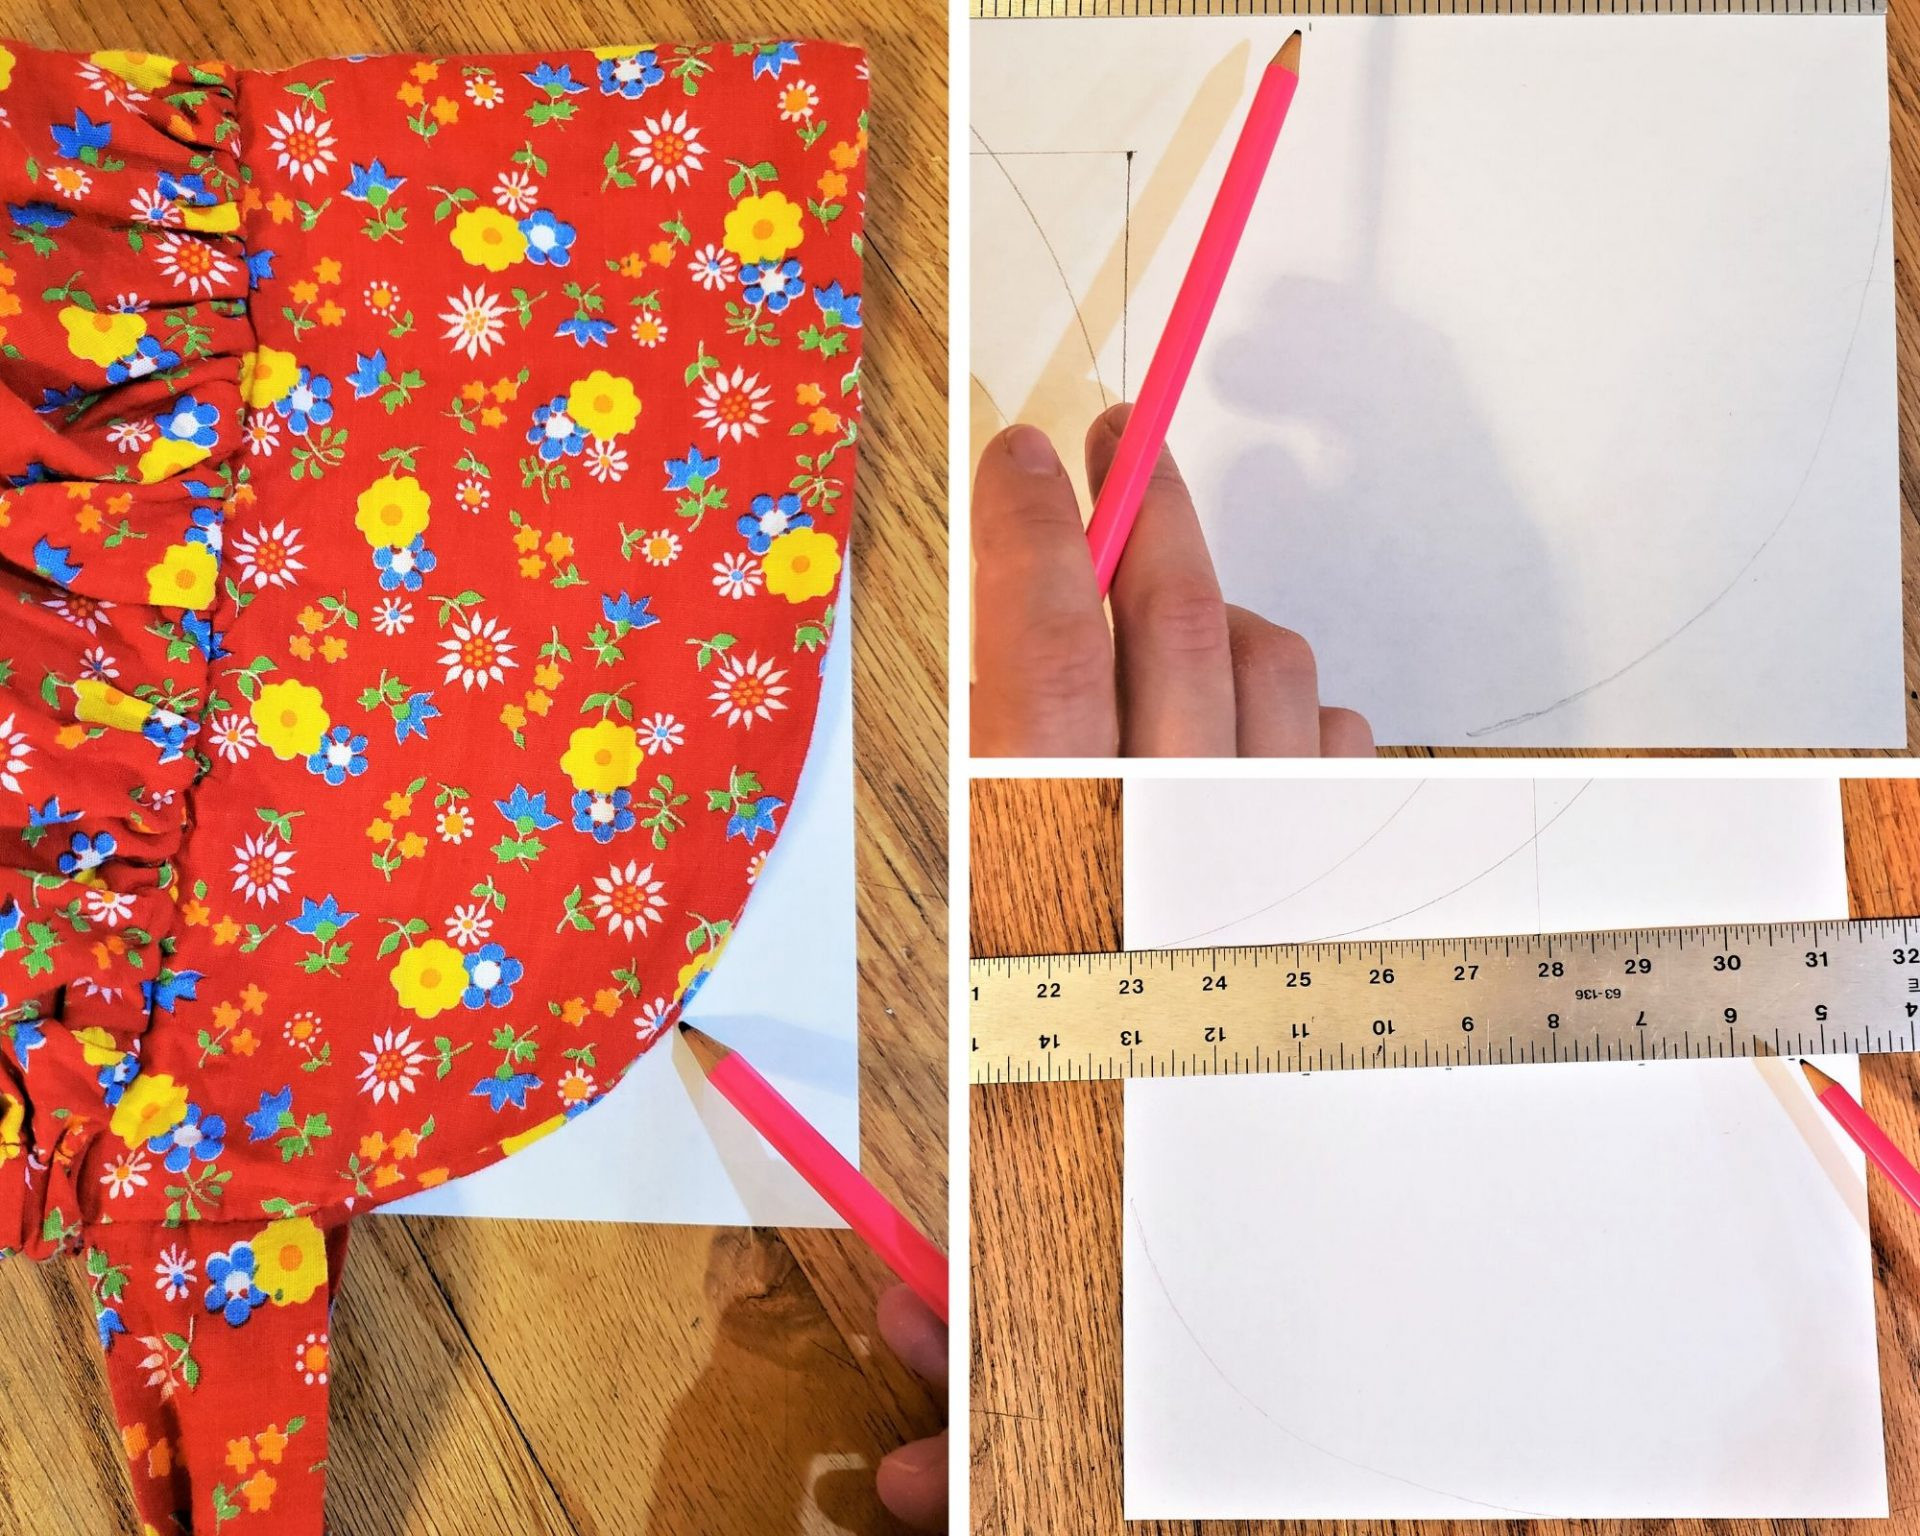
Using measurements from the vintage bonnet as a guide, mark out the shape for the bonnet crown—the rounded back piece. A microwave splatter cover serves perfectly as a curved edge guide. The paper’s vertical edge acts as the pattern’s center back, designed to be placed on a fabric fold.
 Drawing the crown pattern piece using a microwave splatter cover for curves
Re-examining the vintage bonnet revealed the side of the crown pattern needed a more pronounced outward curve. Adjustments were made using a metal t-square, a tool from theatrical set design training, to refine the curve and ensure accurate lines.
 Refining the crown pattern shape using a t-square
Designing the Bonnet Brim Pattern
With the crown pattern piece finalized, move on to drafting the brim pattern. Trace the curve from the original bonnet’s brim and add a straight line for the side to start shaping the brim pattern.
 Tracing the brim curve of a vintage bonnet to create a pattern piece
Sewing Your Pioneer Bonnet: Step-by-Step Guide
Now that your patterns are ready, let’s transform fabric into a pioneer bonnet.
Cutting the Fabric
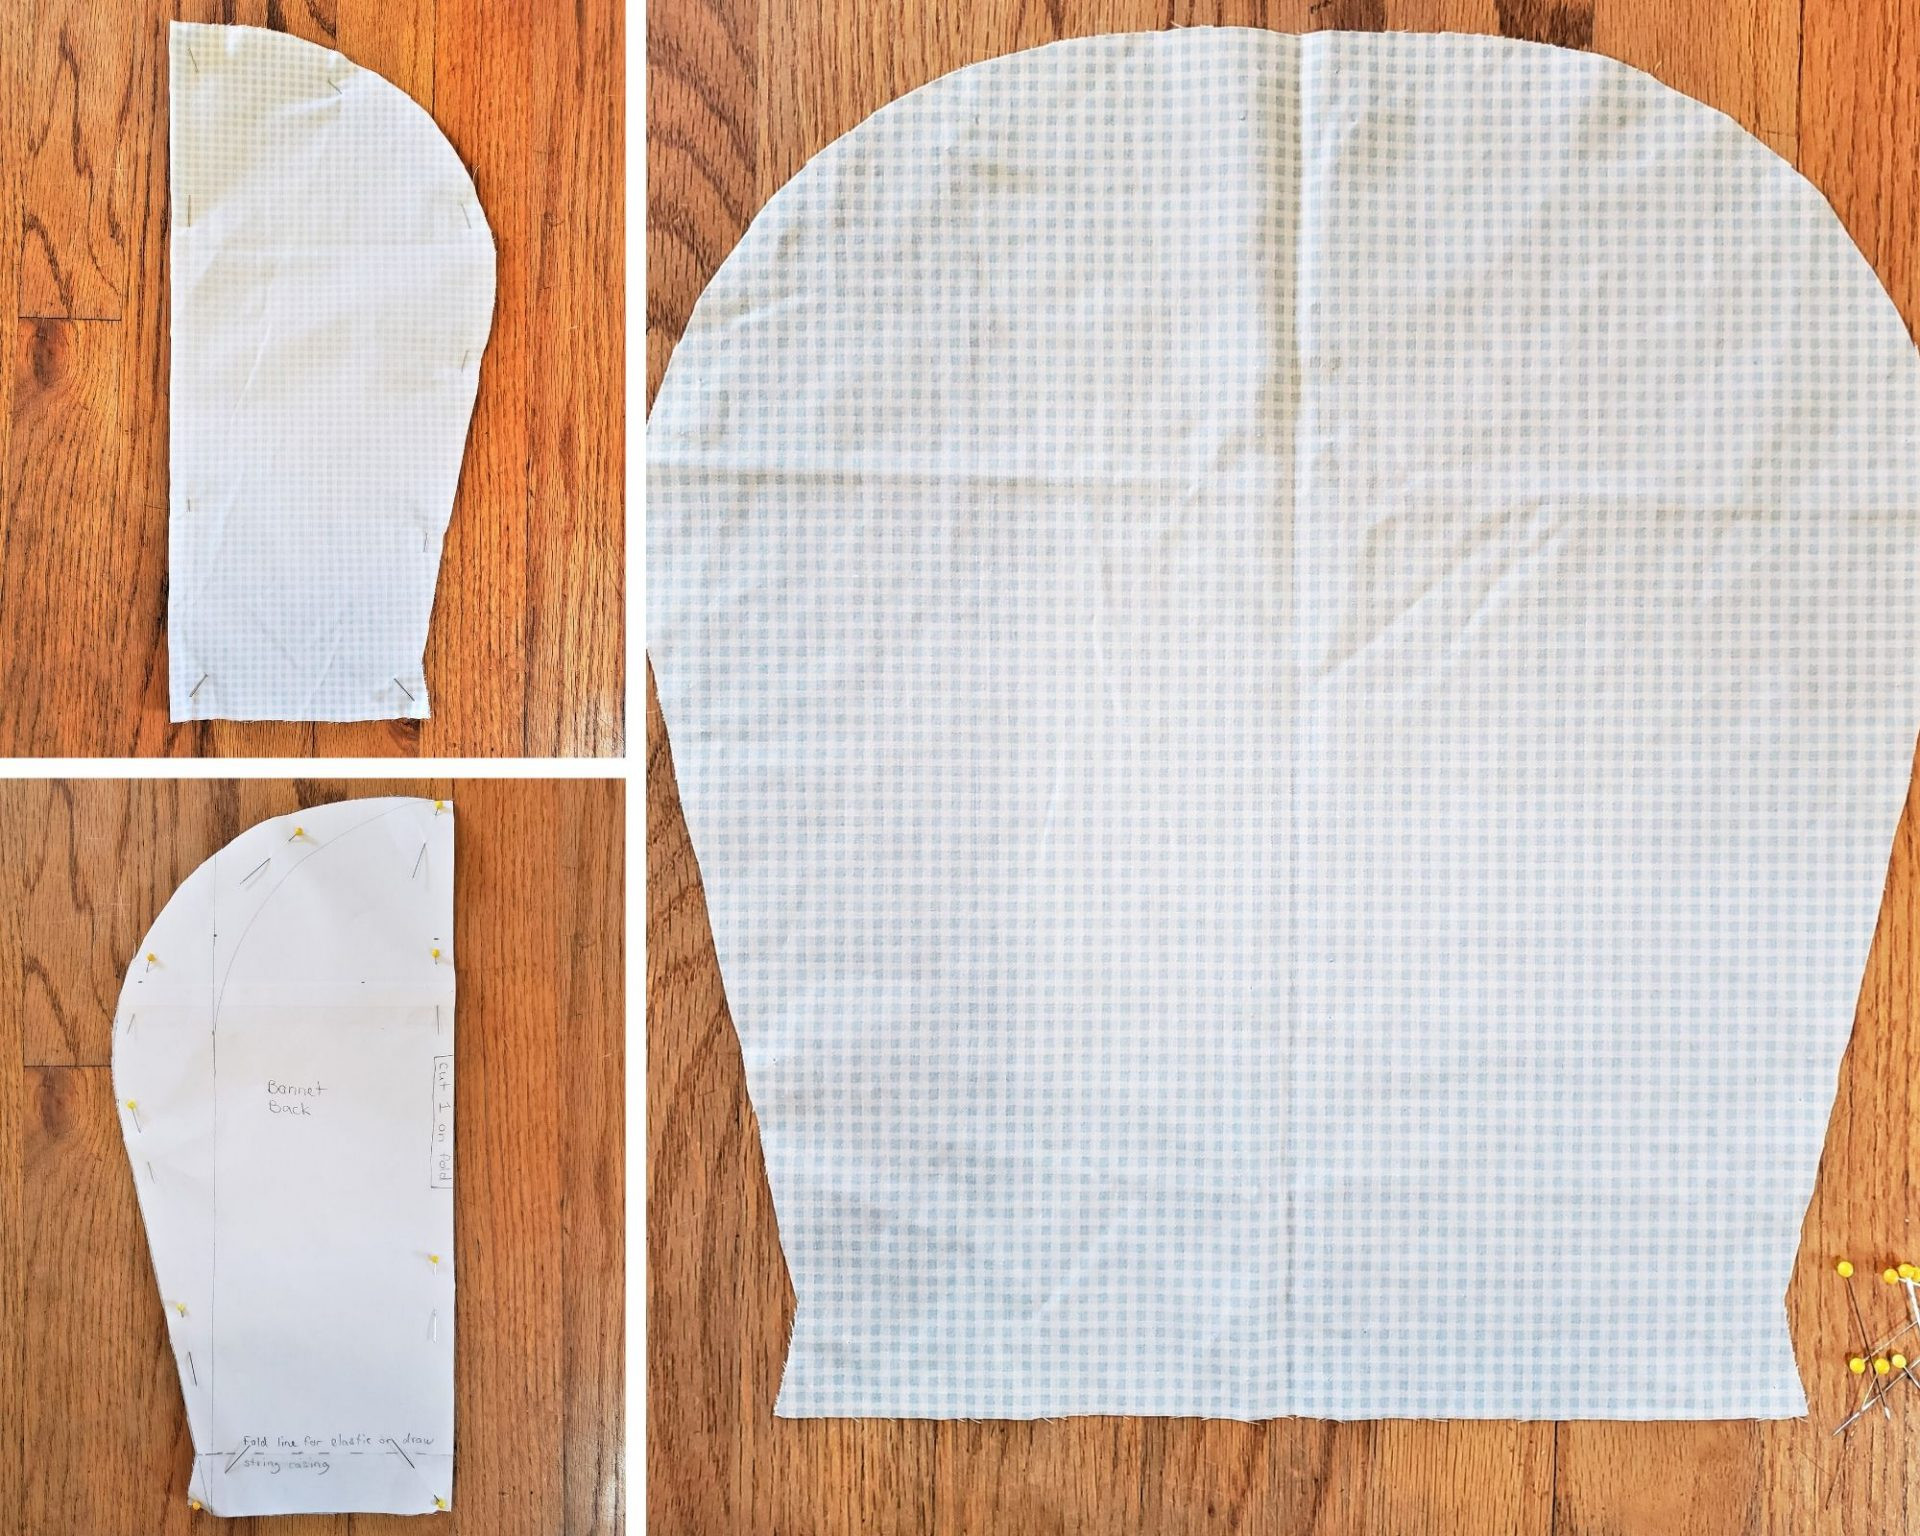
Begin by opening up your washed and dried pillowcase. Snip the side and top seams to lay it flat.
 Pillowcase opened and laid flat for cutting fabric pieces
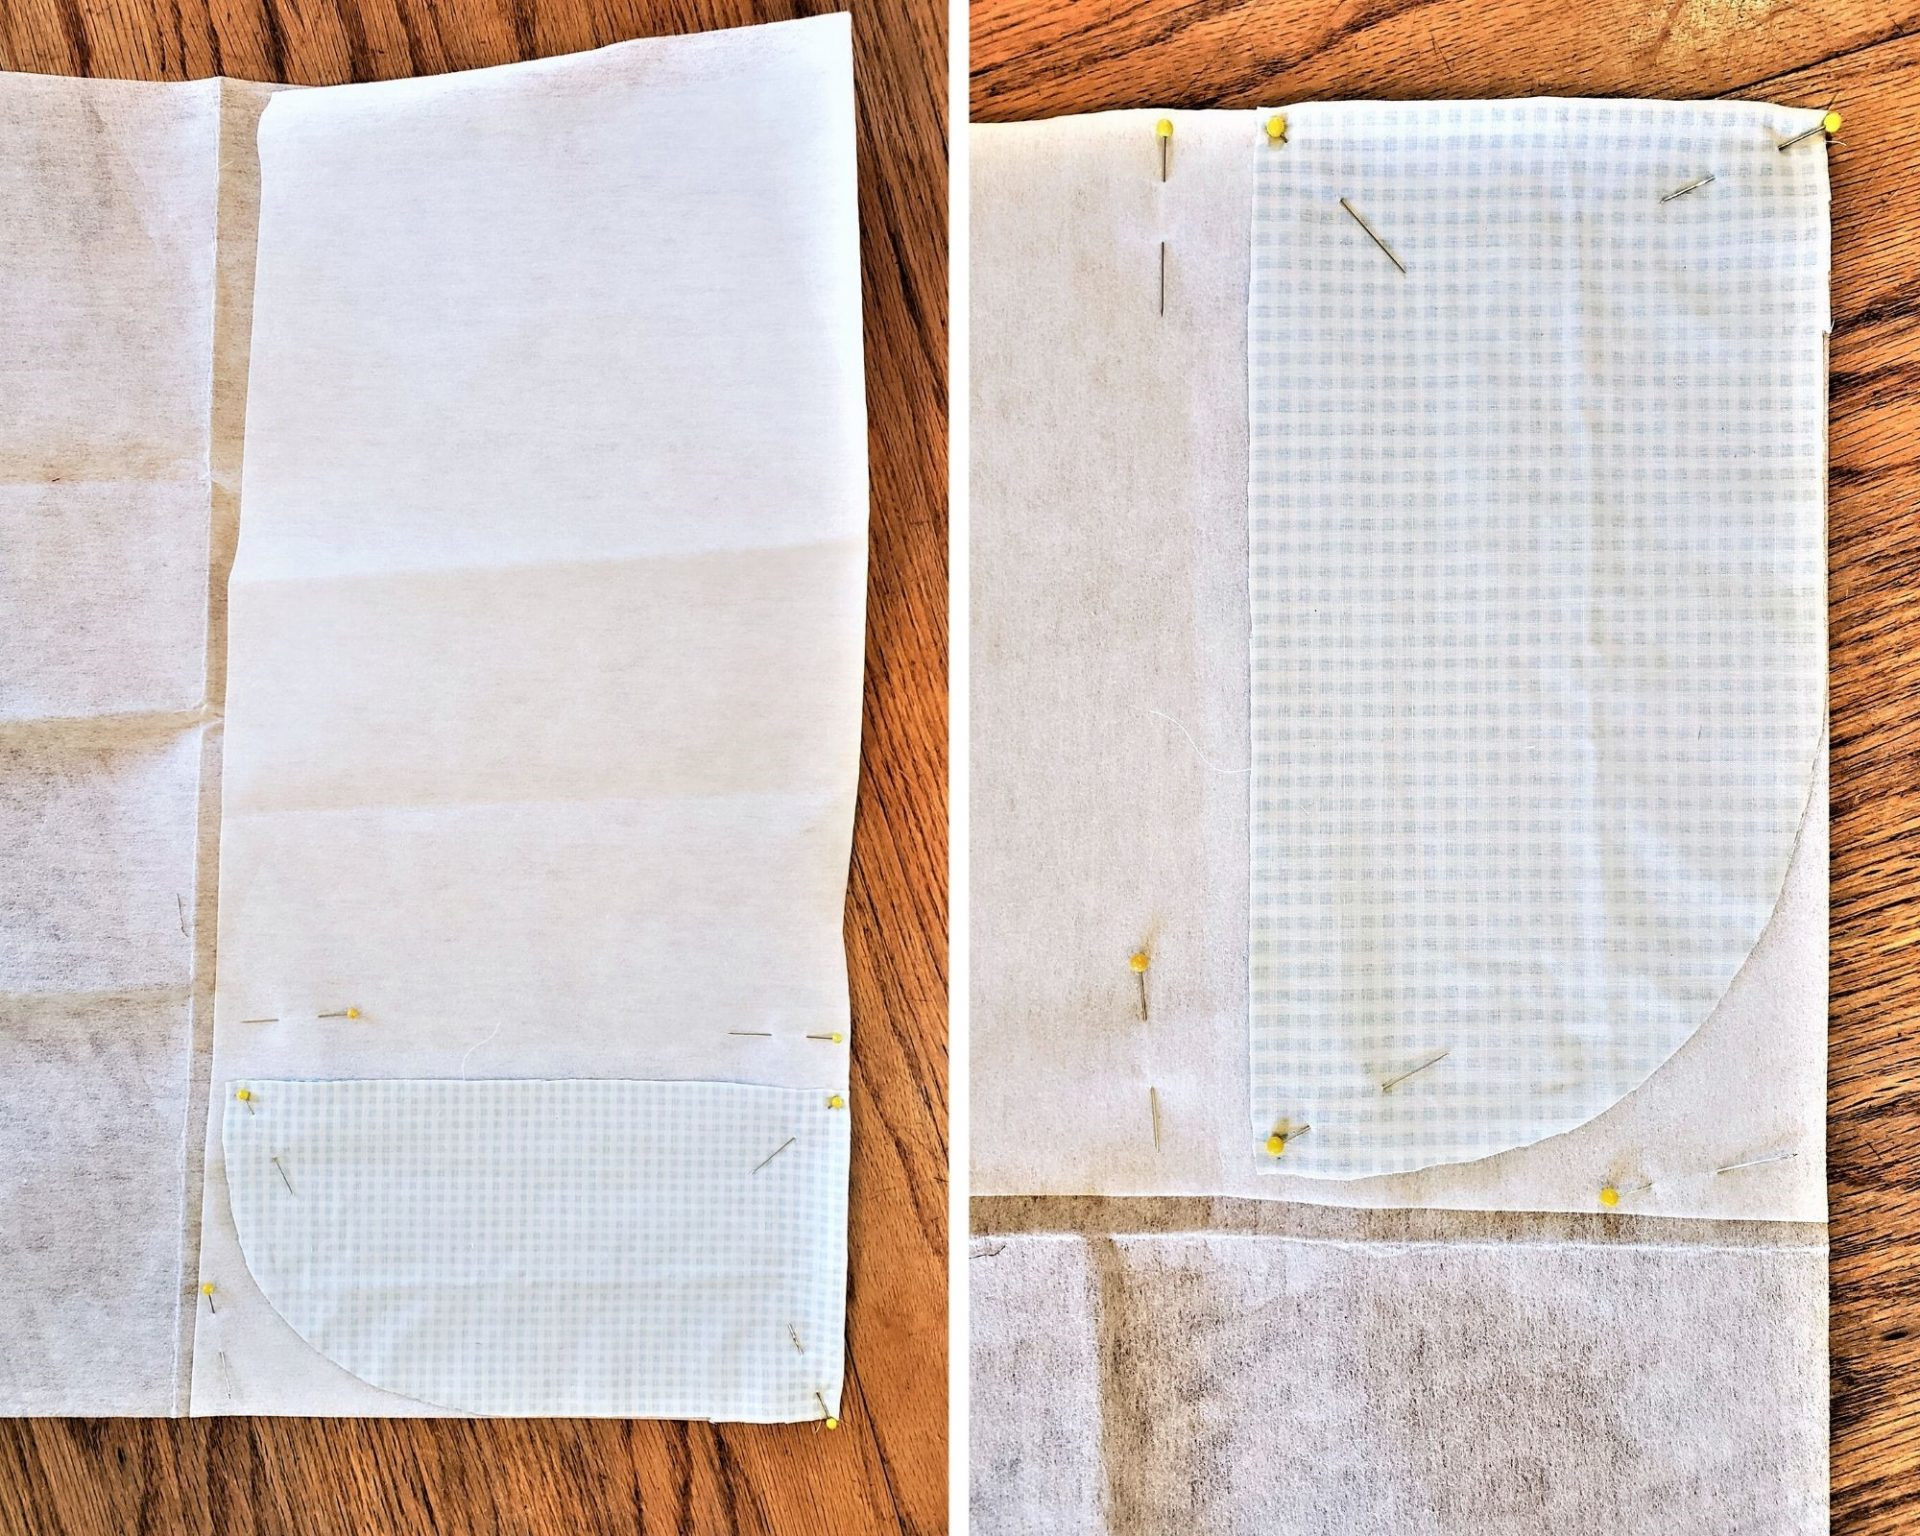
Arrange your pattern pieces on the fabric to maximize material usage. Position the brim pattern along the pillowcase’s finished edge to utilize the double-layer fabric and decorative trim, adding both stiffness and charm to the brim in one step.
 Layout of pattern pieces on the pillowcase fabric, utilizing the finished edge for the brim
Cut out the pieces. Then, reposition the brim pattern to cut a lining piece for the brim. Lastly, measure and cut two fabric strips, each 19 1/2 inches by 2 1/2 inches, for the bonnet ties.
 Cut fabric pieces for the pioneer bonnet, including brim, crown, and ties
Preparing the Brim
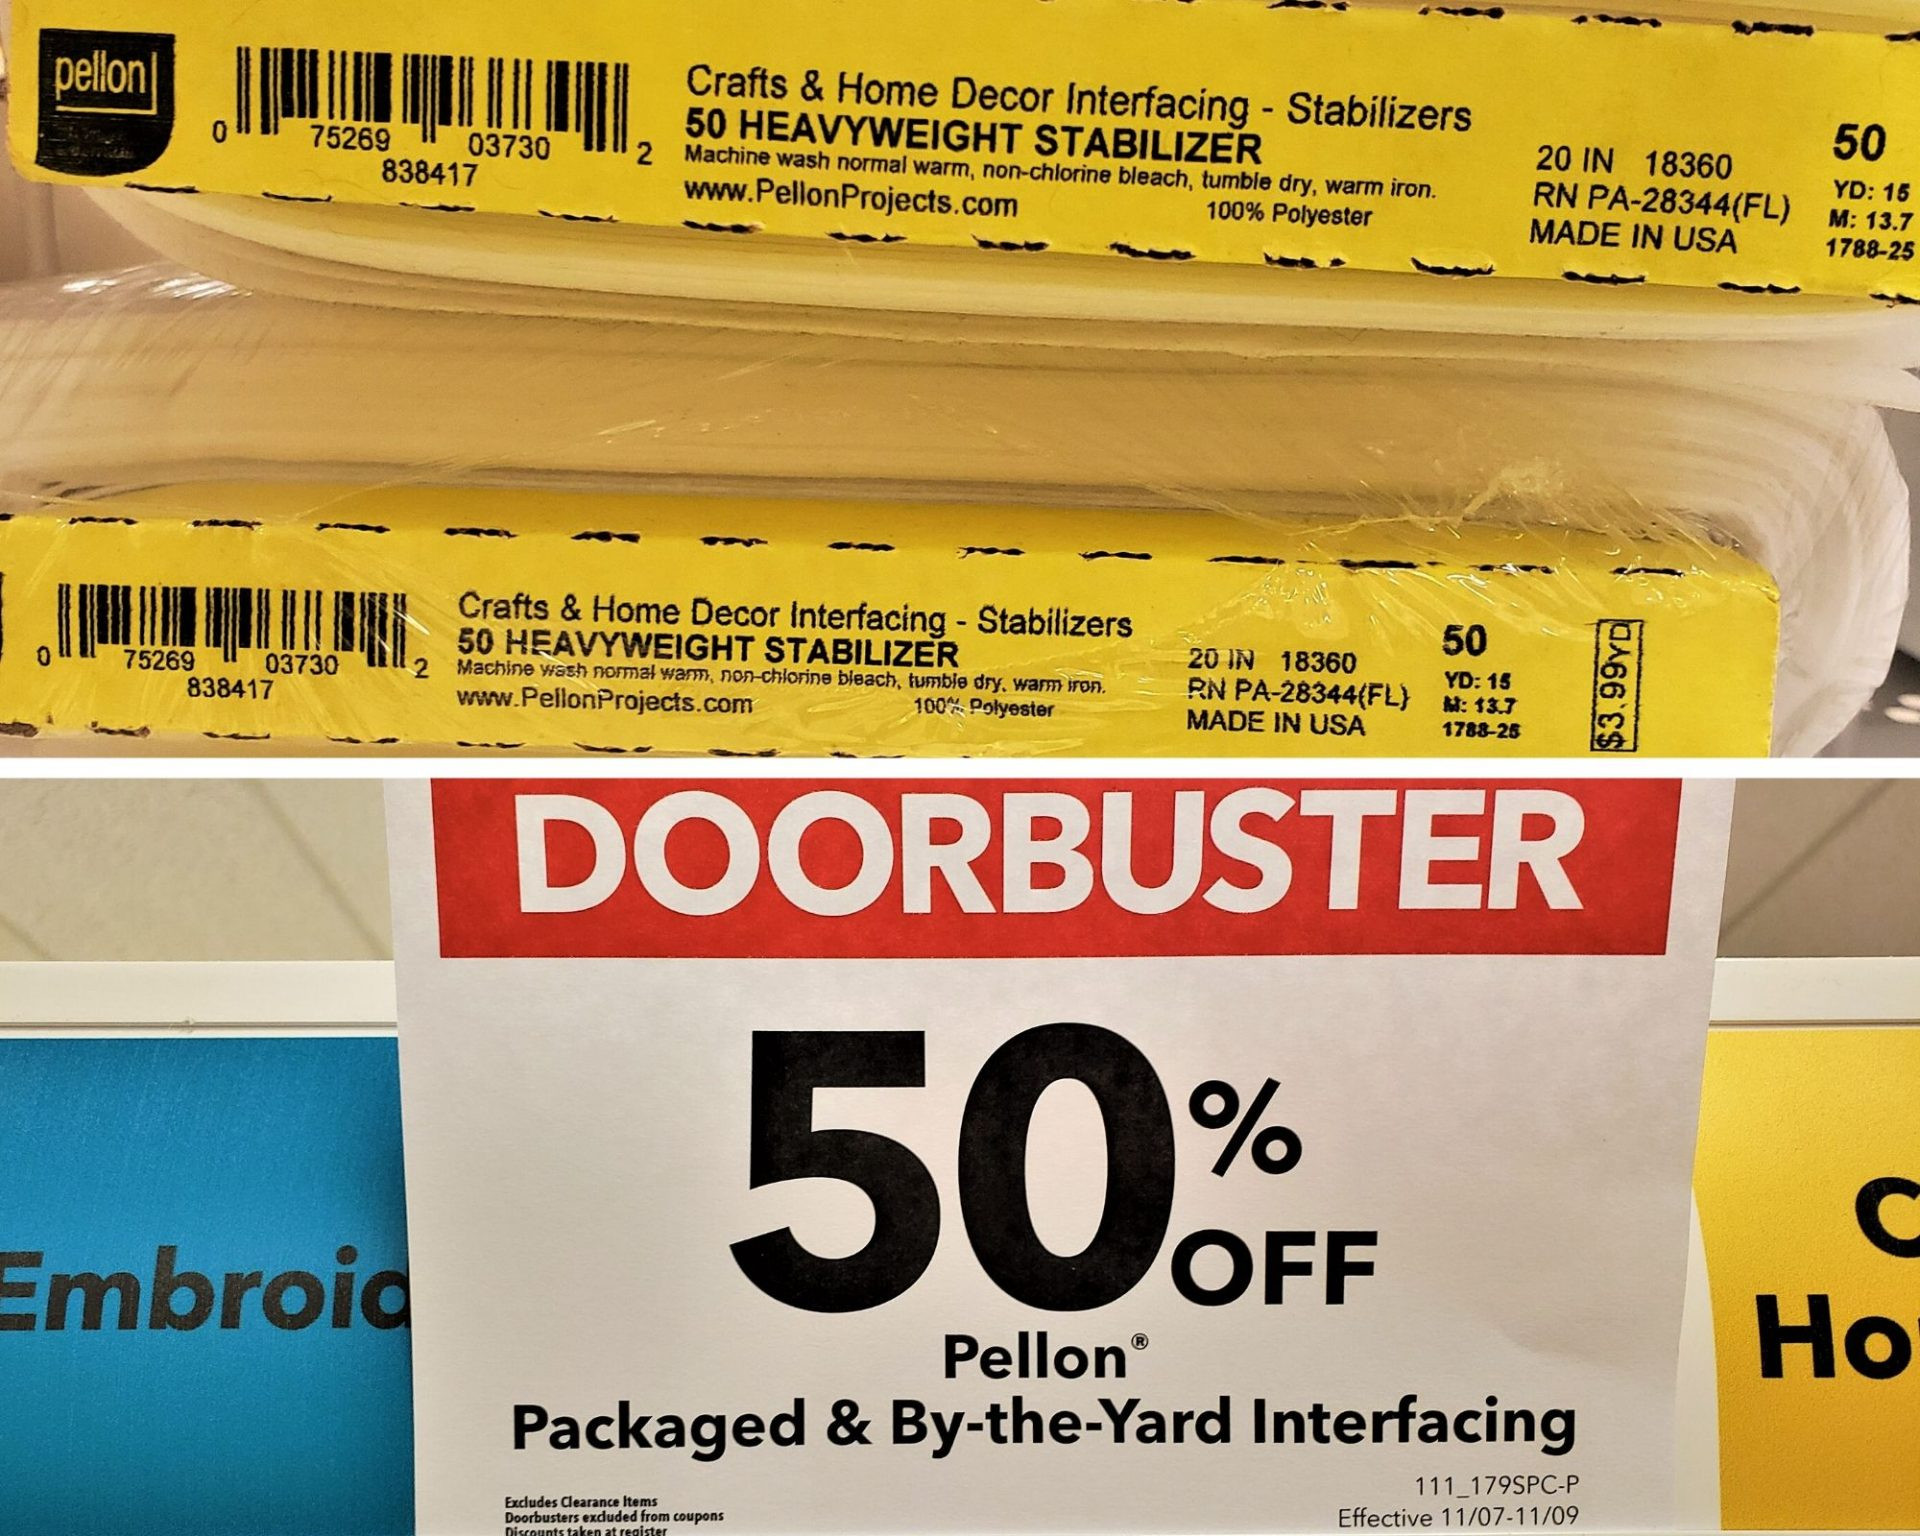
For an extra-stiff brim, incorporate a sew-in stabilizer. While fusible interfacing is an option, sew-in varieties are preferred for their reliability.
 Selection of sew-in stabilizers for adding stiffness to fabric projects
Cut the stabilizer to match the brim pattern. Pellon’s 50 Heavyweight Stabilizer is a recommended choice for achieving a firm brim.
 Pattern pieces laid out with stabilizer for the bonnet brim
Serge the straight edge of the brim lining and then serge the interfacing to the wrong side of the main brim piece. This efficiently finishes the edges and layers the stabilizer.
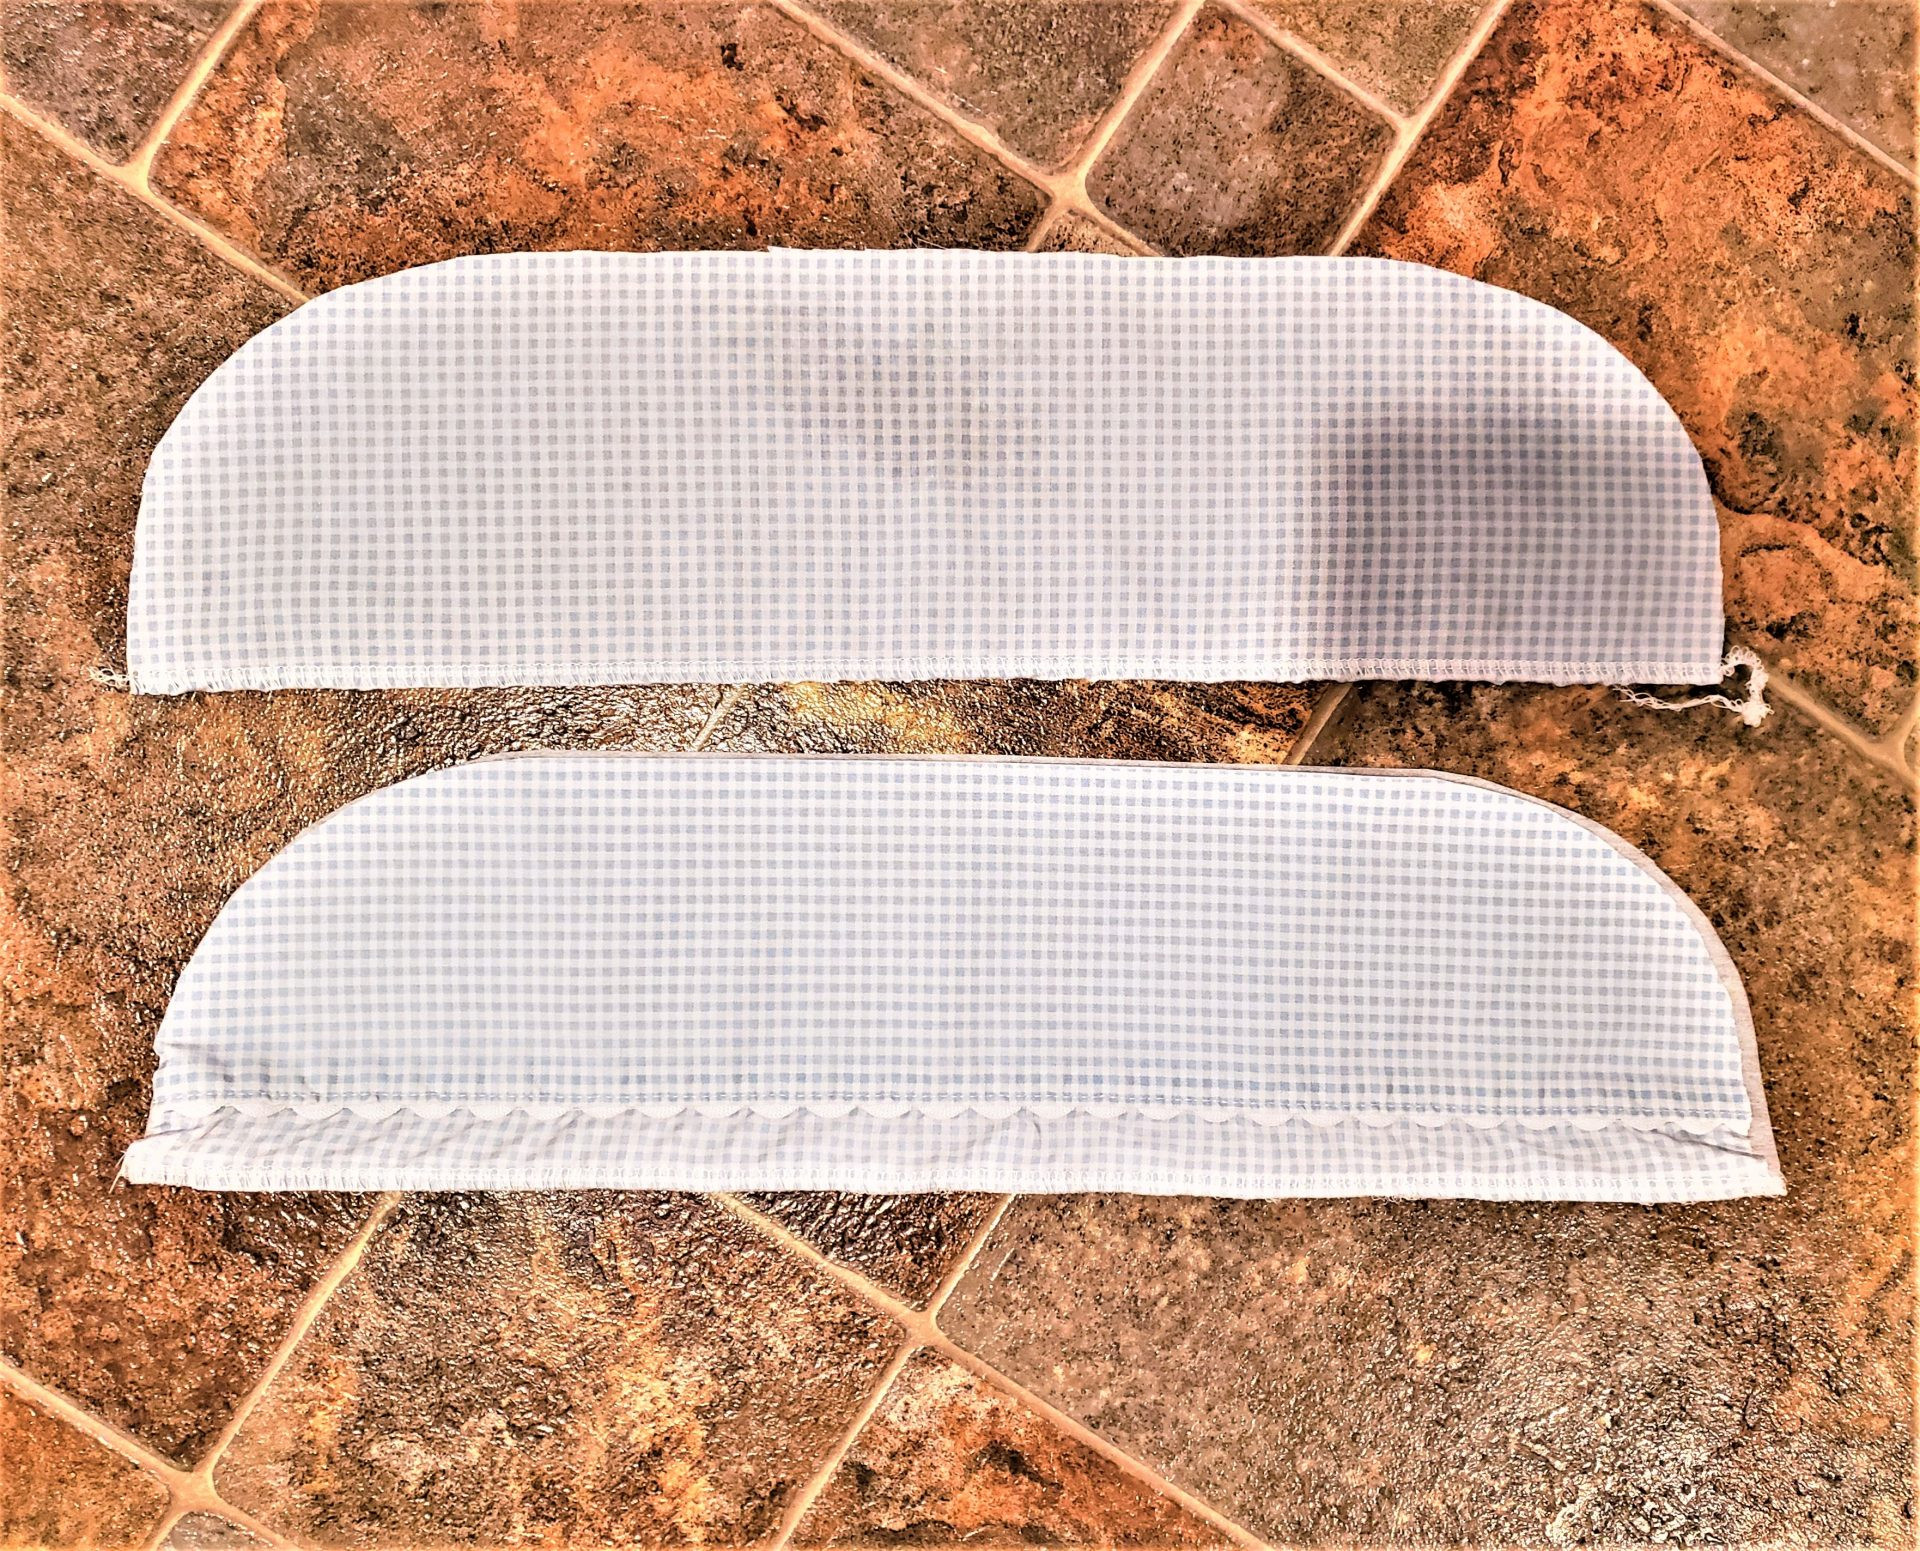 Serged edges of the bonnet brim and lining pieces
These are the prepared brim pieces from the back. Avoid serging the curved edges yet! First, prepare and attach the bonnet ties.
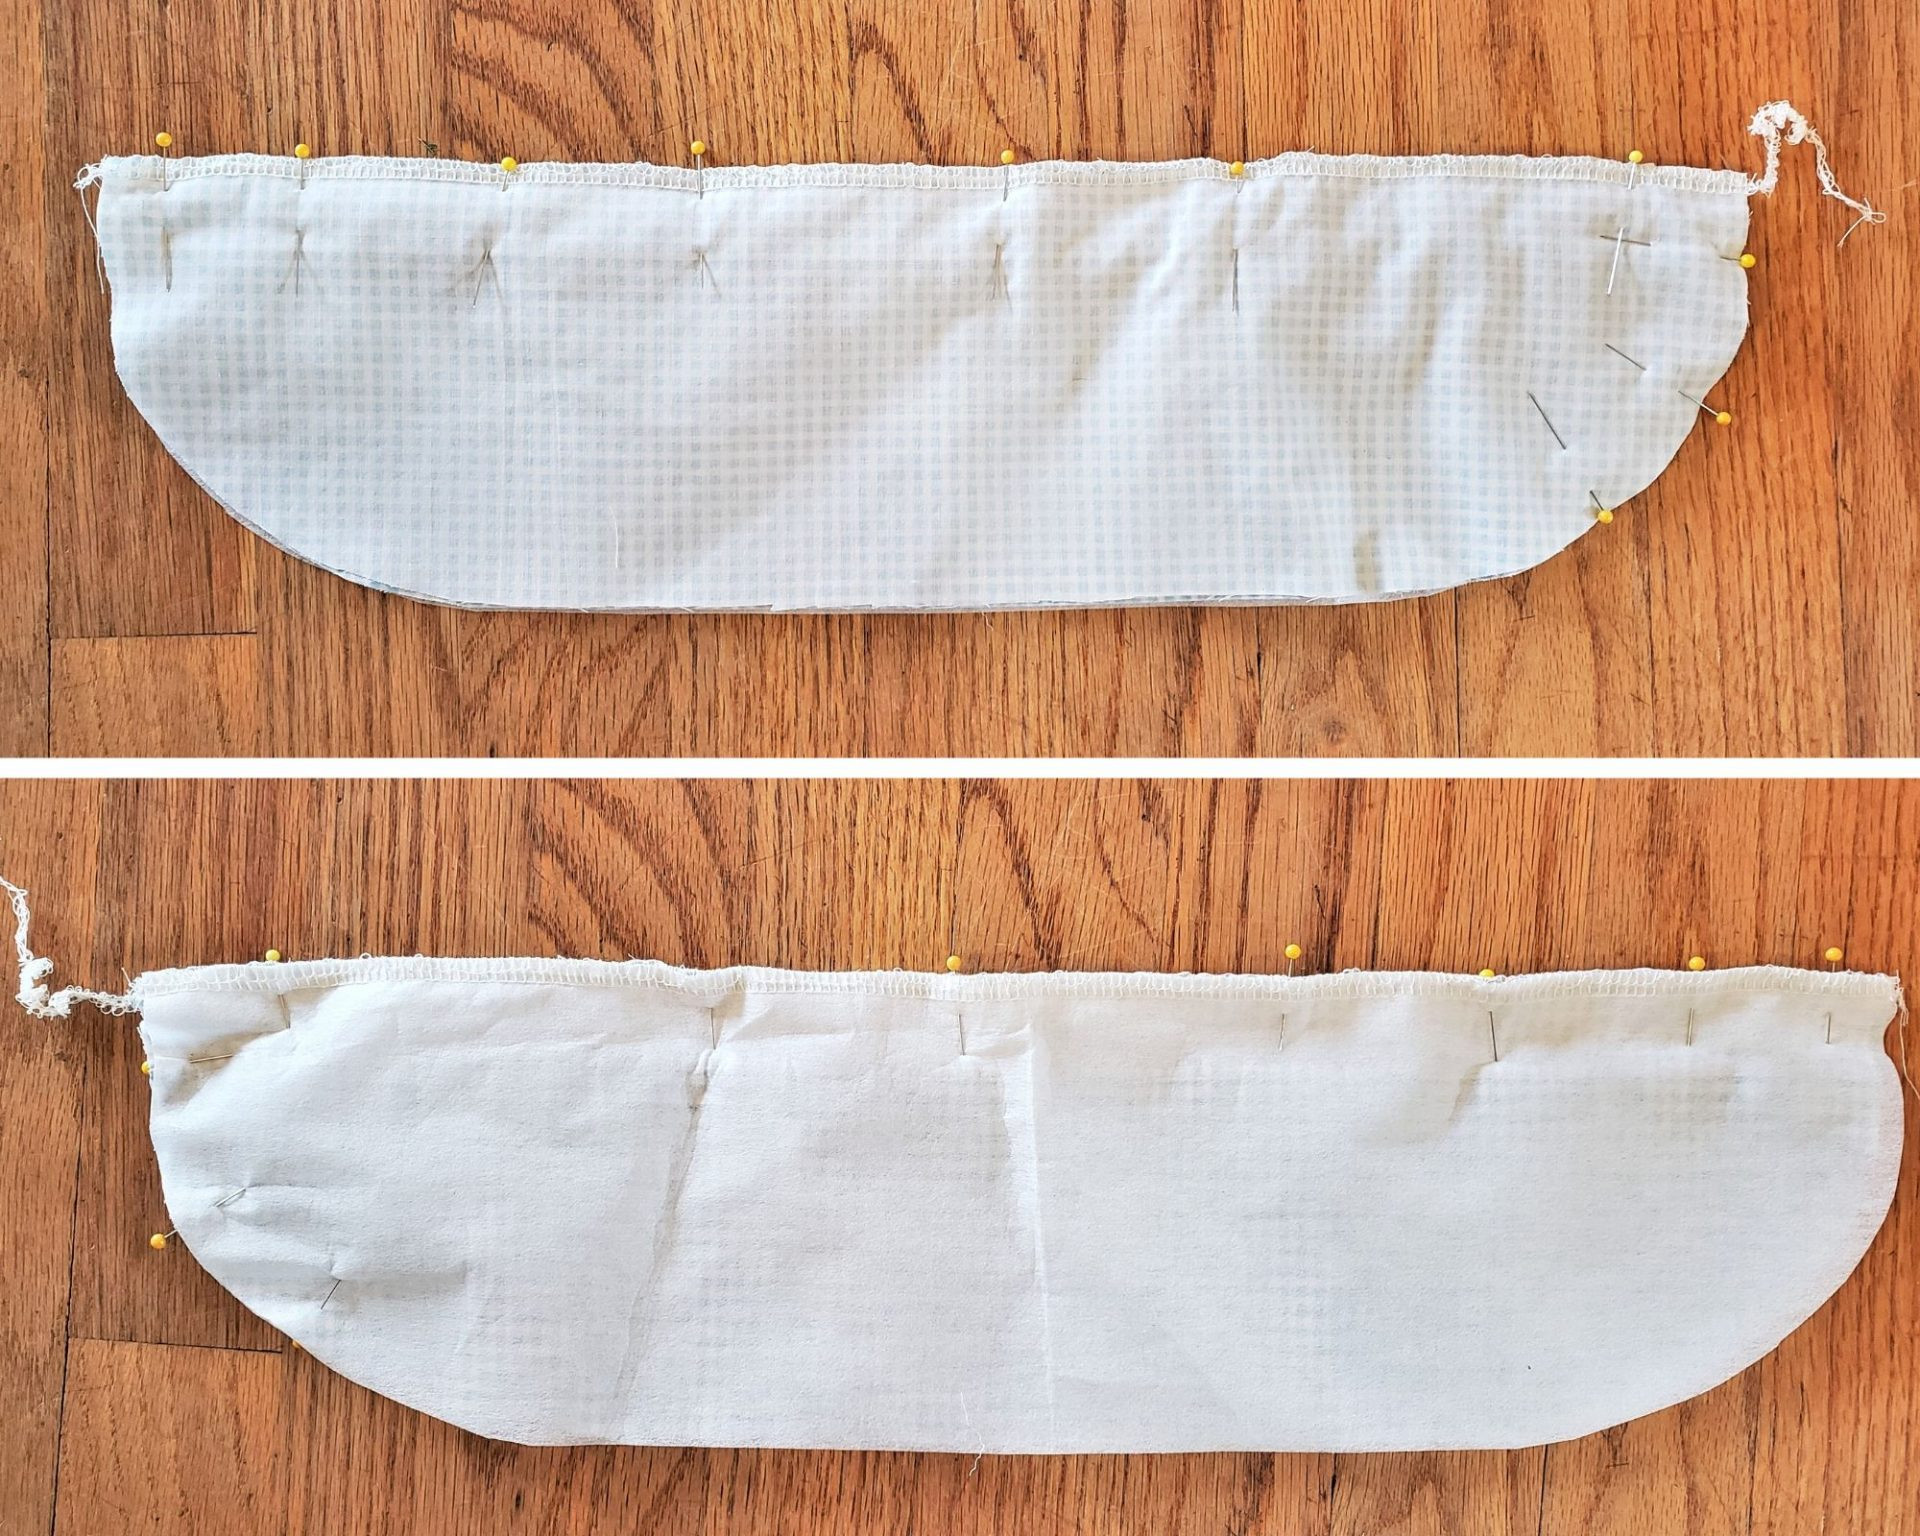 Back view of serged bonnet brim pieces before tie attachment
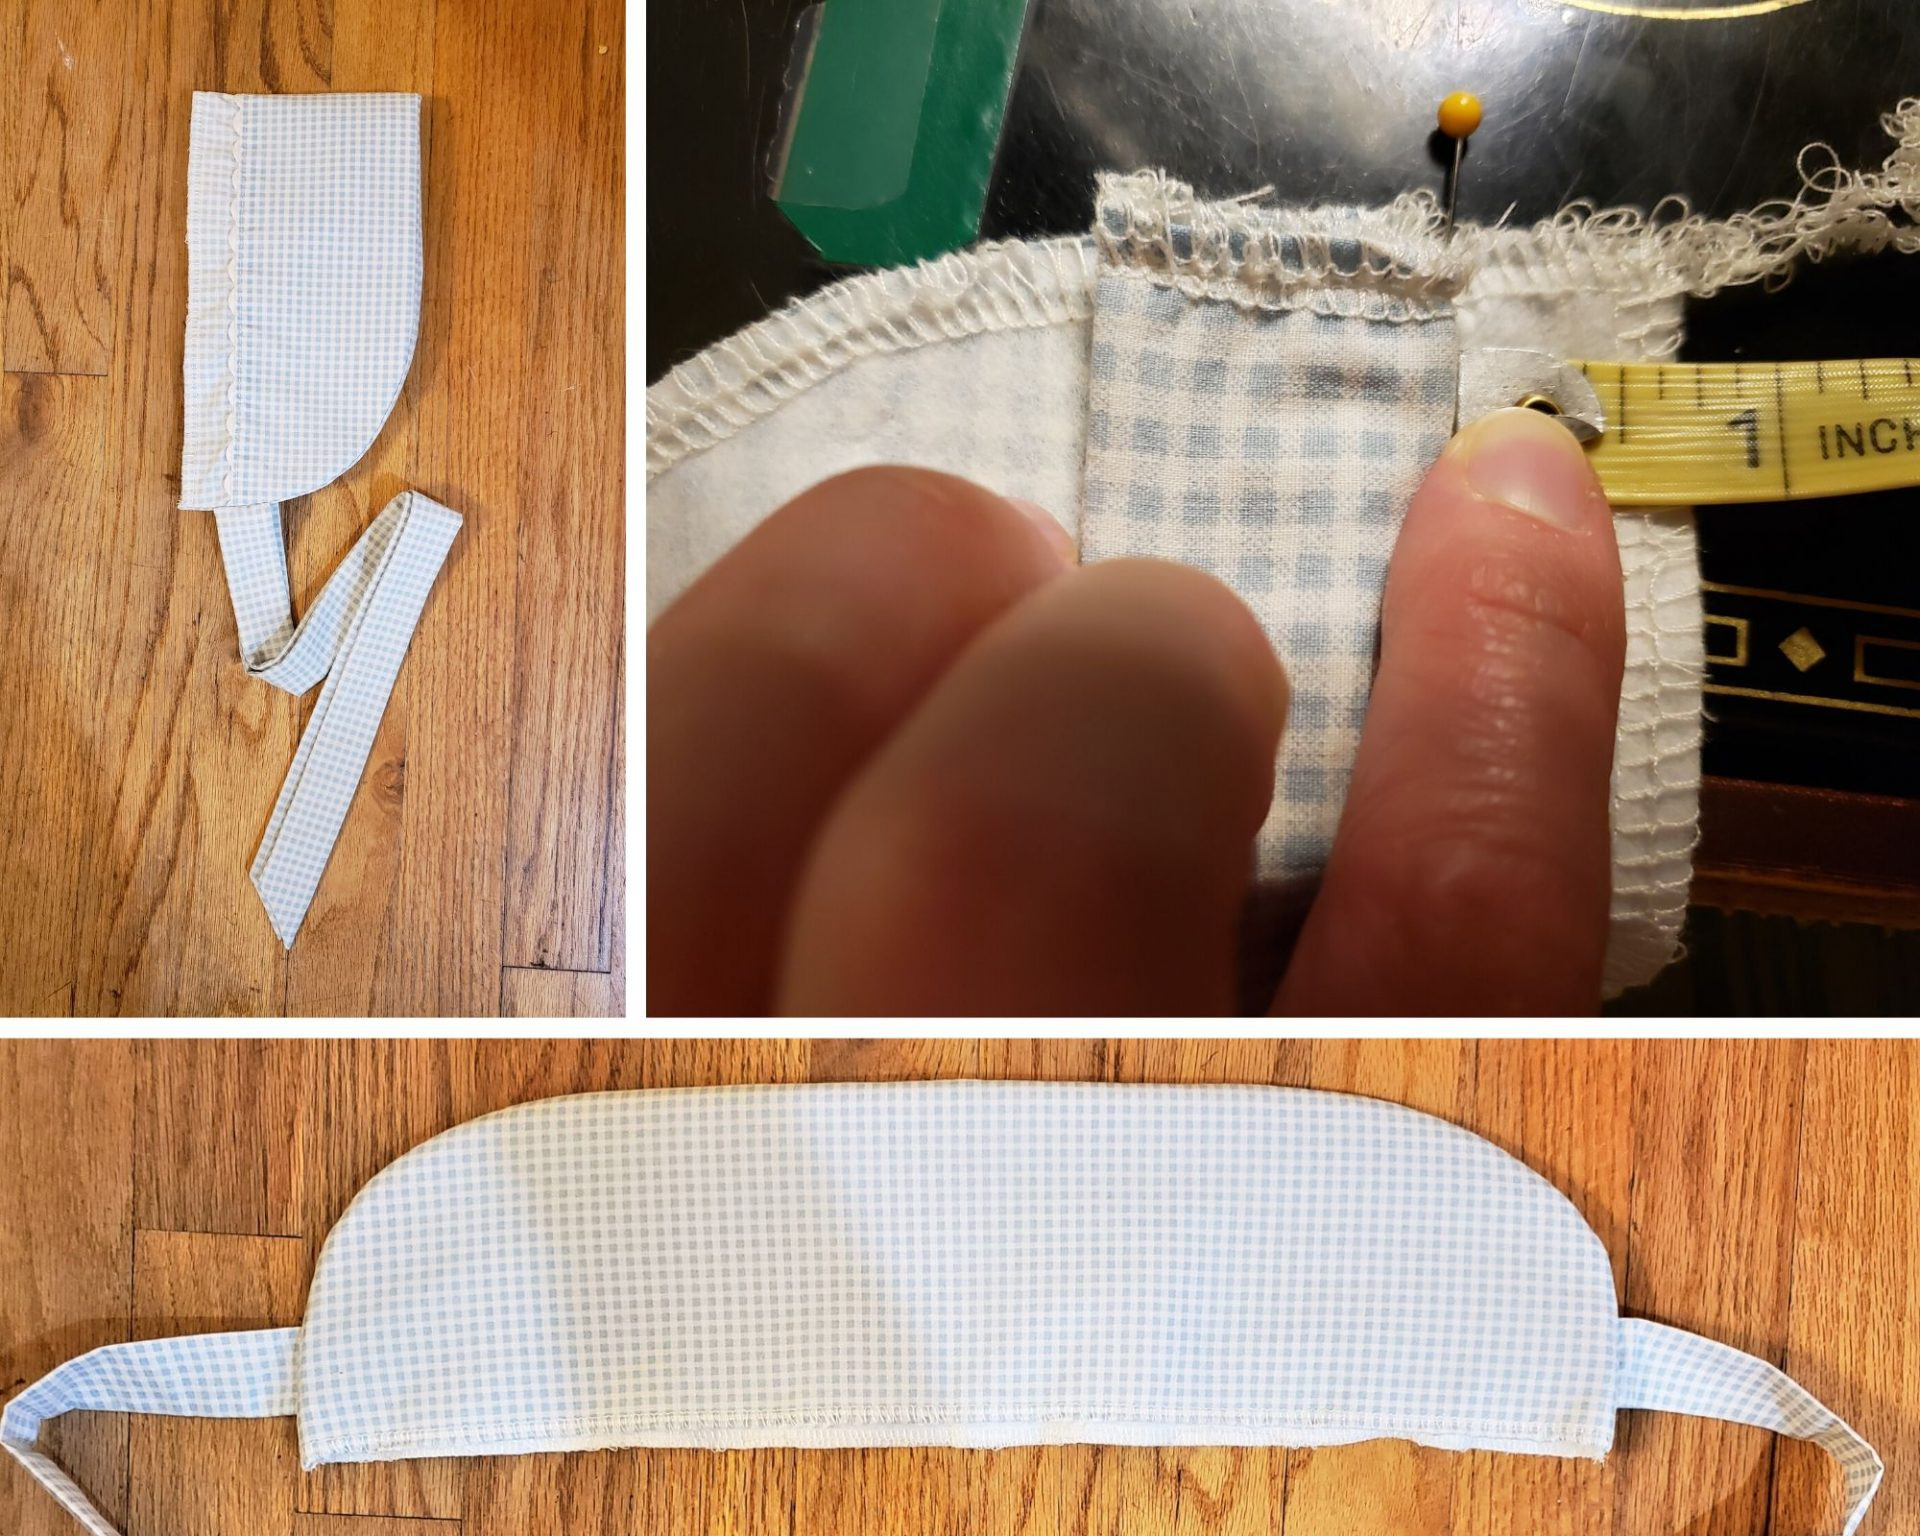
Prepare the bonnet ties by sewing each strip into a cylinder, turning them right-side out using a tool like a Quick Turn, or a simple pencil. Miter and stitch the ends closed for a neat finish.
 Bonnet ties being turned right side out using a fabric turning tool
Attach the bonnet ties to the brim by positioning them 3/4 inches from each corner edge and stitching them in place. Then, sew the brim lining and main piece together along the curved edge, enclosing the ties and creating a clean brim edge. Use a 1/4 inch seam allowance.
 Attaching bonnet ties to the brim and sewing brim lining and main piece together
Assembling the Crown
Set aside the finished brim and focus on the bonnet crown. Serge around all raw edges of the crown piece to prevent fraying, or use a zig-zag stitch if you don’t have a serger. The bonnet’s construction will encase all raw edges for durability.
 Serged edges of the bonnet crown piece
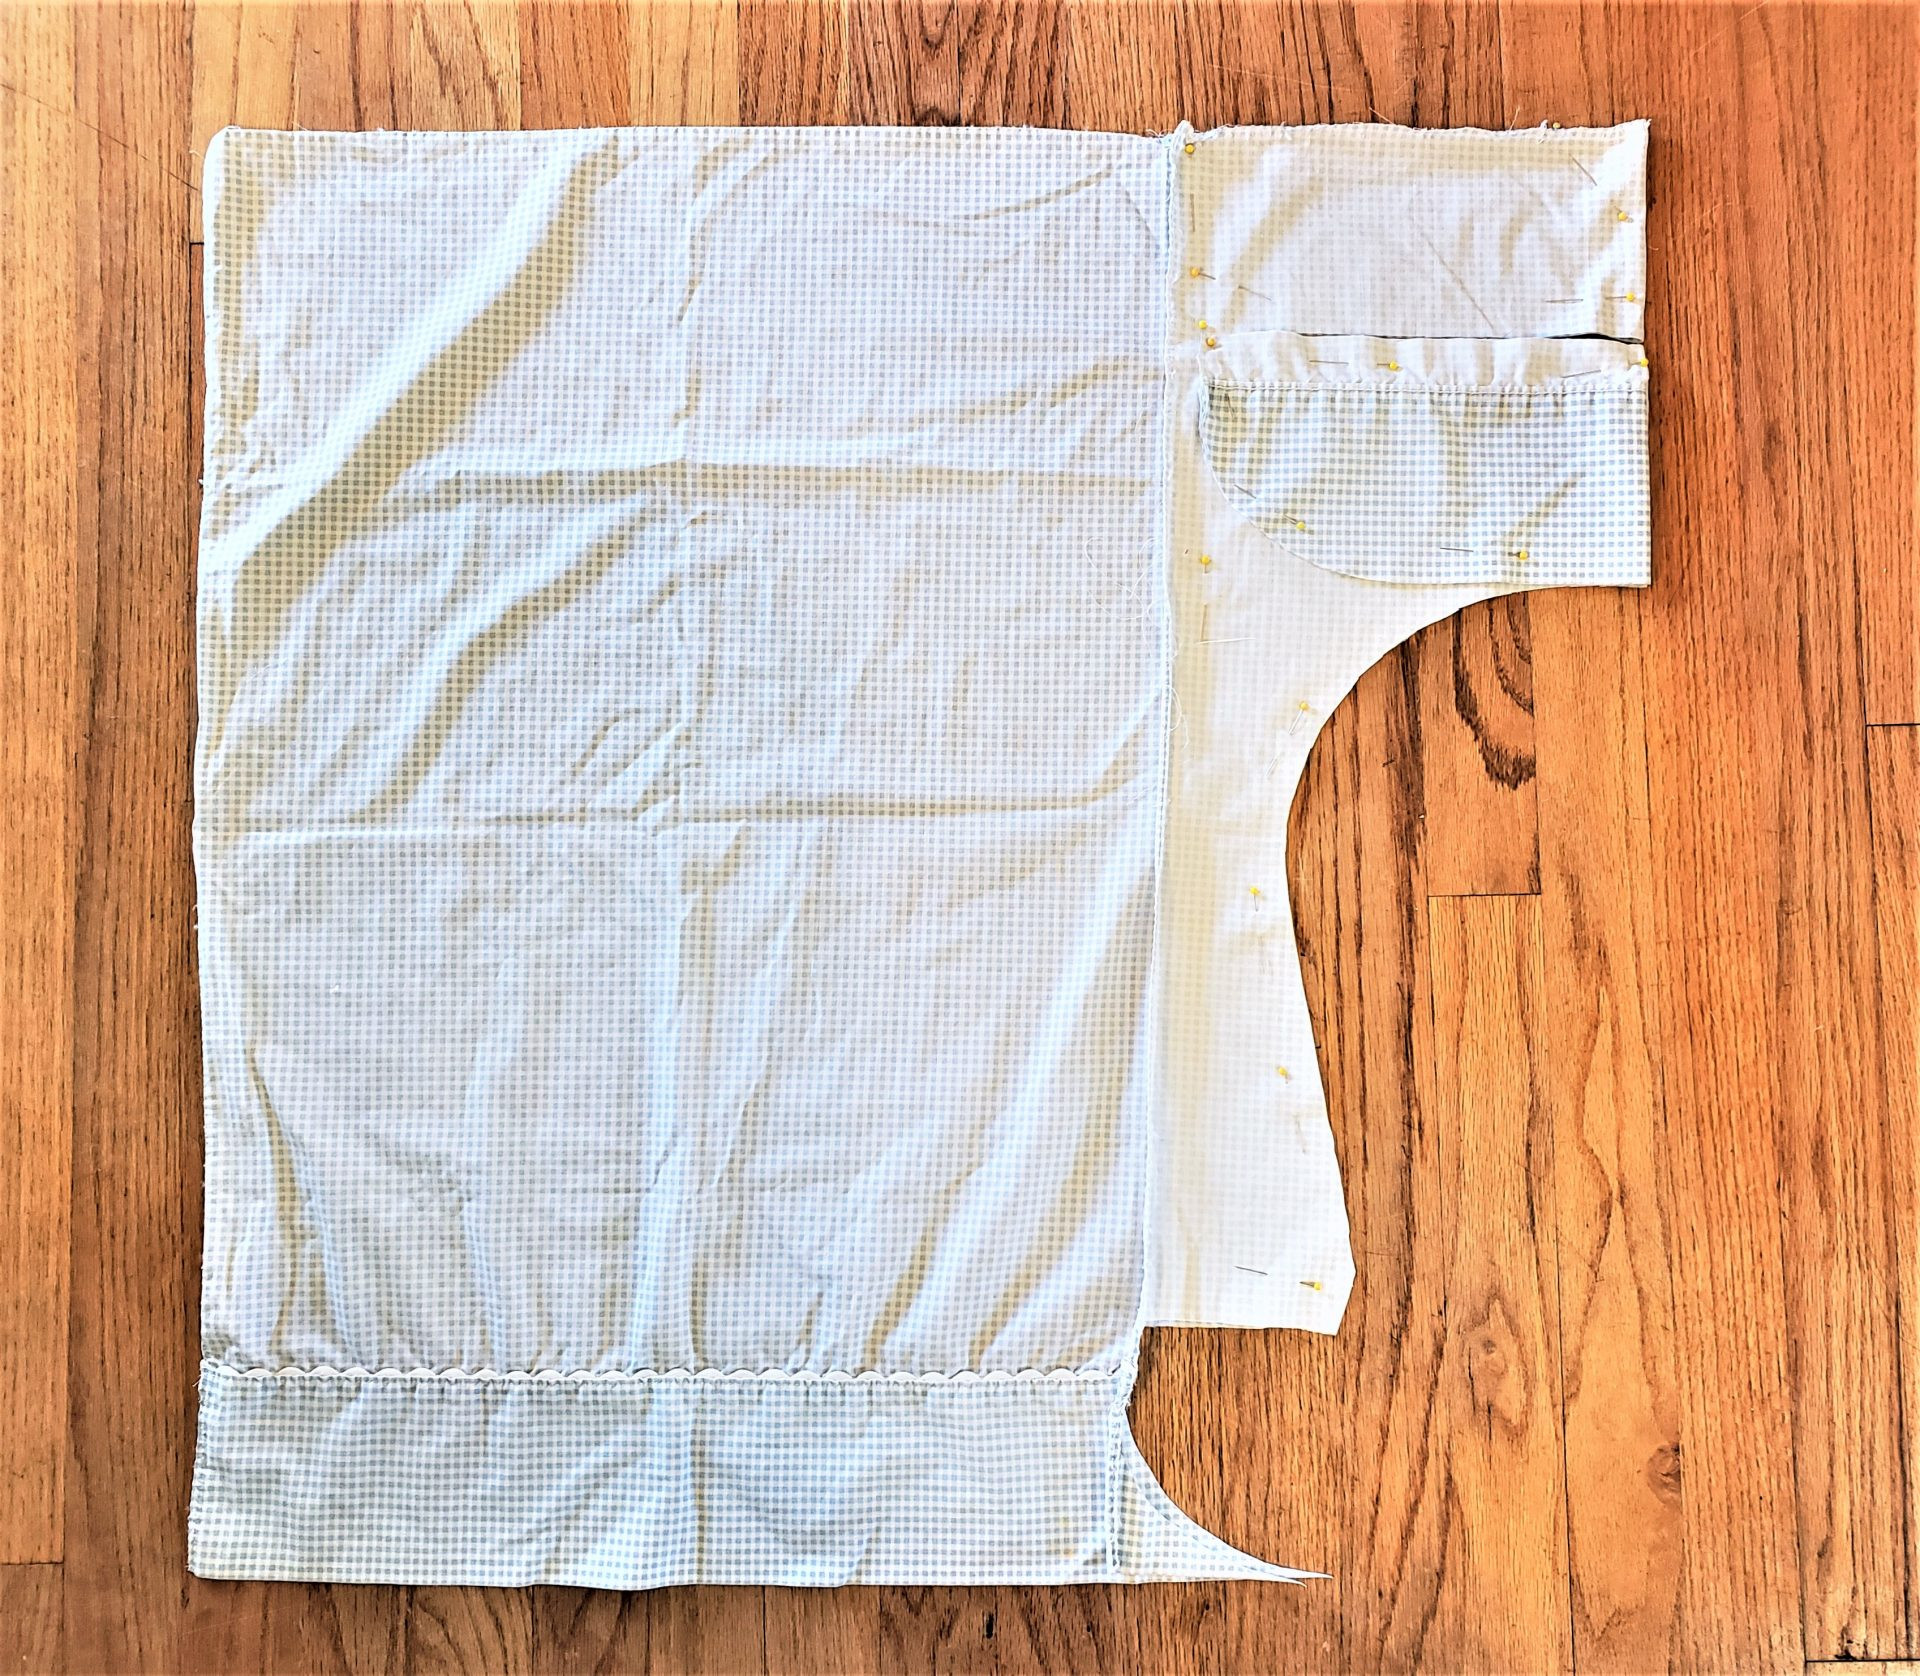
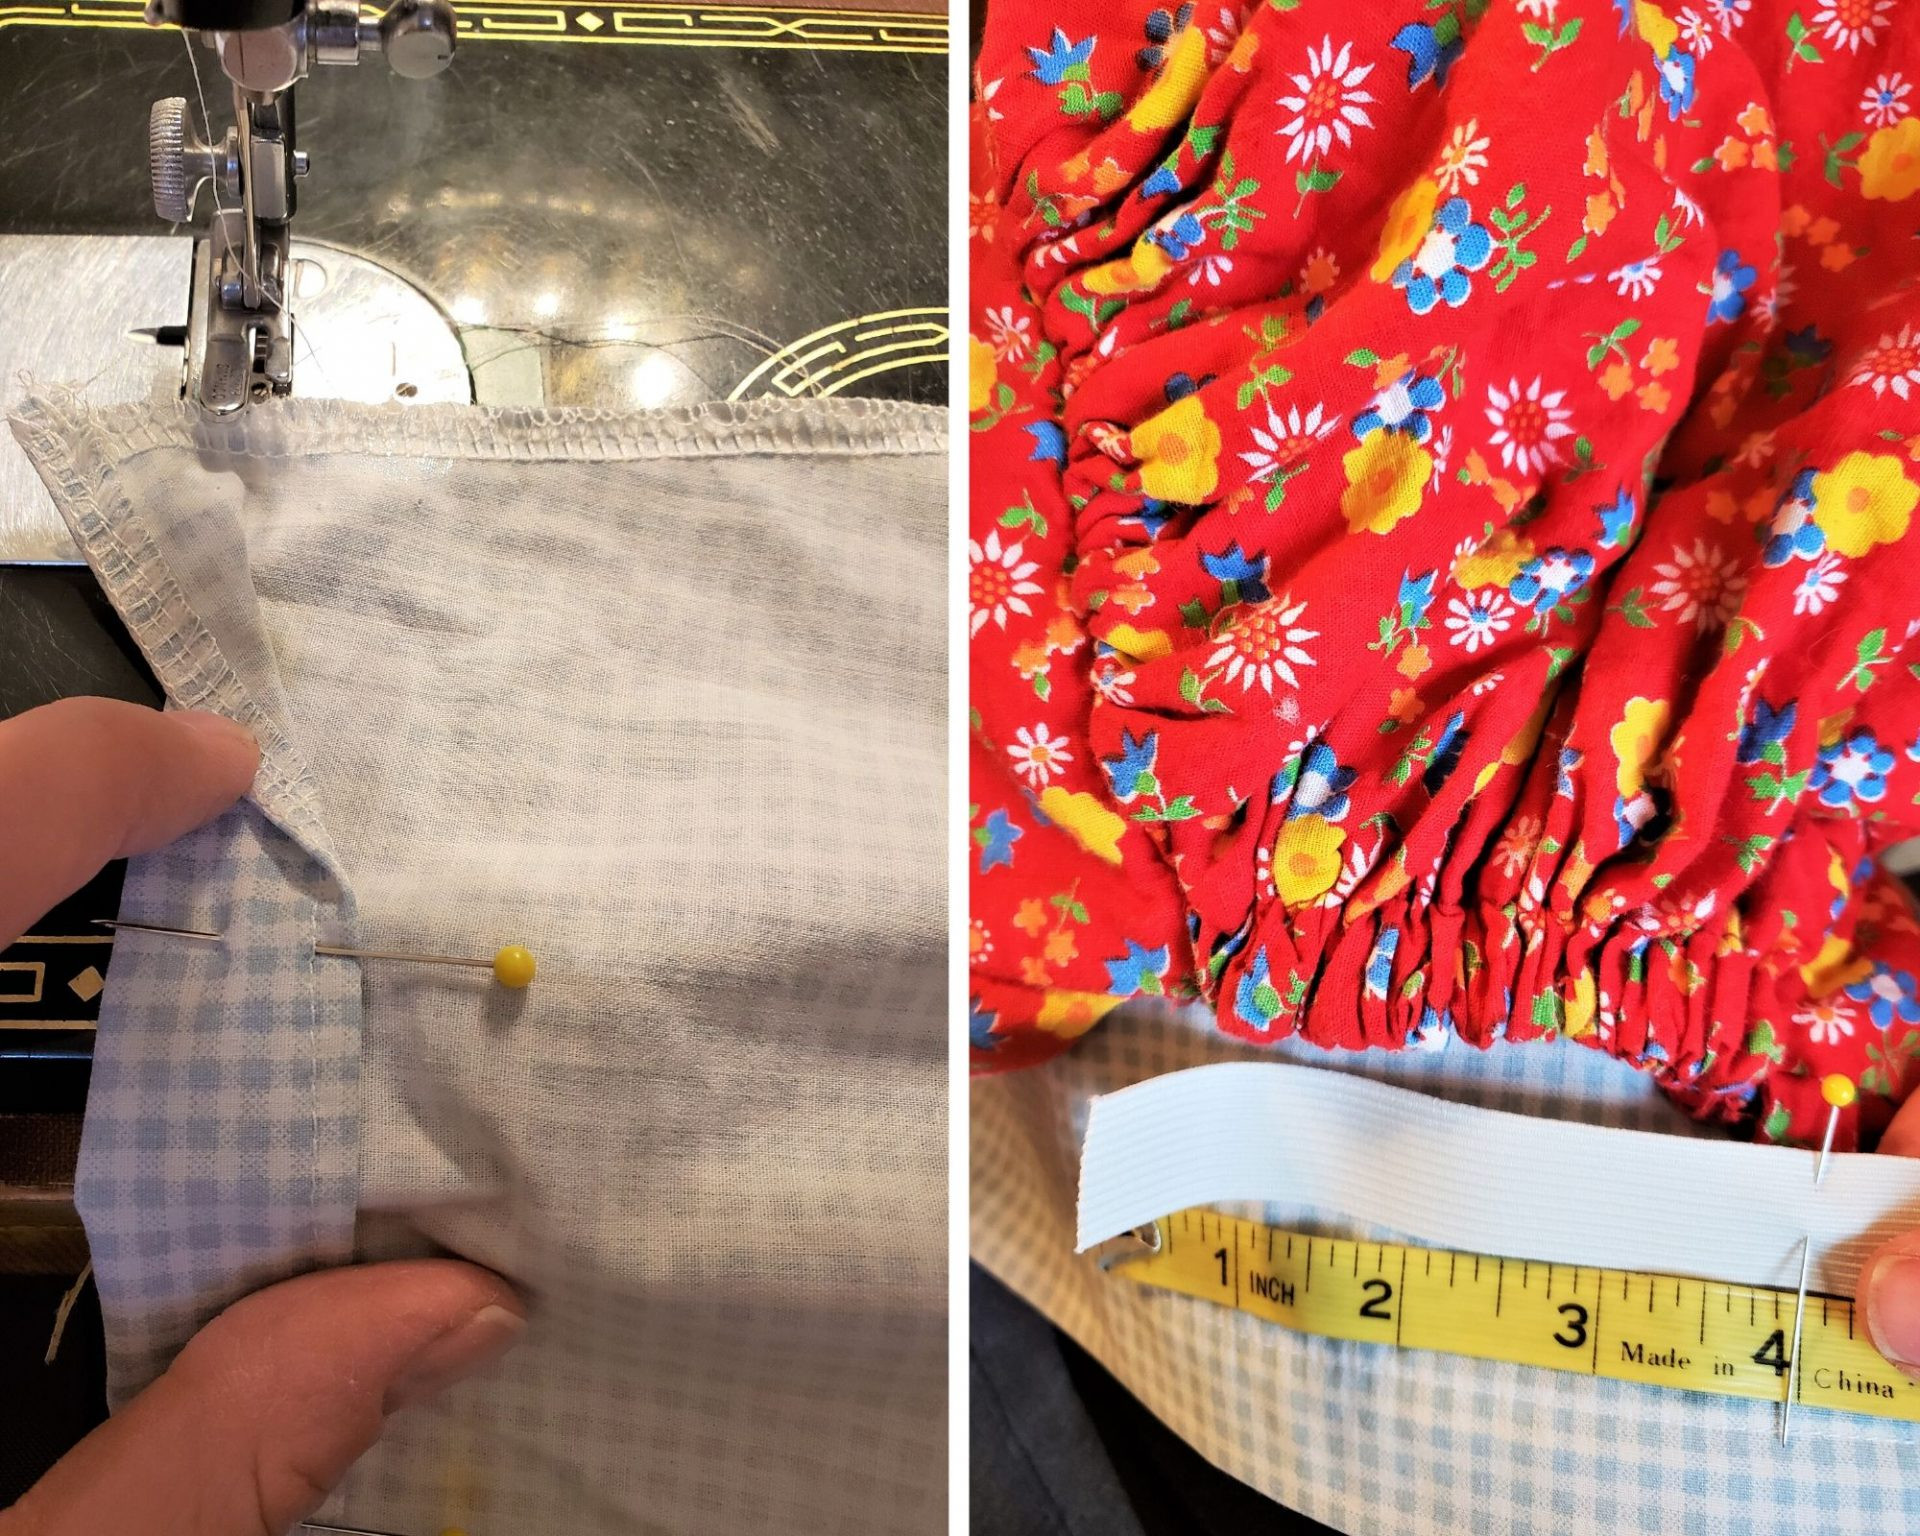
Fold the bottom edge of the crown up by 1/4 inch along the serged line and stitch. Fold it up again by one inch and stitch at the top edge of this fold to create an elastic casing. Measure the elastic against the back of the vintage bonnet to determine the length needed for a snug fit.
 Creating an elastic casing on the bonnet crown piece
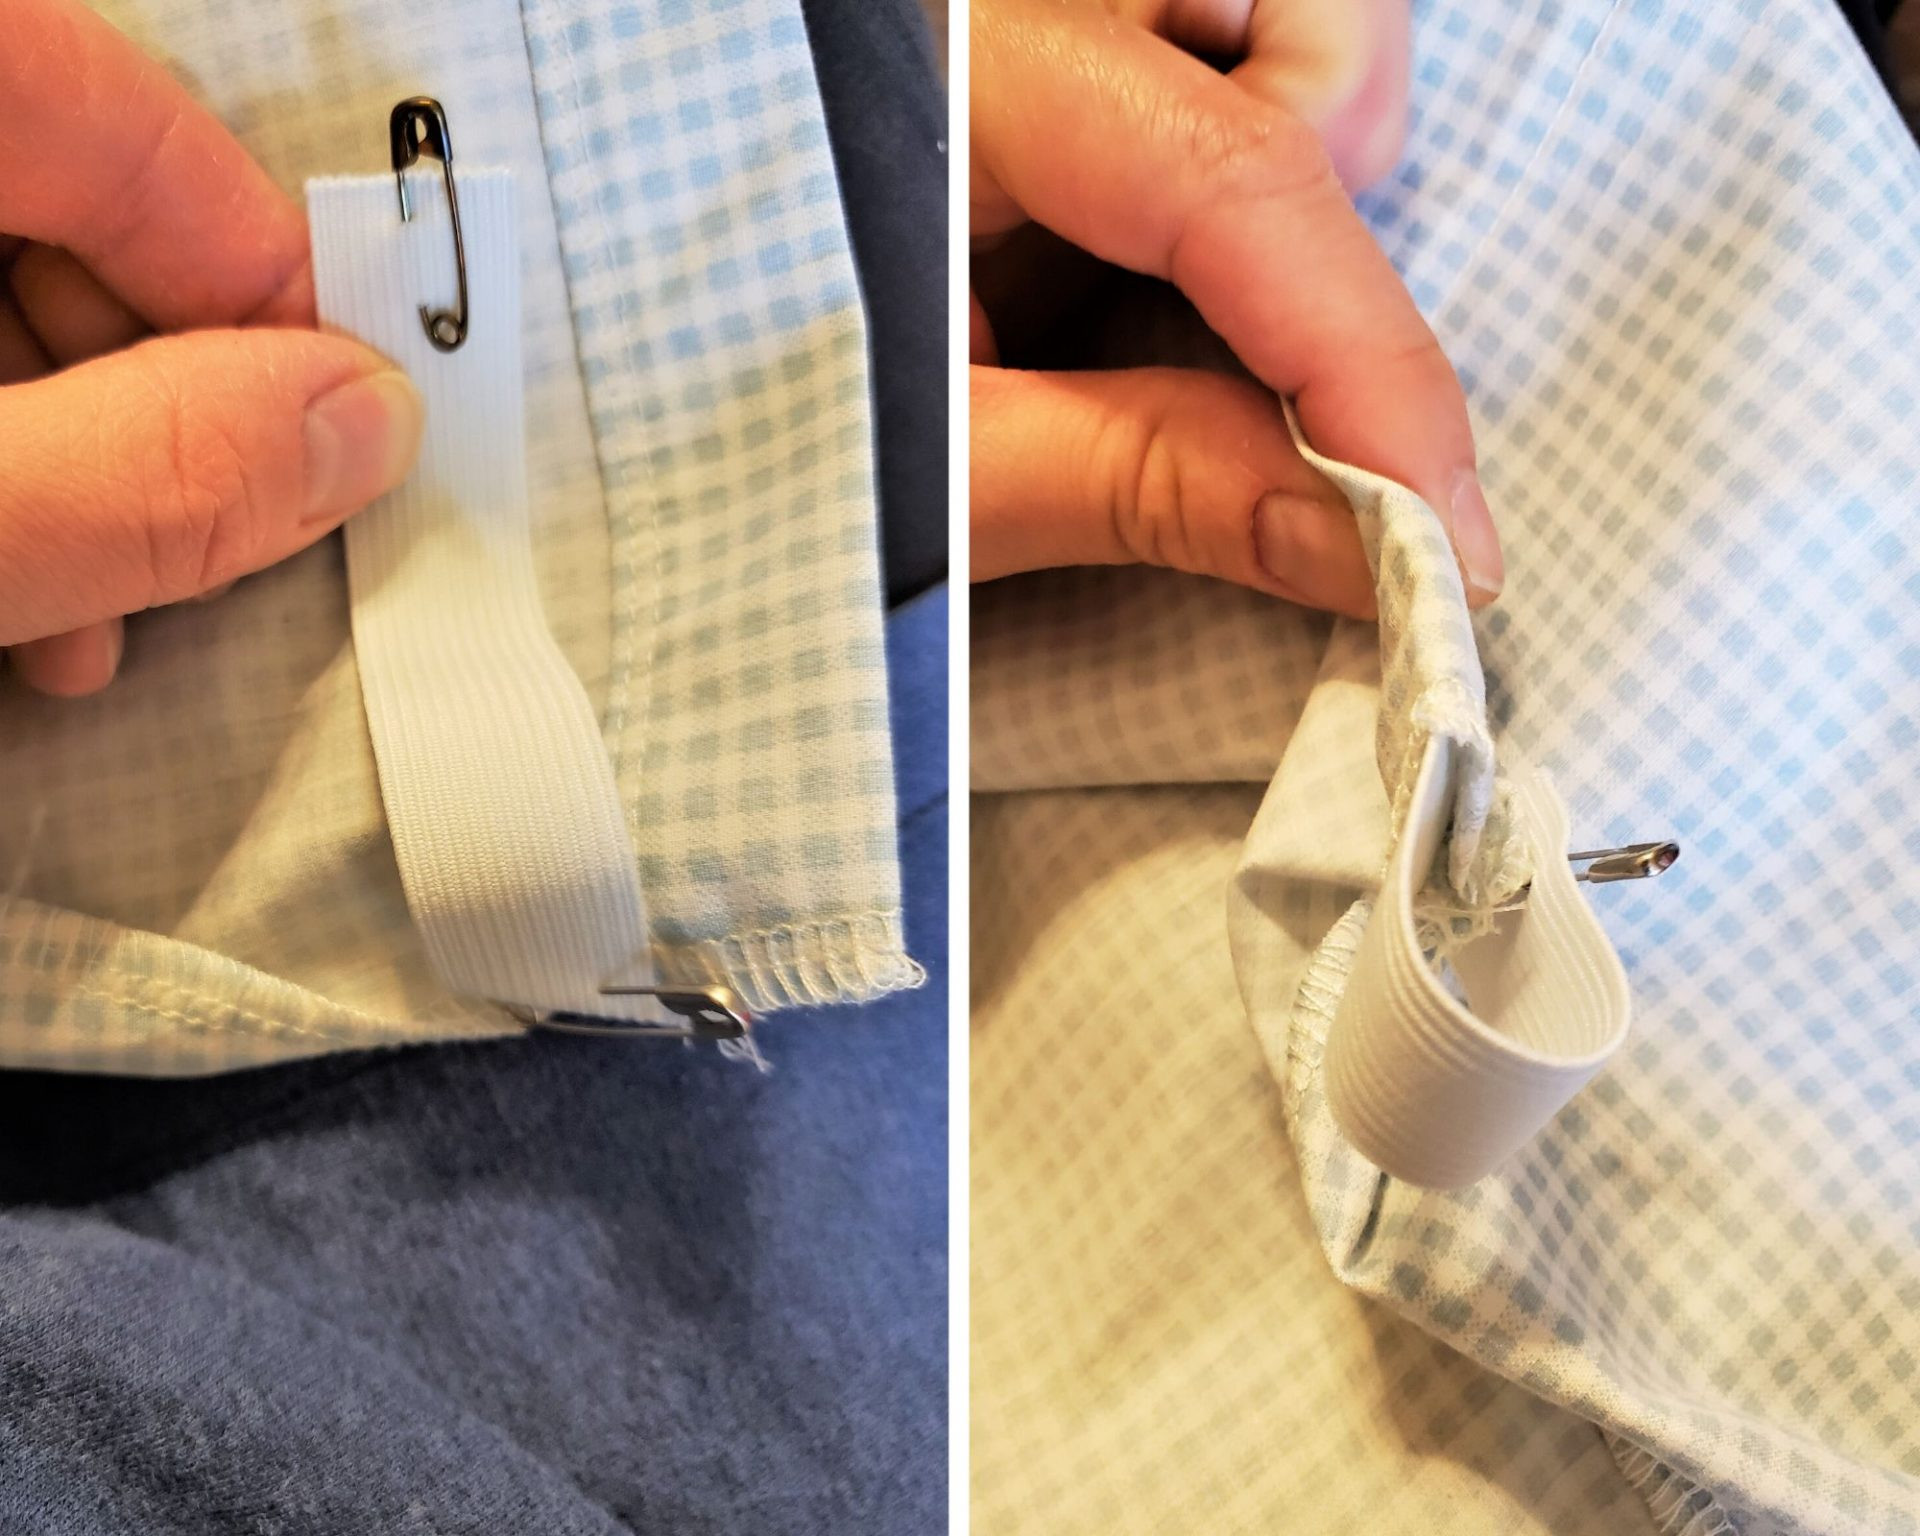
Thread the elastic through the casing using a safety pin to guide it. Secure both ends of the elastic with back-and-forth stitches to ensure it stays in place. For children’s bonnets, start with 6 1/2 inches of elastic for comfortable ease.
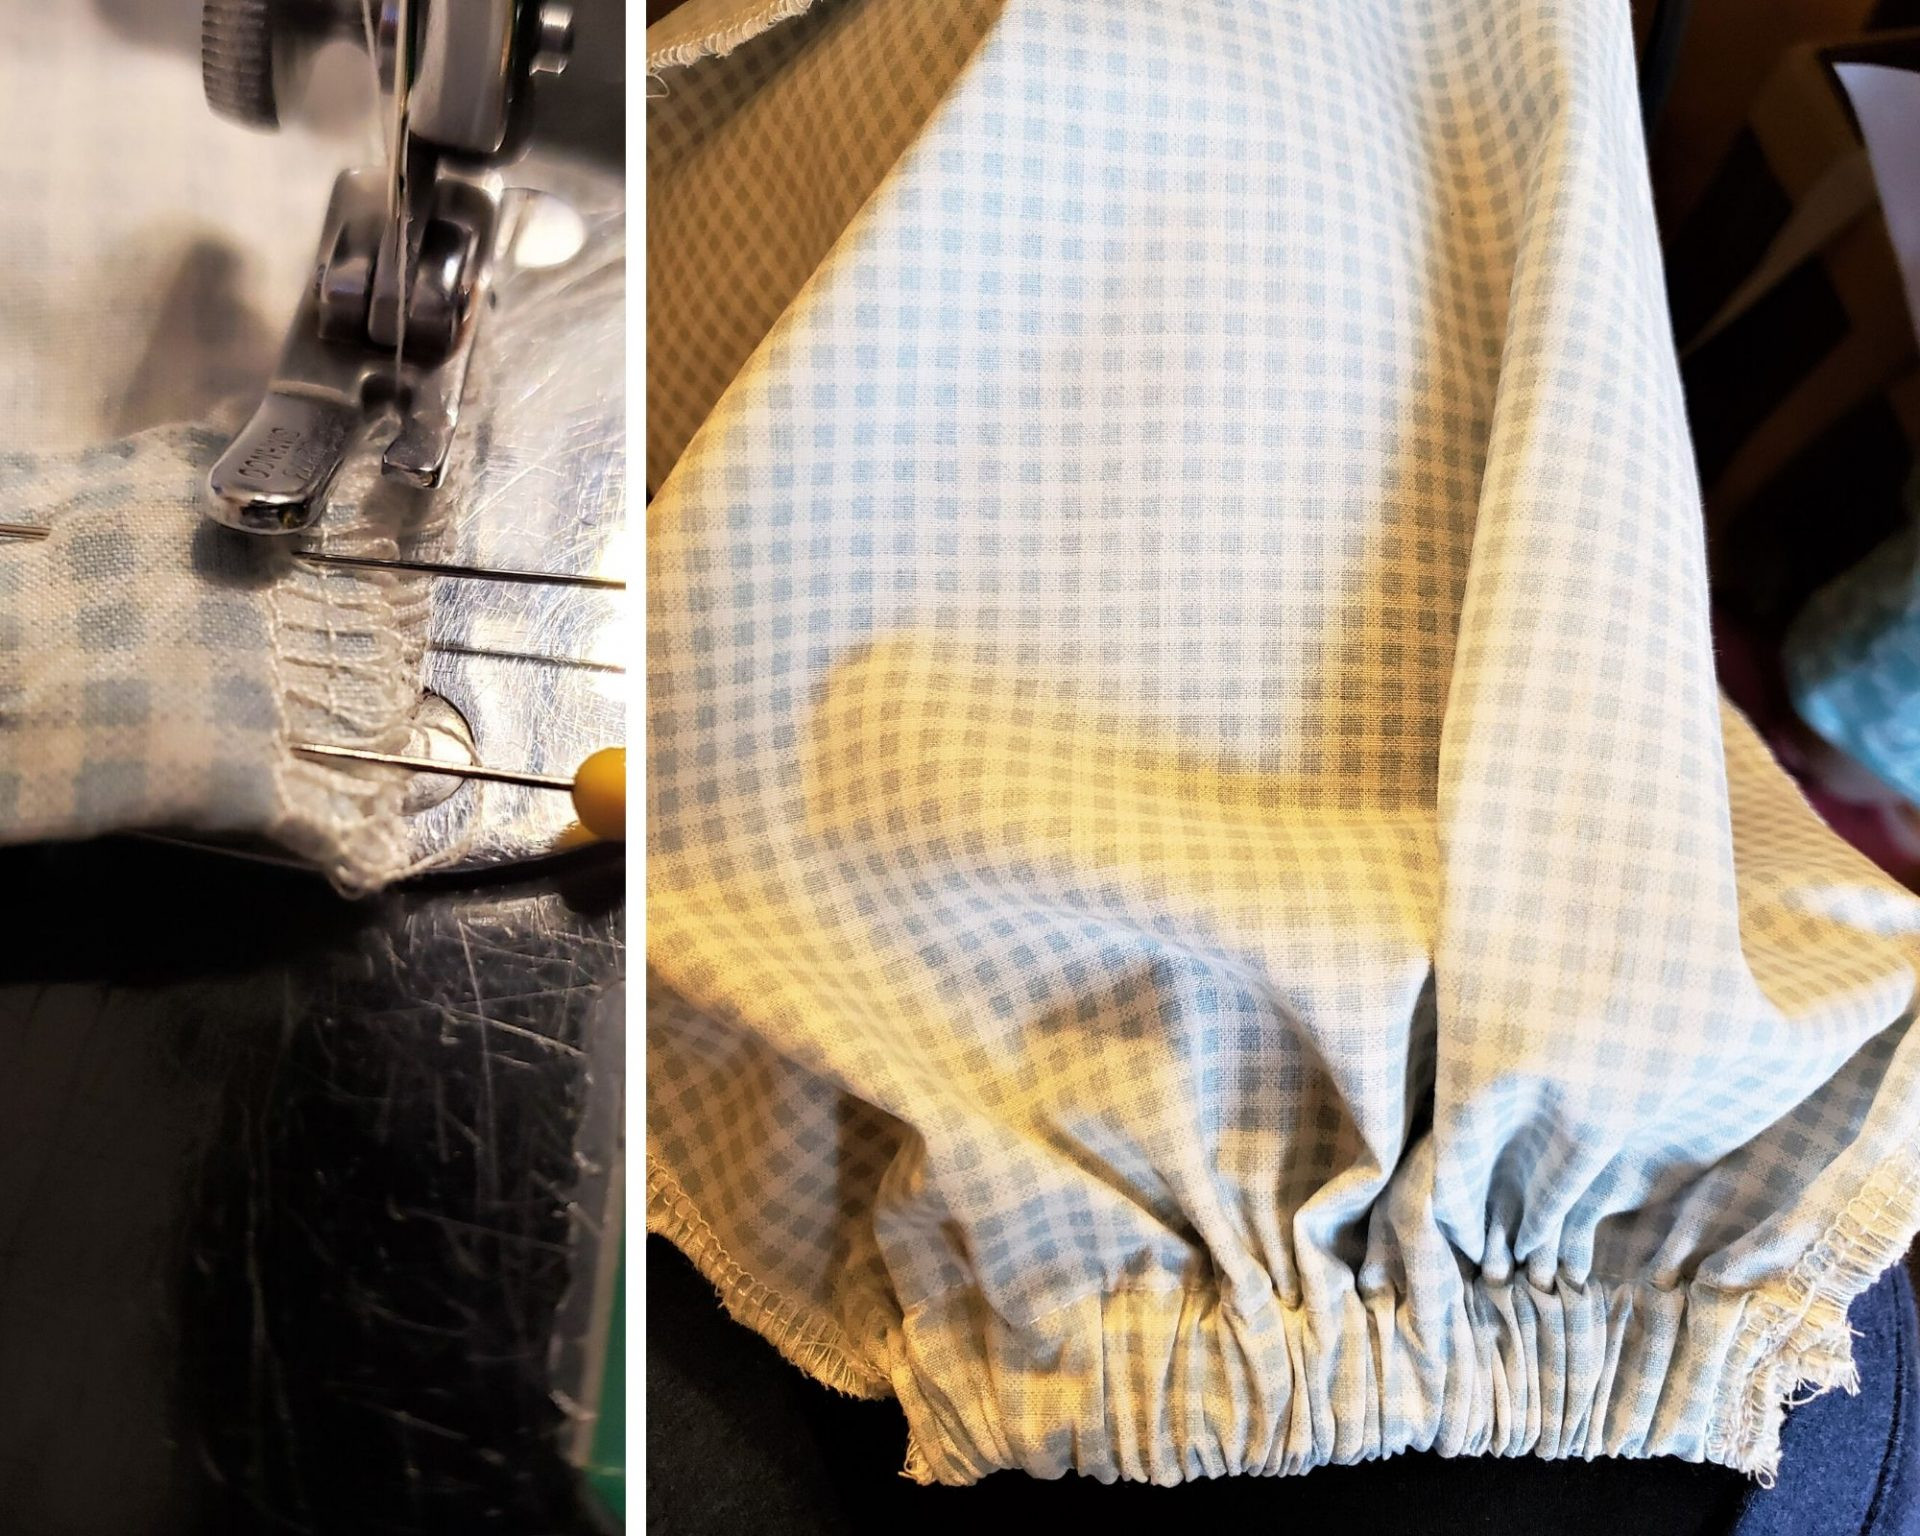 Threading elastic through the casing of the bonnet crown
Attaching the Crown to the Brim
Create gathering stitches along the curved top edge of the bonnet crown using a sewing needle. Use a contrasting thread color like red to easily see and remove these stitches later.
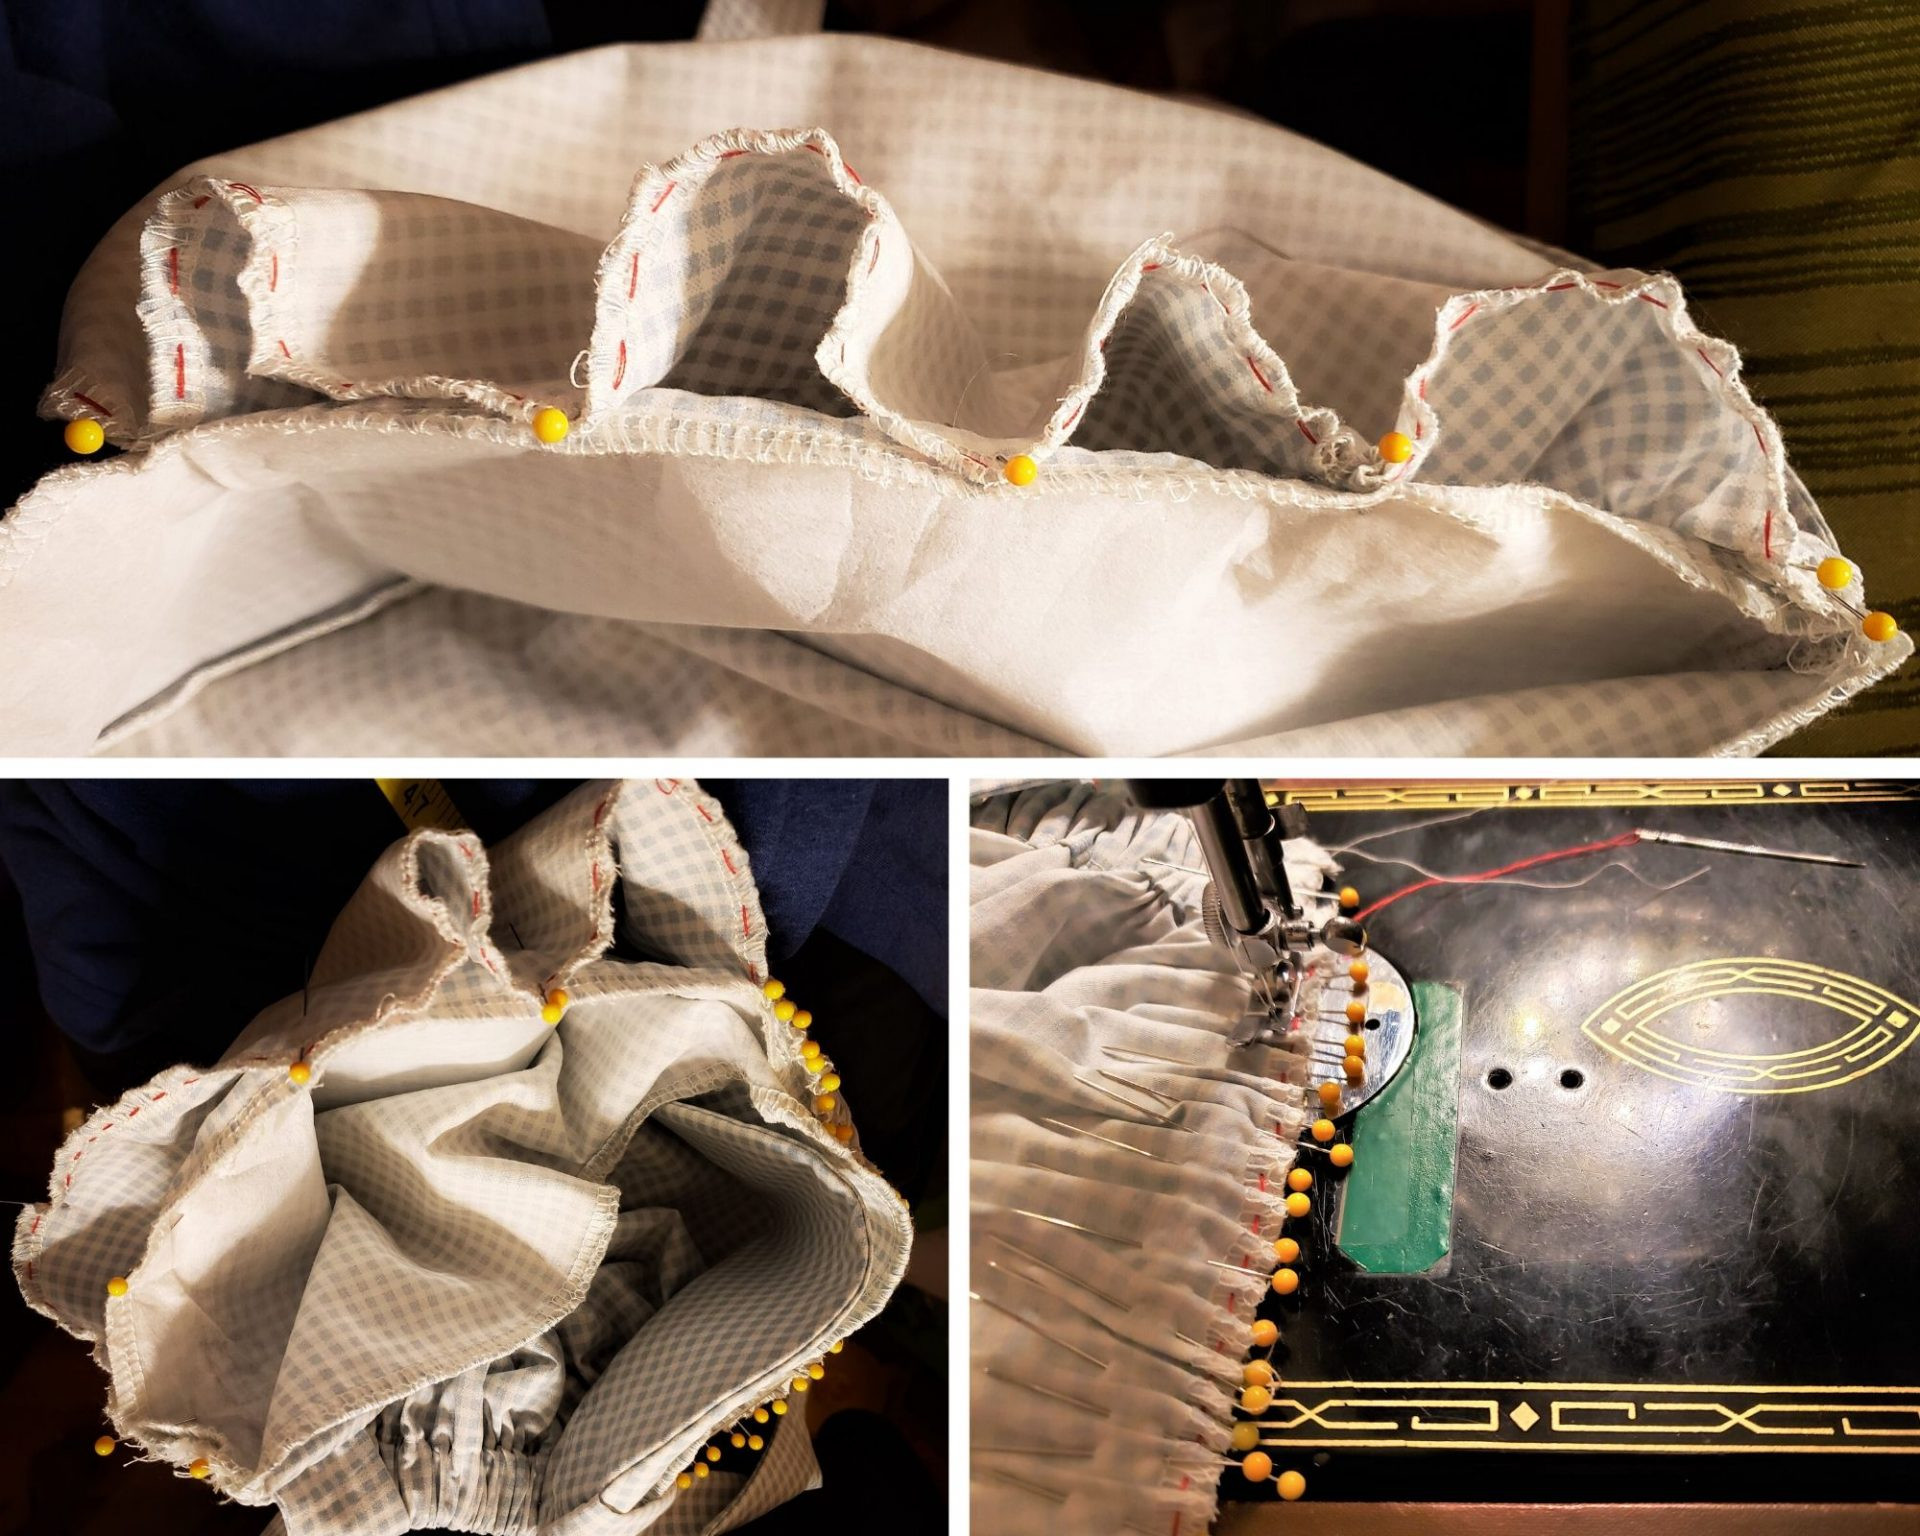 Gathering stitches along the curved edge of the bonnet crown
Evenly distribute the gathers by dividing both the crown and brim into sections. Pin the gathered crown edge to the brim, matching these sections to ensure balanced gathers. Adjust and pin generously for precise gather placement before stitching.
 Pinning the gathered crown to the bonnet brim for even distribution
Finishing Touches
Remove the red gathering stitches. Fold the brim lining over the newly sewn seam where the crown and brim meet. Hand-stitch the brim lining to encase this seam, creating a clean, finished interior with no exposed raw edges.
 Hand-stitching the brim lining to finish the inside of the bonnet
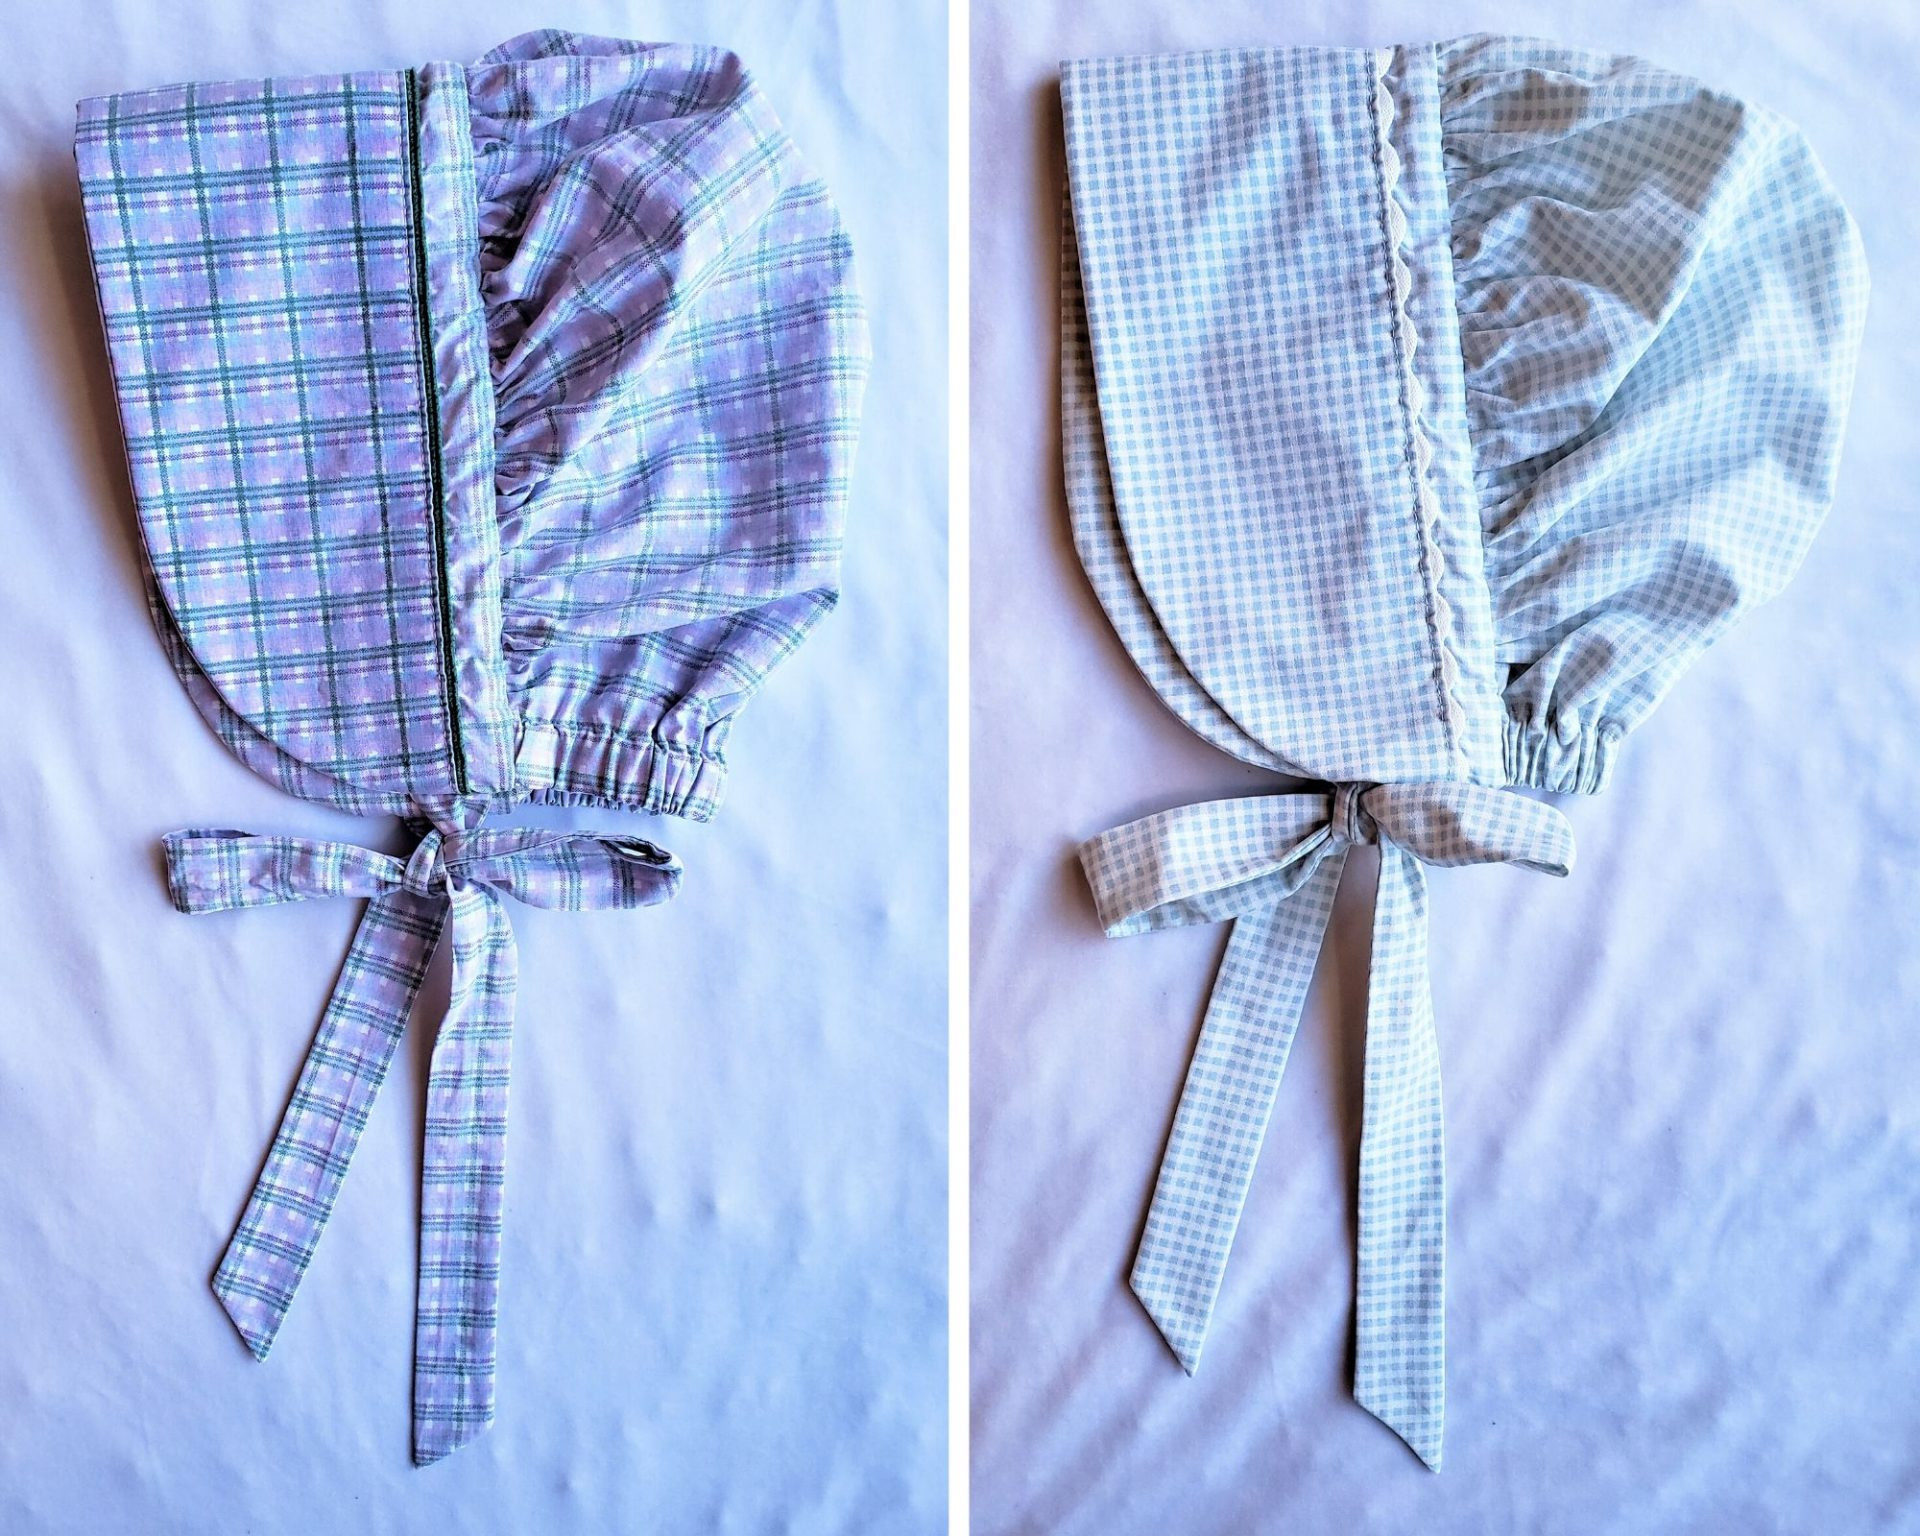
Showcasing Your DIY Pioneer Bonnets
Your handmade pioneer bonnet is now complete! Here are a few views of the finished bonnets. First, Eliza’s bonnet:
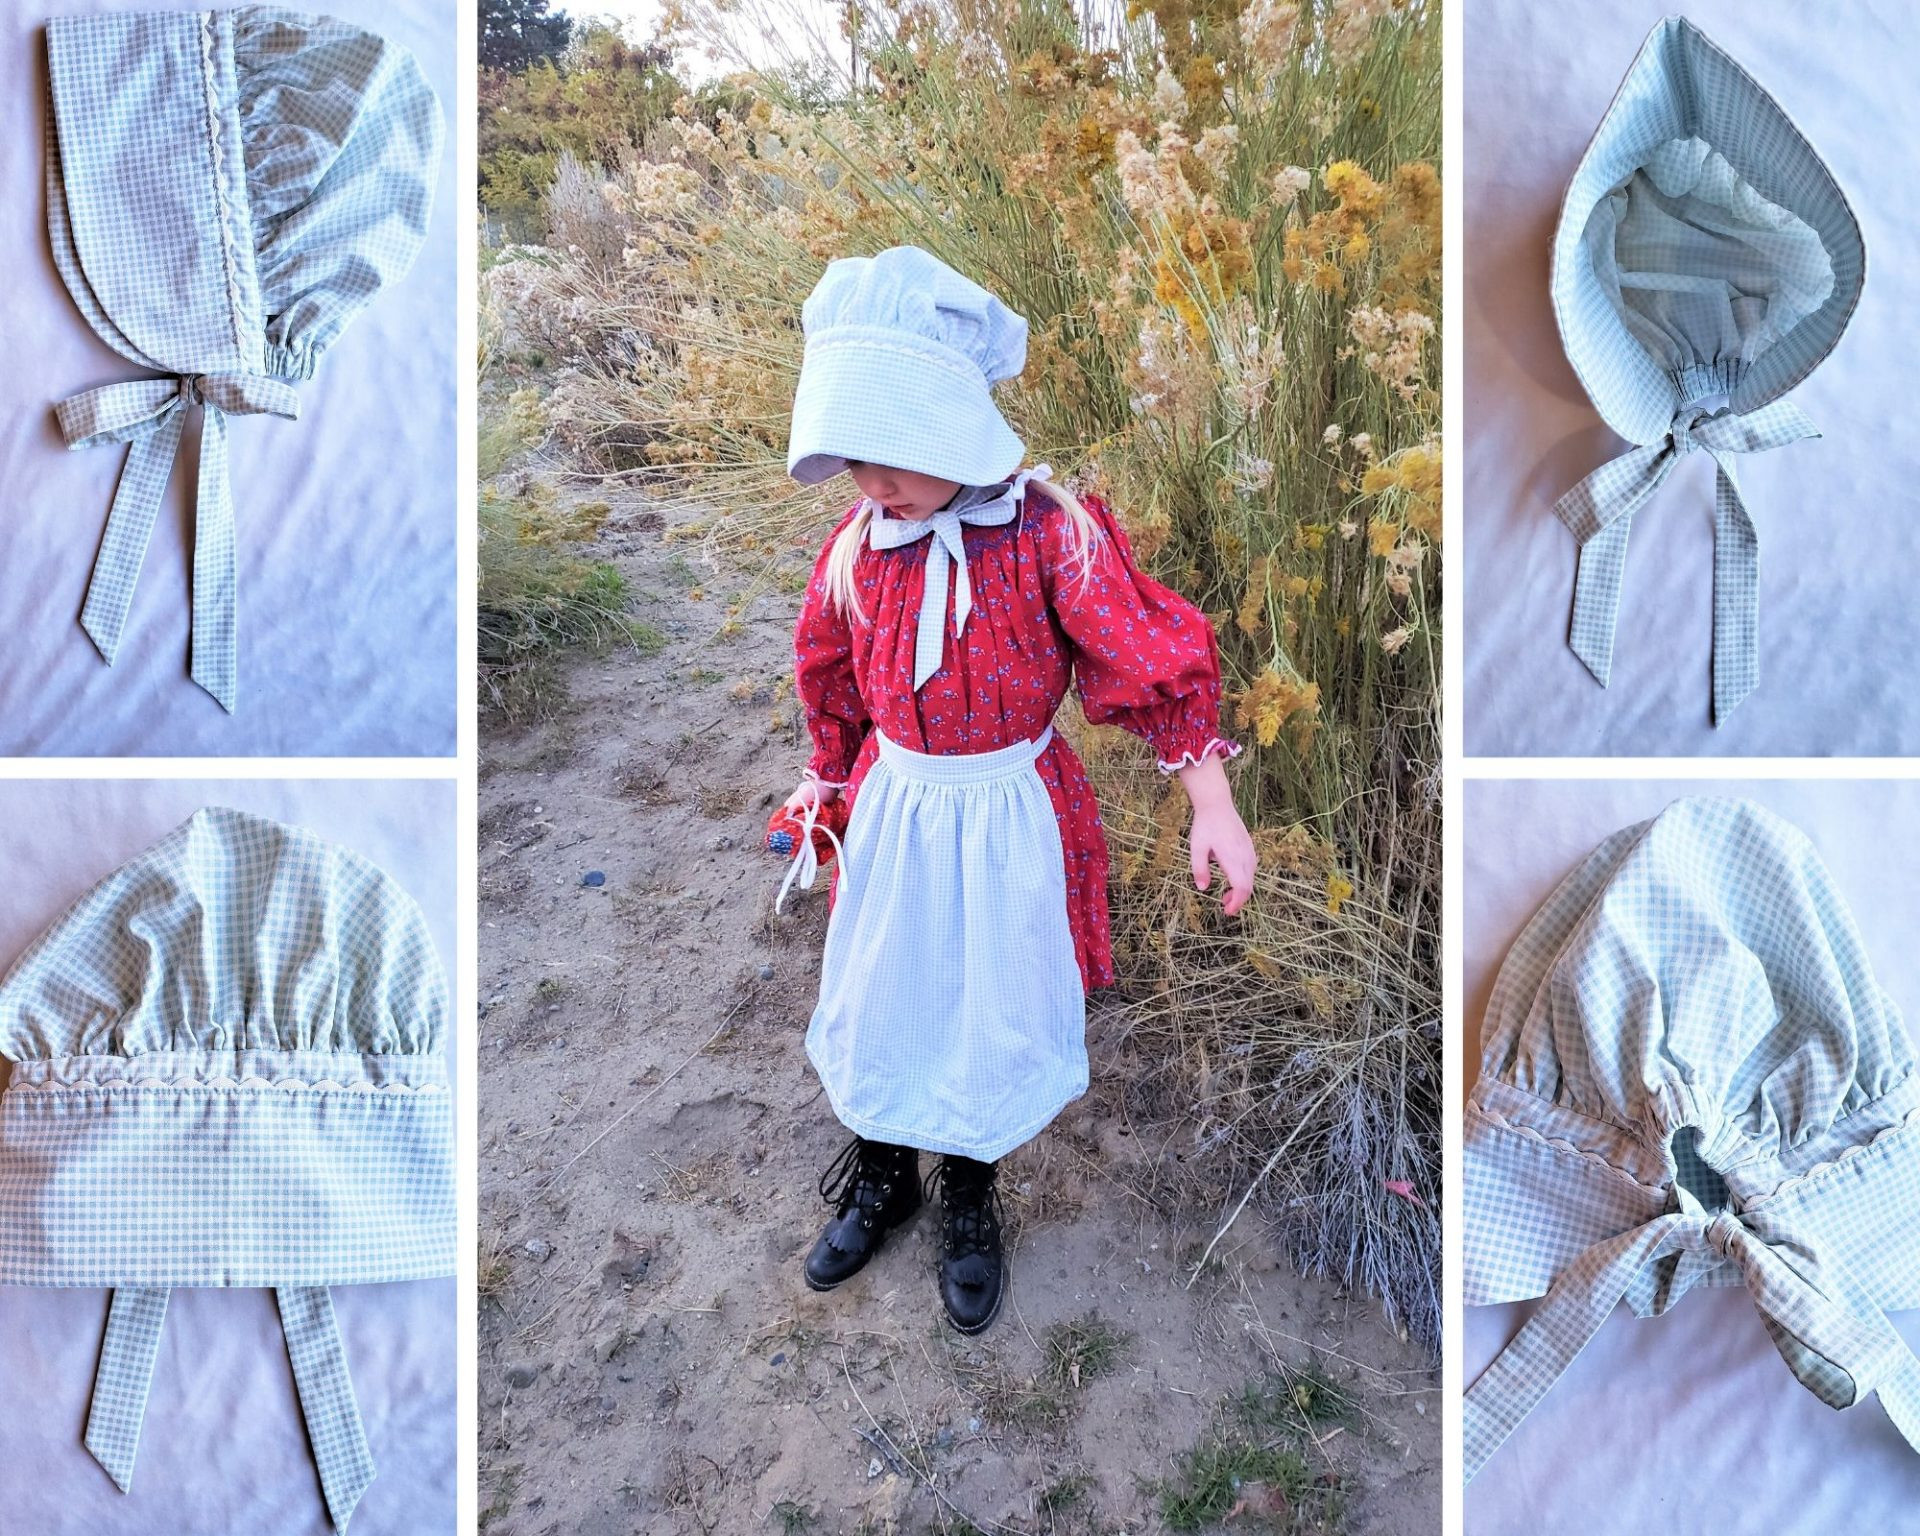 Eliza wearing a finished DIY plaid pioneer bonnet
And here is Emma in her charming bonnet:
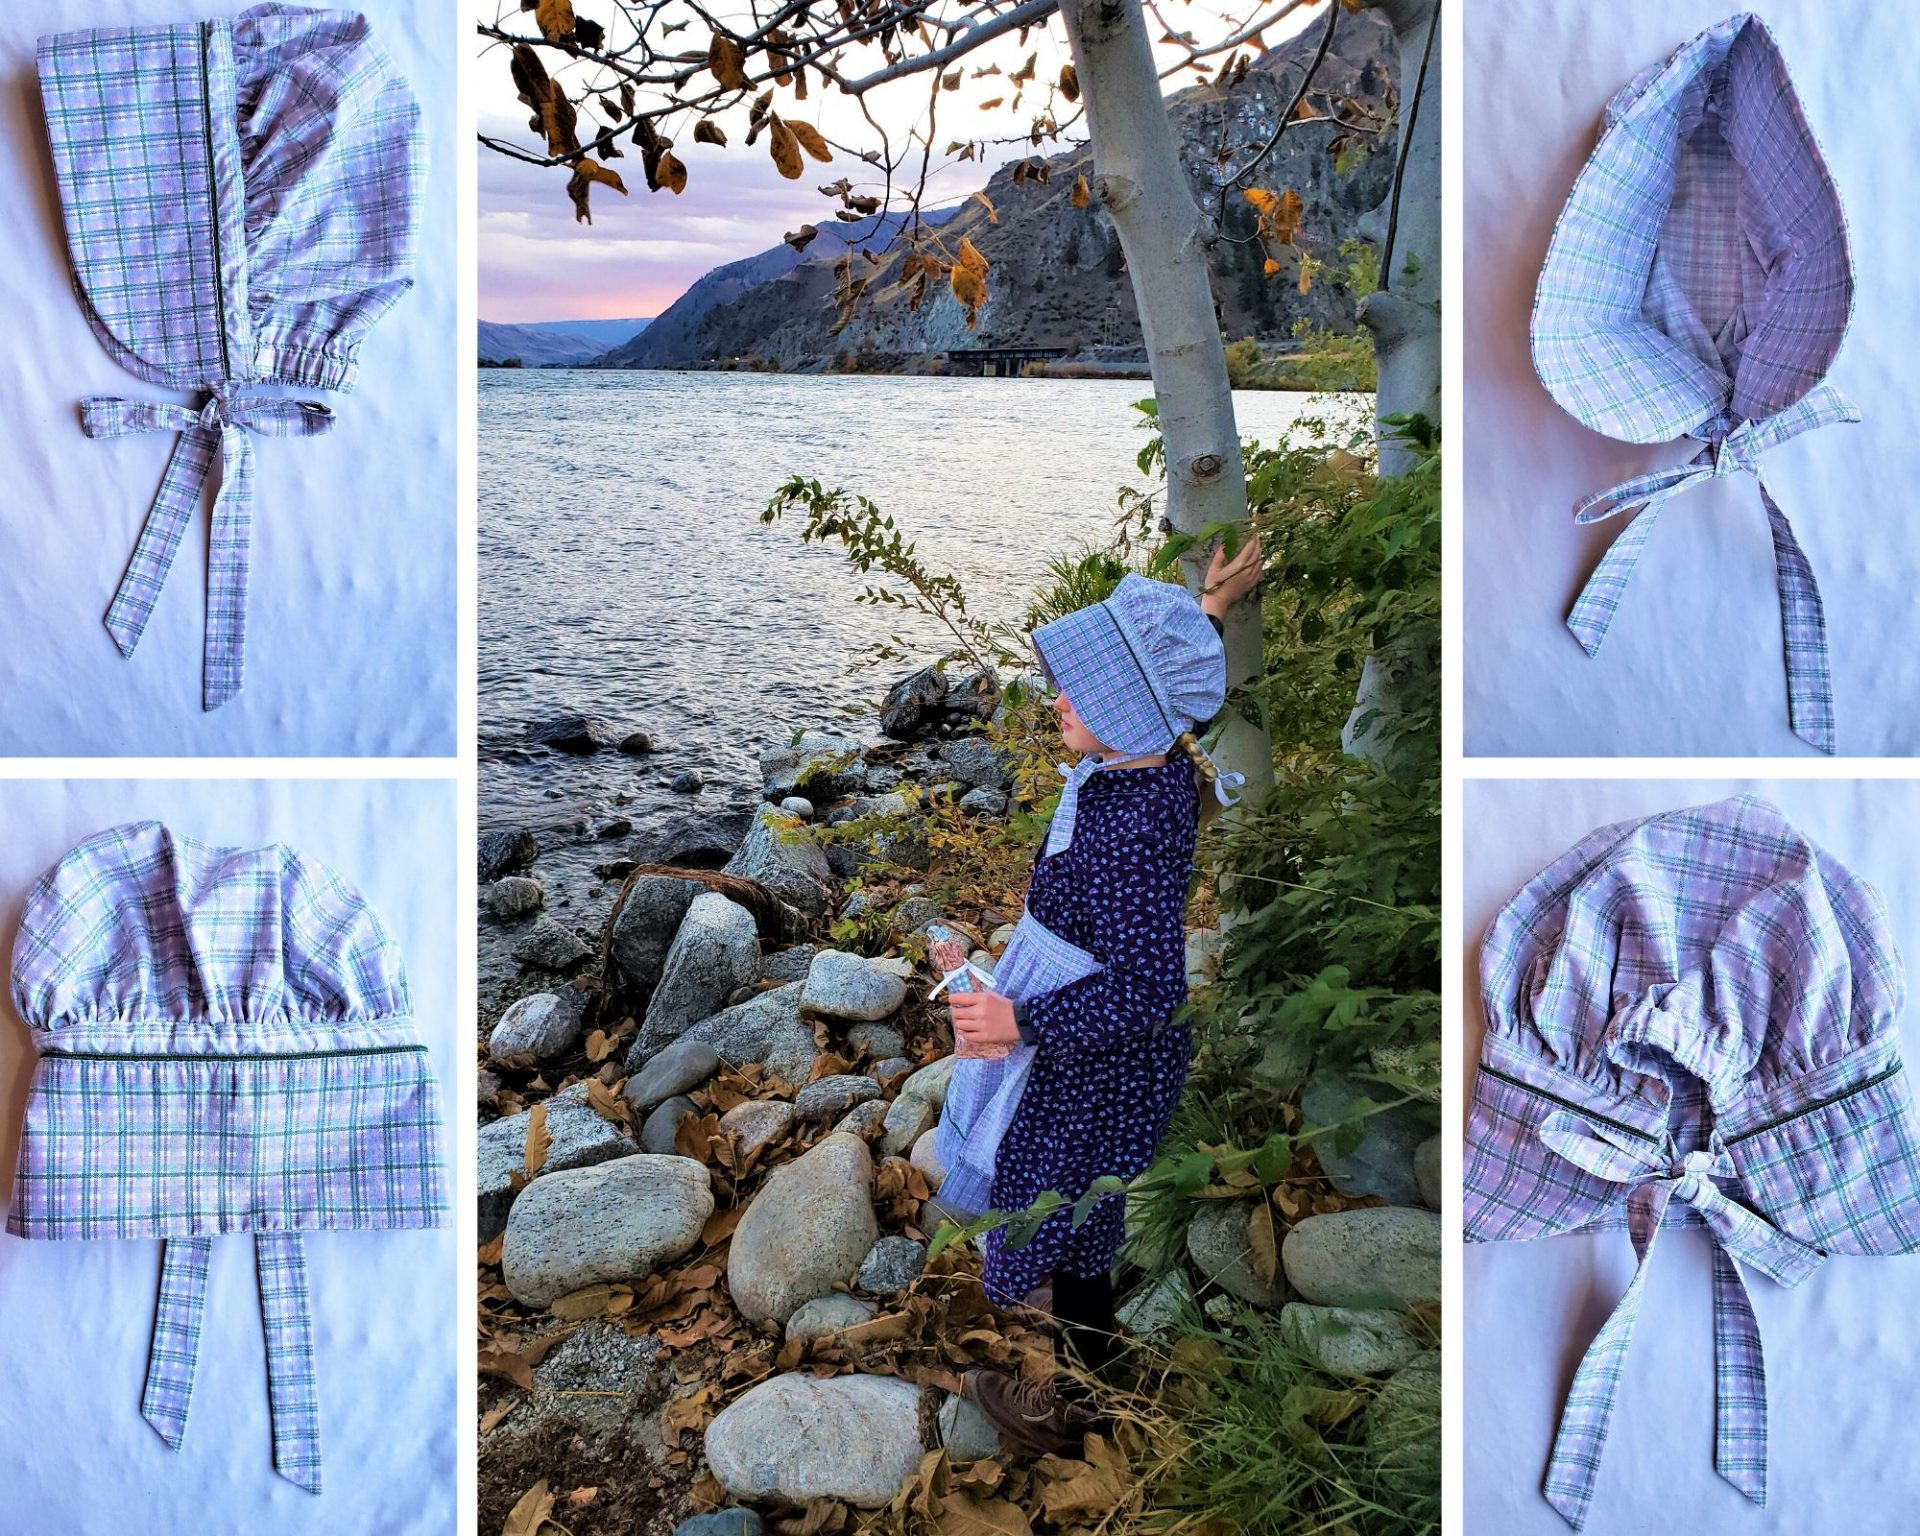 Emma wearing a finished DIY plaid pioneer bonnet
These bonnets were part of a fun photoshoot at Entiat City Park along the Columbia River. Stay tuned for the upcoming post on creating matching pioneer aprons from pillowcase remnants. Until then, enjoy your creative crafting!