
Upgrading the factory audio system in a C5 Corvette, especially a 2004 model, can significantly enhance your driving experience. Many enthusiasts choose to replace the outdated stock radio with modern double DIN units that offer features like navigation and improved sound. This guide details the process of installing a Pioneer AVIC-D1 navigation unit in a 2004 Chevrolet Corvette Z06. While this installation requires some modification, particularly to the console brackets, the result is a seamless integration of advanced technology into your classic sports car. This walkthrough will provide a clear understanding of the steps involved, from dismantling the console to wiring the unit and making necessary adjustments for a perfect fit.
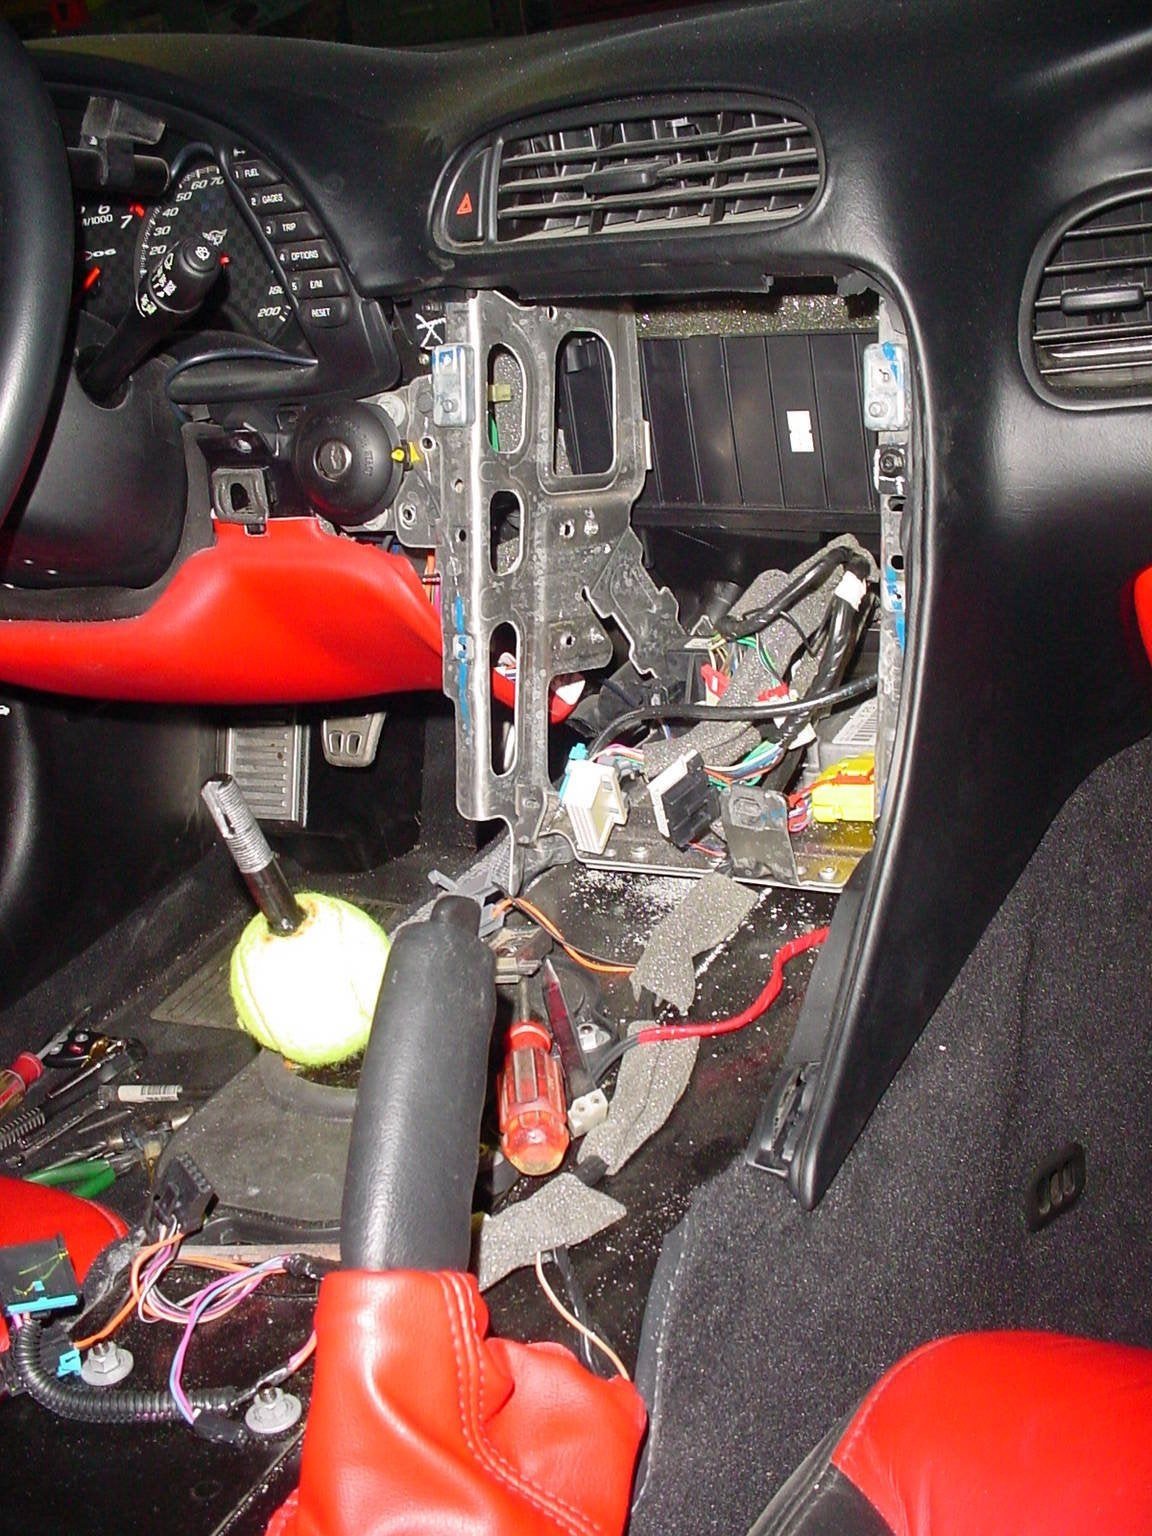
The first step involves gaining access to the Corvette’s radio cavity. This requires removing the console, a task that might seem daunting but becomes straightforward with experience. For those familiar with Corvette modifications, console removal is a routine procedure. Once the console is out, the stock radio and surrounding components are exposed, revealing the factory brackets that obstruct the installation of a double DIN unit like the Pioneer AVIC-D1.
 Corvette C5 dashboard with steering wheel and gauges, highlighting the area for radio replacement
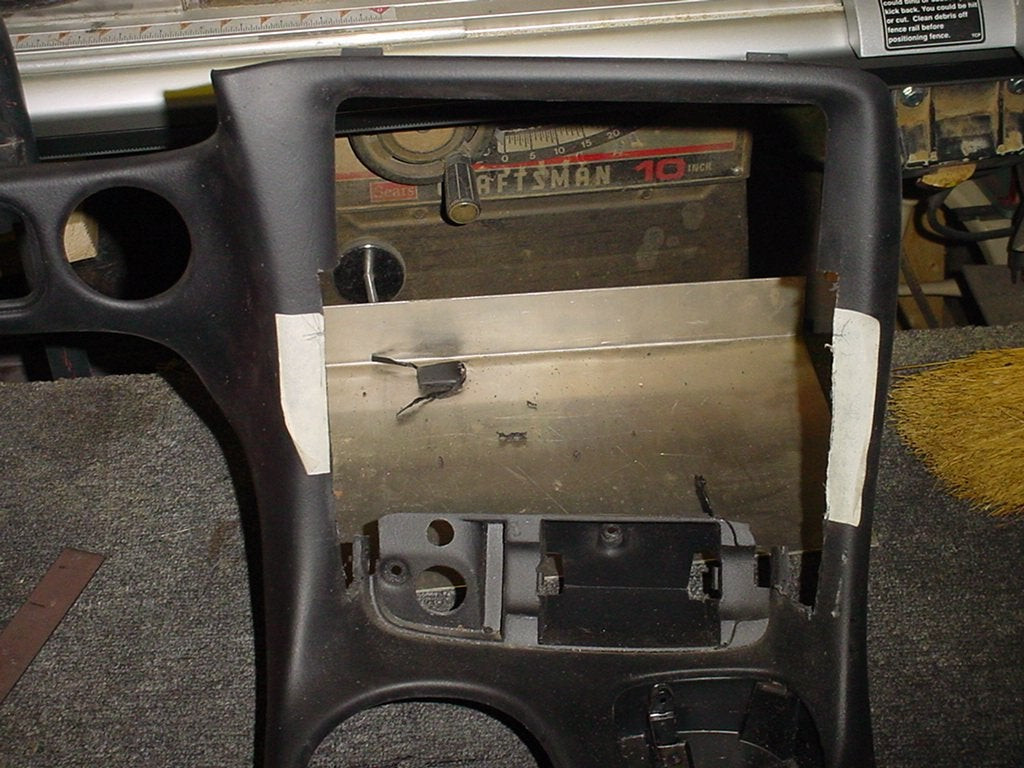
The most challenging part of this installation is dealing with the factory radio brackets. These brackets are riveted in place and must be removed to accommodate the larger double DIN chassis of the Pioneer AVIC-D1. Drilling out these rivets is necessary, and while not overly complicated, it requires patience and the right tools. A right-angle drill can be particularly helpful in this tight space. Removing these brackets creates the necessary space for the new Pioneer unit and its associated wiring.
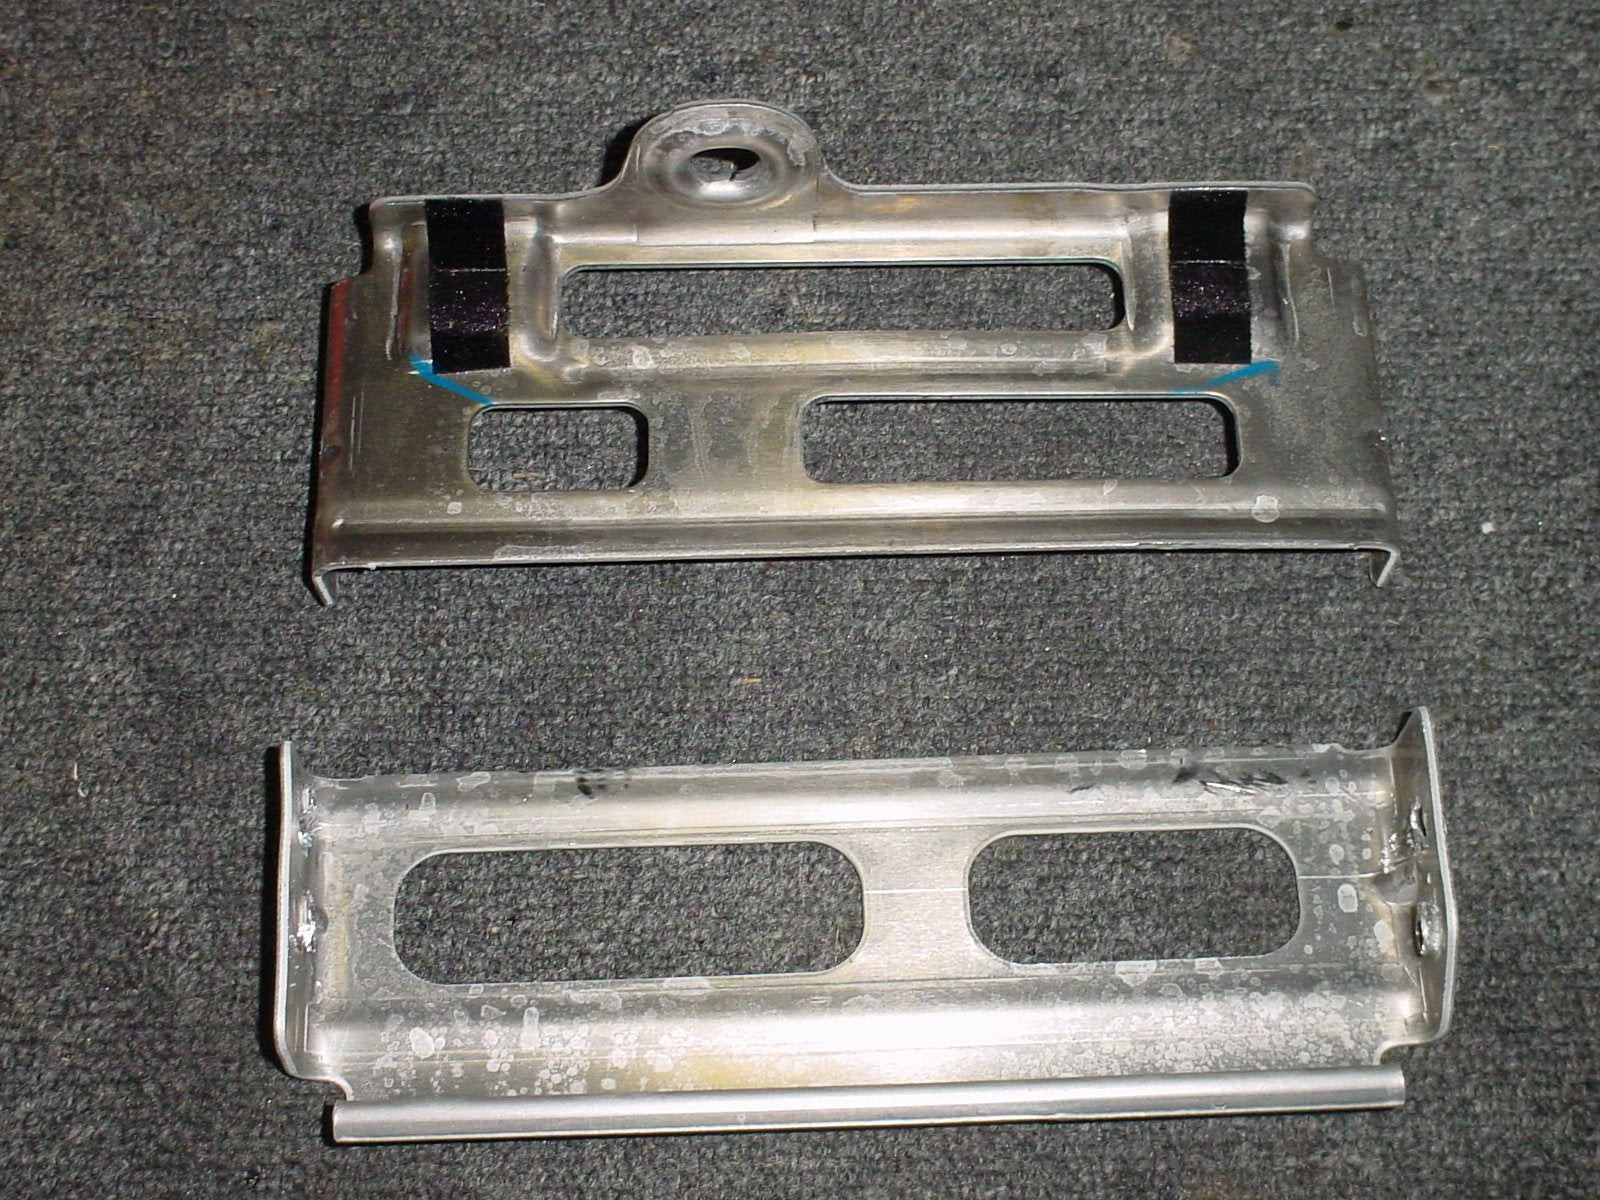 Close-up of the Corvette's metal radio brackets that need to be removed for a double DIN installation
The Pioneer AVIC-D1 comes with its own slide-in mounting bracket, designed for standard double DIN openings. However, it’s not directly compatible with the C5 Corvette’s unmodified radio cavity. To overcome this, custom modifications are required. Fabricating a modified bracket using scrap metal and welding can create a secure and proper mounting solution. This custom bracket acts as an adapter, allowing the Pioneer AVIC-D1’s slide-in bracket to be firmly attached within the Corvette’s console.
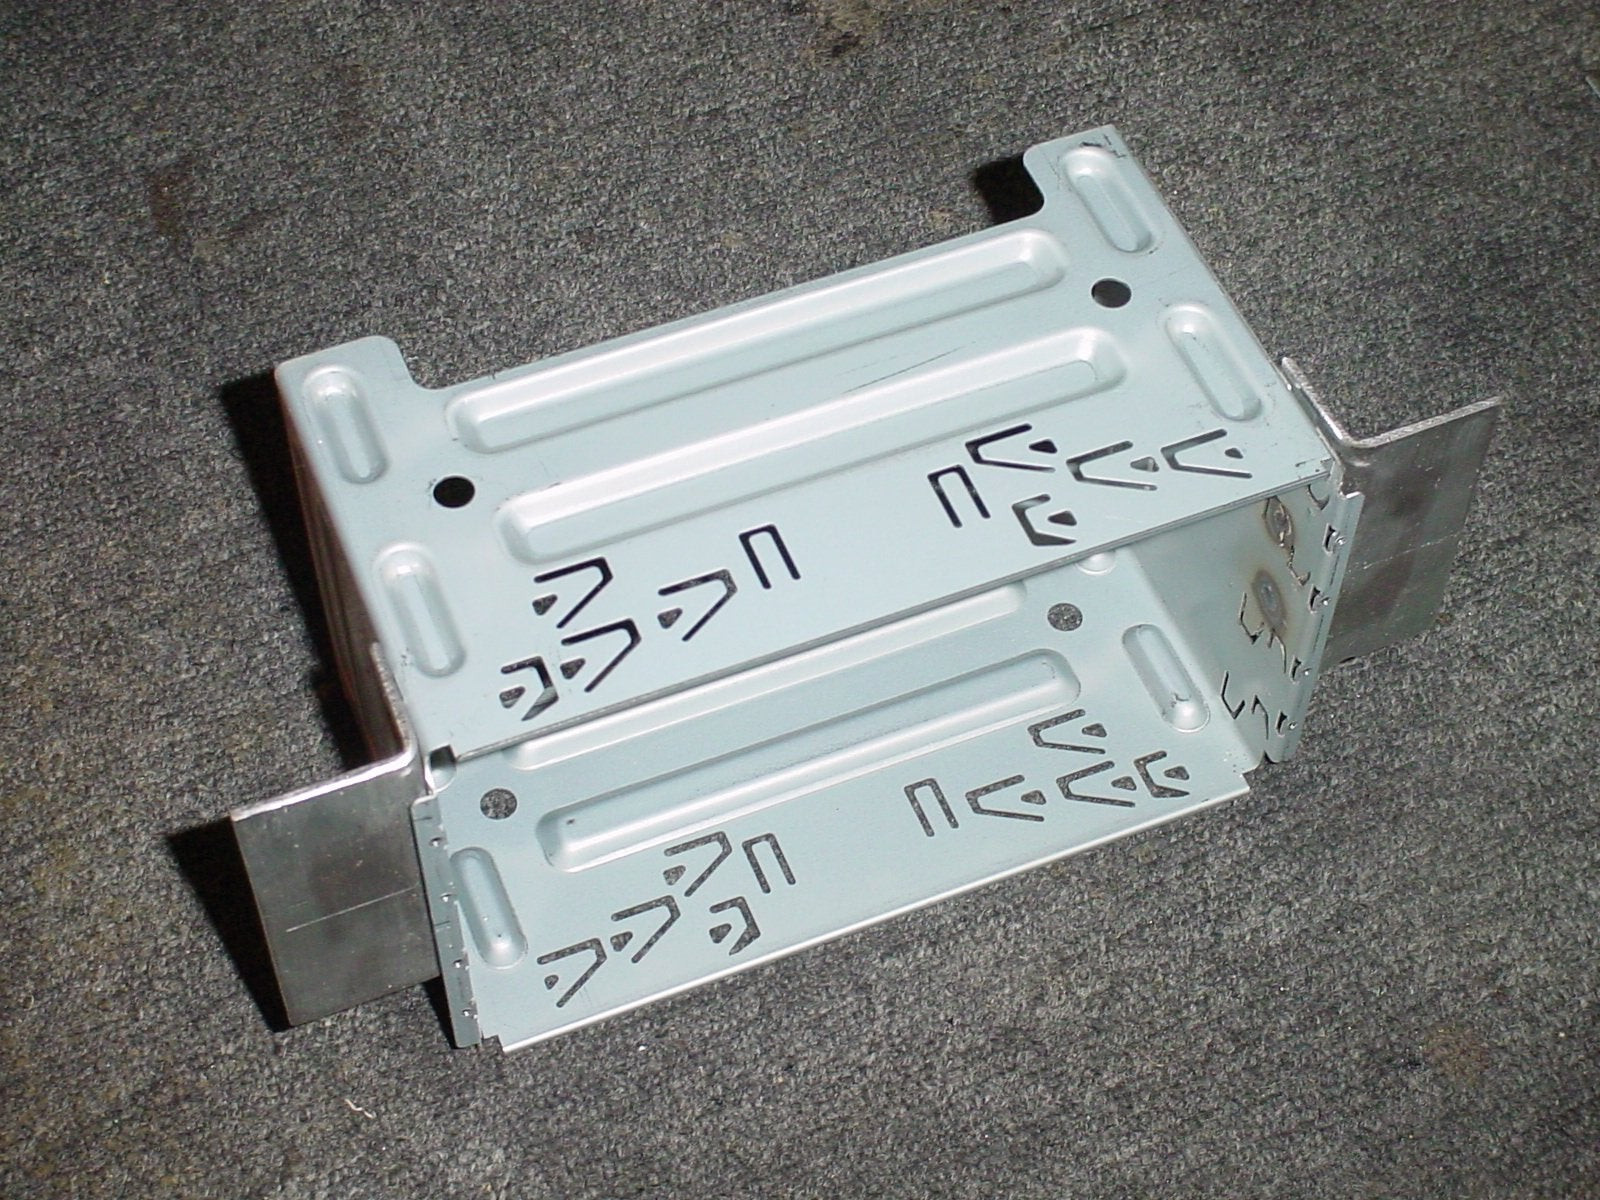 Custom metal bracket fabricated to mount the Pioneer AVIC-D1 in the Corvette C5, showcasing welding and metalwork
Installing a modern navigation unit involves managing a significant amount of wiring. The Pioneer AVIC-D1, like most aftermarket car stereos, comes with a harness containing numerous wires for power, speakers, and various features. Each of these wires needs to be correctly connected to the Corvette’s electrical system. Careful planning and organization are crucial to manage this complexity and ensure a reliable and functional installation.
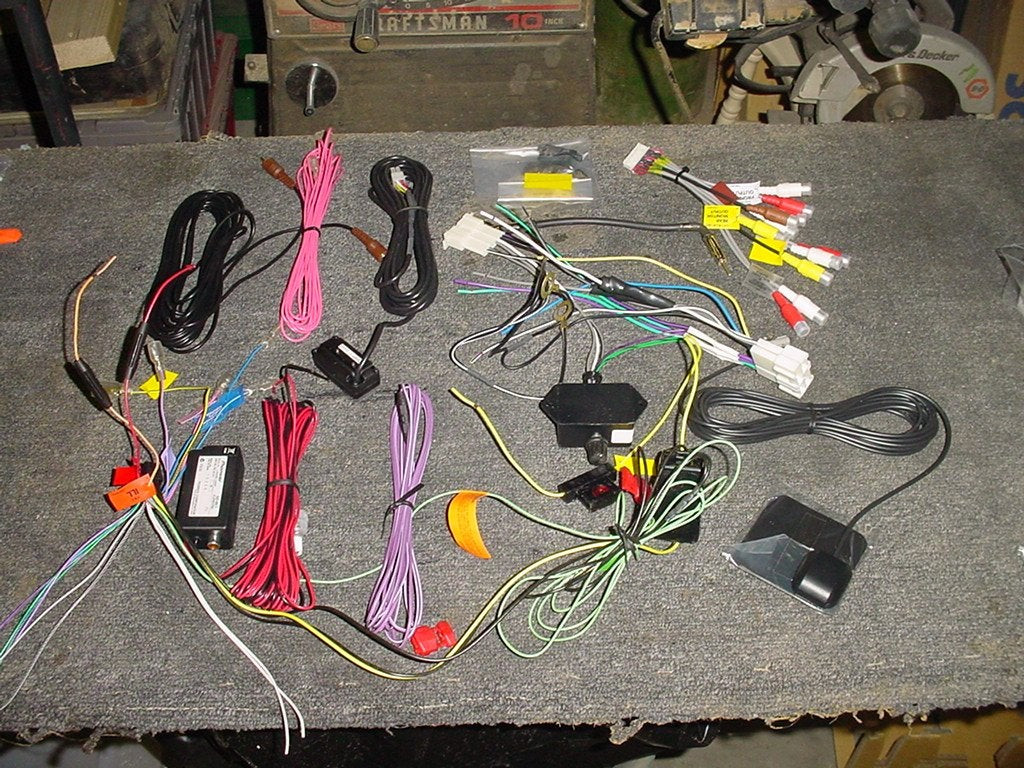 Bundle of wires for the Pioneer AVIC-D1, illustrating the complexity of car stereo wiring
For robust and long-lasting electrical connections, soldering is highly recommended. Creating solder joints, especially on a workbench, is significantly easier and less frustrating than crimping in the confined space of the Corvette’s dashboard. Soldering ensures a secure and corrosion-resistant connection, which is essential for the long-term reliability of your car audio system.
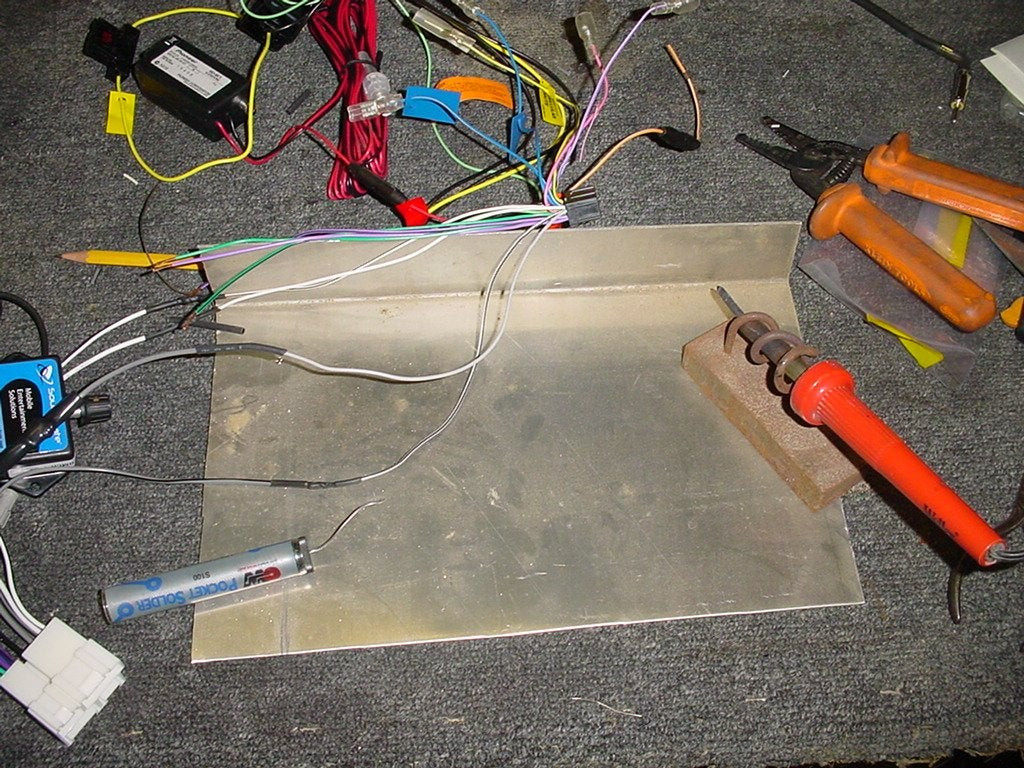 Close-up of soldered wire connections for car audio installation, emphasizing best practices for electrical work
The GPS antenna for the Pioneer AVIC-D1 needs a suitable mounting location. An effective and somewhat hidden spot is on the metal cross/bumper brace, accessible through the taillight opening. This location not only provides a good GPS signal reception but also simplifies the routing of the rear-view camera wiring, if you choose to install one. Wiring can be neatly secured using cable clips and routed through existing vehicle openings, such as the interior vent near the trunk wall, maintaining a clean and professional installation.
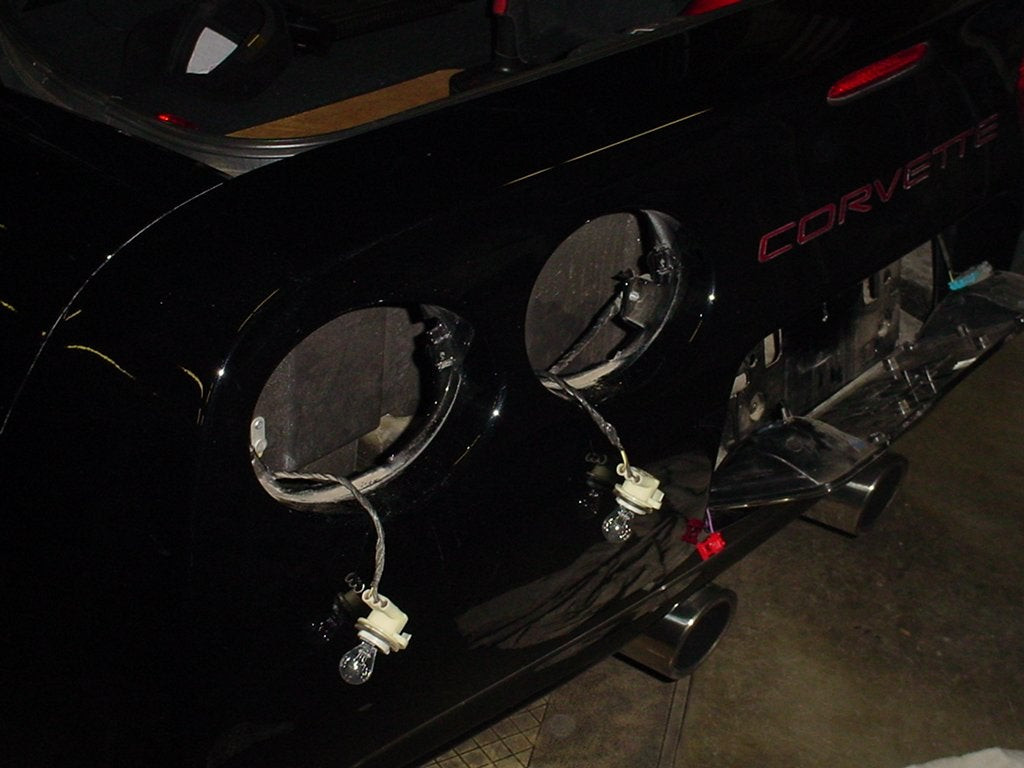 GPS antenna mounted on the Corvette's rear bumper brace, showing a discreet location for GPS receiver installation
Running wires from the trunk to the console requires careful routing. Wires should be run along the side of the vehicle, underneath the carpet and plastic trim panels. Navigating over the gas tank hump and up to the driver’s side of the console requires patience and attention to detail to avoid damaging the wires or creating rattles. Once the wiring is routed, it’s a good practice to test the fit of the Pioneer AVIC-D1 by sliding it into the modified bracket. Successfully sliding the unit in provides a satisfying confirmation that the modifications and wiring are progressing correctly.
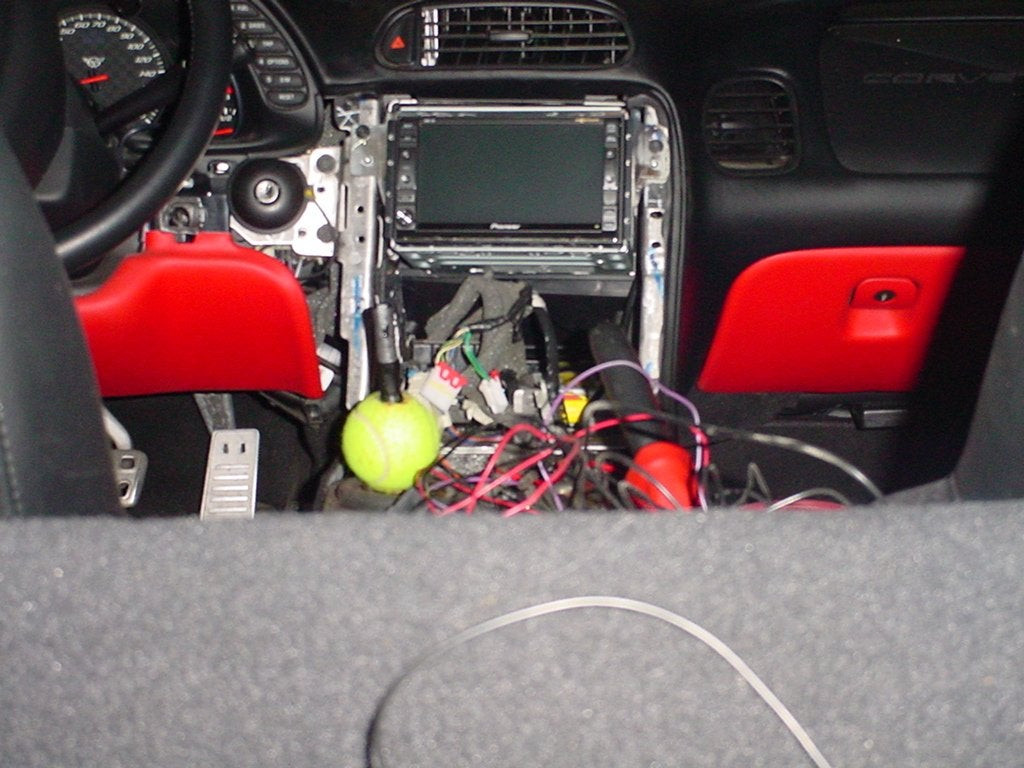 Pioneer AVIC-D1 unit being test-fitted into the Corvette C5 console, verifying bracket and wiring clearances
Connecting the wiring harness involves addressing specific power and signal requirements of the Pioneer AVIC-D1 in a 2004 Corvette. A key challenge in 2004 Corvettes is the absence of an accessory power plug found in earlier models. To obtain keyed power, an “Add-a-Circuit” fuse tap, like the Littlefuse FHM200BP, can be used in the passenger side footwell fuse box. Another crucial connection is the Vehicle Speed Sensor (VSS) wire, a dark Green/White wire. Locating this wire can be achieved at connector bundle C1 of the instrument cluster, pin A7. Consulting a Corvette shop manual’s wiring diagrams is essential for accurate identification and connection of these wires.
 Corvette instrument cluster with speedometer, highlighting the area for accessing VSS wiring for navigation system connection
Integrating a double DIN unit into a C5 Corvette necessitates modifications to the console itself. This involves cutting away sections of the console to accommodate the larger size of the Pioneer AVIC-D1. Careful measurements and precise cuts are needed to ensure a clean and factory-like appearance. Removing the horizontal bars on either side of the HVAC controls as a single piece can aid in alignment during reassembly and finishing.
 Modified Corvette C5 console with sections cut out to accommodate a double DIN radio, showing console trimming for installation
To achieve a seamless finish after cutting the console, an ABS slurry can be created using acetone and small pieces of ABS plastic. This slurry, with a ketchup-like consistency, acts as a filler and adhesive. It’s applied to bond the cut console pieces back together and fill any gaps or imperfections. Acetone is used to dissolve the ABS plastic, creating a workable paste that hardens to form a durable and paintable surface.
 Acetone in a container being used to create ABS slurry for console modification, showing materials used for plastic repair
Applying the ABS slurry involves using a small applicator to carefully smear the mixture onto the front and back of the modified console areas. Multiple thin layers are preferable to one thick layer to minimize drying time and reduce cracking. After each application, allow sufficient drying time, ranging from 4 to 24 hours depending on thickness. Sanding down the dried slurry prepares the surface for texturing and painting, ensuring a smooth and professional-looking console that integrates seamlessly with the new Pioneer AVIC-D1 unit.
While the original article mentions additional steps like texturing and painting the console, and installing switches in place of the ashtray, the core installation process for the Pioneer AVIC-D1 in a 2004 Corvette is thoroughly covered in these steps. This guide provides a detailed insight into the modifications and wiring necessary to bring modern navigation and audio features to your C5 Corvette.