
Making hard-boiled eggs might seem straightforward, but achieving that perfect balance of a cooked yolk, tender white, and, most importantly, an easy-to-peel shell can be surprisingly tricky. For years, home cooks have sought out the holy grail of hard-boiled eggs, and thankfully, tips and tricks abound. Among the most trusted voices in home cooking is The Pioneer Woman, Ree Drummond, known for her accessible and reliable recipes. Inspired by the wisdom of seasoned cooks and methods championed by figures like the Pioneer Woman, this guide delves into a surefire technique for consistently creating easy peel hard boiled eggs, perfect every time.
 Sliced Hard Boiled Eggs on a Cutting Board
If you’re anything like many home cooks, a batch of hard-boiled eggs is a refrigerator staple. They are the ultimate healthy snack, a protein-packed addition to salads, and the base for beloved dishes like egg salad and deviled eggs. However, the frustration of shells stubbornly clinging to the egg white, tearing away chunks in the process, can quickly turn this simple task into a kitchen nightmare. This method, refined through countless trials and drawing inspiration from trusted sources like the Pioneer Woman’s approach, aims to eliminate that frustration.
Why This Method Guarantees Easy Peel Eggs
This method stands out for several key reasons, ensuring you’ll get perfectly peeled eggs every single time:
Consistent Easy Peeling: The secret lies in the combination of a “hot start” – beginning the cooking process in boiling water – and a rapid “cold finish” with an ice bath. This thermal shock is crucial for separating the egg white from the shell membrane, making peeling remarkably easy. You’ll find the shell practically slides off in large pieces, just as promised by easy peel methods touted across the internet and in publications like the Pioneer Woman’s blog.
Preserves Egg White Integrity: No more mangled egg whites! The ice bath is not just about easy peeling; it also helps to gently separate the cooked egg white from the shell. This prevents those annoying situations where you peel away chunks of the egg white along with the shell, leaving you with less-than-perfect eggs.
Scalable for Any Batch Size: Whether you need two eggs or two dozen, this method works flawlessly. Because you’re starting with boiling water, adding more eggs won’t significantly cool down the water and alter the cooking time. Just ensure you use a pot large enough to accommodate your eggs in a single layer. This is a time-saving approach favored by busy home cooks, including those who appreciate the practical wisdom of the Pioneer Woman.
No Need for Room Temperature Eggs: Forget the step of bringing eggs to room temperature. This method is designed for convenience – you can cook eggs straight from the refrigerator without adjusting the cooking time. This is a practical tip for everyday cooking, reflecting the no-fuss approach often highlighted in Pioneer Woman recipes.
Witness the satisfyingly large pieces of shell effortlessly releasing from the egg:
This easy peel technique isn’t just kitchen folklore; it’s a method grounded in science and practical experience. A similar method, with its praises sung by many, was even shared on the Pioneer Woman’s blog in the past, garnering rave reviews from users who experienced the magic of truly easy-to-peel eggs. This updated version incorporates minor improvements and refinements to further enhance the process, ensuring foolproof results. So, if you’re ready to move beyond scrambling and omelets and master the art of hard-boiled eggs, let’s dive into this Pioneer Woman-inspired technique.
Essential Tips for Perfect Hard Boiled Eggs
While this method is incredibly reliable, keeping these tips in mind will further optimize your results:
Prioritize Older Eggs: While this method works with fresh eggs, slightly older eggs are inherently easier to peel. As eggs age, the pH of the albumen (egg white) increases, weakening the bond between the inner shell membrane and the egg white. Harold McGee, in his book “On Food and Cooking,” explains this phenomenon in detail. So, save those super-fresh farm eggs for poaching and use slightly older ones for boiling.
Single Layer Boiling is Key: Avoid overcrowding the pot. For even cooking, and to prevent cracking, ensure your eggs are submerged in boiling water in a single layer. Use a wider pan or skillet if you’re cooking a larger batch to maintain this single layer.
Peel Promptly for Best Results: The window for easy peeling is maximized right after the ice bath. If you let the eggs sit for too long after cooking and cooling, the easy-peel magic diminishes. Peel the eggs while they are still slightly warm to the touch for the most effortless experience. Don’t get distracted – finish the peeling job right after cooking!
Let’s walk through the simple steps to perfectly cooked and easy-to-peel hard-boiled eggs.
Step-by-Step Guide: Achieving Easy Peel Perfection
Because we are starting with boiling water, gently lowering the eggs into the pot is crucial to prevent cracking.
While wire baskets were previously a common tool for lowering eggs, they can sometimes lead to breakage if an egg falls too forcefully.
A safer and more controlled approach is to use tongs to gently place each egg into the boiling water:
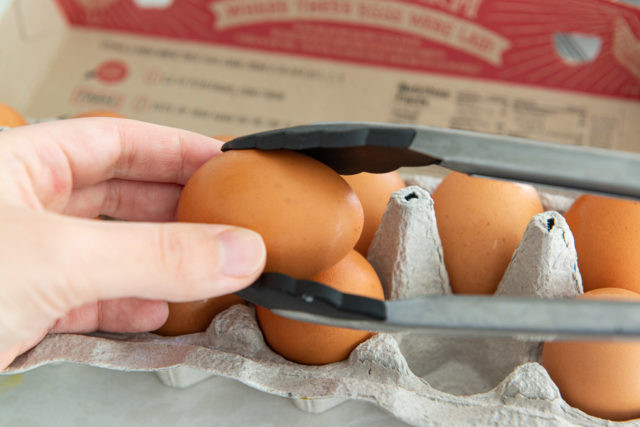 Placing Eggs into Boiling Water with Tongs
A slotted spoon works equally well.
Carefully lower the eggs one at a time into the boiling water:
It takes only about 30 seconds to carefully place a dozen eggs using tongs. This method minimizes the risk of cracking and also allows you to use less water, as you’re not submerging a bulky basket.
Once all the eggs are in the pot, immediately set a timer. Monitor the heat to maintain a gentle boil – not a furious, rolling boil that could cause the eggs to bounce around and crack. If your stovetop is powerful, you might need to reduce the heat to medium-high to achieve a gentle simmer.
Precise Cook Times for Perfect Yolks
The cooking time depends on the size of your eggs. Use these guidelines for perfectly cooked yolks:
Large Eggs (most common): 13 minutes
Medium Eggs: 12 minutes
Extra Large/Jumbo Eggs: 14 minutes
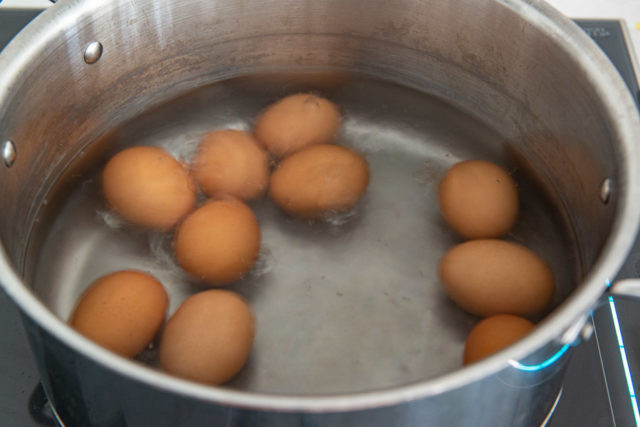 Boiling Eggs in a Saucepan
After the timer goes off, immediately drain the hot water and transfer the eggs to a large bowl filled with ice water for just one minute:
This short ice bath is just enough to halt the cooking process and create that essential separation between the egg white and the shell membrane for easy peeling. It stops carryover cooking without making the eggs completely cold.
The Necessity of the Ice Bath
Is the ice bath truly essential? For the most consistently perfect, easy-to-peel hard-boiled eggs, the answer is a resounding yes. The ice bath serves two crucial purposes:
Stops Carryover Cooking: Immediately plunging the hot eggs into ice water halts the residual cooking process. This is key to preventing the dreaded green ring from forming around the yolk, a telltale sign of overcooked eggs.
Facilitates Easy Peeling: The rapid temperature change from hot to cold causes the egg white to contract slightly more than the shell. This creates a small gap between the shell and the egg white, making peeling significantly easier. The ice bath is a non-negotiable step in achieving truly easy peel eggs, a technique often emphasized in reliable cooking guides, including those inspired by the Pioneer Woman.
No Ice? No Problem: If you don’t have ice readily available, don’t skip the cold water bath altogether. Drain the hot water and place the eggs in a bowl under a constant stream of cold running water for a few minutes. Mimic the rapid cooling effect of the ice bath by ensuring the water in the bowl is continuously refreshed with cold water. This is similar to the quick-thawing method for seafood.
While some recipes suggest longer ice bath times, a mere minute is sufficient to “shock” the eggs and stop the cooking.
After the brief ice bath, peel the eggs immediately. Peeling while the eggs are still slightly warm, but the shells have chilled, is when the separation between the shell and the egg white is at its maximum, leading to the easiest peeling experience.
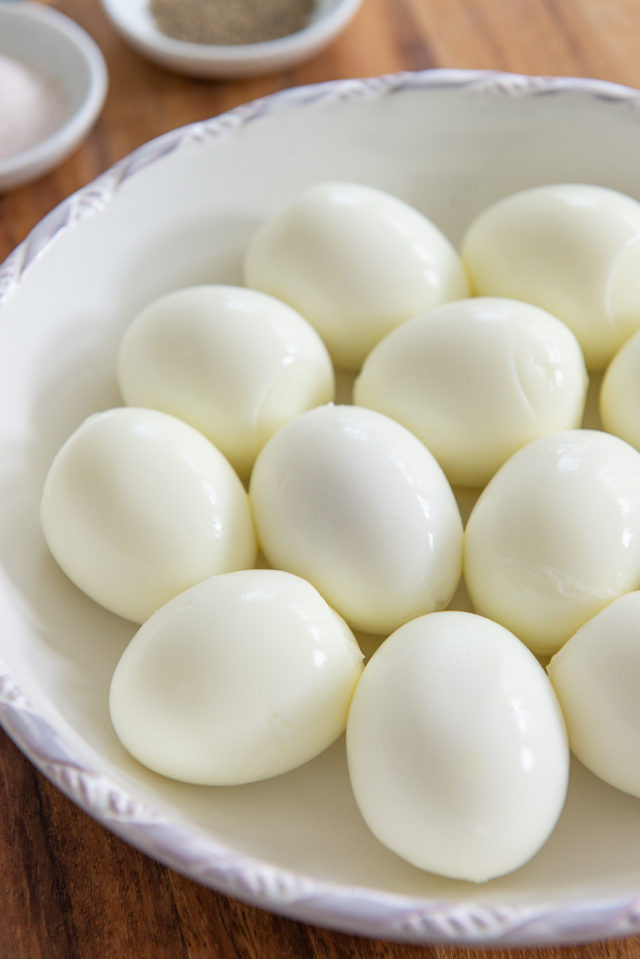 Peeled Boiled Eggs in a Bowl
Delicious Ways to Enjoy Your Perfect Hard Boiled Eggs
Once peeled, your perfectly cooked hard-boiled eggs are ready to be enjoyed in countless ways. Eat them immediately, chill them for a healthy grab-and-go snack, or incorporate them into a variety of dishes.
Deviled Eggs Extravaganza: Elevate your appetizer game with deviled eggs! Try creative variations like Smoked Salmon Deviled Eggs, Bacon and Crispy Shallot Deviled Eggs, or Chile Scallion Deviled Eggs.
Egg Salad Perfection: Whip up a classic Egg Salad or add diced hard-boiled eggs to heartier salads like Red Potato Salad or Cranberry Chicken Salad.
Salad Enhancements: Hard-boiled eggs are a fantastic source of protein for any green salad. They pair particularly well with robust salads like Cobb Salad, Kale Salad, or Wild Rice Salad.
Breakfast Pairings: Create a complete breakfast by serving hard-boiled eggs alongside Hash Browns and Oven Bacon. For a more indulgent breakfast, pair them with Cheddar Scallion Biscuits or Bacon Cheddar Waffles.
Behold – perfectly cooked yolks with no unsightly green ring! These are hard-boiled eggs ready to be devoured and enjoyed in countless dishes.
For more egg-cellent recipes, explore How to Poach an Egg, Croque Madame, and Herbed Baked Eggs. Enjoy!
Common Questions About Hard Boiled Eggs
How should I store hard-boiled eggs and for how long?
Store cooked hard-boiled eggs in an airtight container in the refrigerator for up to 5 days. This prevents them from absorbing odors from other foods. Do not leave them at room temperature for extended periods.
Can hard-boiled eggs be frozen?
Freezing hard-boiled eggs is not recommended. The egg whites become rubbery and develop an unpleasant texture. It’s best to cook only the number of eggs you anticipate using within a week.
How do I reheat hard-boiled eggs?
If you want to warm pre-cooked hard-boiled eggs, keep the shells on and submerge them in boiling water for about 5 minutes to gently heat them through. Avoid microwaving hard-boiled eggs, as they can explode.
Are older eggs truly better for easy peeling?
Yes, slightly older eggs tend to peel more easily due to the pH changes in the egg white. However, commercially sold eggs are usually not extremely fresh by the time they reach stores, and this method works well even with relatively fresh eggs.
What’s the key to making easy-to-peel eggs?
The most reliable method for easy peeling is the combination of a hot start (boiling water) and a cold finish (ice bath).
What are the ideal boiling times for eggs?
For large eggs, boil for 13 minutes. For medium eggs, 12 minutes. For extra-large or jumbo eggs, 14 minutes.
How can I prevent the green ring around the yolk?
The green ring indicates overcooking. The ice bath is crucial for stopping the cooking process and preventing this discoloration.
Can I use an Instant Pot for this recipe?
Yes, you can! For Instant Pot hard-boiled eggs, add 1 cup of water to the pot, place eggs on the trivet, and cook at high pressure for 6 minutes with a quick release. Follow with an ice bath and peel immediately. For soft-boiled eggs in the Instant Pot, cook for only 4 minutes.
Enjoyed this guide? Leave a 5-star rating in the recipe card below and/or share your feedback in the comments! Follow for more kitchen tips and recipes!
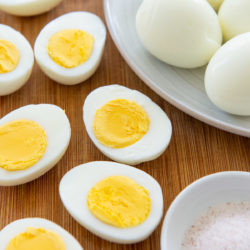 Sliced Hard Boiled Eggs on a Wooden Board – Recipe Card Thumbnail
Easy Peel Hard Boiled Eggs Recipe
Servings: 12 eggs
Prep Time: 0 minutes
Cook Time: 13 minutes
Ice Bath Time: 1 minute
Total Time: 14 minutes
These Hard Boiled Eggs are consistently easy to peel and perfectly cooked every time.
Print Recipe Pin Recipe
6 Reviews Leave a Review »
Ingredients
- 12 large eggs *
Instructions
- Bring a pot of water to a rolling boil over high heat. Ensure the water level is at least two inches above the bottom of the pot.
- Using tongs, gently and quickly place the eggs into the boiling water. Briefly shake off the tongs after each egg to avoid dripping hot water on your hands.
- Adjust the heat to maintain a gentle, consistent boil. If cooking a larger batch, you might need to slightly increase the heat. If the boil becomes too vigorous and causes excessive egg movement, reduce the heat slightly.
- Cook for precisely 13 minutes. Set a timer to ensure accuracy. While the eggs are cooking, prepare an ice bath (a bowl of ice water).
- After 13 minutes, drain the boiling water and immediately transfer the eggs to the ice bath for 1 minute to halt carryover cooking.
- Promptly peel the eggs while they are still warm for the easiest peeling experience. Enjoy!
Recipe Notes
*The quantity of eggs can be adjusted as needed without altering the cooking time, provided the water remains boiling and the heat is adjusted as described. Always start with cold eggs straight from the refrigerator. Bringing eggs to room temperature may necessitate reducing the cooking time.
Nutrition
Serving: 1g, Calories: 72kcal, Carbohydrates: 1g, Protein: 6g, Fat: 5g, Saturated Fat: 2g, Trans Fat: 1g, Cholesterol: 186mg, Sodium: 71mg, Potassium: 69mg, Sugar: 1g, Vitamin A: 270IU, Calcium: 28mg, Iron: 1mg
Nutritional information is estimated using a food database and is intended for informational purposes only.
Course: Breakfast
Cuisine: American
Author: Fifteen Spatulas
Posted in: All Recent Posts, Breakfast and Brunch, Dairy-free, Gluten-free, Low Carb, Snacks, Whole30 Compliant 8 Comments 8 comments