Candied Jalapeños, also affectionately known as Cowboy Candy, are the unexpected flavor bomb your pantry has been missing. This easy-to-make sweet and spicy jalapeño pickle recipe elevates everything from sandwiches to tacos, and once you try them, you’ll understand why they’re a long-time family favorite. Discover the magic behind these addictive candied jalapeños and learn how to make your own batch of Cowboy Candy right at home.
My journey with Cowboy Candy began with a simple sandwich recommendation. A friend raved about the incredible flavor that candied jalapeños brought to her lunch. Intrigued, I embarked on a quest to recreate this culinary delight. I dove deep into the world of candied jalapeño recipes, exploring countless variations and techniques. It turns out, I wasn’t alone in my fascination – the internet is brimming with cowboy candy enthusiasts! To ensure I nailed the perfect balance of flavor and safety, I even consulted with local food preservation experts.
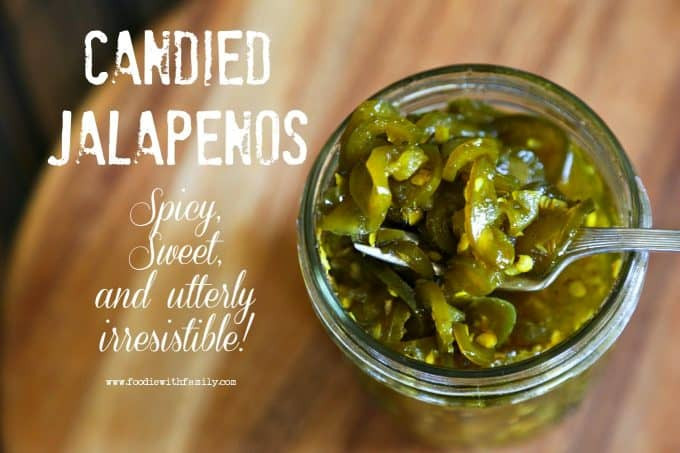 Easy canning project Candied Jalapenos from foodiewithfamily.com
Canning jalapeños, a low-acid food, requires careful attention to safety. There are two primary methods for safe home canning of peppers: pressure canning or acidification. Acidification, which involves adding vinegar or lemon juice to increase acidity, is the method we’ll use for this Cowboy Candy recipe. I opted for acidification to maintain the delightful crisp-tender texture of the jalapeños. Pressure canning, while safe, can sometimes lead to softer, mushier peppers – something we want to avoid when making Cowboy Candy.
The result of my candied jalapeño experiments was nothing short of extraordinary. The combination of sweet, spicy, and savory flavors in these Cowboy Candy rings is truly addictive. They are incredibly versatile, and I soon found myself adding them to almost every meal.
From topping sandwiches and baked beans to adding a kick to tacos and even using the flavorful syrup as a glaze for grilled meats, Cowboy Candy became a staple in my kitchen. And don’t even get me started on the classic pairing of candied jalapeños served over cream cheese and crackers – an appetizer that disappears in minutes at any gathering!
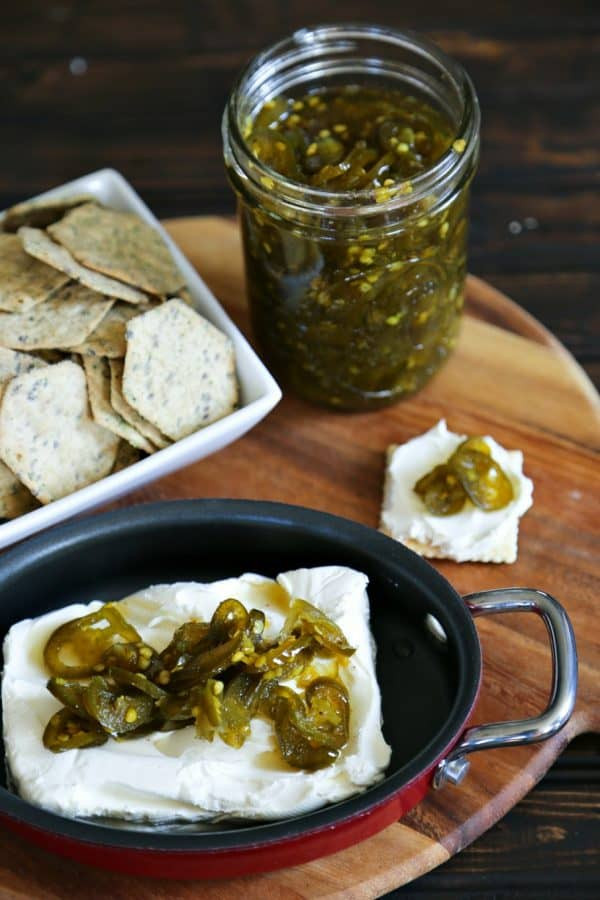 Candied Jalapenos on cream cheese and crackers from foodiewithfamily.com
For such a simple canning recipe, Cowboy Candy delivers an unbelievable depth of flavor. Trust me, you’ll want to make a large batch of these candied jalapeños. Once you open that first jar, you’ll quickly realize just how irresistible they are.
Making Cowboy Candy: Your Go-To Recipe
Cowboy Candy is a canning project I undertake every year without fail. Knowing my pantry is stocked with jars of these sweet and spicy delights brings joy to every meal and makes holiday gift-giving a breeze.
Perhaps the idea of canning seems daunting? Or maybe you’re hesitant to try? If canning feels overwhelming, don’t worry! You can easily make Cowboy Candy without canning and simply store them in the refrigerator.
For those who prefer to skip the canning process, follow the recipe instructions up to the canning step. Then, instead of processing the jars, simply store your jars of Cowboy Candy in the refrigerator for up to three months. Canning ensures shelf stability for a year, but refrigeration is a perfectly viable alternative if you plan to enjoy them sooner.
Choosing the Right Jalapeños for Cowboy Candy
For the best Cowboy Candy, fresh jalapeños are a must. Many have asked about substituting frozen or canned jalapeños, but unfortunately, pre-cooked or frozen peppers won’t work in this recipe. Cooking or freezing jalapeños begins to break down their cell walls. Re-cooking them in the syrup would further soften them, resulting in mushy Cowboy Candy – exactly what we want to avoid.
Just How Spicy is Cowboy Candy?
Yes, Cowboy Candy is definitely spicy! The heat level of jalapeños can vary significantly, adding a touch of mystery to each batch. While some believe that more tan veins on a jalapeño indicate higher heat, this isn’t always a reliable indicator.
The spiciness of your Cowboy Candy will depend on the heat level of your specific jalapeños. Keep in mind that freshly made Cowboy Candy will be quite fiery, but the heat mellows slightly as they age and the flavors meld over time.
A word of caution: always wear gloves when handling jalapeños! Jalapeños range considerably on the Scoville scale, and even seemingly mild peppers can cause skin irritation. Processing a large batch of hot jalapeños without gloves can lead to an unpleasant surprise!
While this recipe is designed for jalapeños, feel free to experiment with other fresh peppers. Serranos, habaneros, bell peppers, and banana peppers have all been used successfully by readers. As long as you maintain the 3-pound pepper quantity, you can get creative. Some readers also prefer chopping the peppers for a Cowboy Candy relish, which is equally delicious!
How many jalapeños make up 3 pounds? The size of jalapeños varies greatly, so a precise count is impossible. Approximately 60 jalapeños make up 3 pounds. It’s best to measure by weight to ensure the correct pepper-to-syrup ratio.
Preparing Your Jalapeños for Cowboy Candy
Slicing 3 pounds of jalapeños can seem like a daunting task, but there are efficient methods to streamline the process. A food processor with a slicing blade is the quickest way to slice uniform rounds. Simply stand the peppers on their ends in the feed chute, and let the processor do the work.
No food processor? A mandoline slicer is another excellent option for achieving even slices. If you don’t have either of these tools, a sharp knife and gloved hands will do the job – just take your time and slice carefully.
Many wonder if the seeds should be removed from the jalapeños. We prefer to leave them in for added texture and a bit of extra heat. Contrary to popular belief, the seeds themselves don’t contain the majority of the pepper’s heat. The capsaicin, responsible for the heat, is concentrated in the pepper’s membrane. Since we’re keeping the membranes, there’s no need to remove the seeds unless you prefer a milder heat level.
Crafting the Perfect Cowboy Candy Syrup
Do not reduce the sugar in this Cowboy Candy recipe! Sugar plays a crucial role not only in the sweet flavor but also in the texture of both the peppers and the syrup, and importantly, it acts as a preservative.
Turmeric is added to enhance the color of the finished Cowboy Candy, giving it a vibrant golden hue. However, turmeric also contributes a subtle, warm, mustard-like note that complements the sweet and spicy profile beautifully.
I prefer using Bragg’s Apple Cider Vinegar for its robust flavor, but any undiluted cider vinegar will work perfectly. In a pinch, white distilled vinegar can be substituted, but it will impart a slightly sharper flavor to the syrup.
Granulated garlic is my go-to for this recipe as it disperses well without clumping like garlic powder. If you only have garlic powder, use half the amount specified for granulated garlic (1 1/2 teaspoons of garlic powder instead of 3 teaspoons granulated garlic). Dried garlic flakes can also be used; in this case, use 2 tablespoons of flakes in place of 3 teaspoons of granulated garlic.
Celery seed adds a unique umami depth to Cowboy Candy that’s hard to replicate. Even if you’re not a celery fan, don’t worry – the celery seed flavor is subtle and enhances the overall savory notes without tasting like celery pickles.
Cayenne pepper is optional, allowing you to customize the heat level. Cayenne provides a different kind of heat – an earthy, smoky warmth that complements the fruity heat of the jalapeños. If you prefer a less fiery Cowboy Candy, feel free to omit the cayenne pepper.
Timing is Key for Cowboy Candy
A common question is when to start timing the boiling of the peppers. Begin timing once the syrup returns to a full rolling boil after adding the peppers. This means the syrup continues to boil even when stirred.
Once a full rolling boil is reached, reduce the heat to a simmer and gently simmer for exactly 4 minutes. To clarify, you are bringing them to a boil, then immediately reducing to a simmer for 4 minutes, not boiling hard for the entire 4 minutes.
Many are concerned when their peppers appear shriveled after simmering, jarring, and canning. This is perfectly normal! The peppers will look shriveled after simmering and jarring. They will re-plump as they rest in the jars for the required 4 weeks after processing.
Yes, patience is key! While some may sneak a jar open sooner, allowing the Cowboy Candy to mellow for at least 4 weeks significantly improves both flavor and texture. Trust the process – the wait is worth it!
Serving Suggestions for Cowboy Candy:
While Cowboy Candy is famously delicious on cream cheese and crackers, its versatility extends far beyond appetizers. We love Cowboy Candy in sandwiches, with Bacon Wrapped Hot Dogs, in salads, taco soup, tortilla soup, tacos, and even on pizza. They are also fantastic chopped into dips for an extra layer of flavor and spice.
The possibilities are endless! I wouldn’t be surprised if my husband considered adding them to his breakfast cereal if he thought he could get away with it.
 3 pounds of jalapenos sliced for Candied Jalapenos from foodiewithfamily.com
Essential Equipment for Making Cowboy Candy
- Chef’s knife
- Cutting Board
- Large stainless steel stockpot
- Long handled stainless steel slotted spoon
- Half pint jars
Helpful (But Not Required) Equipment
- Rubber gloves or disposable gloves
- Food processor with a slicing disc
- Canning funnel
- Stainless steel ladle
- Canning tongs
Connect with Foodie with Family
Facebook | Pinterest | Instagram | Twitter
Canning Cowboy Candy is Easier Than You Think!
Worried about the canning process? Don’t be! It’s surprisingly straightforward. Watch this video to see just how easy making and canning Cowboy Candy really is!
Cowboy Candy Recipe: Candied Jalapeños
Wearing gloves, remove the stems from the jalapeño peppers. Slice a small disc off the stem end to easily remove the stem. Discard stems. Slice peppers into 1/8-1/4 inch rounds using a knife or food processor. Set aside.
In a large pot, combine cider vinegar, sugar, turmeric, celery seed, granulated garlic, and cayenne pepper. Bring to a full rolling boil, then reduce heat and simmer for 5 minutes.
Increase heat to high, add pepper slices, and return to a hard boil. Reduce heat again and simmer for exactly 4 minutes. Use a slotted spoon to transfer peppers to sterilized canning jars, leaving 1/4 inch headspace.
Return syrup to a boil and boil hard for 6 minutes. Ladle boiling syrup into jars over jalapeños, leaving 1/4 inch headspace. Use a chopstick or knife to remove air bubbles. Adjust syrup level if needed. Wipe jar rims, apply lids and rings to finger-tip tightness.
Process in a boiling water bath canner for 10 minutes for half-pints or 15 minutes for pints, ensuring jars are covered by 2 inches of water. After processing, turn off heat, remove canner lid, and let jars rest in hot water for 5 minutes. Use canning tongs to transfer jars to a cooling rack and let cool undisturbed for 24 hours. Check for proper sealing, wipe jars clean, and label. Allow to mellow for at least 4 weeks before enjoying for optimal flavor.
If you have leftover syrup, can it separately! It’s delicious for grilling or in salads!
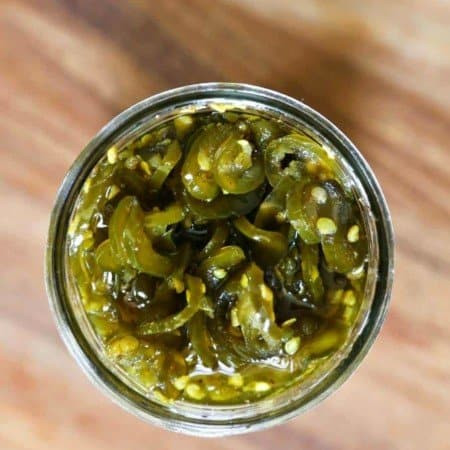 Sweet, spicy Candied Jalapeno from foodiewithfamily.com
Candied Jalapeños Recipe
By Rebecca Lindamood
Prep Time: 20 minutes
Cook Time: 20 minutes
Total Time: 40 minutes
Yields: 4-6 half pints
Ingredients
- 3 pounds fresh jalapeño peppers, washed and firm
- 2 cups cider vinegar
- 6 cups granulated white sugar
- 1/2 teaspoon turmeric
- 1/2 teaspoon celery seed
- 3 teaspoons granulated garlic
- 1 teaspoon ground cayenne pepper (optional)
Instructions
- Wear gloves. Remove jalapeño stems by slicing a small disc around the stem end. Discard stems.
- Slice jalapeños into 1/8-1/4 inch rounds. Set aside.
- In a large pot, bring cider vinegar, sugar, turmeric, celery seed, granulated garlic, and cayenne pepper to a boil. Reduce heat and simmer for 5 minutes.
- Raise heat to boiling. Add jalapeño slices, return to a hard boil, then reduce heat and simmer for exactly 4 minutes.
- Use a slotted spoon to transfer peppers to sterilized canning jars, leaving 1/4 inch headspace.
- Return syrup to a boil and boil hard for 6 minutes.
- Ladle boiling syrup into jars over jalapeños, leaving 1/4 inch headspace. Remove air bubbles. Adjust syrup level if needed. Wipe rims, lid, and ring.
- For canning: Process in a boiling water bath for 10 minutes (half-pints) or 15 minutes (pints). Let rest in canner for 5 minutes after processing before removing to cool. Or, for refrigerator storage: skip canning and refrigerate jars for up to 3 months.
- Let jars cool undisturbed for 24 hours. Check seals, wipe clean and label.
- Allow to mellow for at least 4 weeks before eating.
Recipe Notes
Double this recipe – you’ll be glad you did! This recipe yields 4-6 half pints.
Nutrition
Calories: 88kcal
Carbohydrates: 22g
Sodium: 2mg
Potassium: 81mg
Sugar: 21g
Vitamin A: 230IU
Vitamin C: 32.6mg
Calcium: 4mg
Iron: 0.3mg
Nutritional information is an estimate.
Did you make this recipe?
Tag @foodiewithfam on Instagram and hashtag #foodiewithfamily!
Print Recipe Pin Recipe Share on Facebook
More Food Preservation Recipes
Originally posted May 23, 2010, updated in 2015, 2017, and June 2022.