
Creating a pioneer-inspired apron is a delightful and simple sewing project, perfect for adding a touch of historical charm to your kitchen or crafting activities. This week, we guided a group of teenagers in making these adorable aprons, and today, we’re excited to share the step-by-step tutorial with you. You’ll be surprised at how quickly and easily you can put these together!
 Close up of a girl wearing a homemade pioneer inspired apron
To embark on this fun sewing adventure, gather the following readily available supplies:
- Flour Sack Dish Towel: One (approximately 28″ x 29″). These are the perfect size and fabric weight for a comfortable and durable apron.
- 2-inch Wide Ribbon: Choose your favorite color or pattern to add a personal touch to your apron ties.
- Sewing Machine: A reliable sewing machine will make the construction process smooth and efficient.
- Iron: Essential for creating crisp folds and ensuring professional-looking finishes.
- Scissors: Sharp fabric scissors are crucial for accurate cutting.
- Thread: Select a thread color that complements your ribbon and dish towel.
- Fray Check (Optional): This is helpful to prevent ribbon ends from fraying, ensuring longevity.
 Supplies needed to make a pioneer apron including a flour sack towel, ribbon, scissors, and thread
Flour sack dish towels are incredibly cost-effective, especially when making aprons for a group. We utilized a pack of four for just $6, making this a budget-friendly craft. For larger groups, consider purchasing a set of 12 online for even greater savings.
Now, let’s dive into the simple steps to create your own Pioneer Apron:
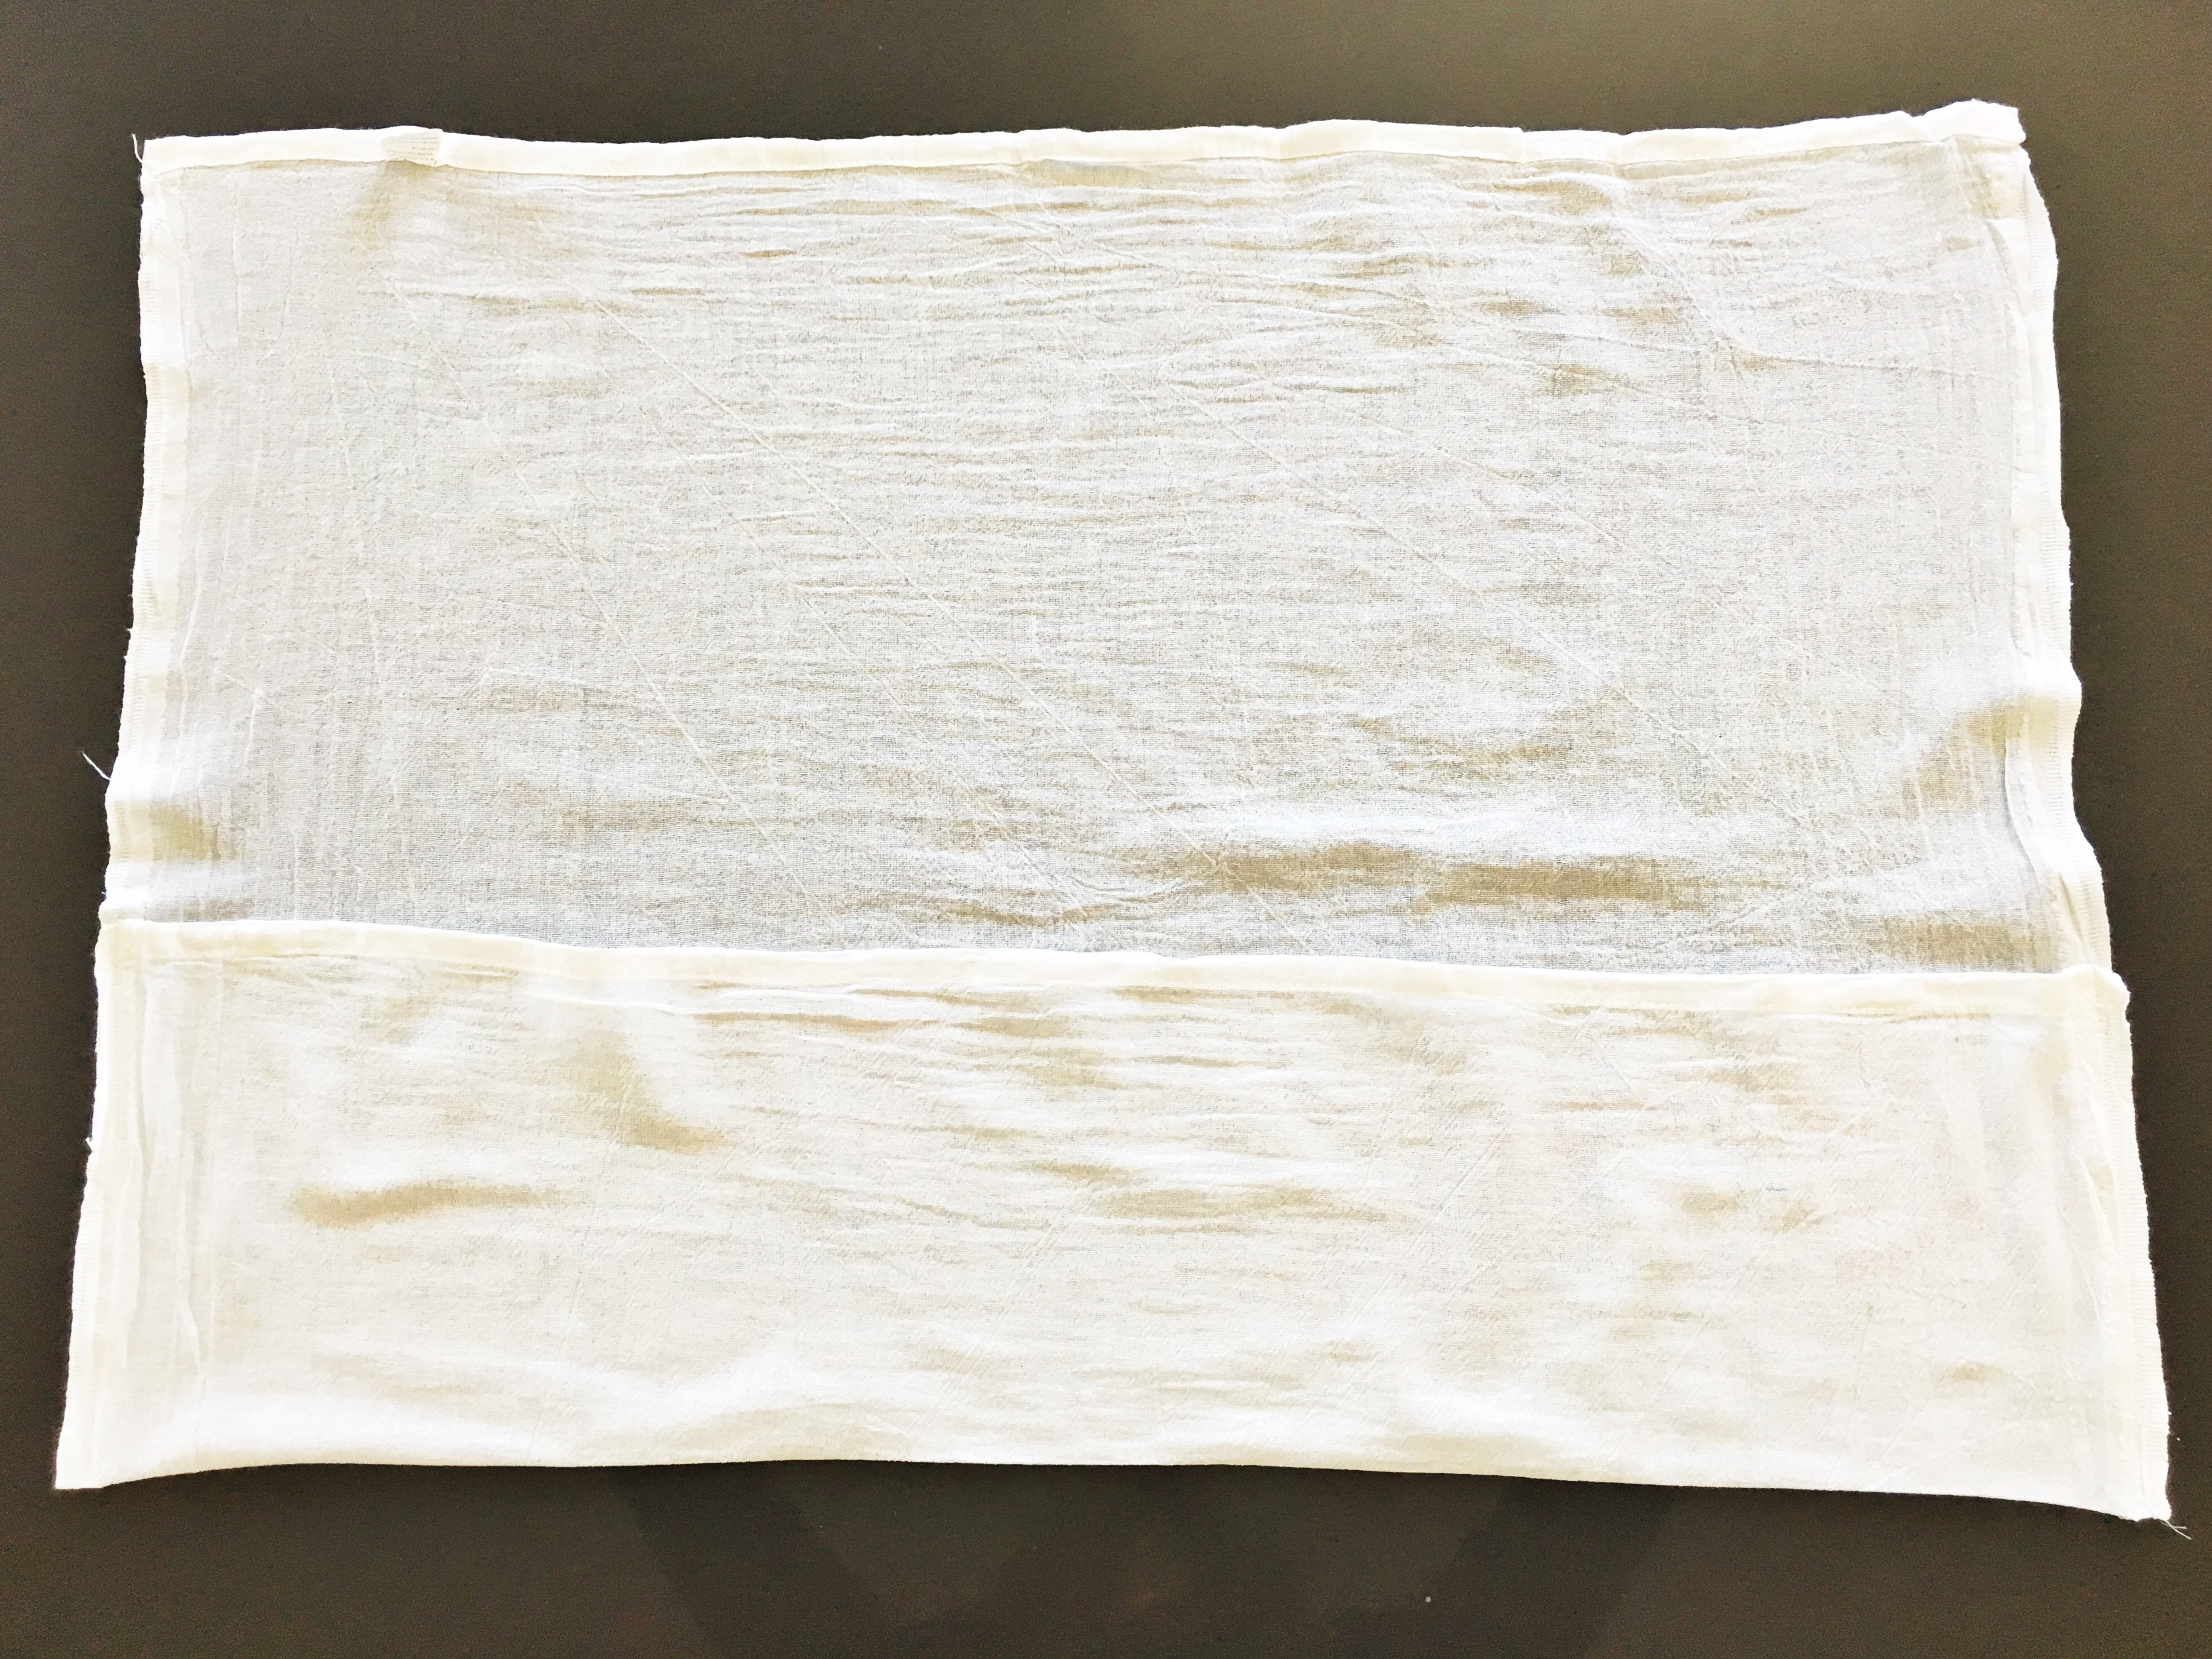
Step #1: Create the Apron Pocket
Begin by folding the bottom edge of your flour sack dish towel upwards by 8 inches. Press this fold firmly with an iron to create a sharp crease. Next, stitch along both the left and right sides of the folded edge, securing the pocket in place.
 Folding and ironing the bottom of the dish towel to create the pioneer apron pocket
This folded and stitched section will form the handy pocket at the bottom of your pioneer apron – perfect for holding utensils or craft supplies!
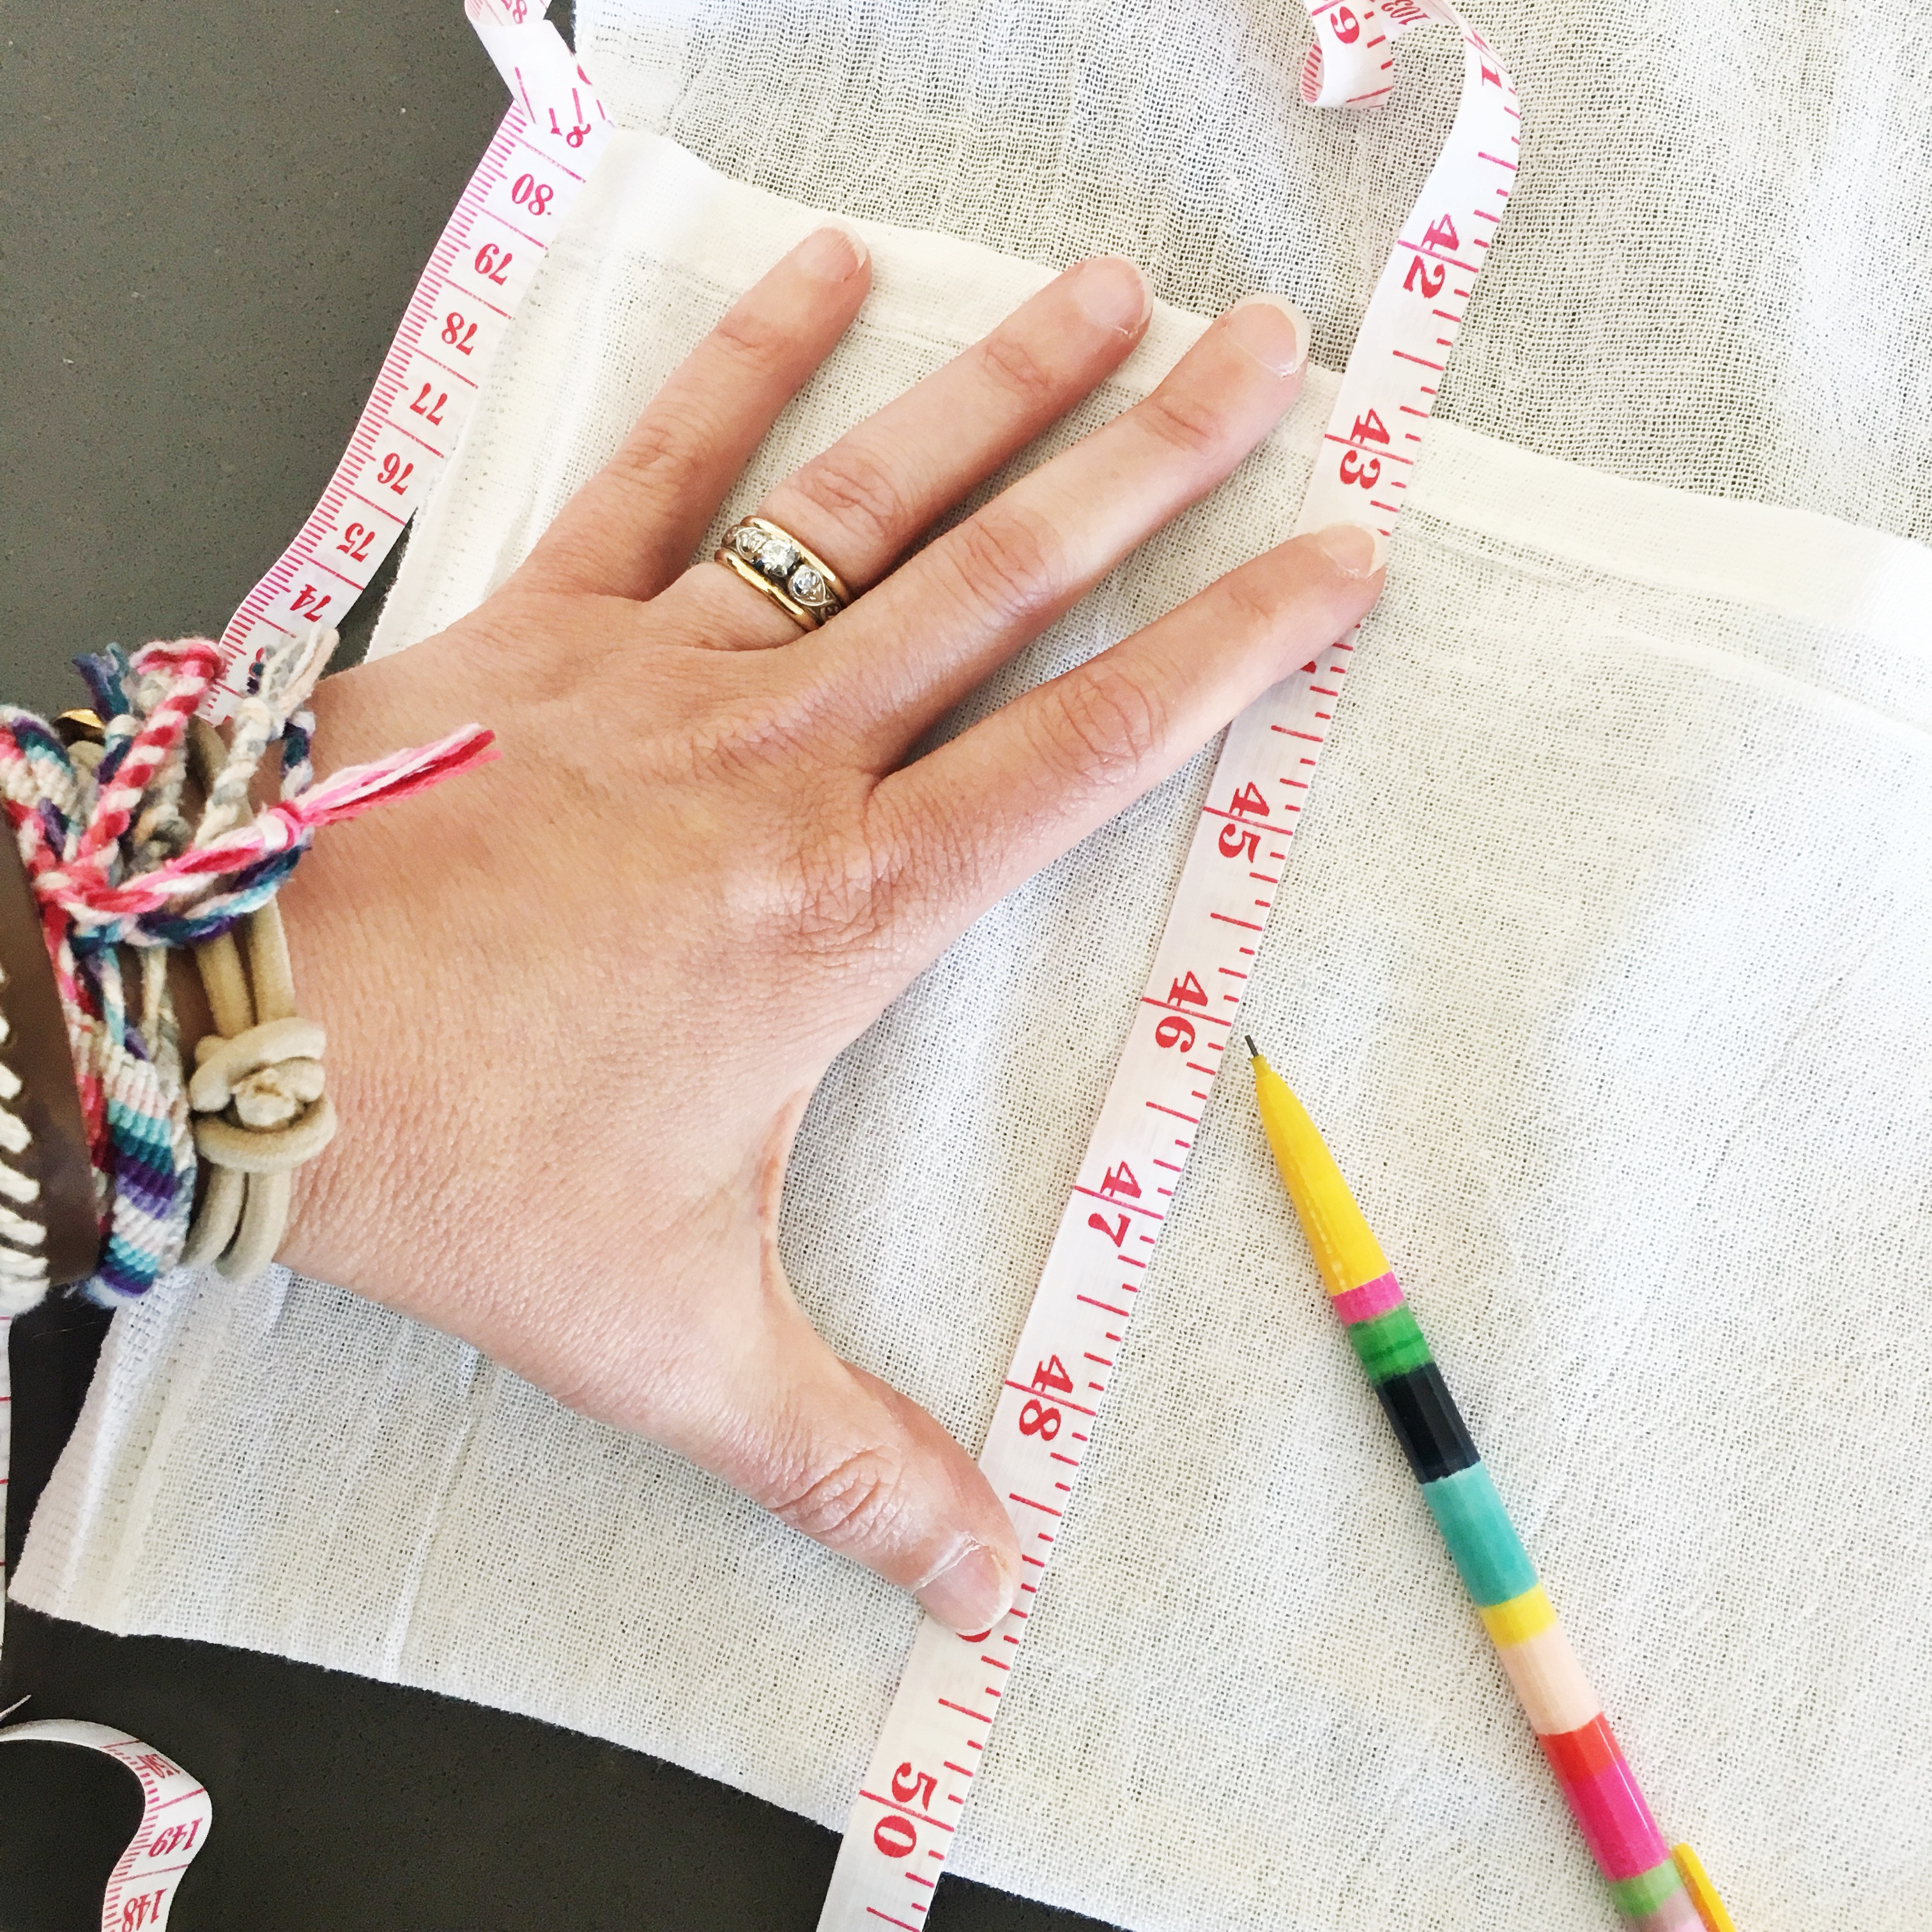
Step #2: Segment the Pocket
To create divided sections within your apron pocket, measure across the bottom edge at approximately 6.5-inch intervals. Mark these points with pins or fabric chalk. Then, stitch vertically from the bottom folded edge upwards to the top of the pocket along each of these marked lines.
 Measuring and marking the pocket to create segments for the pioneer apron
These vertical seams will divide your large pocket into smaller, more functional compartments.
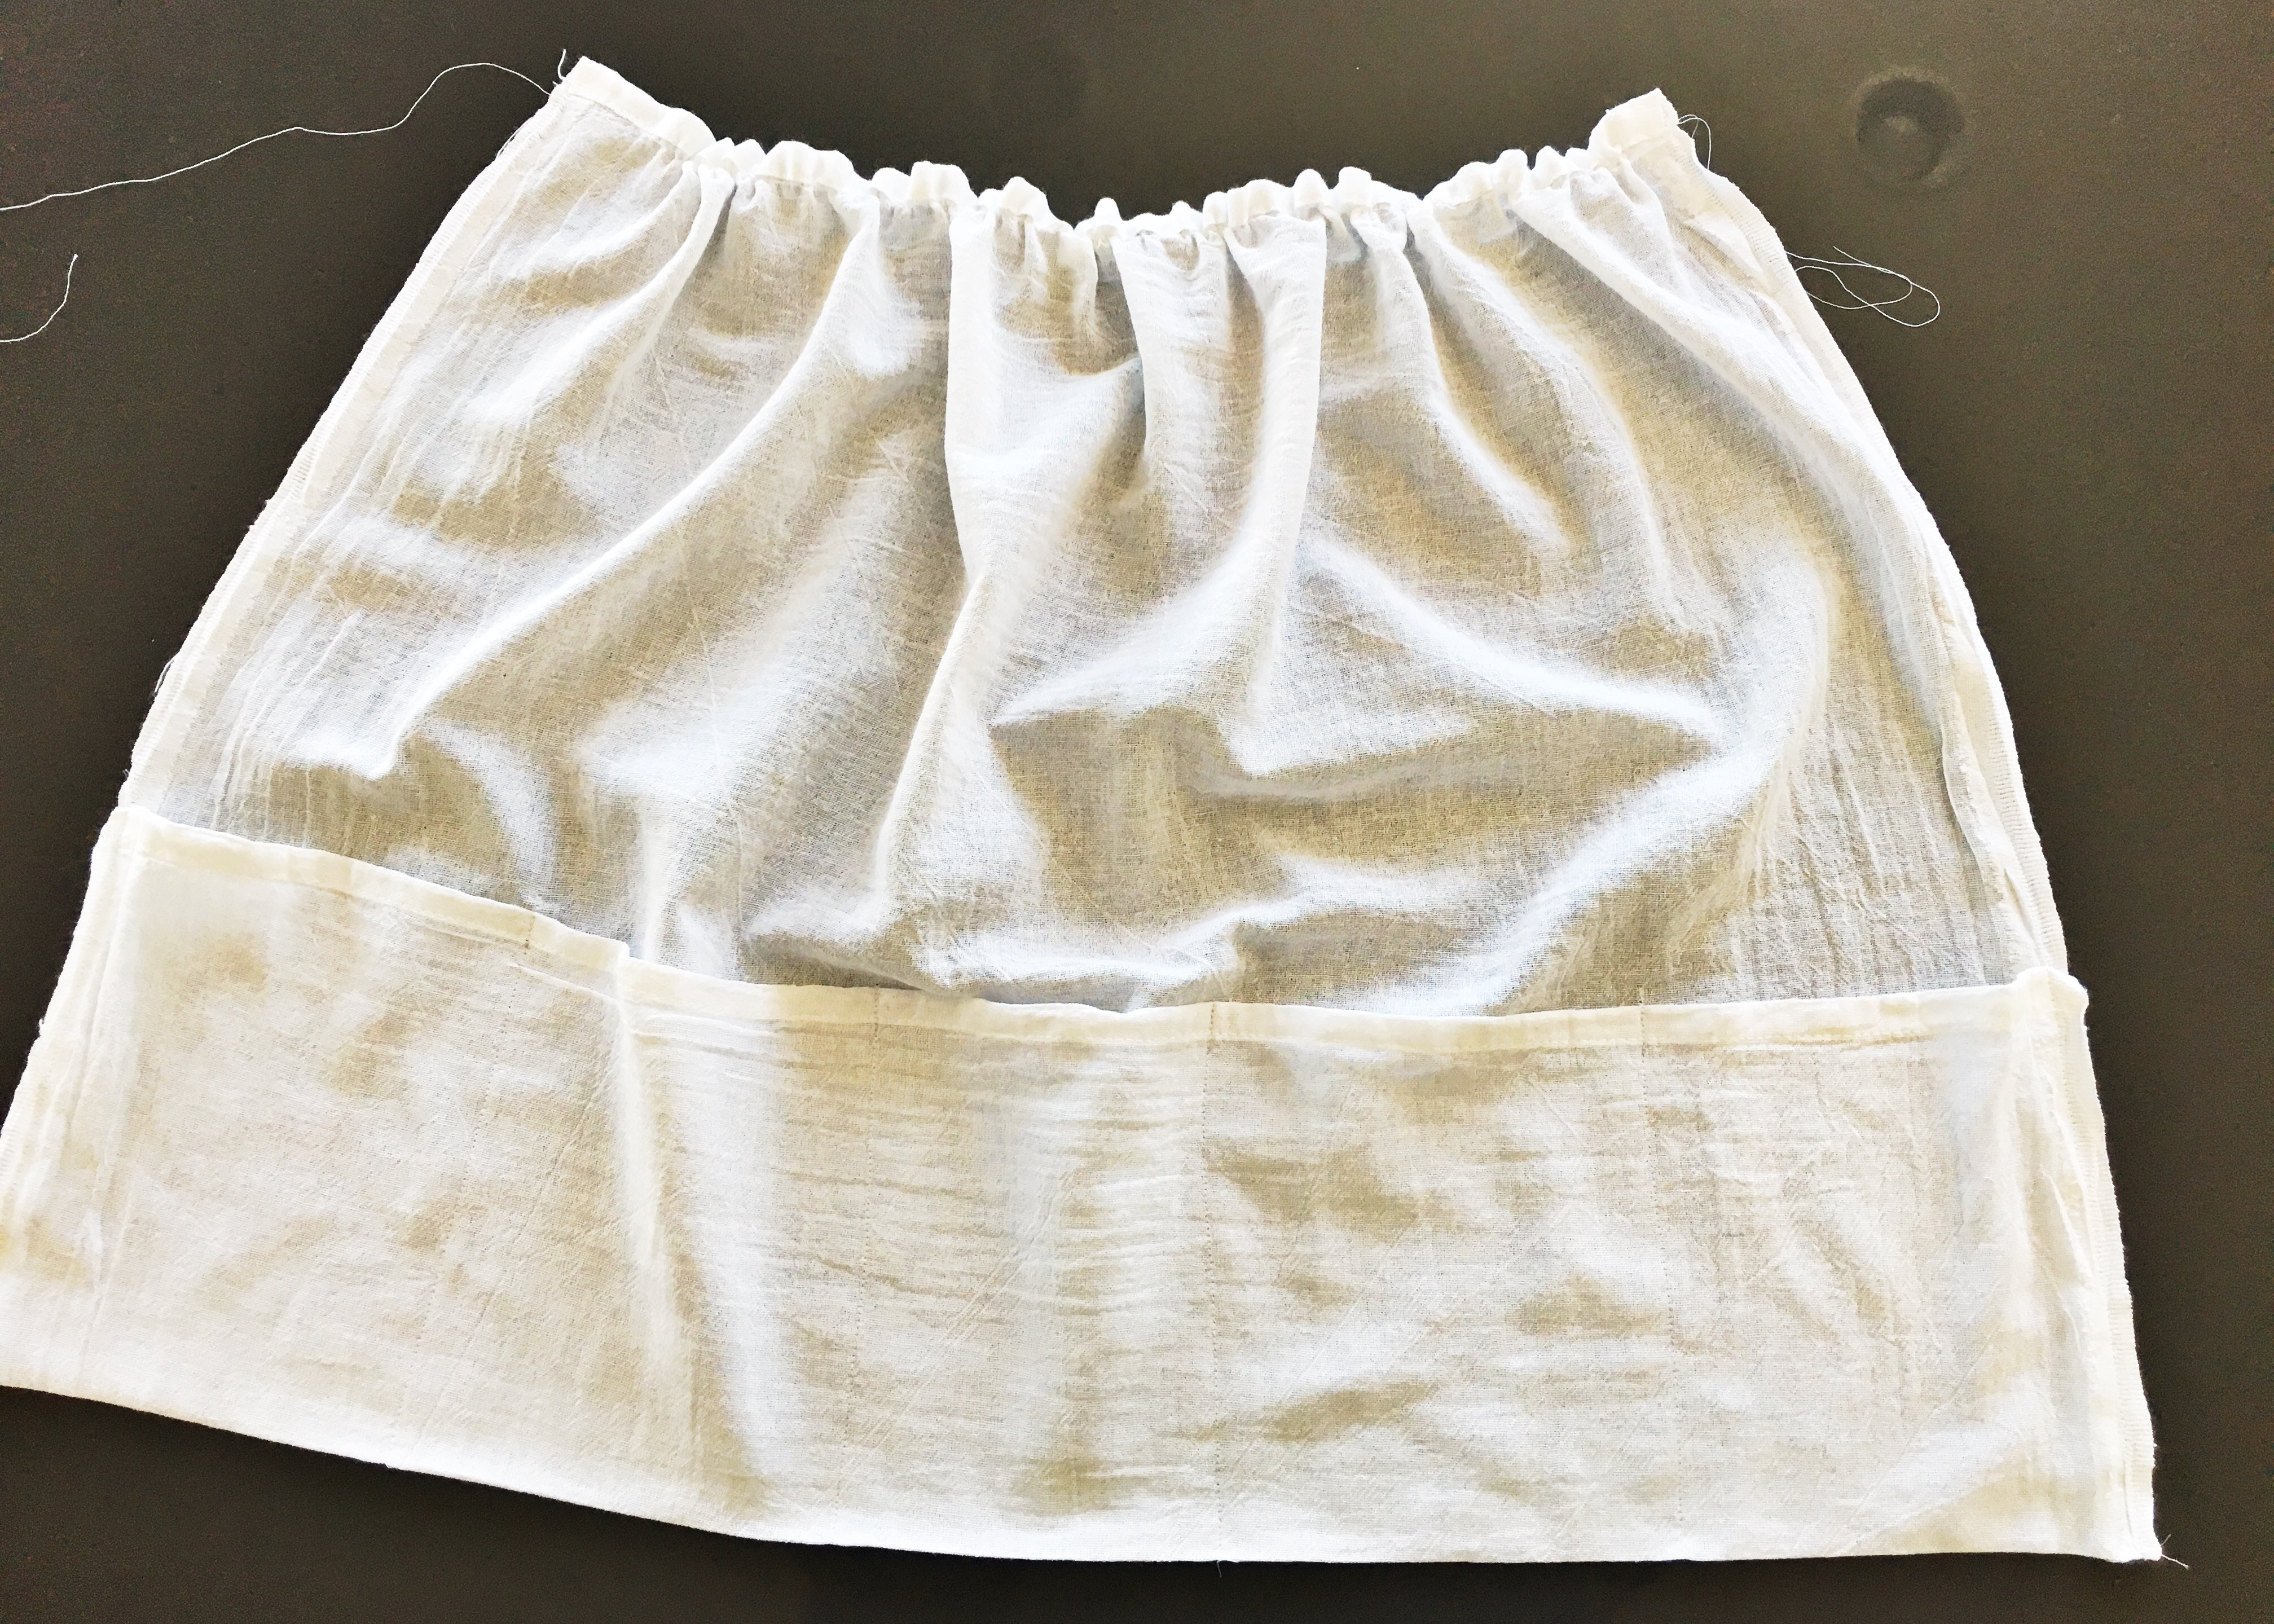
Step #3: Gather the Top Edge
Set your sewing machine to a long stitch length and sew a gathering stitch along the top edge of the dish towel. Gently pull the bobbin thread to gather the fabric. Continue gathering until the width of the top edge is roughly 2 inches wider than the front waist measurement of the person who will wear the apron.
 Gathering the top edge of the flour sack towel for the pioneer style apron
This gathered top will create the characteristic ruffled look of a pioneer apron and ensure a comfortable fit.
Step #4: Prepare the Ribbon Ties
To determine the length of ribbon needed for the apron ties, measure the waist of the intended wearer. Multiply this measurement by two, and then add half of the original waist measurement to that number.
For example, if the waist is 30 inches: (30 inches x 2) + (30 inches / 2) = 75 inches of ribbon.
Cut your 2-inch wide ribbon to this calculated length. Fold the ribbon in half to find the center and mark it with a pin. Similarly, fold the gathered top edge of your apron in half and mark its center with a pin.
 Folding the ribbon to find the center point for attaching to the pioneer apron
This method ensures ample ribbon length for comfortable ties and a charming bow in the back.
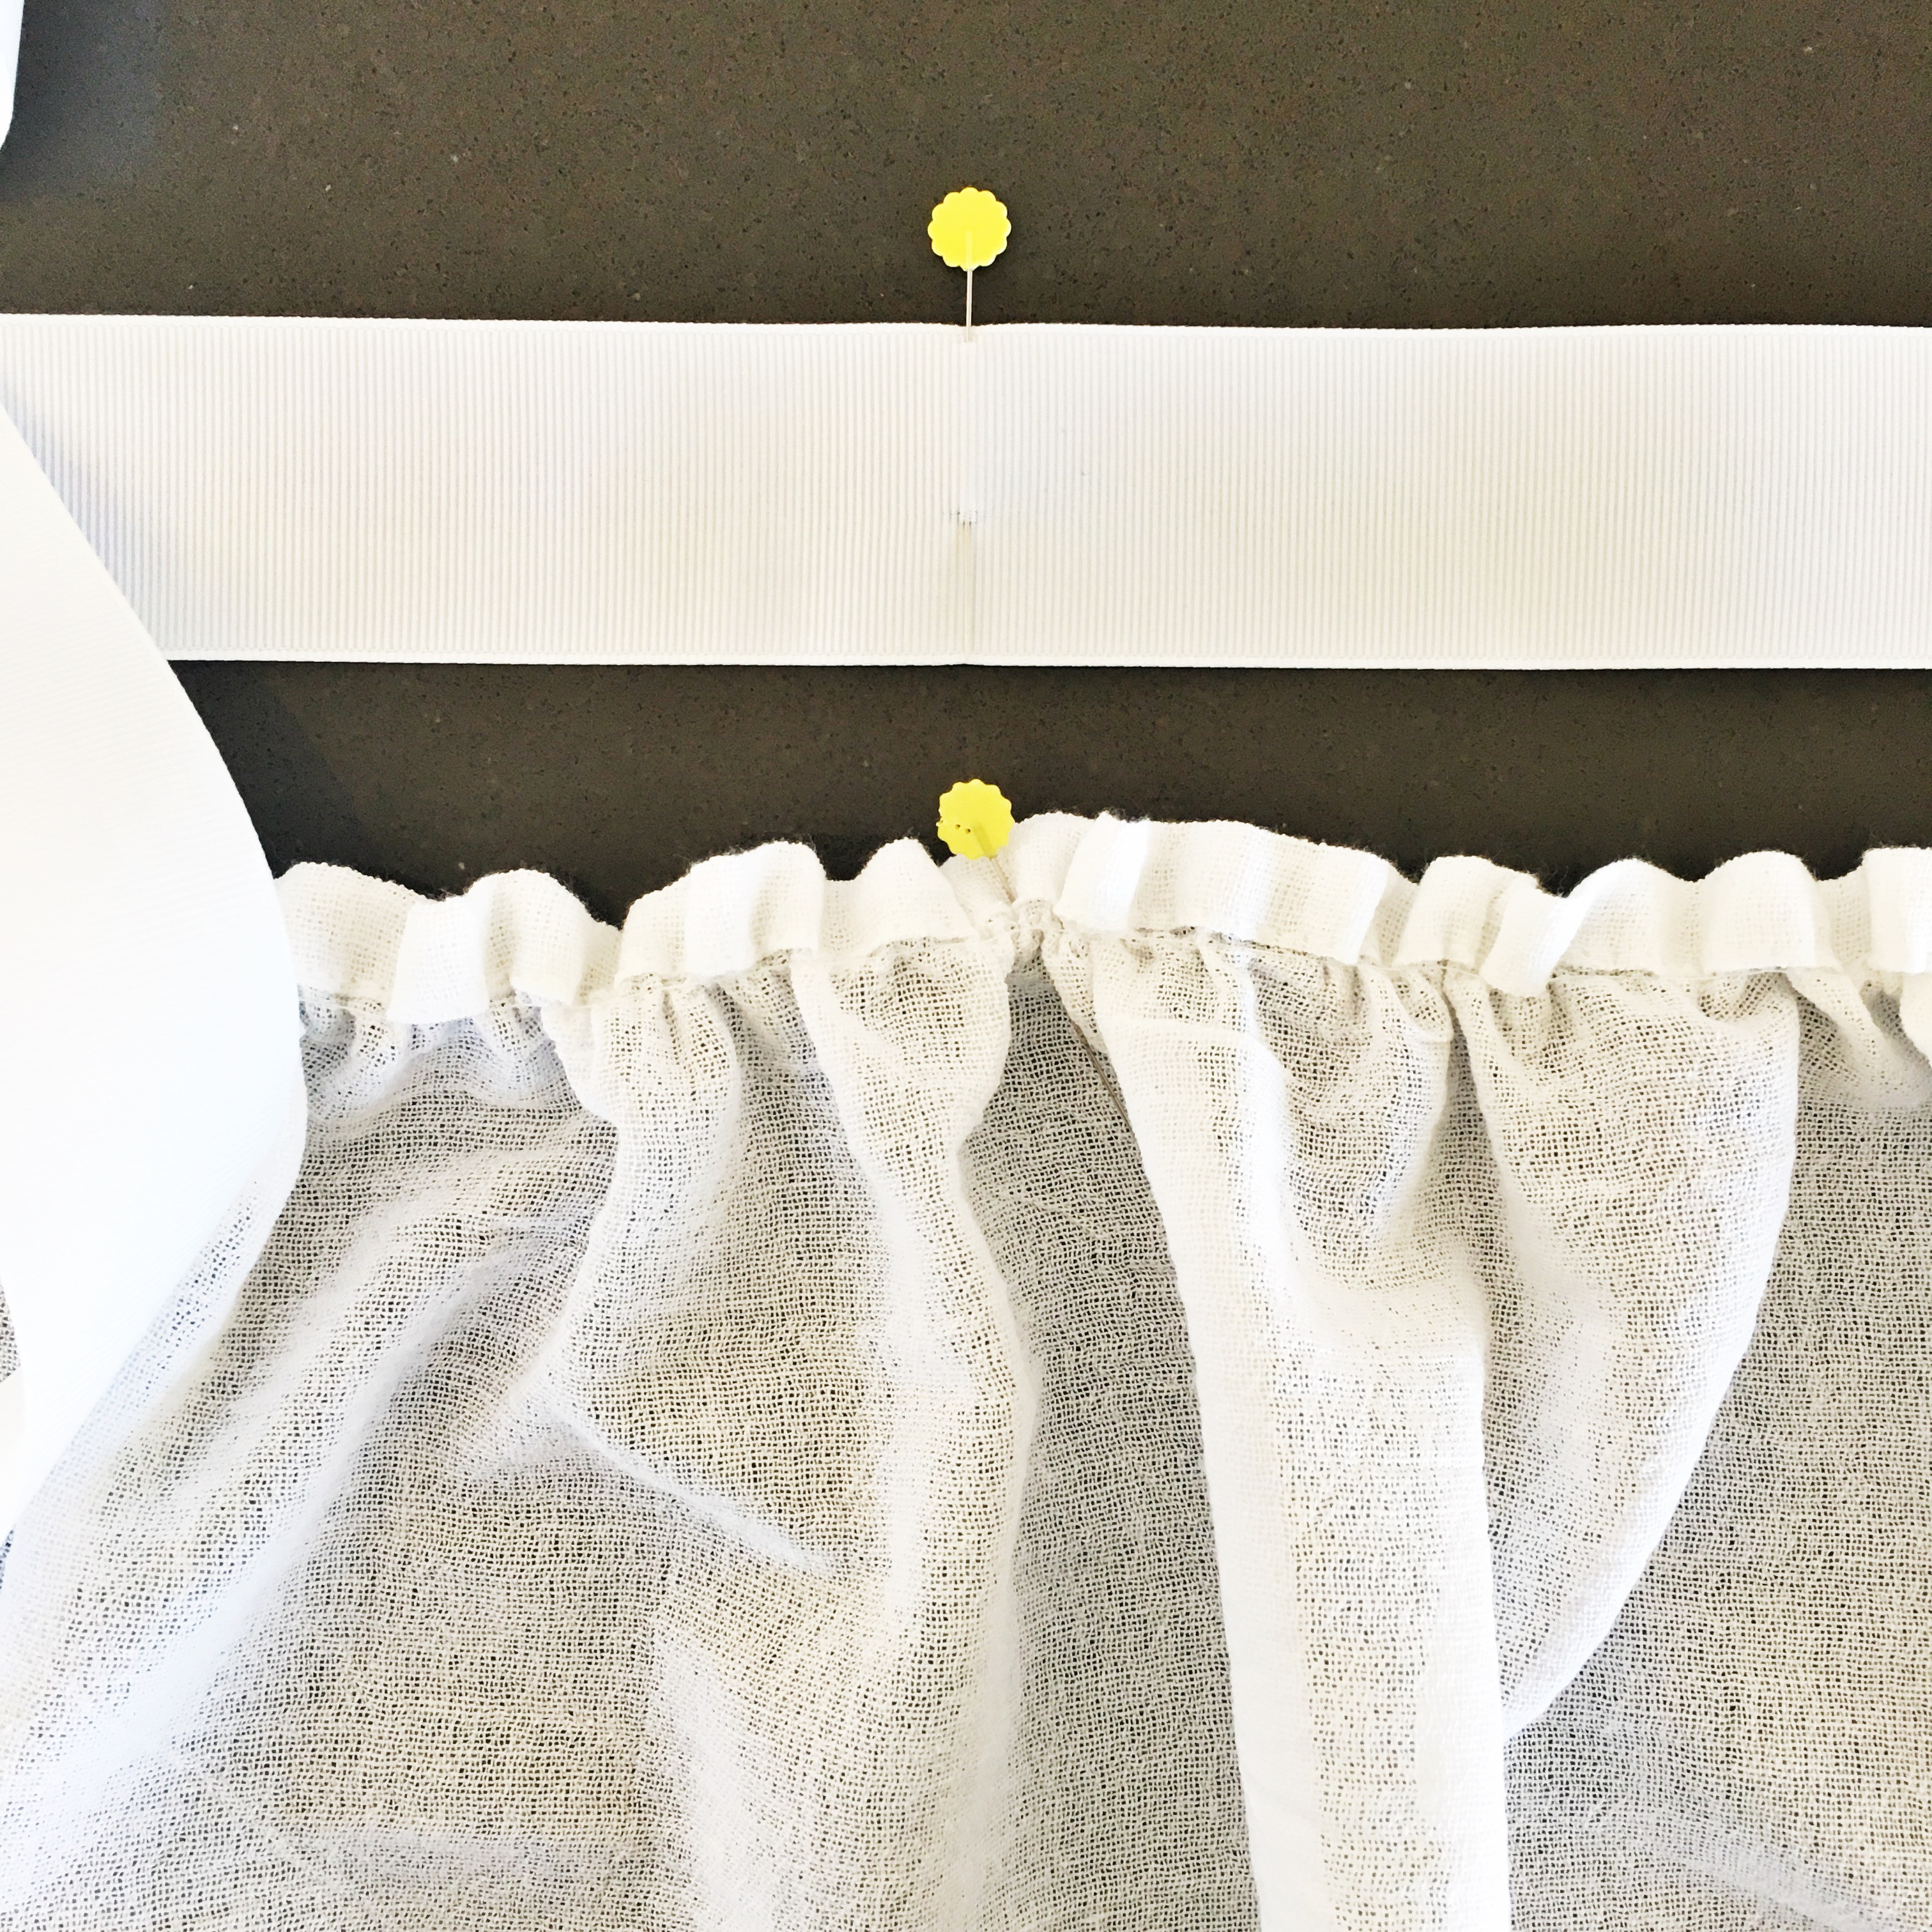
Step #5: Pin Ribbon to the Apron
Align the center pin of the ribbon with the center pin of the gathered apron top edge. Position the top edge of the ribbon just slightly above the gathered edge of the apron. Pin these center points together. Working outwards from the center, continue pinning the entire gathered edge of the apron to the ribbon. You will have excess ribbon extending beyond each side of the gathered apron top – this is intentional for the tie straps.
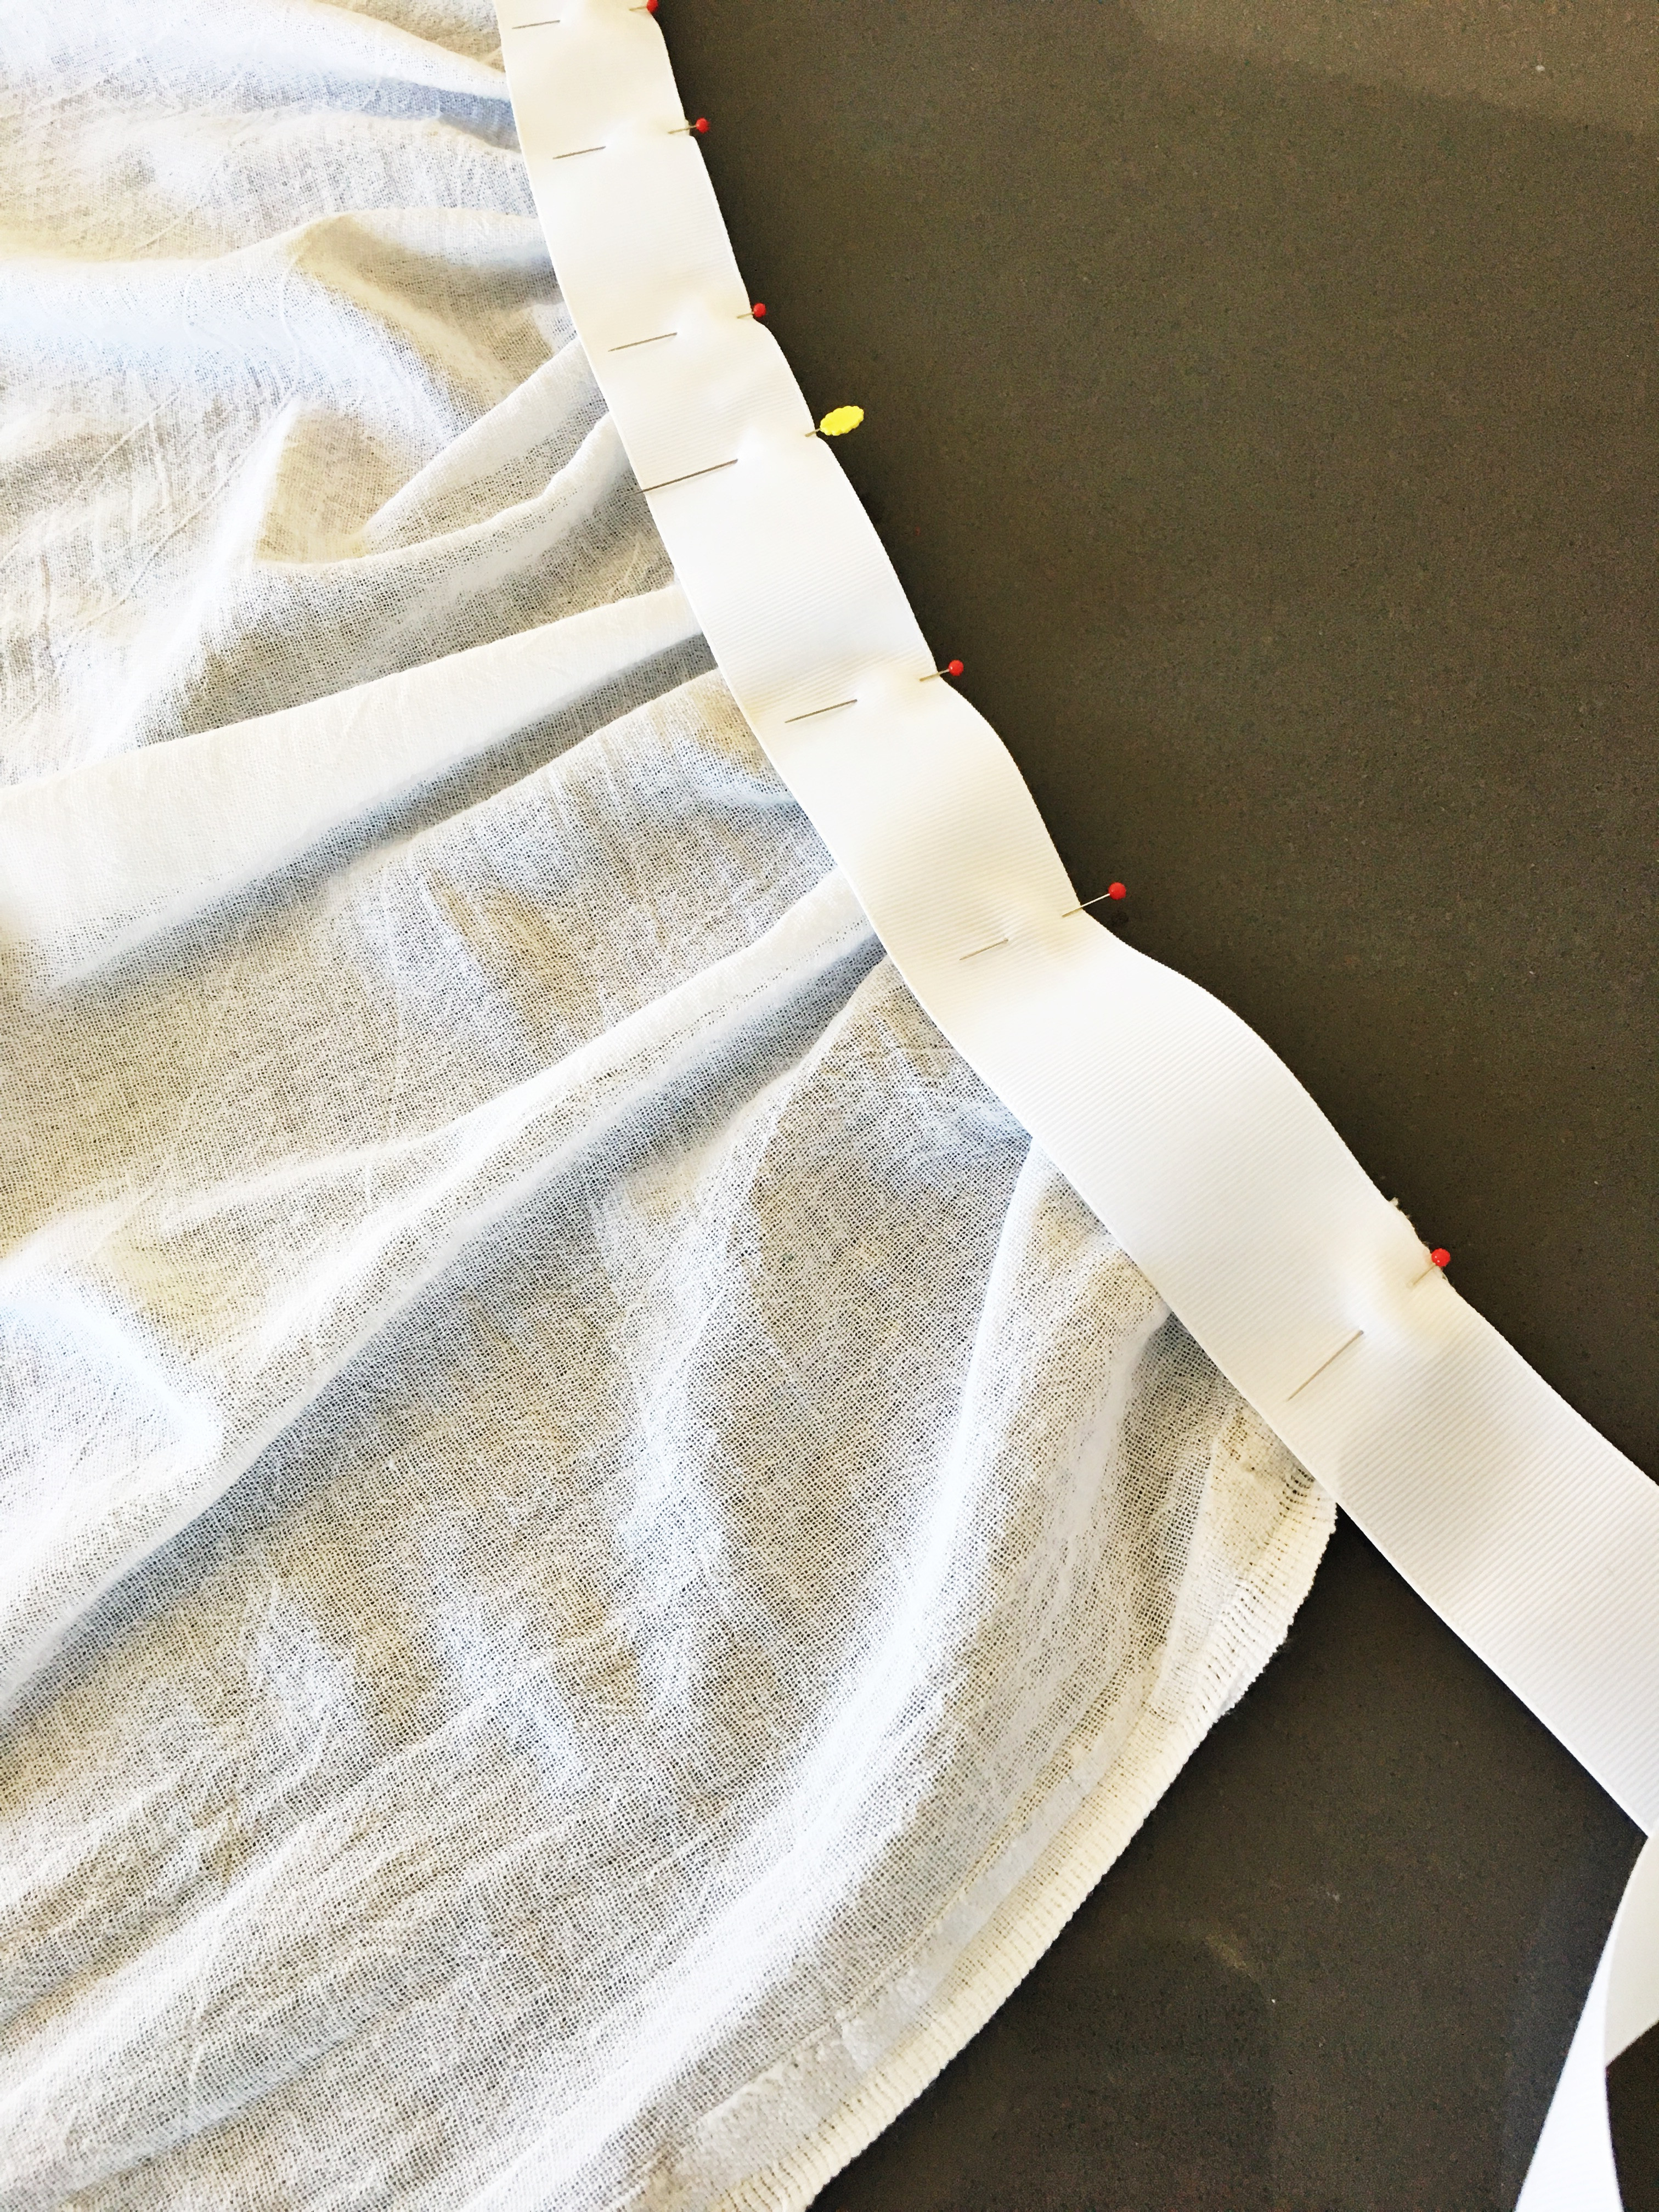 Pinning the ribbon to the gathered top of the pioneer apron for sewing
Ensure the gathers are evenly distributed along the ribbon for a balanced look.
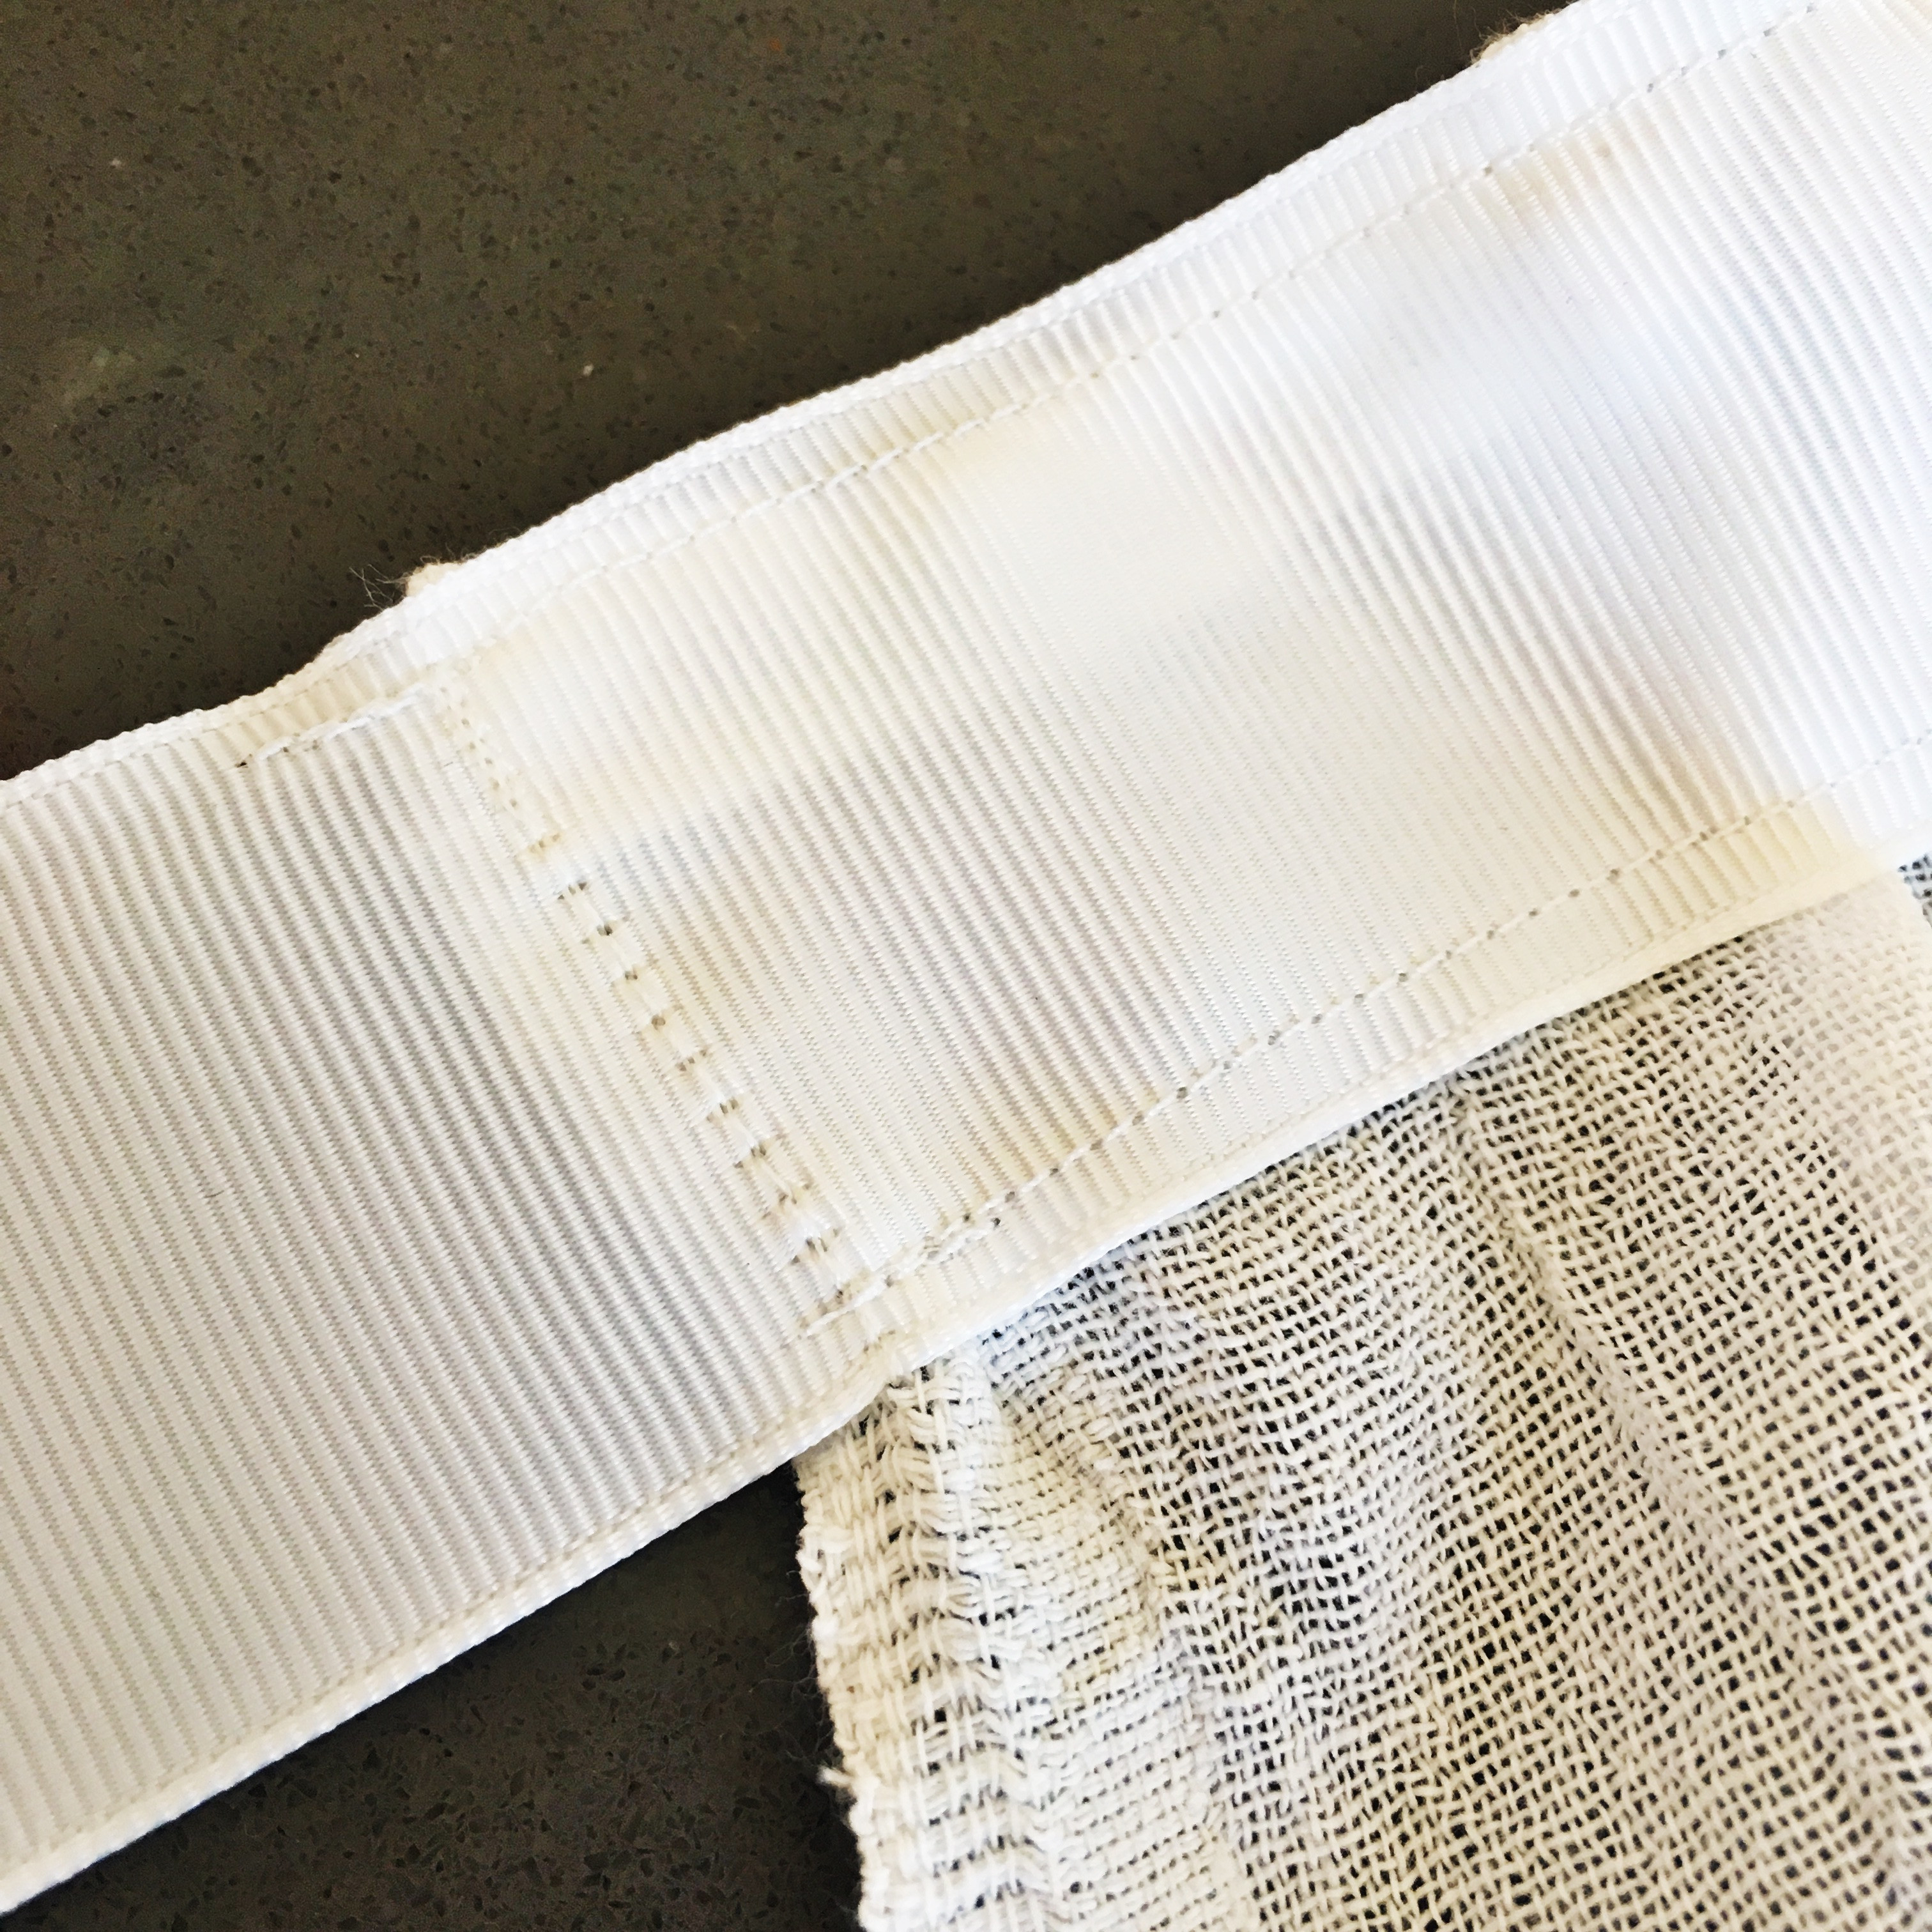
Step #6: Sew the Top Ribbon Edge
Using your sewing machine, stitch along the top edge of the ribbon, attaching it to the gathered apron top. Use a generous quarter-inch seam allowance to ensure you catch all the fabric gathers securely within your stitches.
 Sewing the top edge of the ribbon to the pioneer apron
Backstitch at the beginning and end of your seam to secure the stitches.
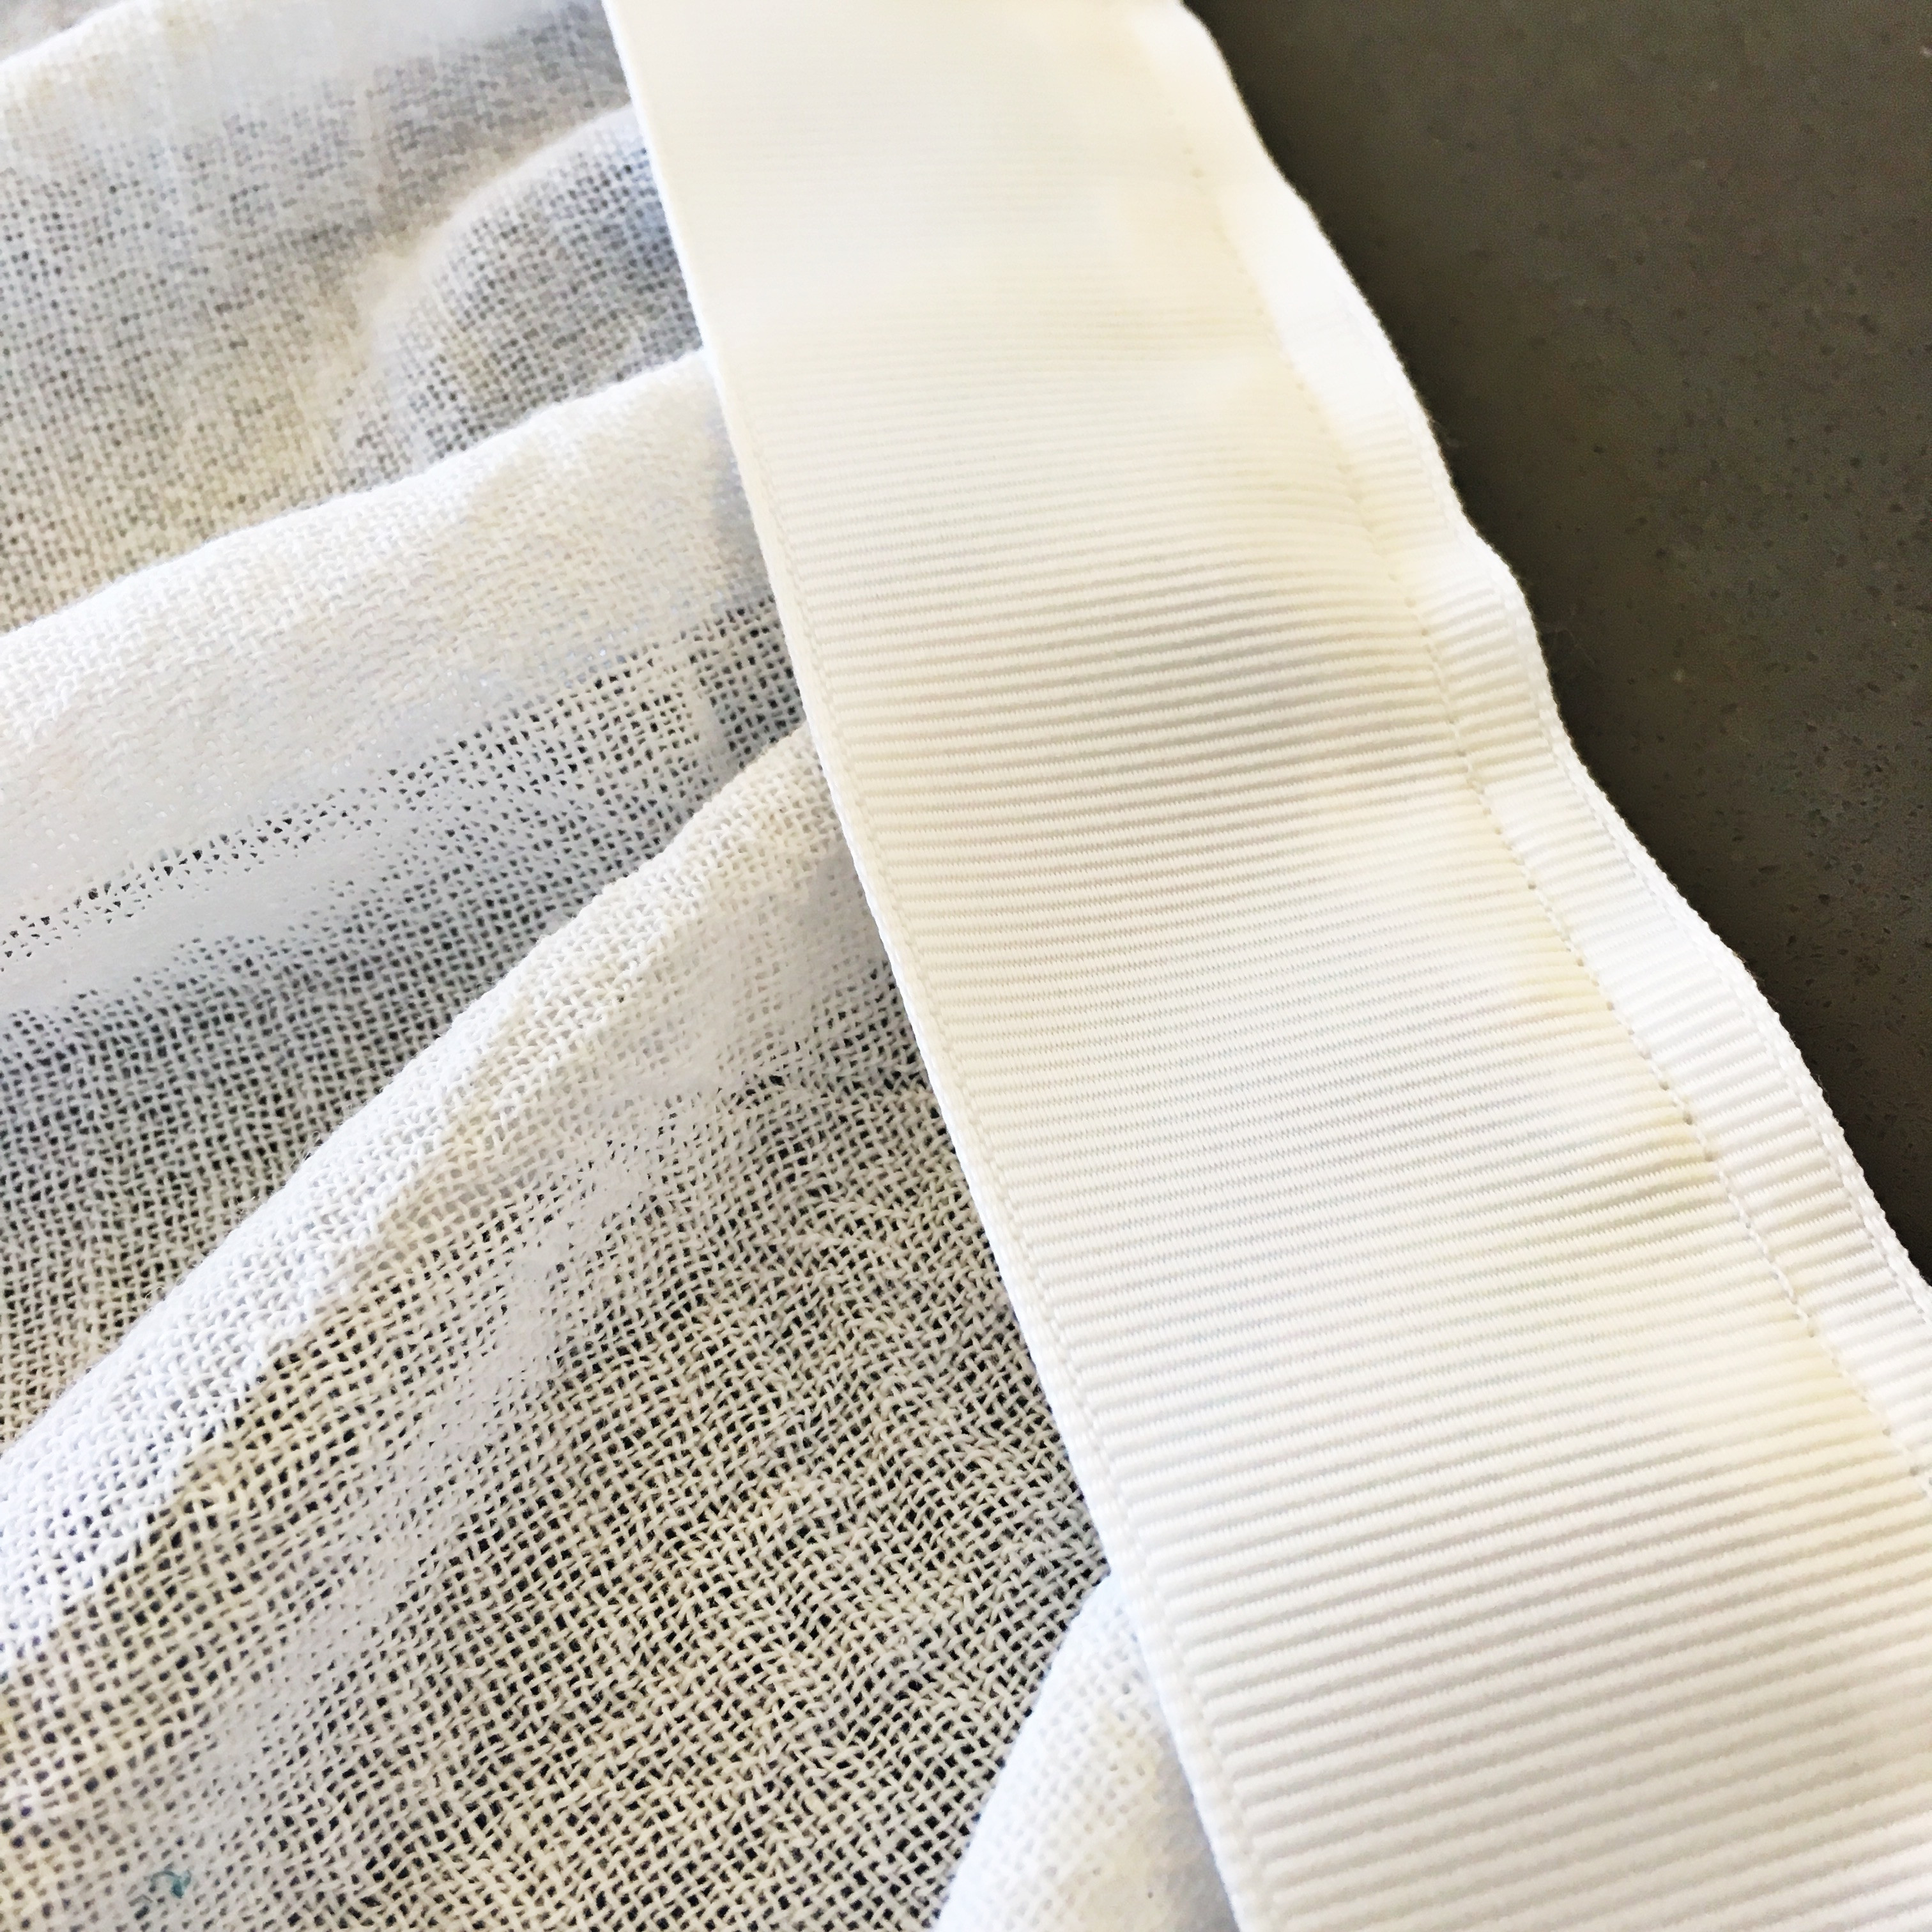
Step #7: Finish the Ribbon and Sides
Now, sew along the bottom edge of the ribbon, encasing the gathered apron top edge completely within the ribbon. Continue stitching along each side of the apron, from the top edge of the ribbon down to the bottom edge of the ribbon. This step neatly finishes the sides and secures the ribbon ties.
 Sewing the side edges of the ribbon on the pioneer apron
Again, remember to backstitch at the start and end of each seam for durability.
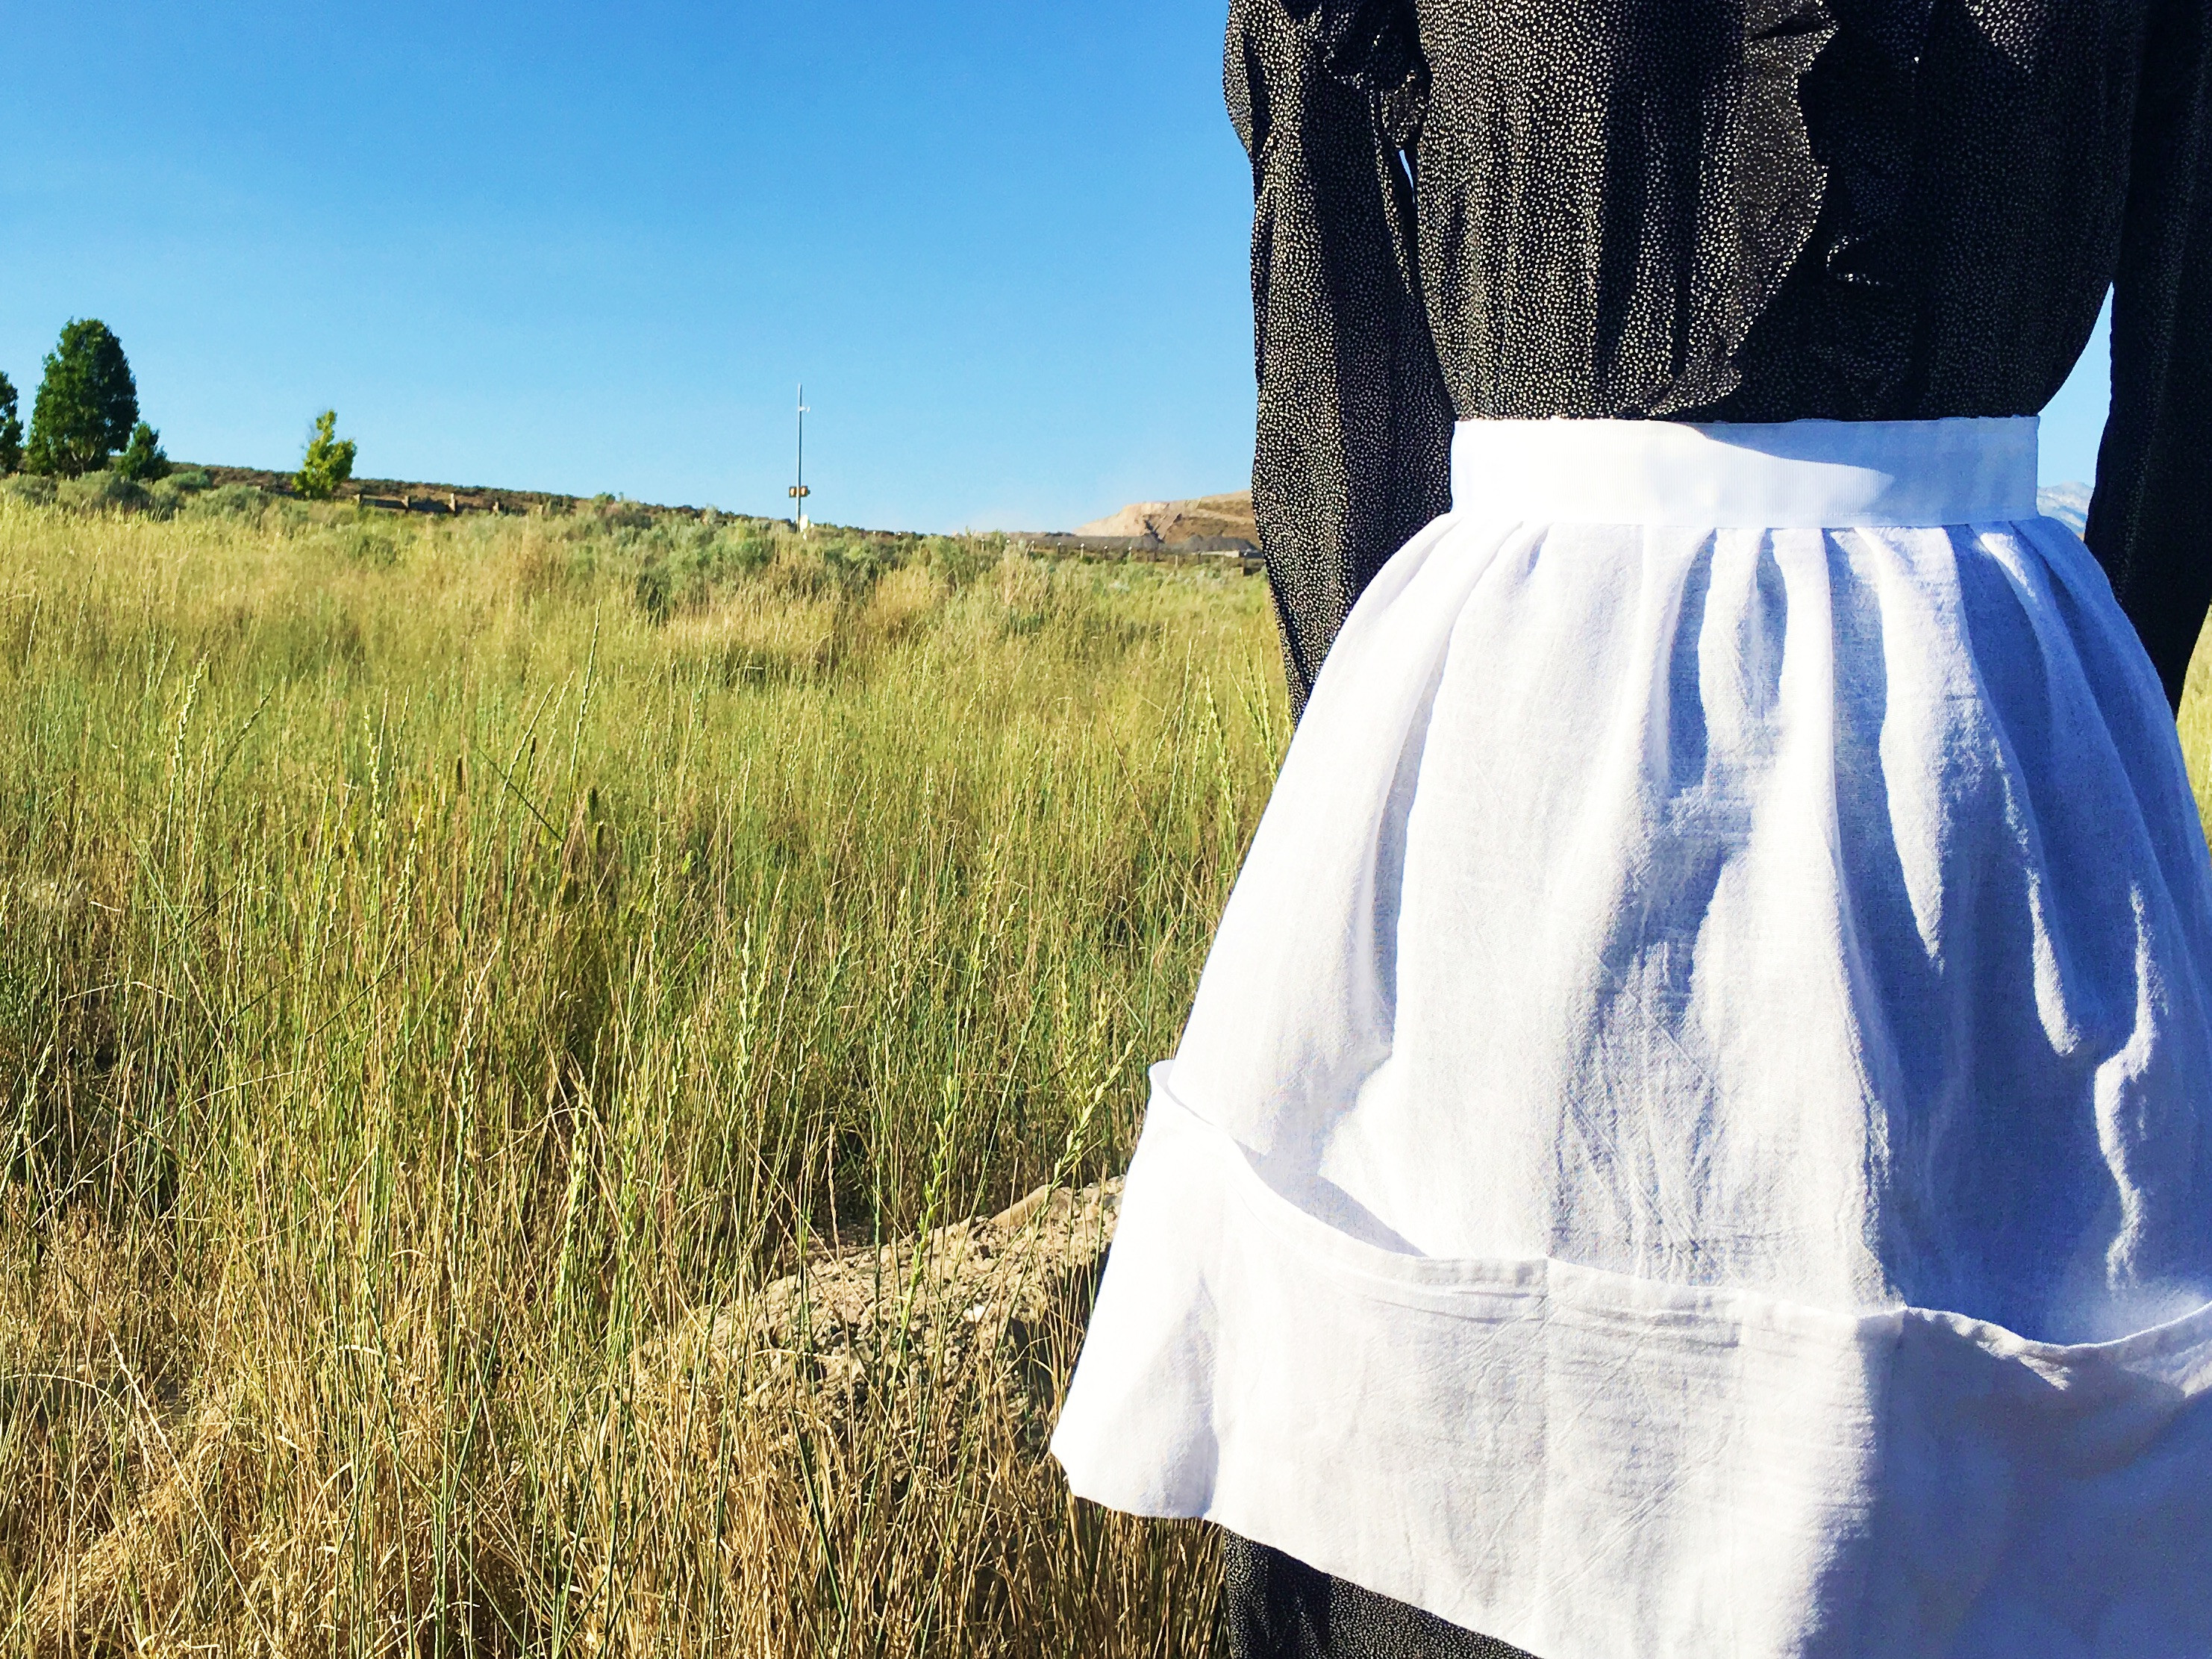
You’re Done!
Congratulations! Your charming pioneer apron is complete and ready for action!
 Close up of the pocket and ribbon detail on a finished pioneer apron
Imagine yourself ready for a prairie adventure, baking in the kitchen, or tackling any crafting project with this adorable and functional apron.
Optional Fray Check: To prevent the ribbon ends from fraying over time, apply a small amount of fray check to each end. Alternatively, you can neatly fold the ribbon ends under twice and stitch them to create a clean, finished edge.
Enjoy your new handmade pioneer apron – a perfect blend of historical inspiration and practical design!
