
Westerns and the captivating history of the Wild West have always held a special place in my heart. For years, the idea of designing my own Pioneer Bonnet pattern has been simmering, and I finally dedicated time to bring this vision to life. The result? A bonnet pattern I’m thrilled to share, blending simplicity with versatile style options.
My primary goal for this pioneer bonnet project was accessibility. I wanted to create a sewing pattern that even beginners could confidently tackle and complete. Starting with a foundational, easy-to-sew bonnet style, the project naturally evolved as I explored various design elements and stylistic choices, adding layers of customization for those wanting to expand their sewing skills.
Exploring Brim Styles for Your Pioneer Bonnet
The brim is a defining feature of any bonnet, and the pioneer bonnet is no exception. I experimented with several brim shapes to offer a range of looks and functionalities in the final pattern.
The Classic Rectangular Brim
Initially, I opted for a simple rectangular brim with gently curved ends. This design provided exactly the aesthetic I envisioned: clean, straightforward, and undeniably classic. This is the quintessential pioneer bonnet brim – functional and timeless.
Adding a Ruffled Brim Edge
Never one to resist a touch of frill, I then explored adding a gathered ruffle trim to the brim’s edge. This involved creating a simple fabric rectangle, folding it, gathering it, and attaching it to the brim. The result was utterly charming, injecting a delightful, feminine touch to the bonnet.
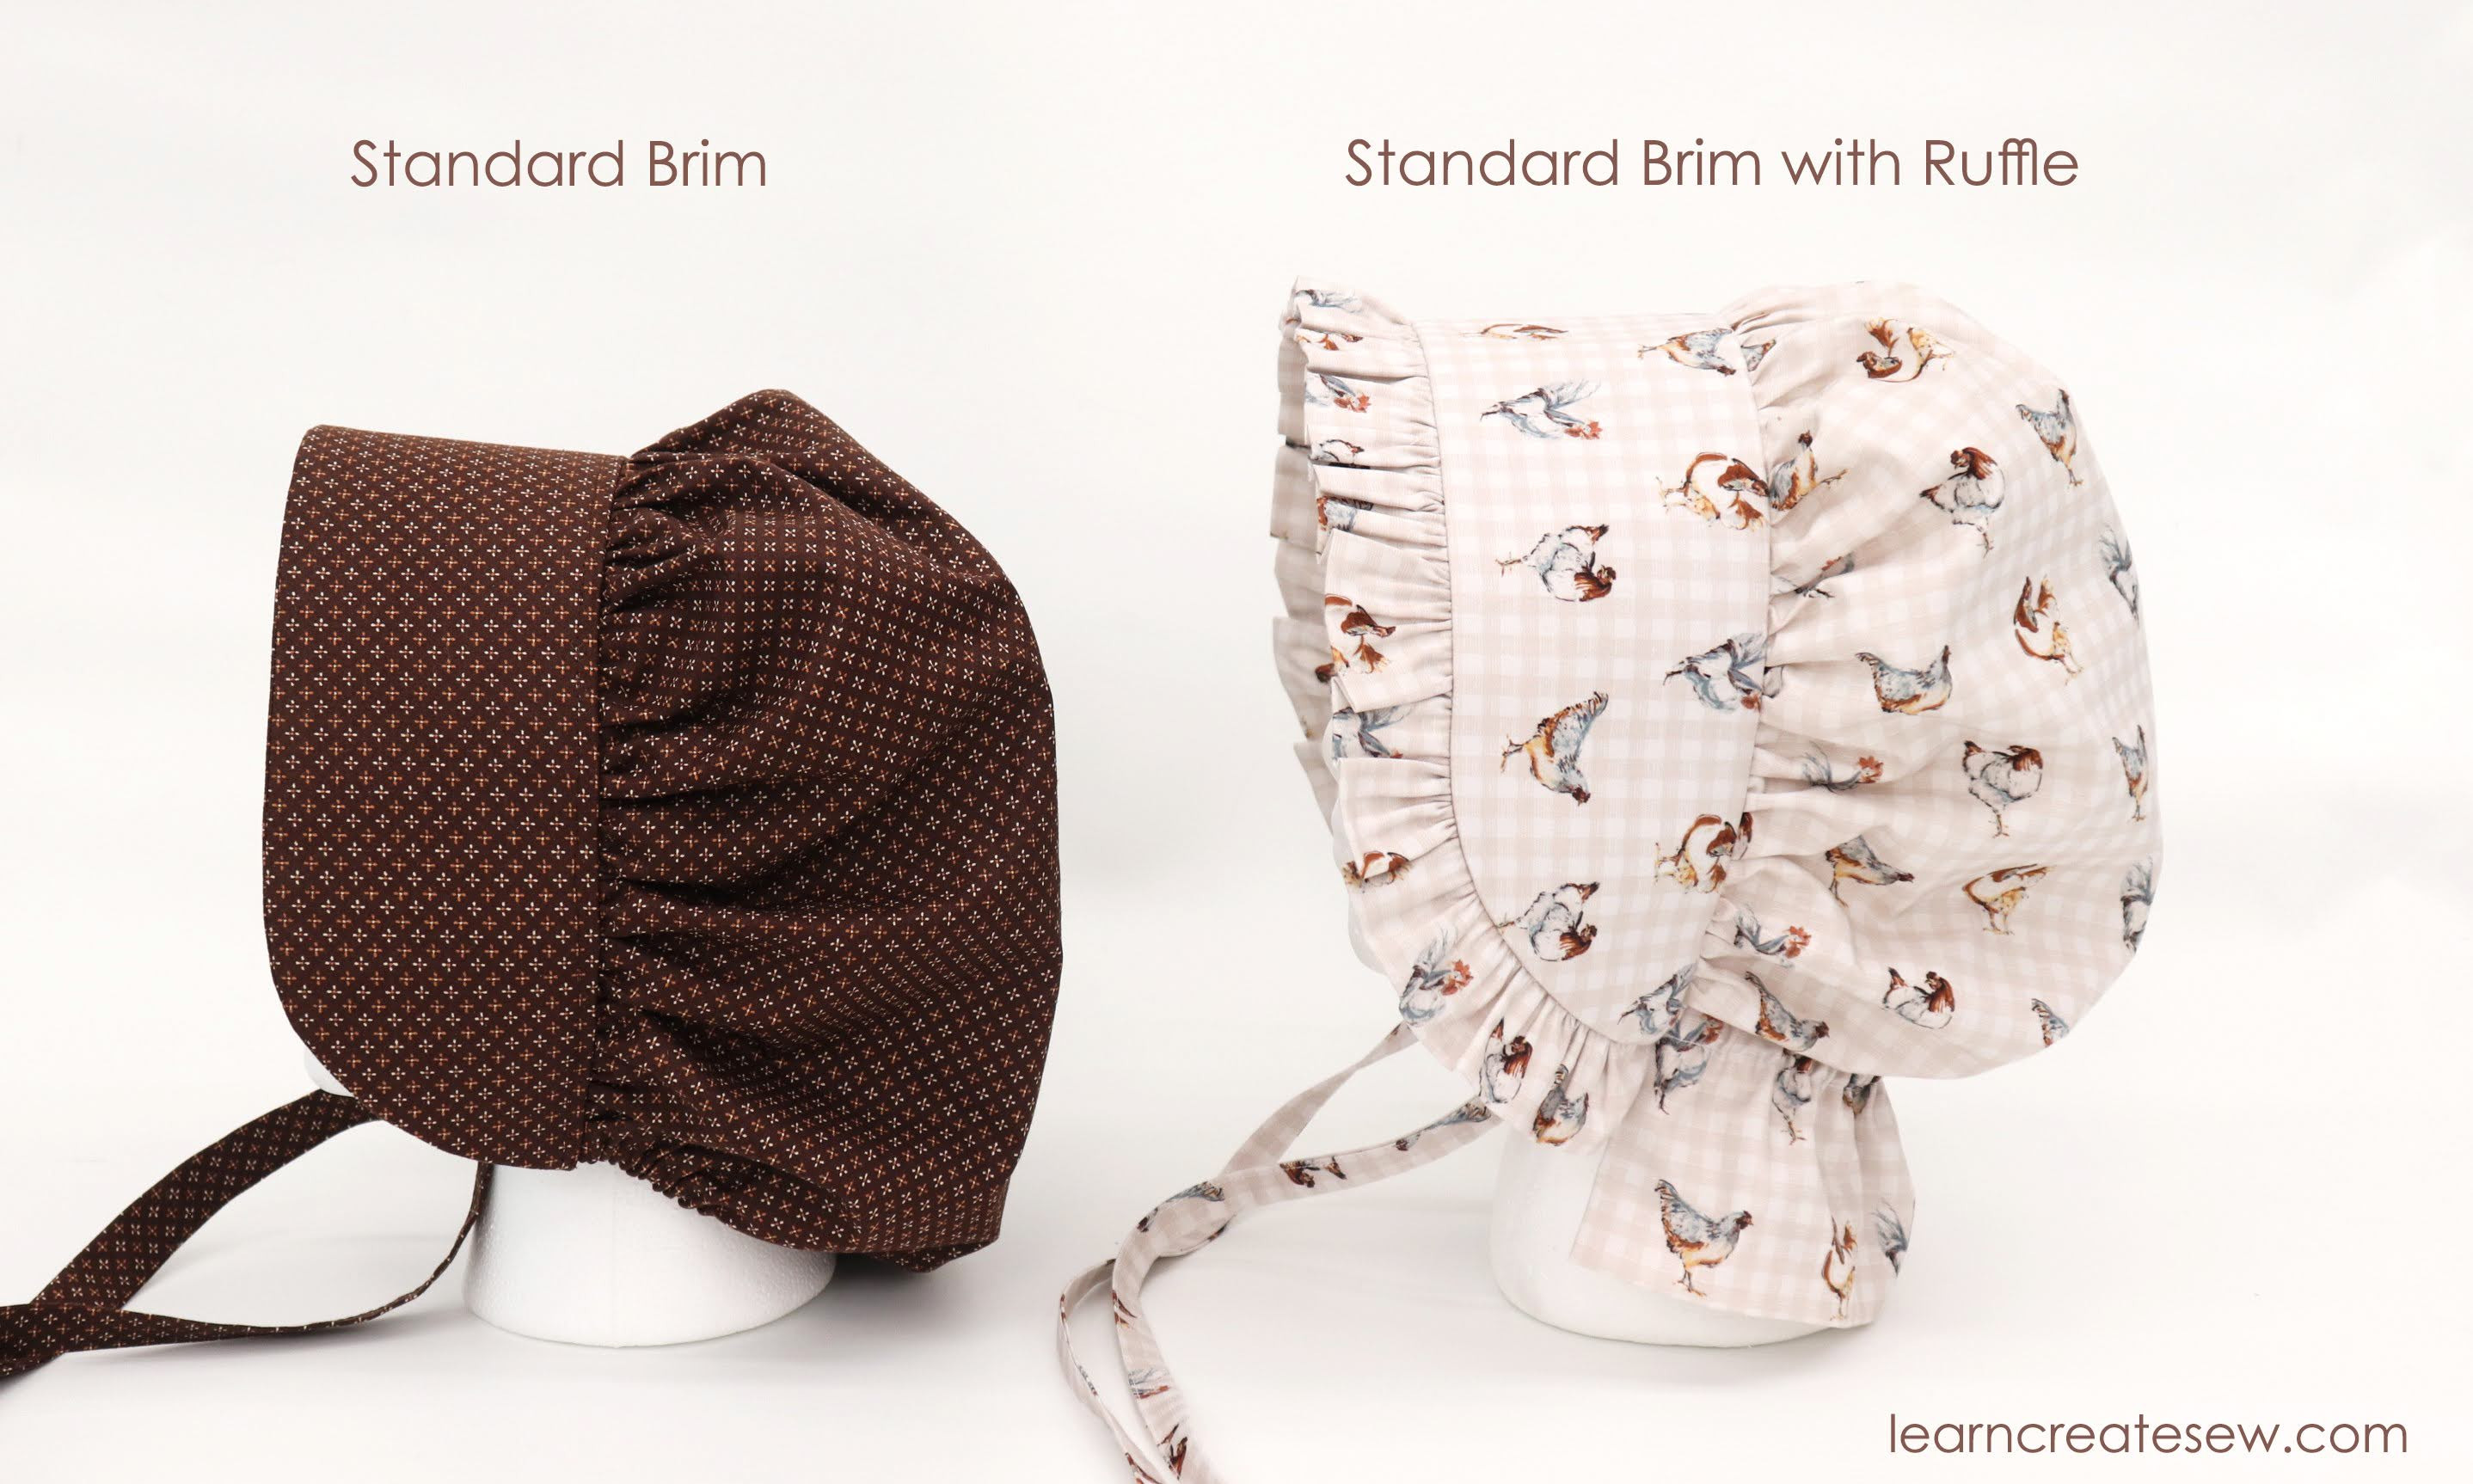
While the ruffled trim elevates the bonnet’s style, it does slightly increase the sewing complexity. Gathering fabric can be a skill that new sewers find challenging. However, the added charm of the ruffle is, in my opinion, well worth the effort, adding a beautiful detail to your handmade pioneer bonnet.
The Extended Brim for a Dramatic Flair
Seeking a more dramatic silhouette, I experimented with extending the brim a few inches at the center front. This modification resulted in a more pronounced curve, creating a bonnet with a distinctly more eye-catching and stylish presence. While the extended brim does slightly reduce peripheral vision, the added visual appeal is undeniable.
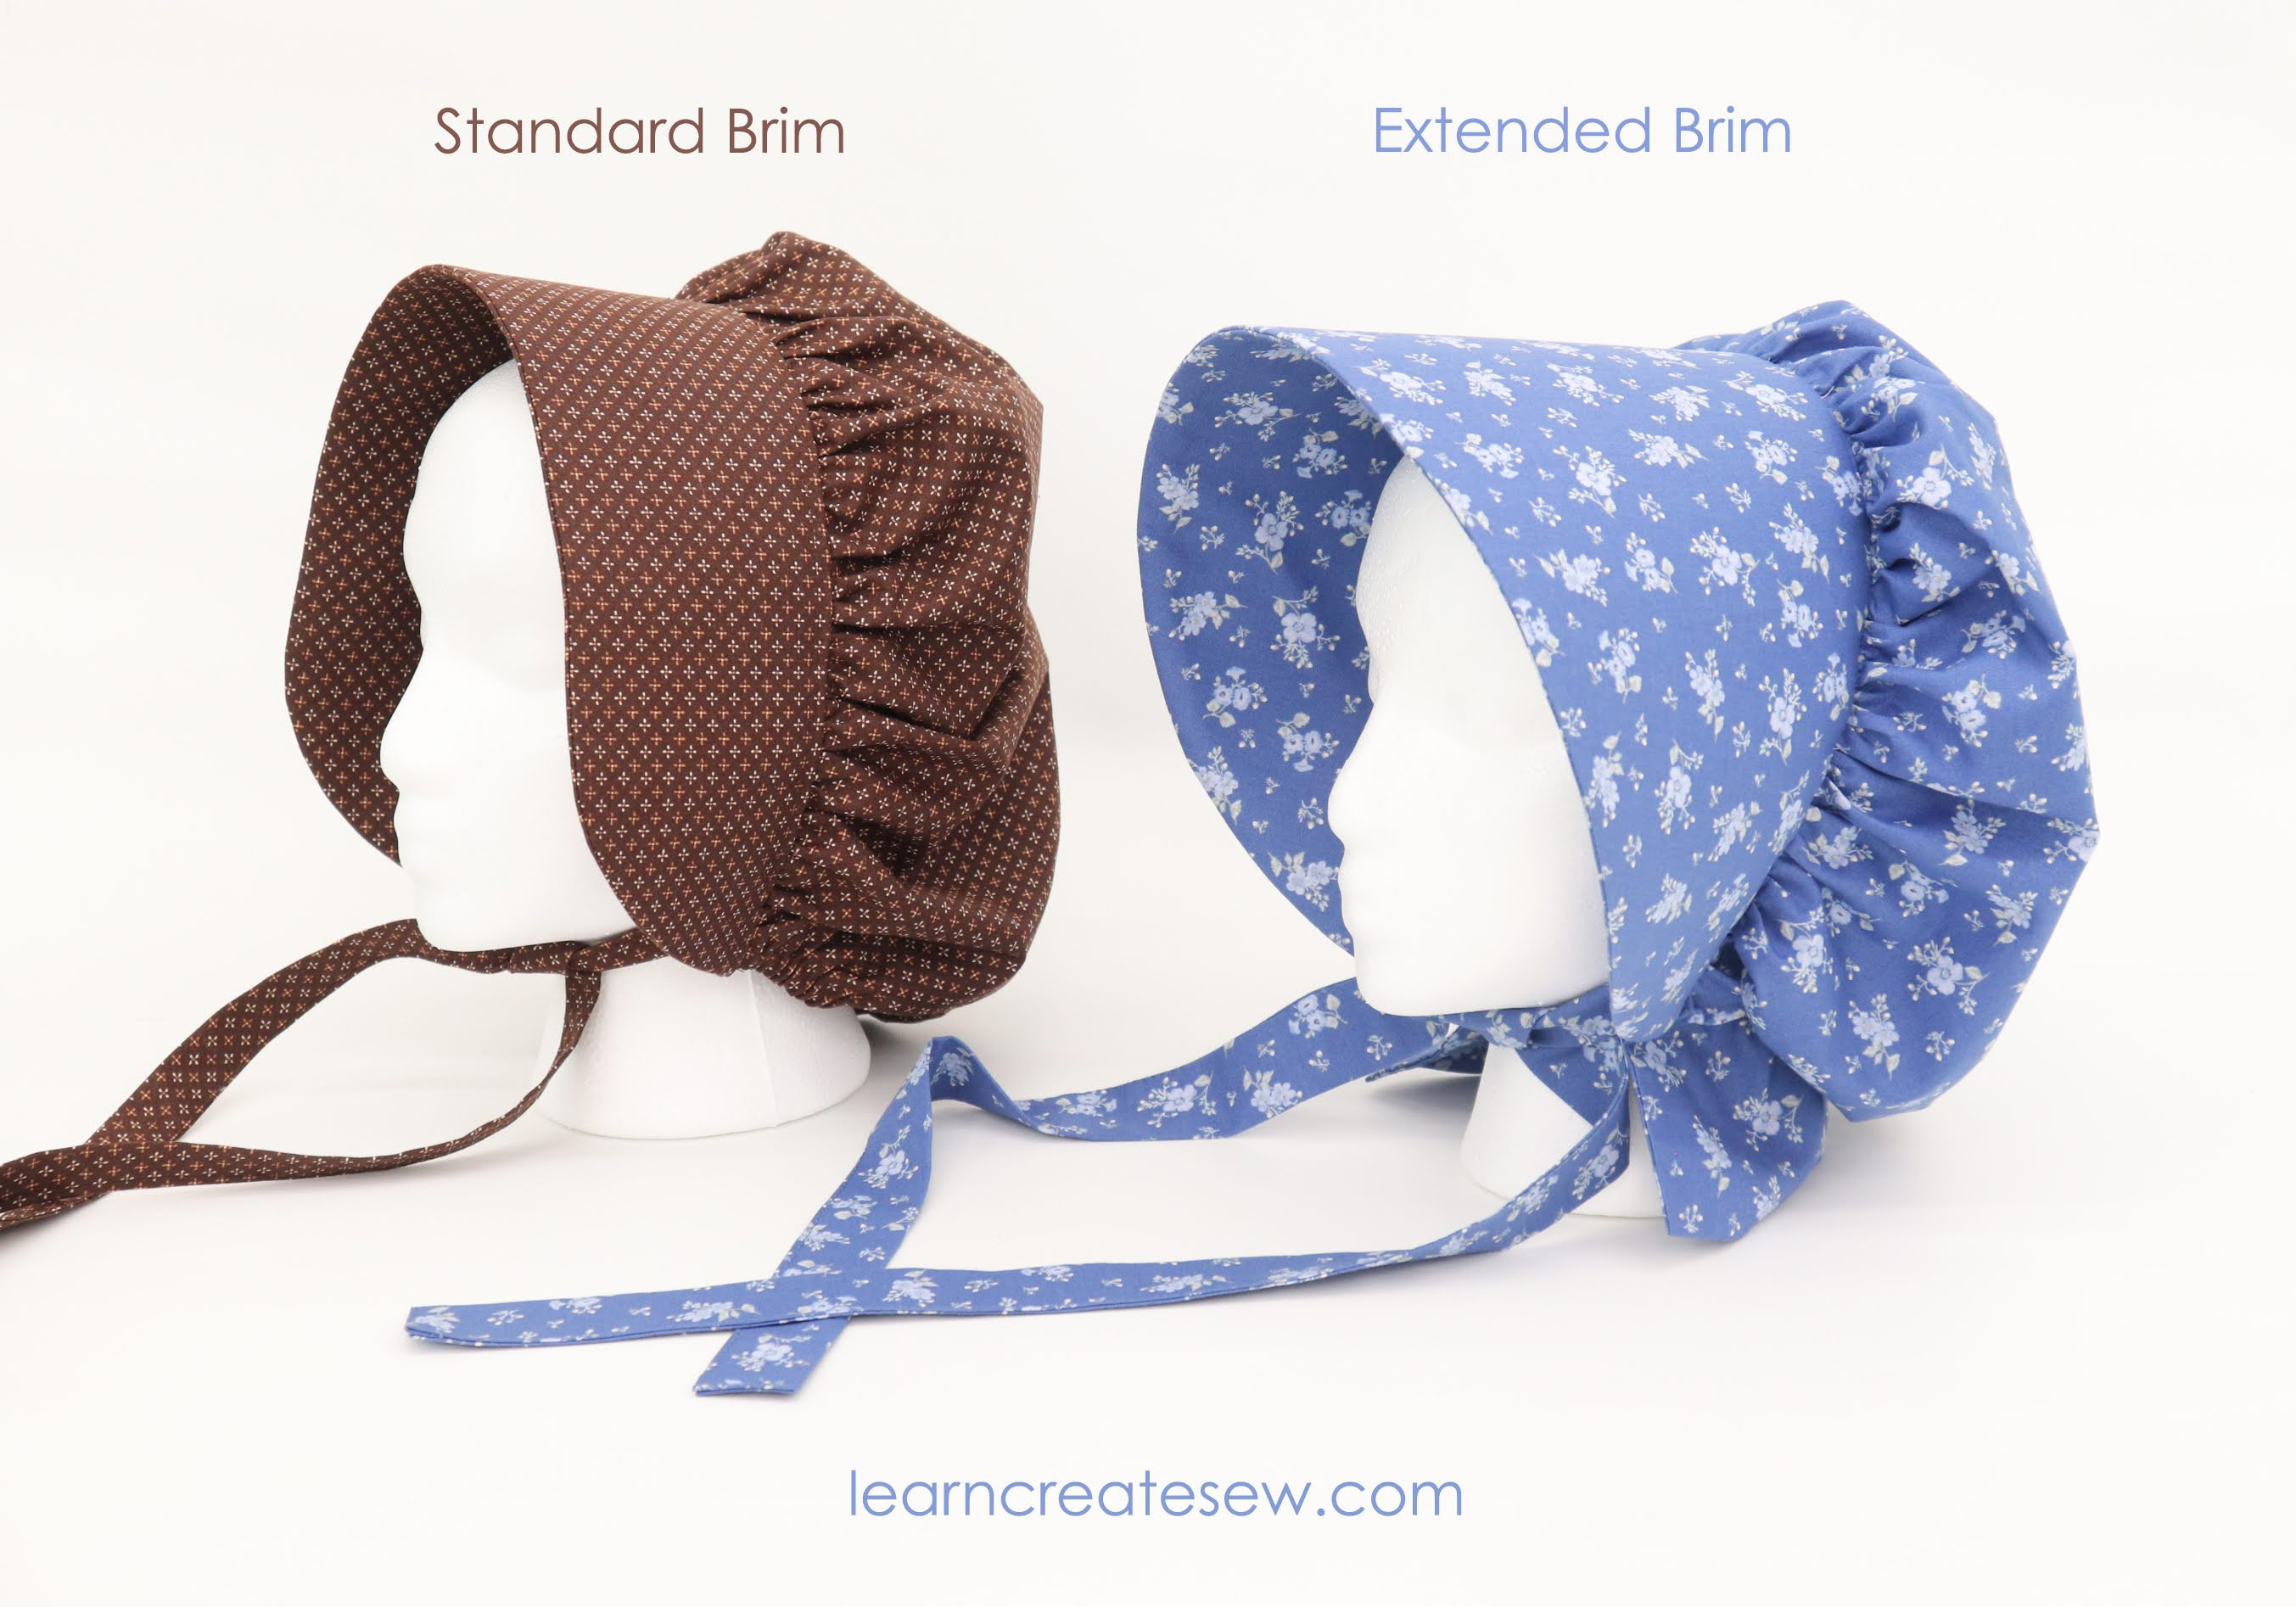
The beauty of this design is that swapping between the standard and extended brim styles doesn’t increase the pattern’s difficulty. The free pioneer bonnet pattern includes both the standard and extended brim options for every size, allowing you to easily select your preferred style.
Neck Finish Options: Elastic Casing vs. Neck Ruffles
Another key stylistic and functional element of the pioneer bonnet is the neck finish. My starting point was an elastic casing, prioritizing ease of construction for beginner sewers. However, the allure of neck ruffles, often seen in authentic historical bonnets, was too strong to ignore.
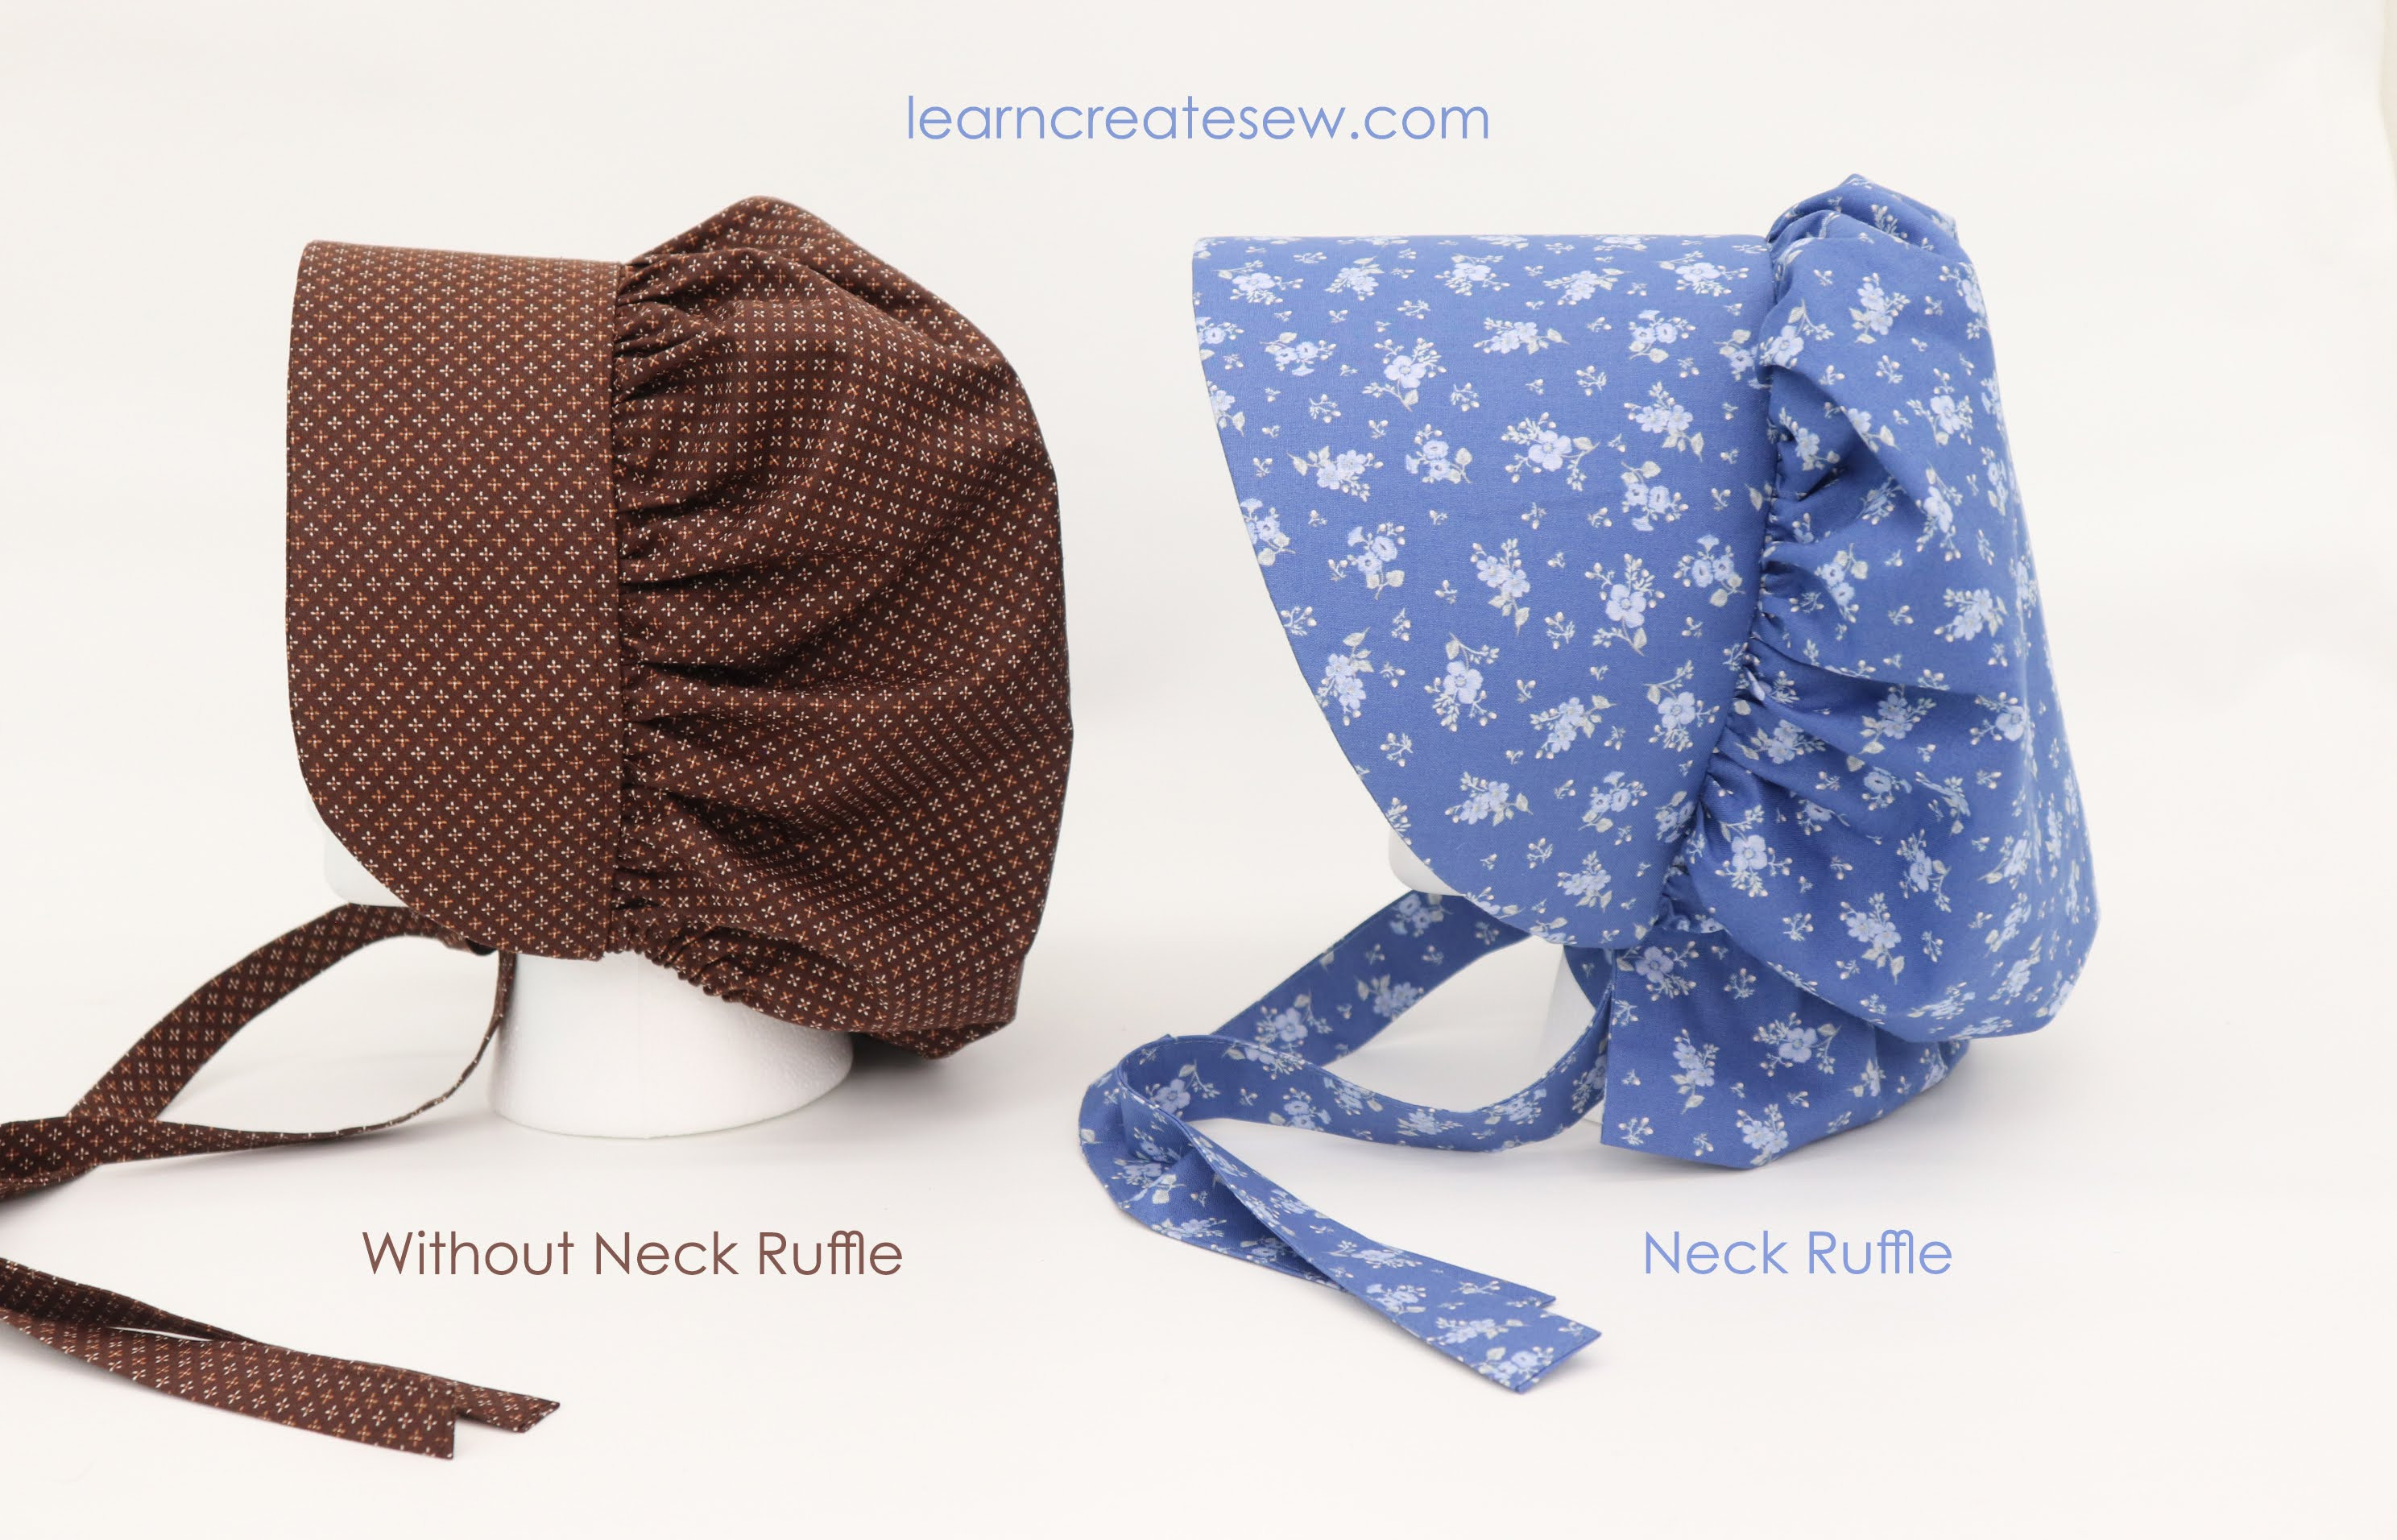
I explored incorporating neck ruffles and was delighted with both the simplicity of the elastic casing and the traditional charm of the ruffles. Consequently, the pattern includes both neck finish options, giving you the freedom to choose based on your skill level and desired aesthetic for your pioneer bonnet.
Customizing Your Pioneer Bonnet with Neck Ties
The neck ties are another area where customization can truly personalize your pioneer bonnet. I experimented with various tie widths, styles, and attachment techniques. Ribbons also offer a beautiful alternative to fabric ties.

I tested both hand-tacking the ties after the bonnet was assembled and sewing the ties directly into the brim seam. For the standard brim, I found sewing the ties into the seam to be preferable. However, for the extended brim, hand-tacking offered more control, allowing the ties to be positioned precisely to manage the larger brim shape. I personally prefer thinner ties, but wider ties can easily be substituted. The blue extended brim bonnet showcases wider ties, approximately double the width of those on the plaid ruffled bonnet, demonstrating the versatility in tie options.
Supplies for Sewing Your Pioneer Bonnet
The following supply list is tailored for the largest bonnet size; smaller sizes will require less fabric.
- 3/4 yard Cotton Fabric: Choose a breathable cotton fabric, perfect for comfort and the classic pioneer look.
- 10 inches of 1/4-inch wide Elastic: For the elastic casing neck finish.
- 2/3 yard Medium weight fusible interfacing: Provides structure to the bonnet.
- Coordinating Thread: Match your thread to your chosen fabric for a professional finish.
- Optional Brim Stabilizers: While not essential, stabilizers are highly recommended, especially for extended or ruffled brims, to give them more structure and shape. Consider options like Duck Canvas or heavy-weight fabric, Fusible Web, Medium-weight fusible interfacing, and/or sew-through buckram. The amount needed will depend on the fabric width, but 2/3 yards or less of each should be ample. Use the stabilizer pattern pieces as your guide. Stabilizers are used in addition to the interfacing mentioned above. My preferred stabilizer combination for a robust brim is:
- 1 layer Duck Canvas
- 1 layer Fusible Web (I used Heat n Bond Lite)
- 1 layer Medium Weight Fusible Interfacing (I used Pellon’s SF101)
Download the Free Pioneer Bonnet Pattern
Ready to start sewing your own pioneer bonnet? Download the free pattern in various sizes using the links below:
Cut Layout Easy Bonnet
Easy Bonnet Pattern SMALL
Easy Bonnet Pattern MEDIUM
Easy Bonnet Pattern LARGE
Easy Bonnet Pattern X-LARGE
Video Sewing Instructions
For visual learners, video instructions are available to guide you through each step of sewing your pioneer bonnet. (Link to video instructions would be added here)
Now, the delightful dilemma… what to do with the numerous bonnets created while perfecting this pattern? My collection has grown to a considerable dozen! Perhaps a bonnet for every day of the week, or maybe they are perfect for gifting! Happy sewing!