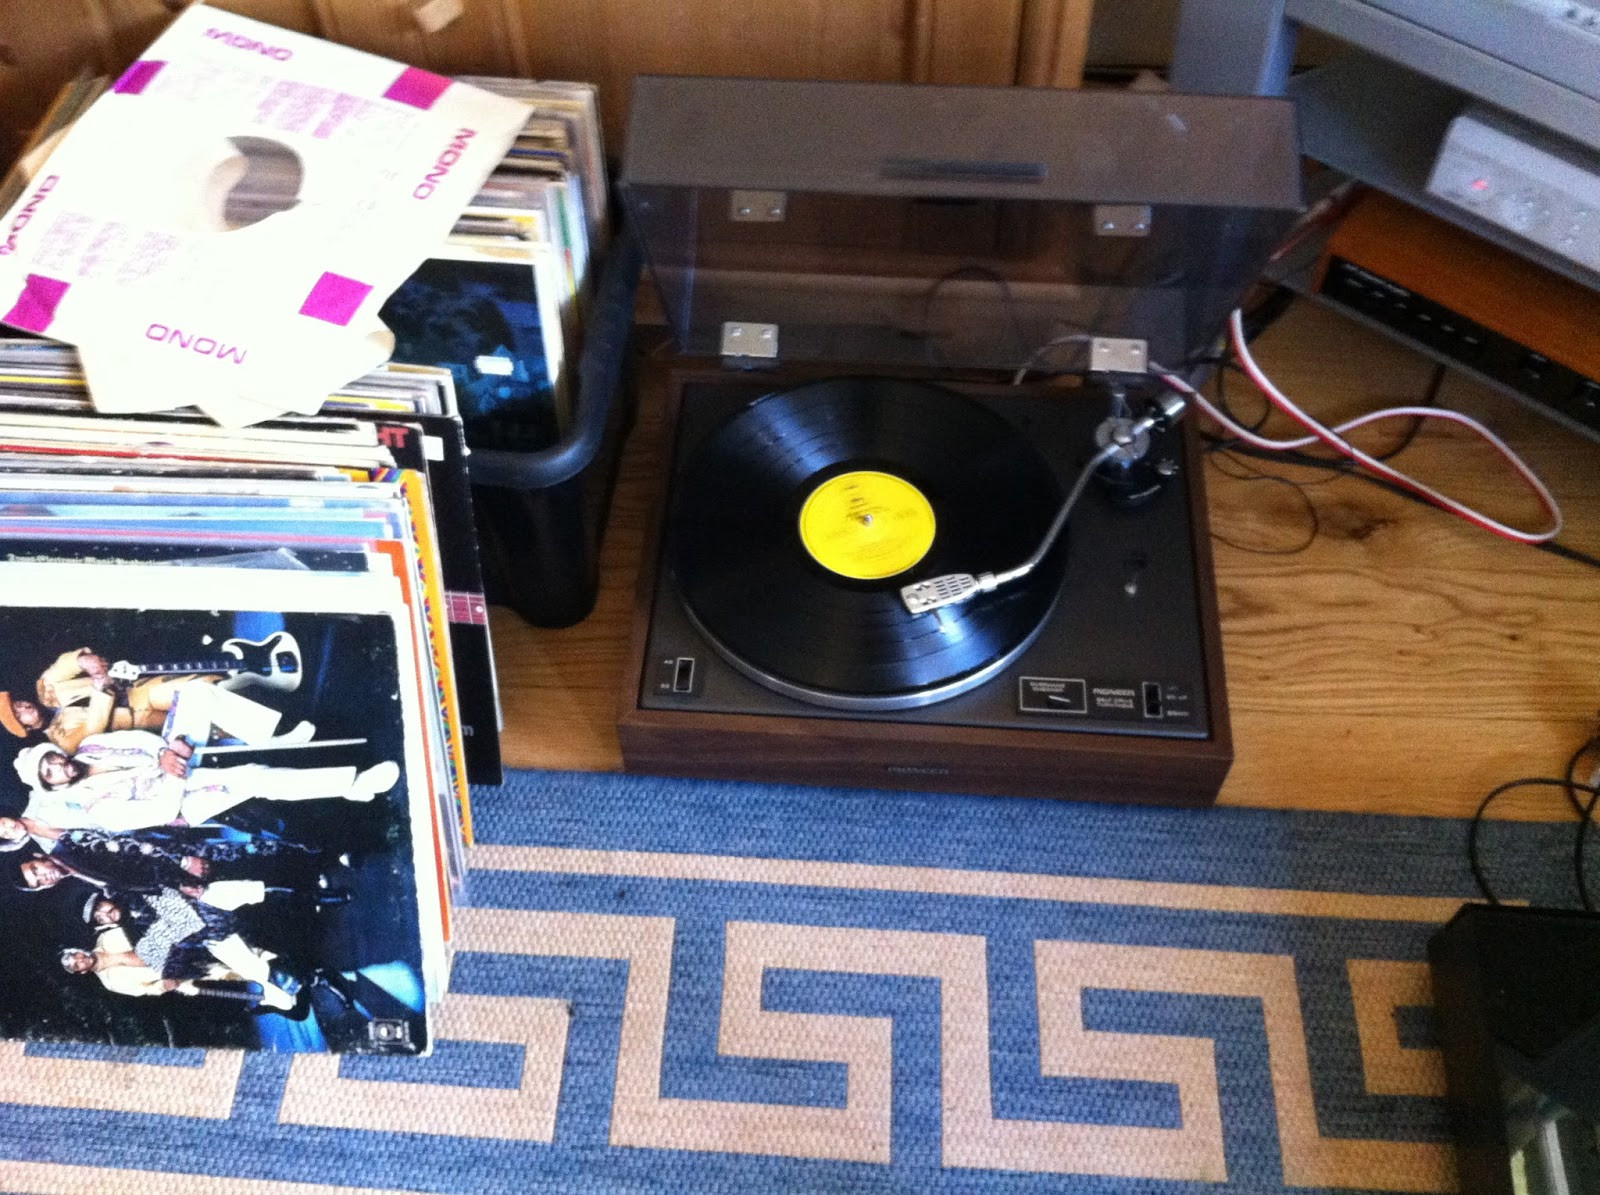
Like many vinyl enthusiasts, I rediscovered the joys of record collecting about 18 months ago. Since then, my collection has grown to a few hundred albums, mostly sourced second-hand. To play these treasures, I’ve also acquired a small fleet of vintage turntables, including a NAD 5120, an Ariston QDeck, and a Pioneer PL-12D, all also pre-loved. Some I keep, others find new homes with friends, and those beyond repair are salvaged for parts. Almost all have needed some level of TLC to get them spinning smoothly again. Just last week, I was fortunate enough to receive a Pioneer PL-12D turntable through Freecycle. The previous owner mentioned she had also obtained it via Freecycle, replaced the belt, but struggled with its “springiness” and opted for a modern USB turntable instead. Having worked on a PL-12D before, I understood exactly what she meant about the suspension system.
While this post is specifically about the Pioneer PL-12D, many of the techniques and concepts discussed are applicable to other turntables from the same era. Many Japanese belt-drive decks from the 1970s share similar construction principles, so this guide may be helpful even if you don’t own a PL-12D.
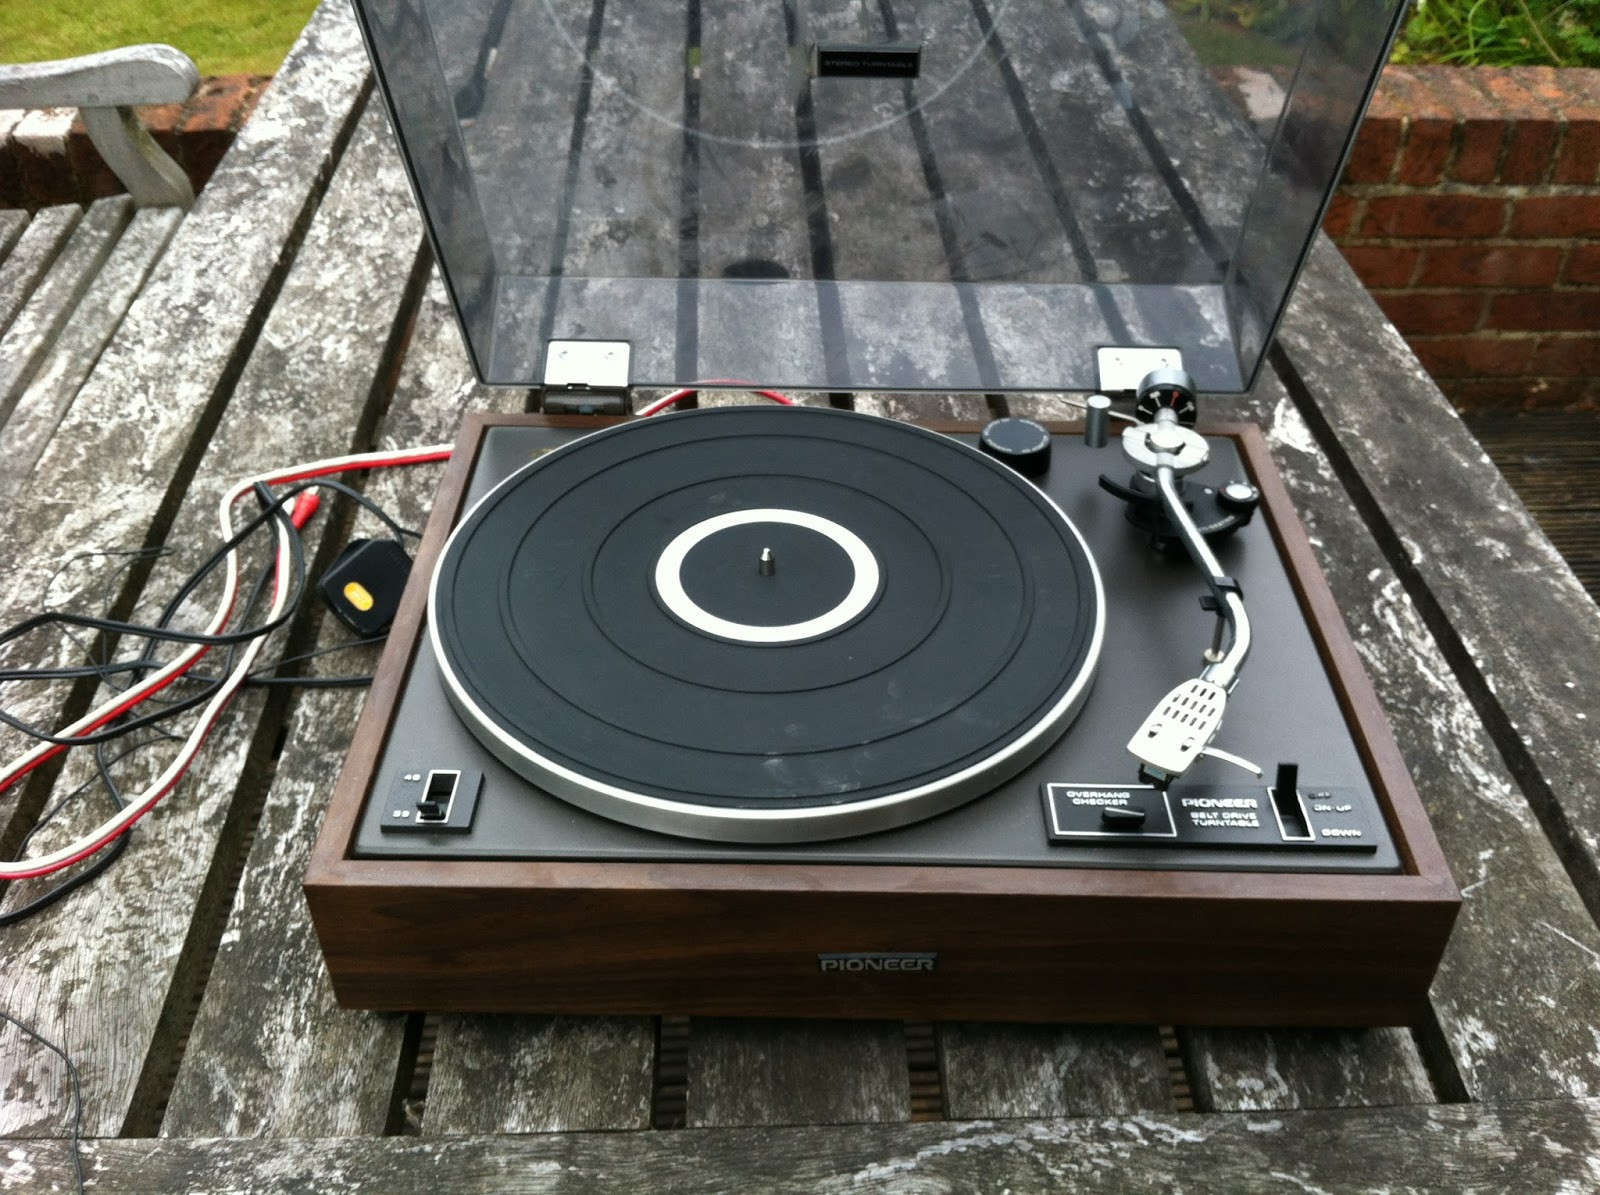
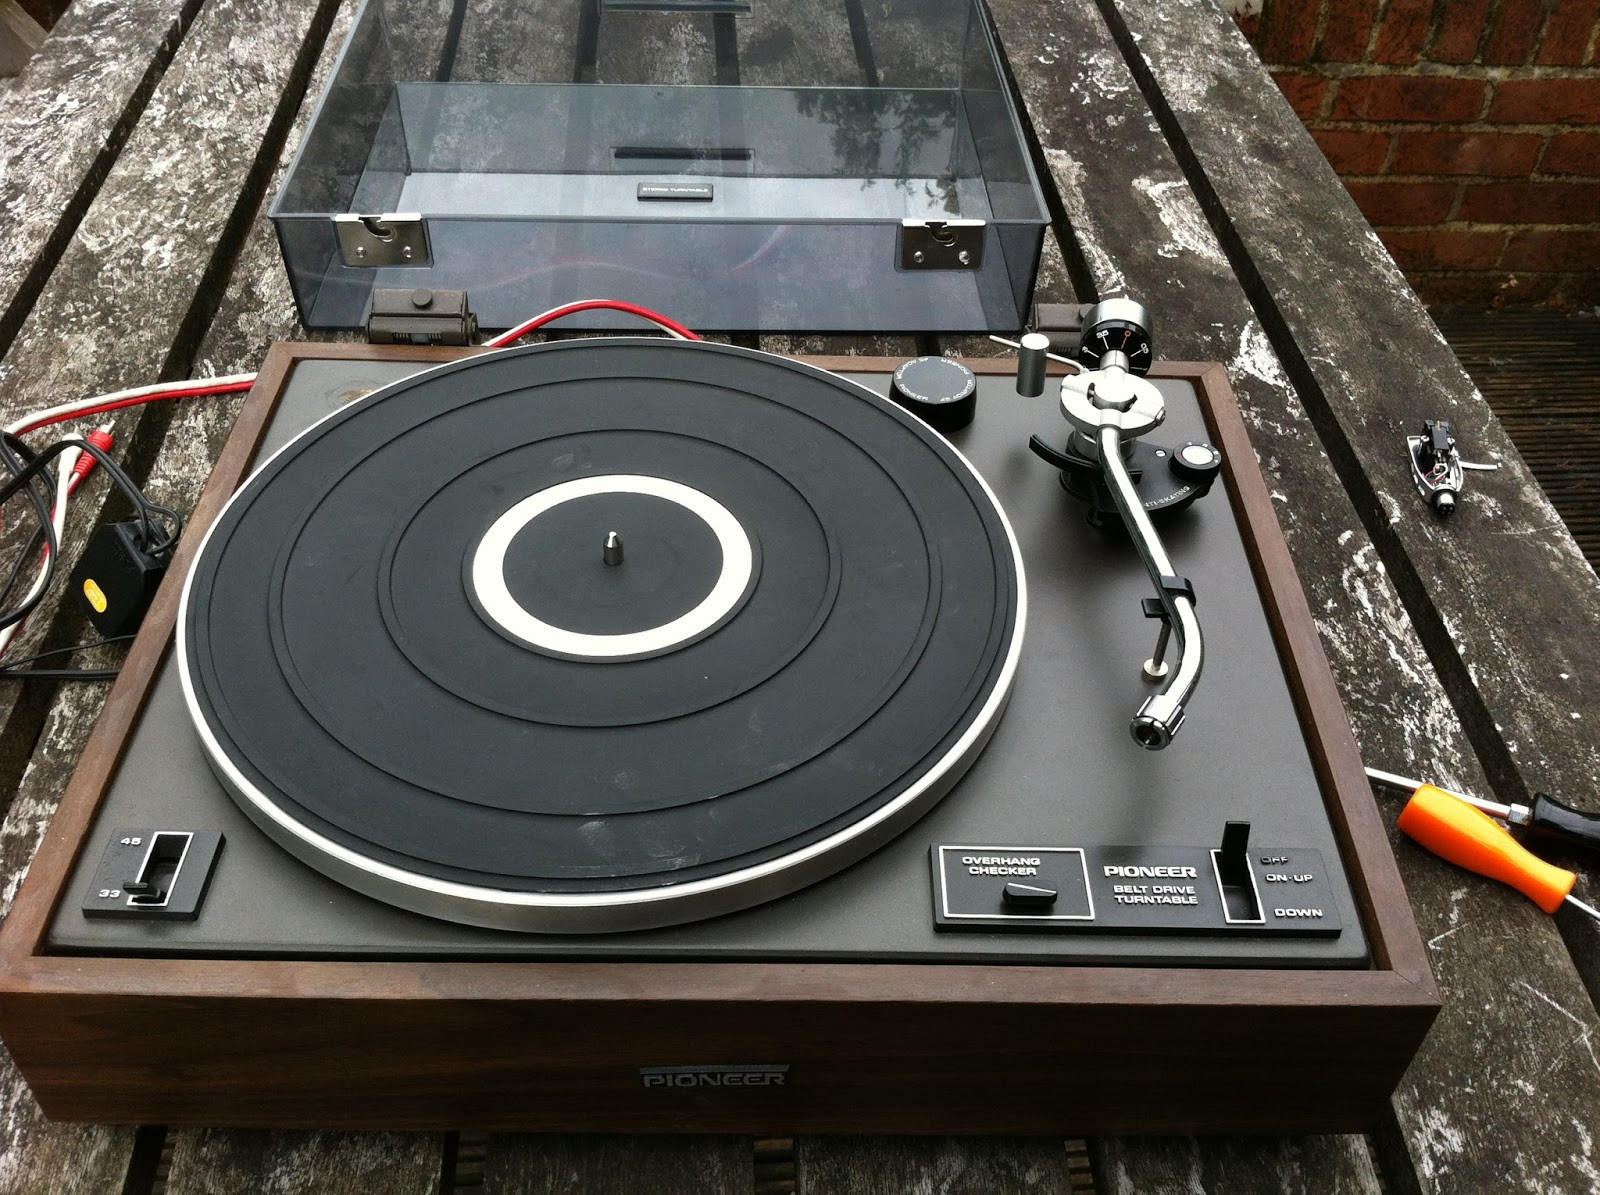
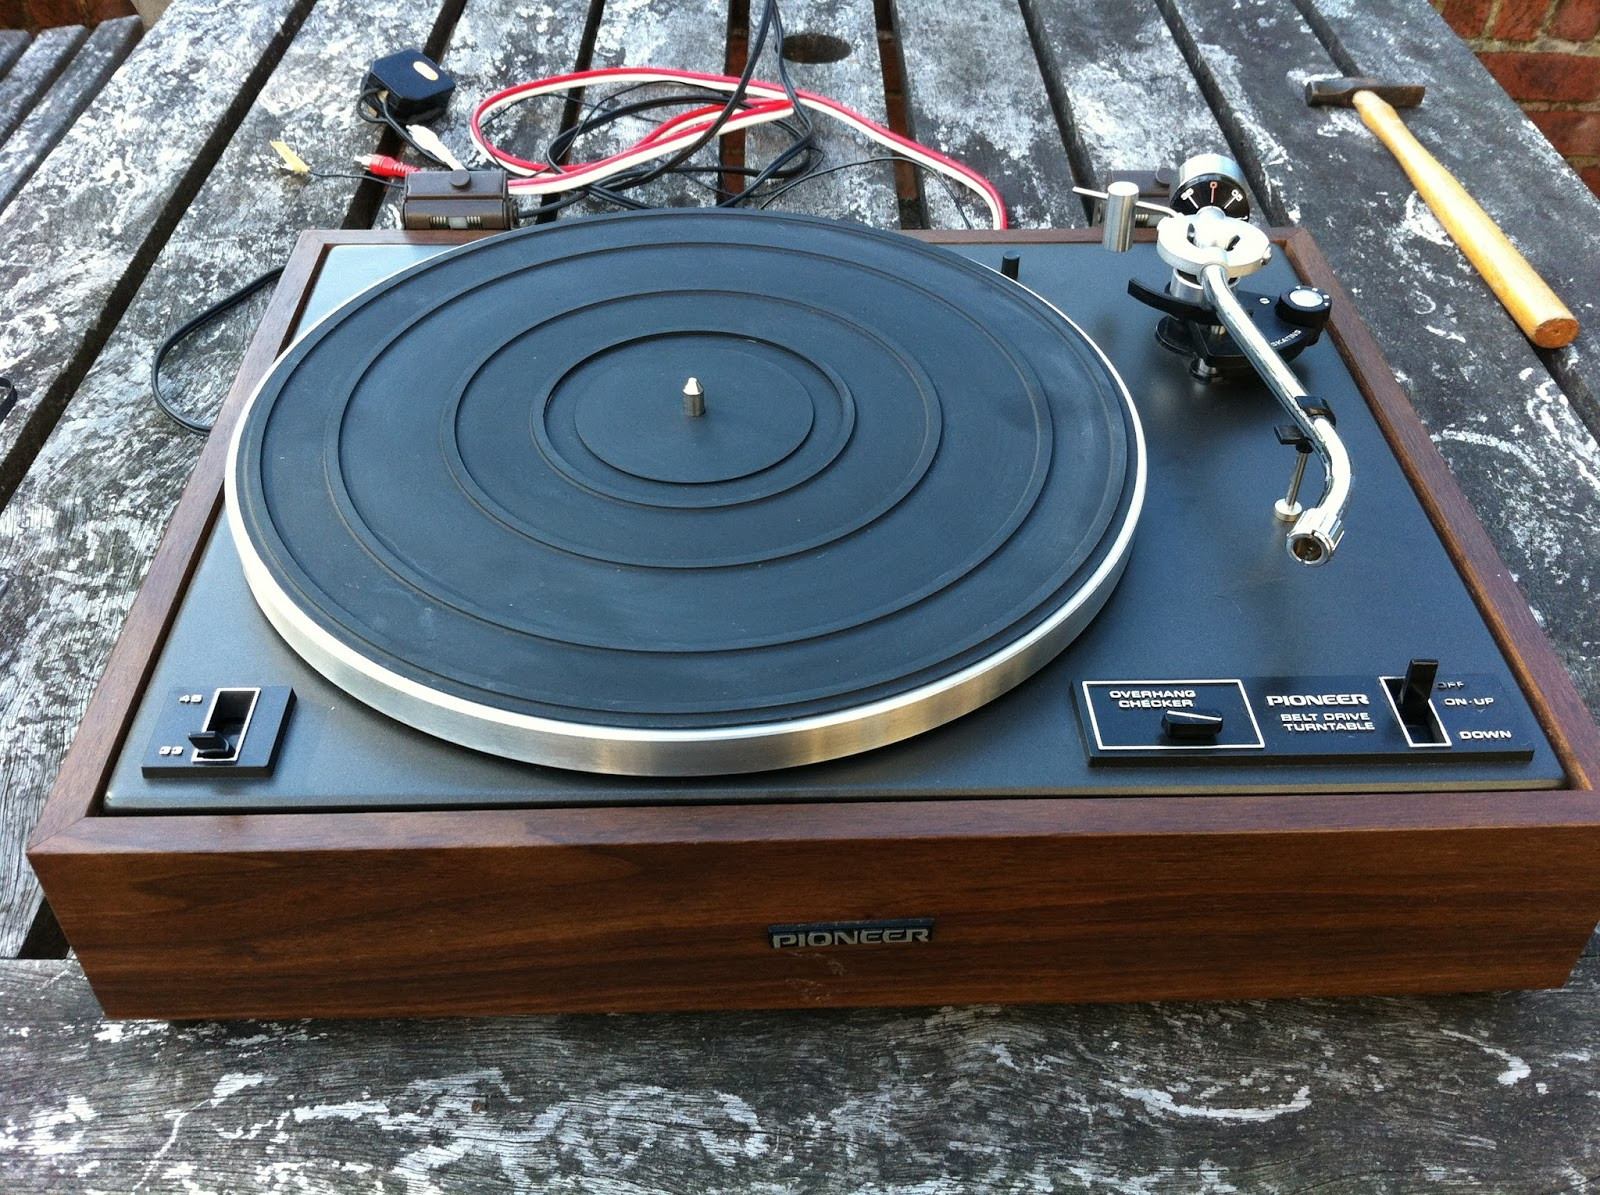
The Pioneer PL-12D I received was in remarkably good condition and complete. It even included both the 45 RPM adapter and the additional screw-in balance weight for heavier cartridges, along with a classic Shure M75HE Mk 2 cartridge.
I decided to give it a quick service. While the platter did rotate, turning the spindle by hand after removing the platter felt stiff, suggesting the grease might have dried out. Additionally, the motor was making a slight knocking sound, possibly indicating a lubrication issue. A simple service seemed like a wise first step.
 Pioneer PL-12D turntable as received, showcasing its complete condition.
Here it is as it arrived. The first step was to remove the headshell, which uses a standard SME-style collar fitting. Simply unscrew the collar, and the headshell and cartridge will detach. I placed these components safely aside. Given the unknown history of the stylus, I decided to replace it. I then clipped the tonearm back into its rest. If the arm clip is loose, secure it with tape to prevent unwanted movement. These tonearms are generally robust, and you can assess the arm bearings by checking for smooth side-to-side and up-and-down movement. Also, gently twist the arm between your fingers to check for any rotational play, which could indicate loose bearings. Avoid forcing it; a gentle twist is sufficient. Neither of the Pioneer PL-12D turntables I’ve encountered have had issues in this area. Next, I removed the dust cover. Open the lid, and holding the back near the hinges, apply slight pressure to the right to disengage the lid from the hinges, which utilize a clever lug system.
 Close-up view of the Pioneer PL-12D headshell and tonearm, highlighting the SME-style collar fitting.
Then, I carefully lifted off the platter mat, which should detach easily from the center spindle. It features a decorative metal ring that sits within a groove in the mat.
 Detailed shot of the Pioneer PL-12D platter mat, showing the decorative metal ring and its placement.
With the mat removed, you can now see the platter and a couple of access holes on either side. By rotating the platter, you’ll locate the motor spindle with the drive belt looped around it beneath the platter. Slip the belt off the motor through one of the holes, and you should be able to lift the platter off with a gentle vertical motion. If it feels slightly stiff, apply gentle pressure to the spindle with your thumb while gripping the platter’s edge with your fingers. Set the platter, mat, and belt aside in a safe place.
 Pioneer PL-12D platter removed, revealing the access holes and underlying components.
Here’s the deck with the platter removed. In the top left, you can see the motor pulley, and in front of it, the speed selector mechanism. This mechanism raises or lowers the belt on the motor spindle to engage sections of different diameters for 33 and 45 RPM speeds. Next to the motor pulley, a small sticker indicates the oil point for the motor. This is a small rivet through the top plate where you can apply a few drops of oil. The oil then flows down into a reservoir on top of the motor below and lubricates internal points.
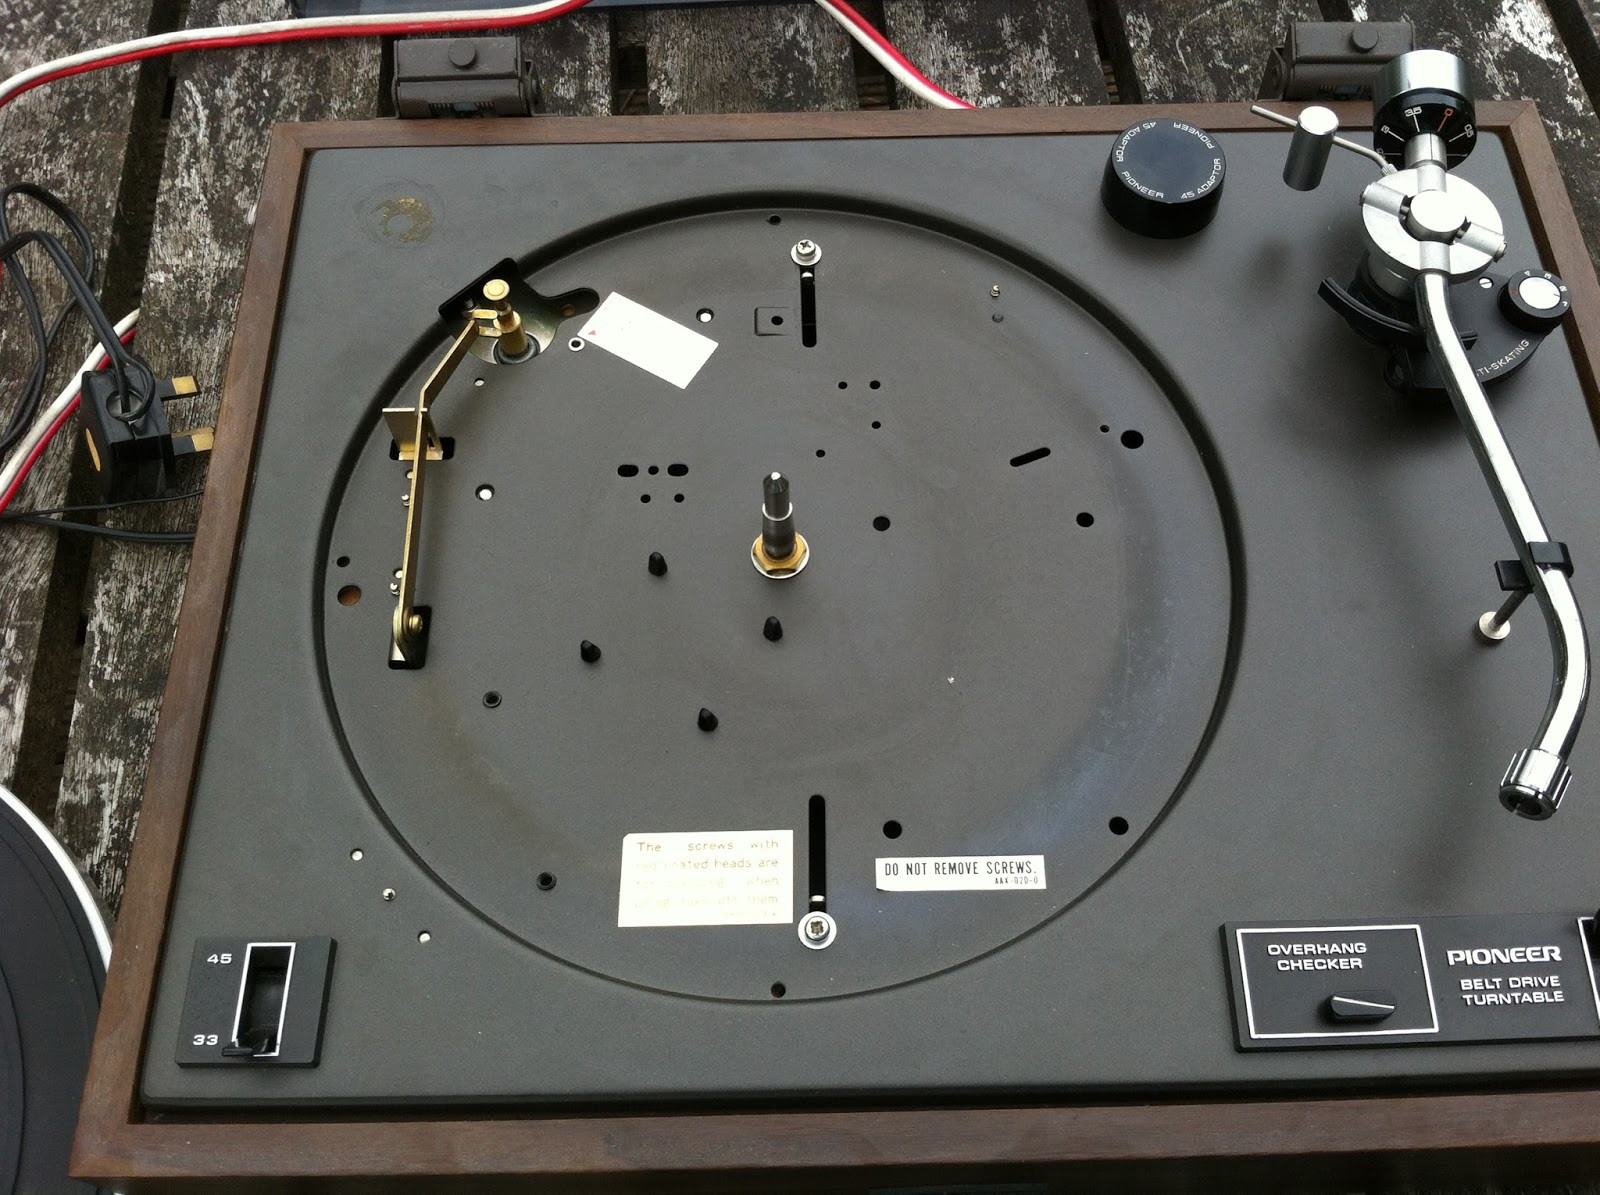 Top view of the Pioneer PL-12D chassis with platter removed, highlighting motor pulley and oil point.
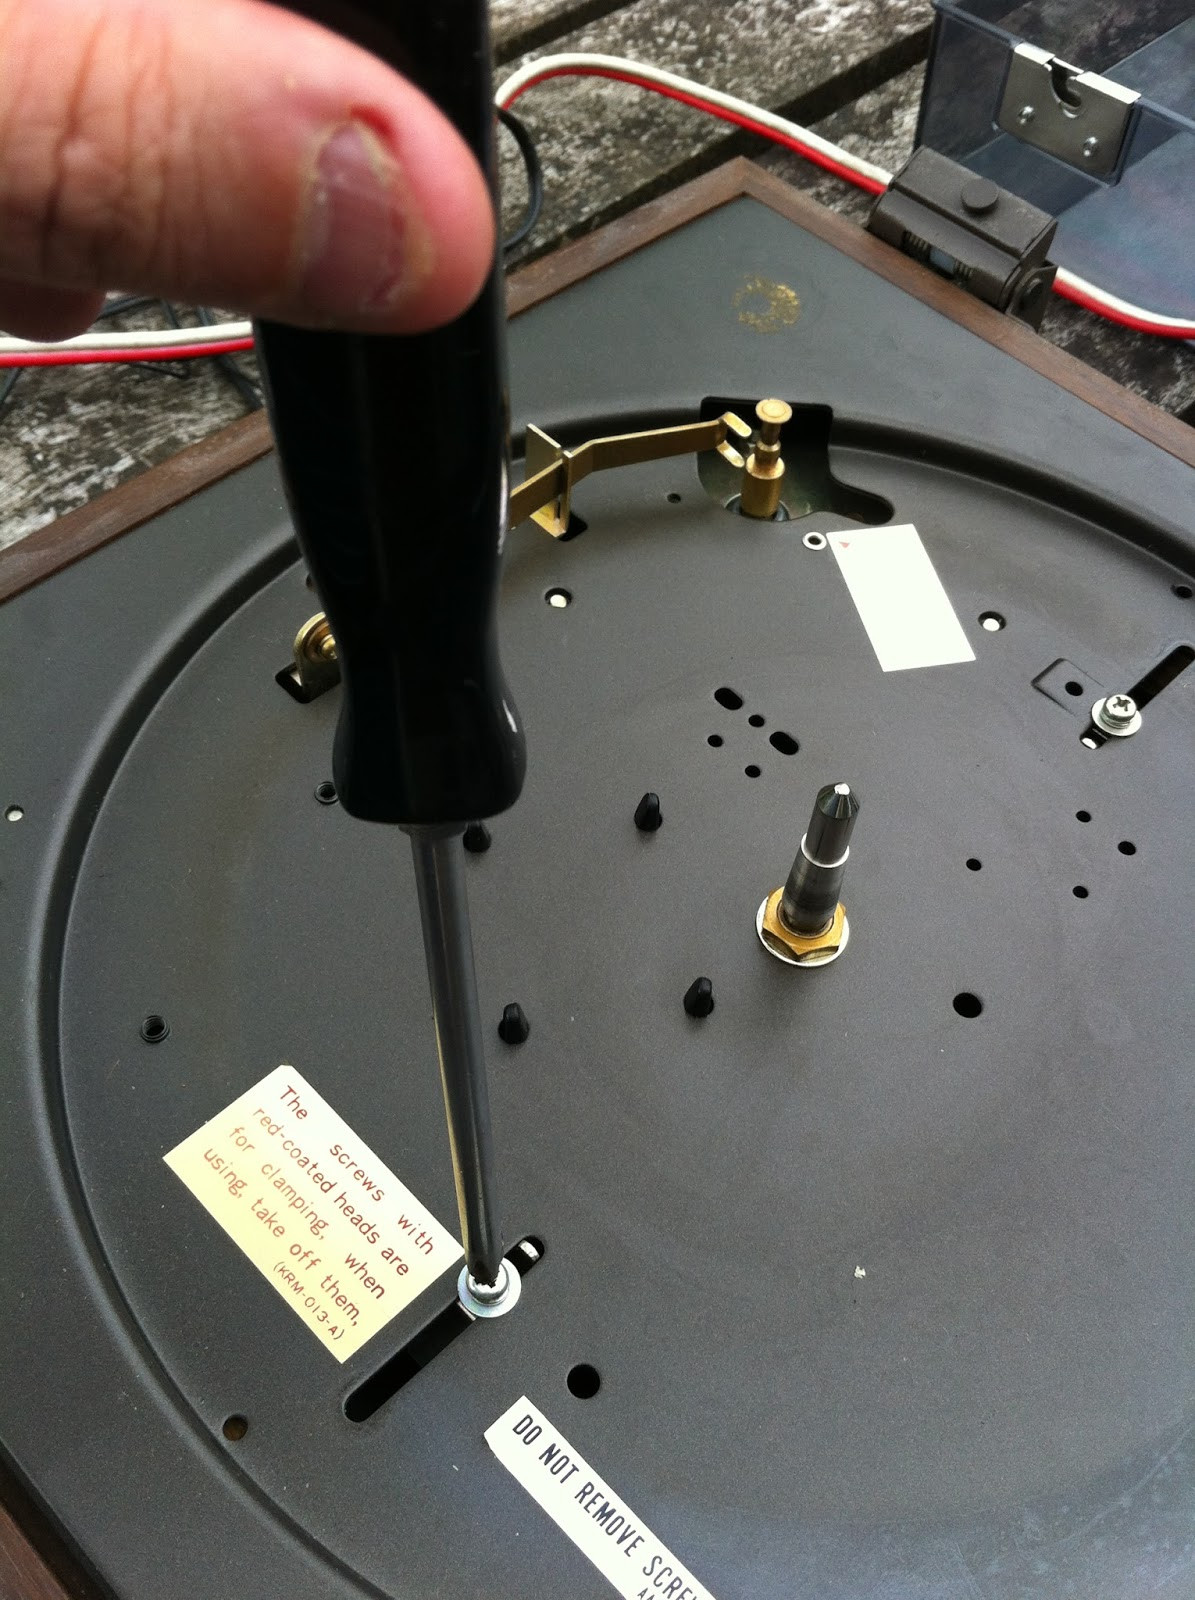
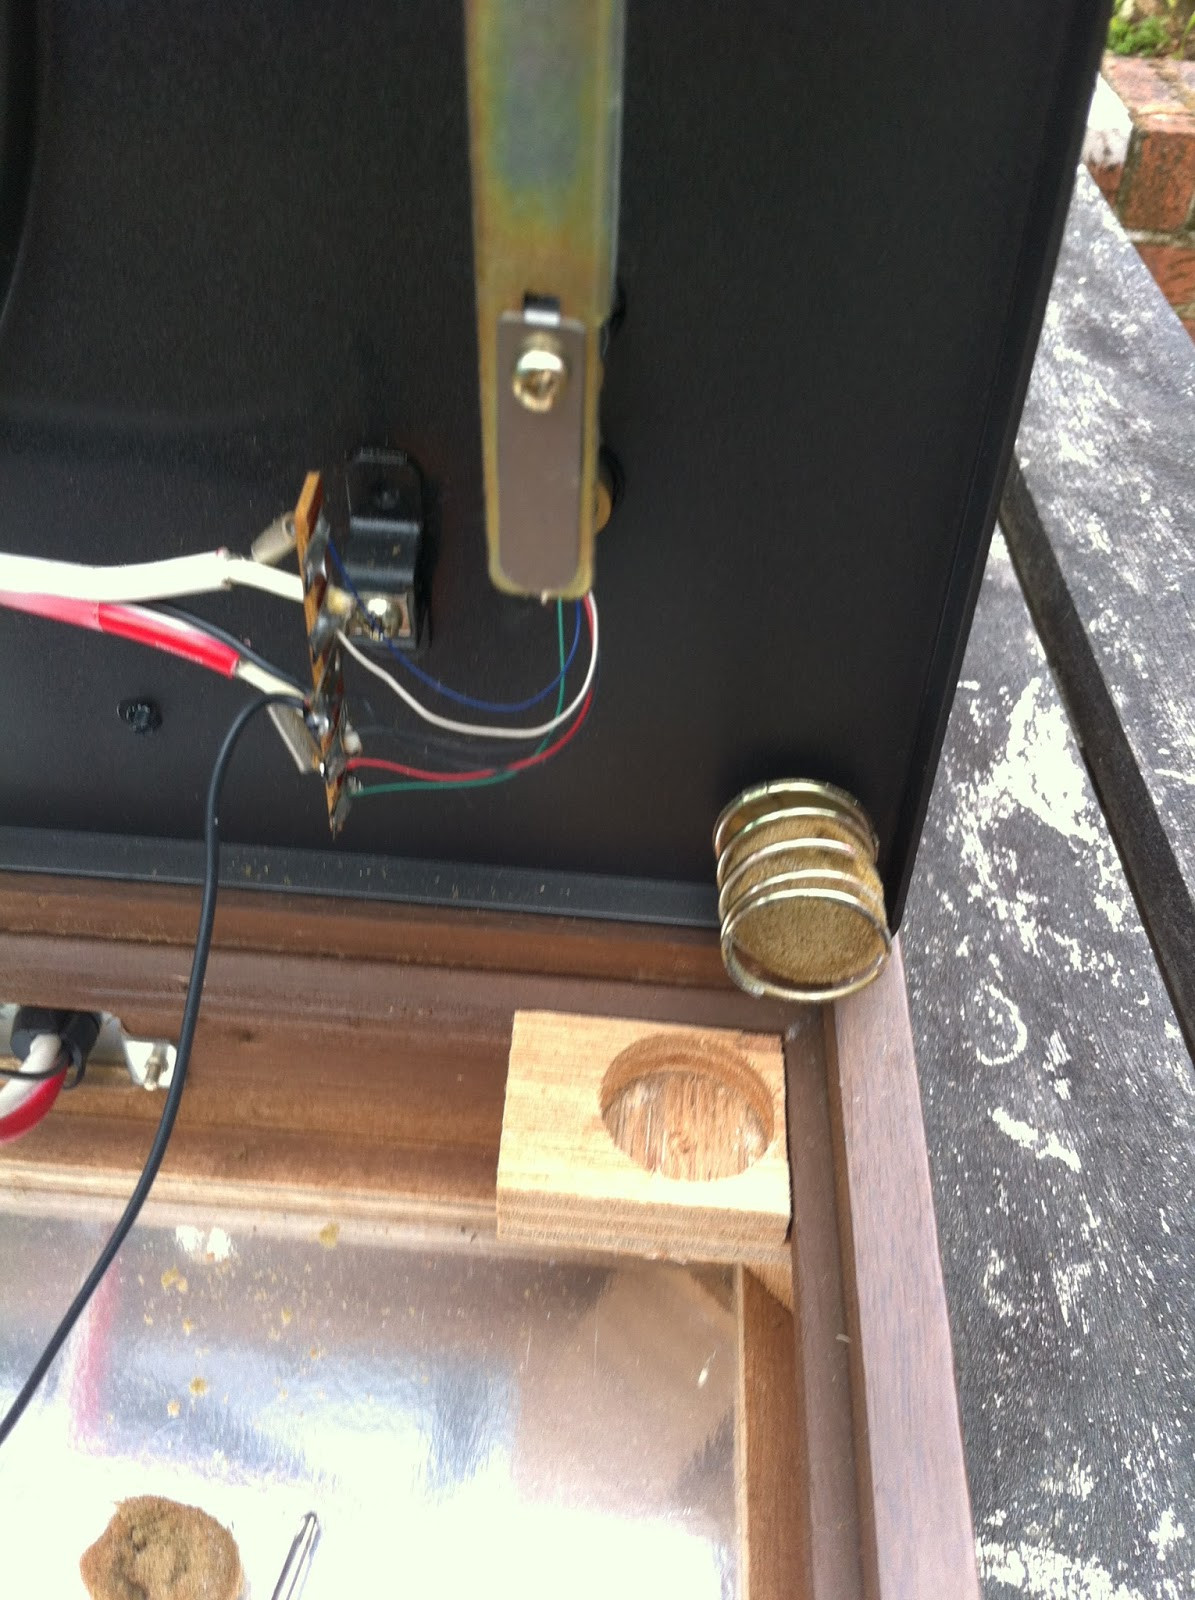
Accessing the underside of the deck is straightforward. Loosen the two screws on the top slightly, and then slide the screws and their connecting brackets towards the center of the deck. You’re essentially sliding two clamps away from the wooden internal ledges they normally engage with.
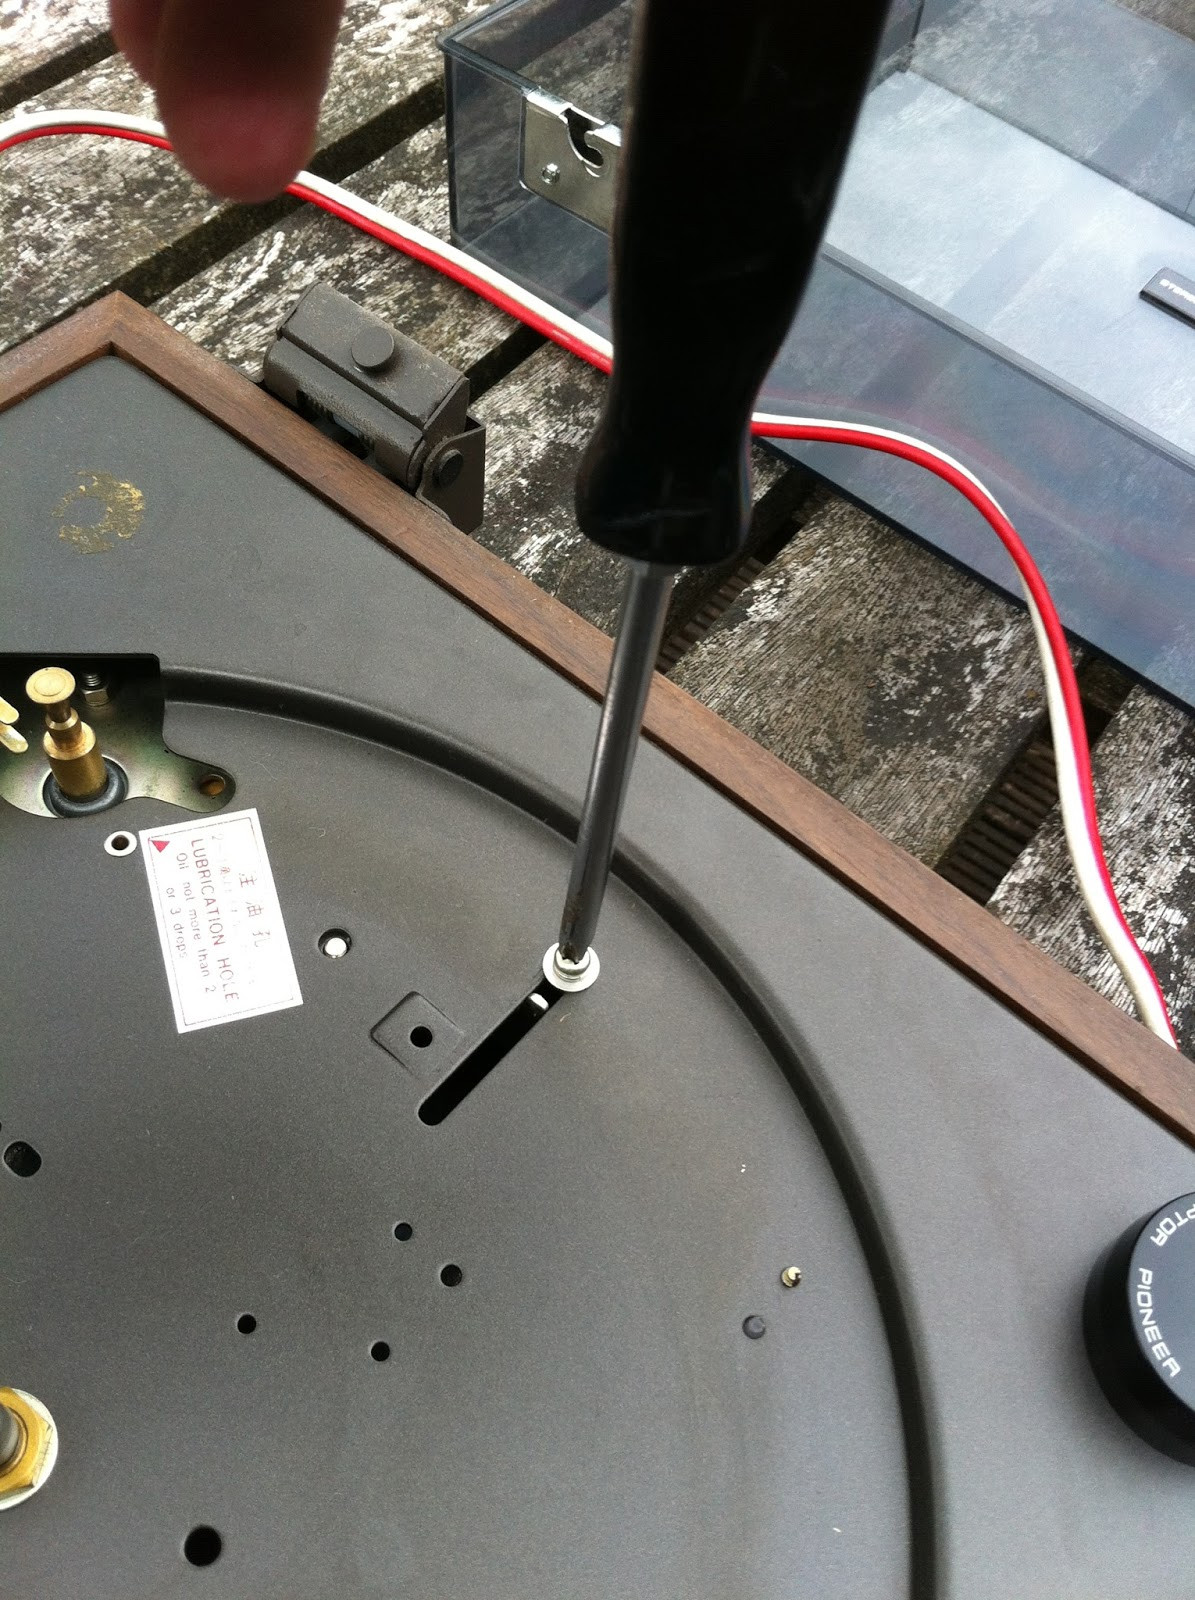 Close-up of the Pioneer PL-12D top plate screws and brackets, demonstrating the loosening and sliding mechanism.
Once these are slid inwards, the top of the deck can be carefully tilted upwards. Be mindful of the captive cables at the back and the four springs still engaged in their recesses. I find that holding the speed selector and on/off switches at the top allows me to lift the front. There might be some “twanging” as the four springs bend and pop out of their recesses. Below, we see the clean and organized interior.
 Pioneer PL-12D chassis tilted open, revealing the internal components and spring suspension system.
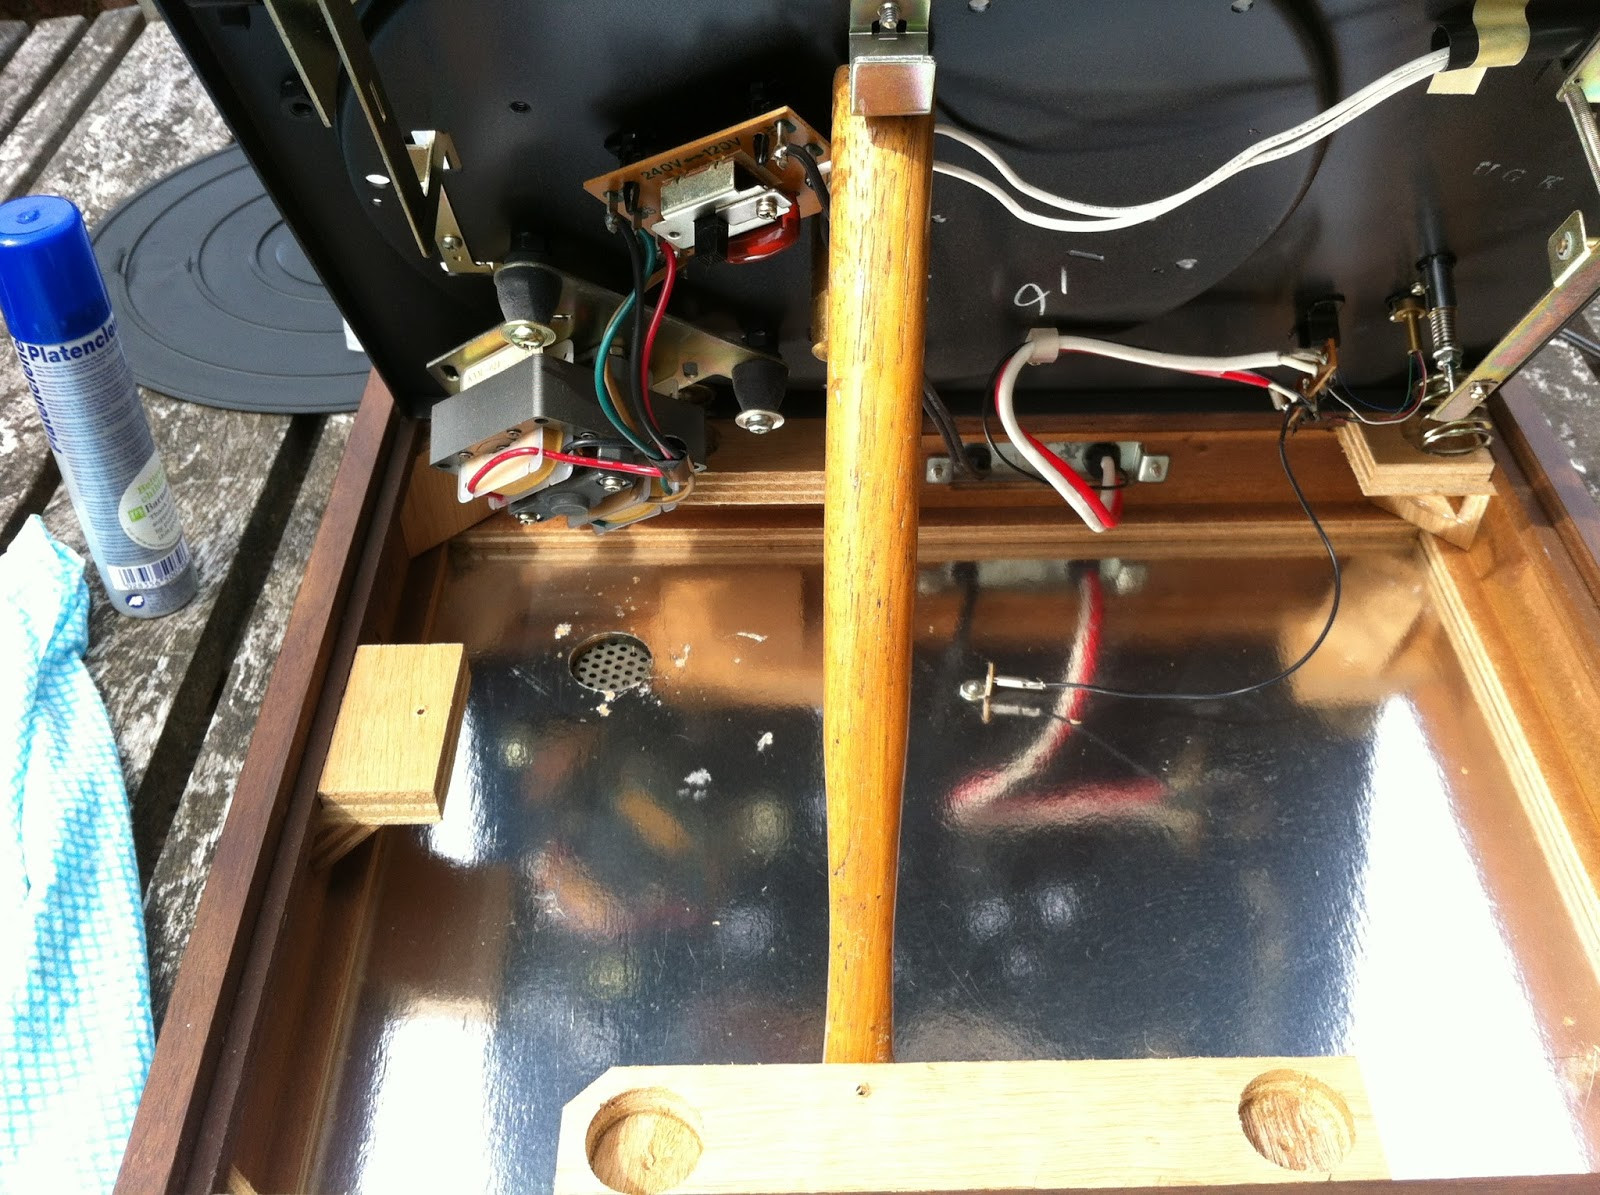
You’ll notice the mains cable entering through a plate at the back, with the red and white signal cables exiting nearby. An additional wire connects the EMI screen on the base to the grounding point. While you could remove the rear plate and unclip the black screen wire for full top access, for simplicity, I left it as is. I used a wooden hammer as a prop, placing the head inside the plinth at the front and the handle supporting the top by the front metal catch, similar to propping up a car bonnet.
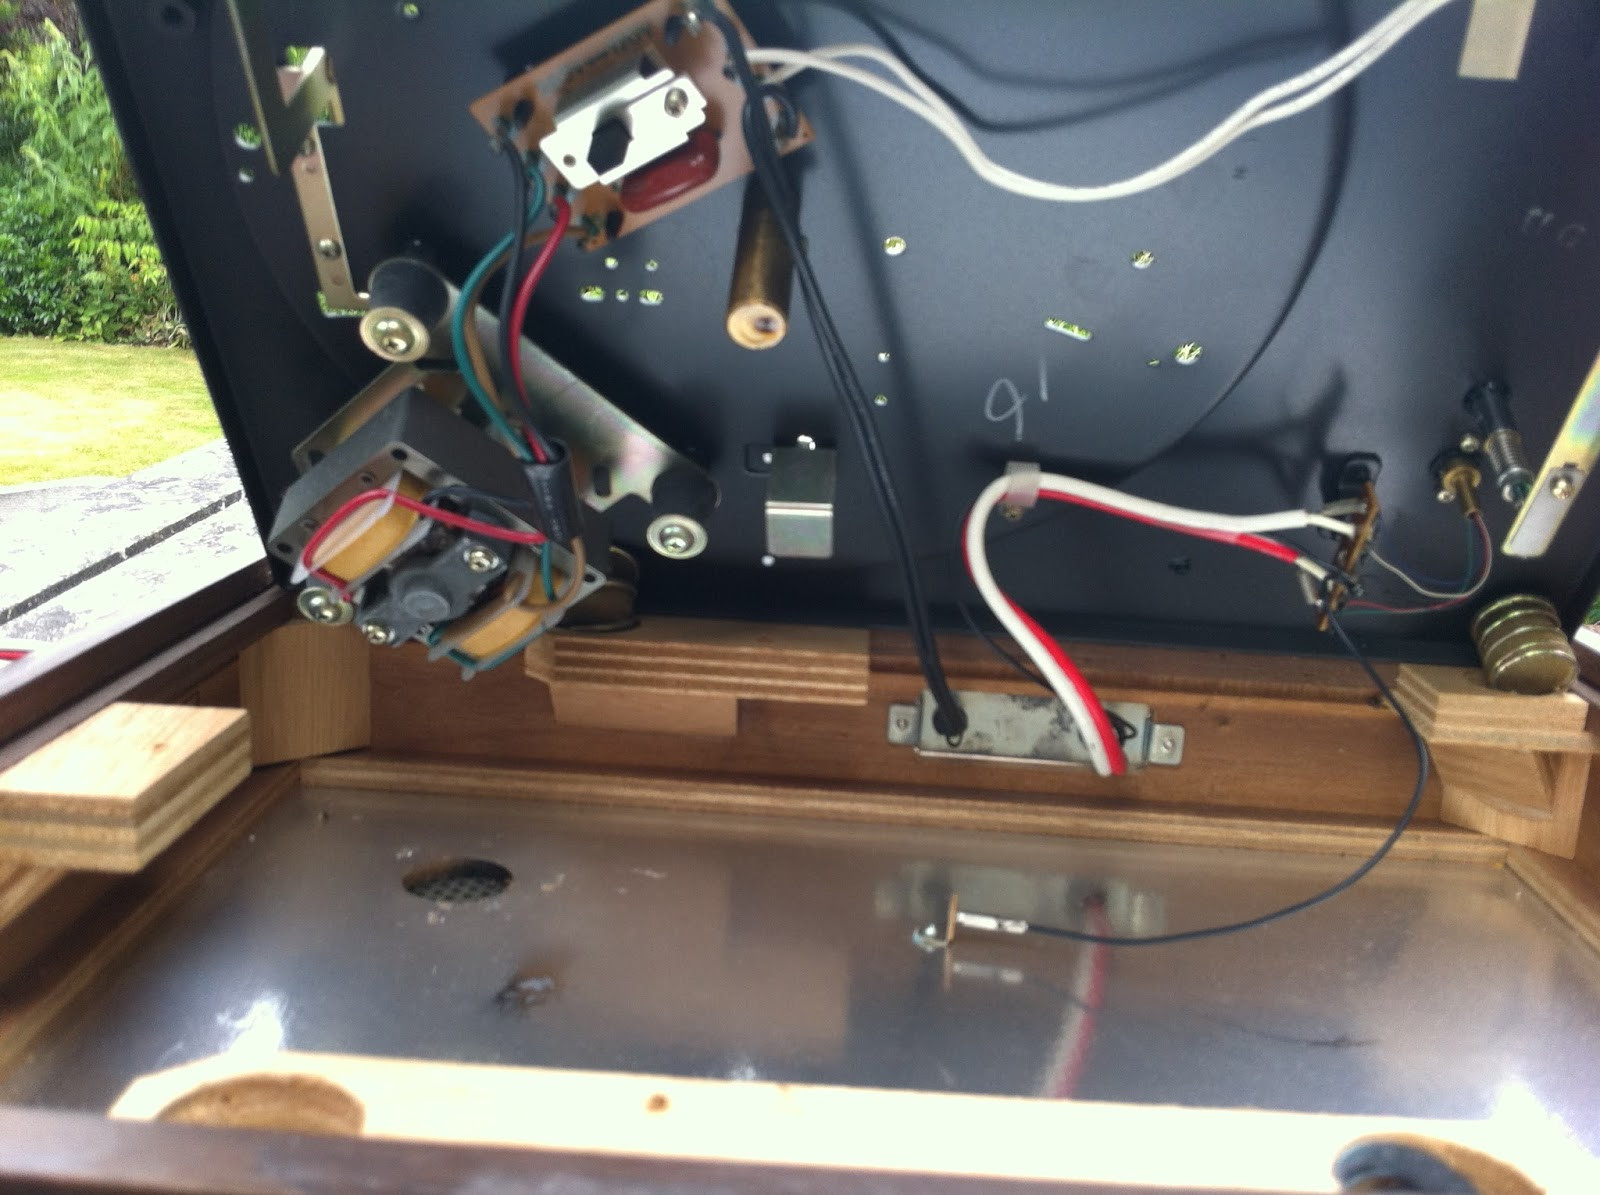 Internal view of the Pioneer PL-12D chassis, showing wiring, grounding, and wooden hammer prop.
Since music reproduction from vinyl relies on transforming microscopic vibrations into electrical signals, unwanted vibrations are the enemy of good sound. All turntables incorporate some degree of decoupling, or “springiness,” to isolate vibration sources from the tonearm and platter. The motor and the surrounding environment are primary sources of vibration. The Pioneer PL-12D employs five key decoupling systems:
-
The metal top plate is decoupled from the wooden plinth by four springs with foam rubber dampers, much like car suspension and shock absorbers.
-
The motor is decoupled from the top plate by resting on three rubber bushes via three retaining rods.
-
The motor is decoupled from the platter through the drive belt.
-
The deck sits on four rubber feet, primarily for grip and airflow beneath, with minimal decoupling effect. A mesh vent beneath the motor allows for air circulation as the motor can generate heat.
-
The record is decoupled from the platter by the rubber mat.
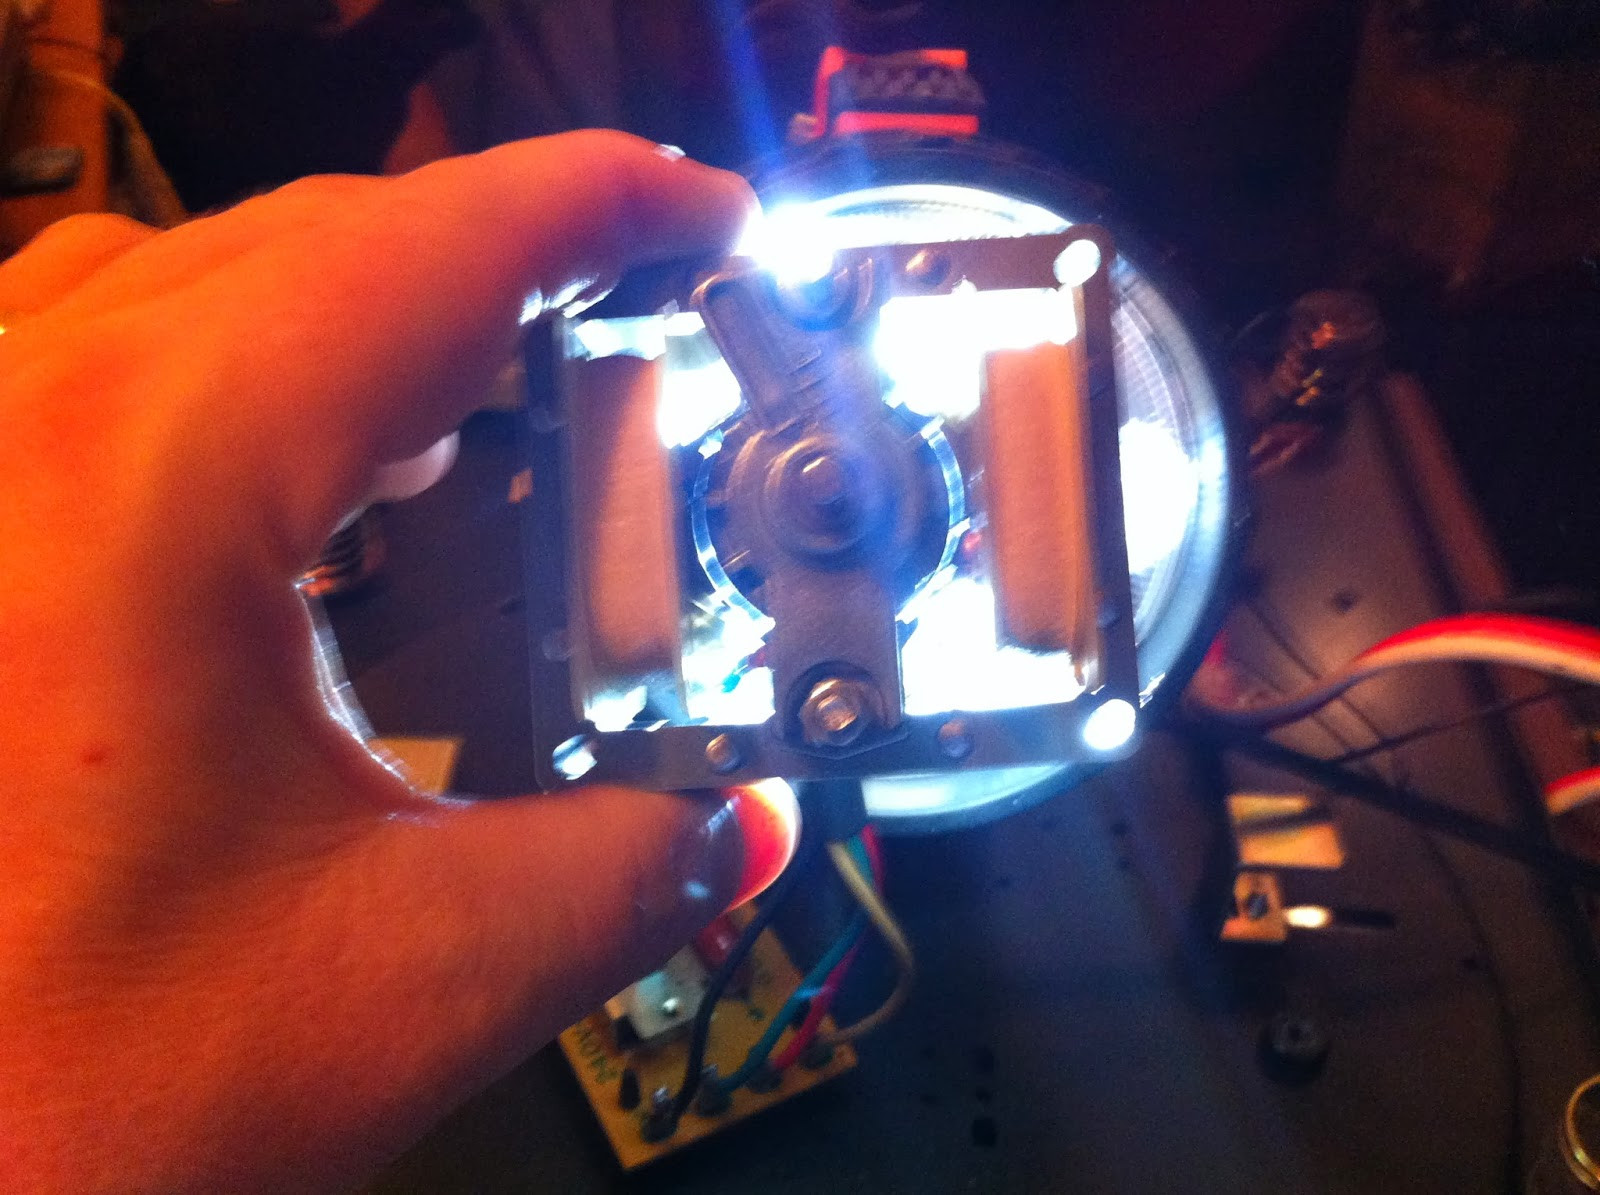
 Close-up of a Pioneer PL-12D suspension spring and foam damper, showing the spring mechanism.
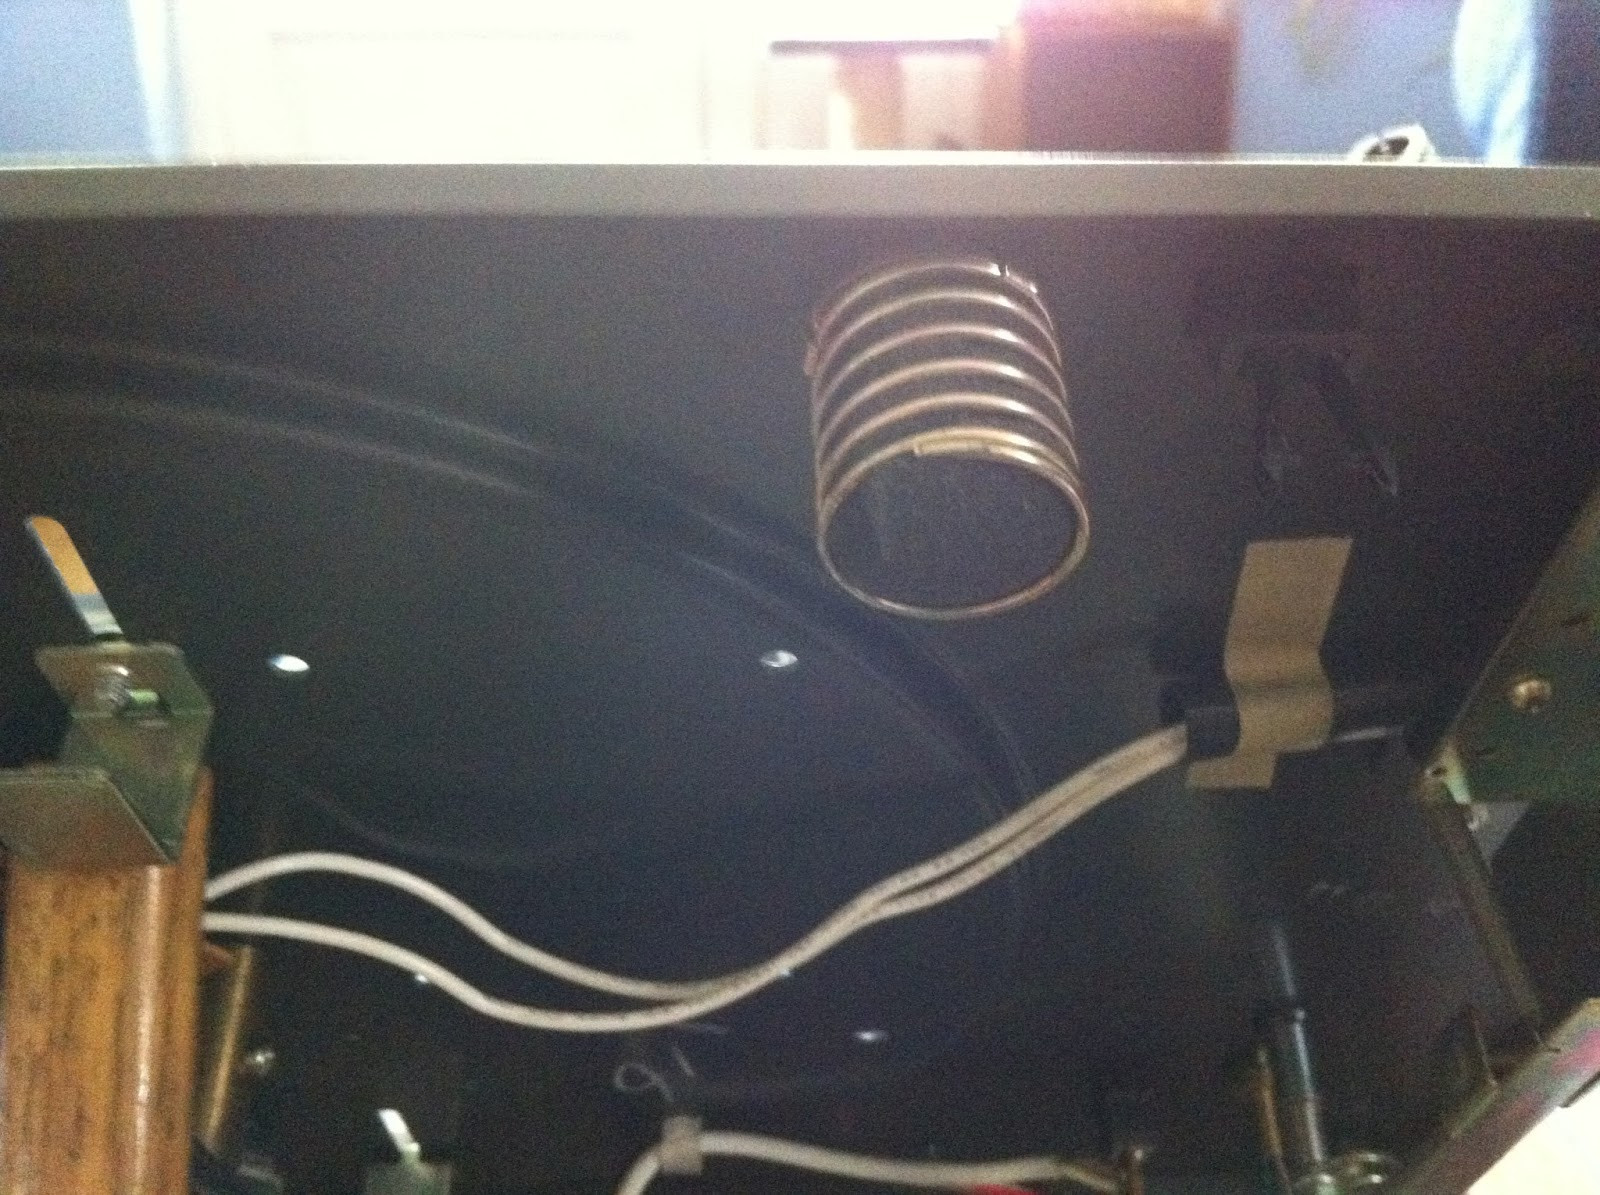
In the image above, you can see one of the four springs described in point 1), with its foam plug still present. Upon inspection, these foam dampers were crumbling, a common issue with foam rubber over time. I discarded them for replacement with new foam later. This degradation was likely the cause of the previous owner’s complaint about excessive bouncing. This issue is quite common with the Pioneer PL-12D.
 Underside view of the Pioneer PL-12D chassis, focusing on the spring suspension mounting points.
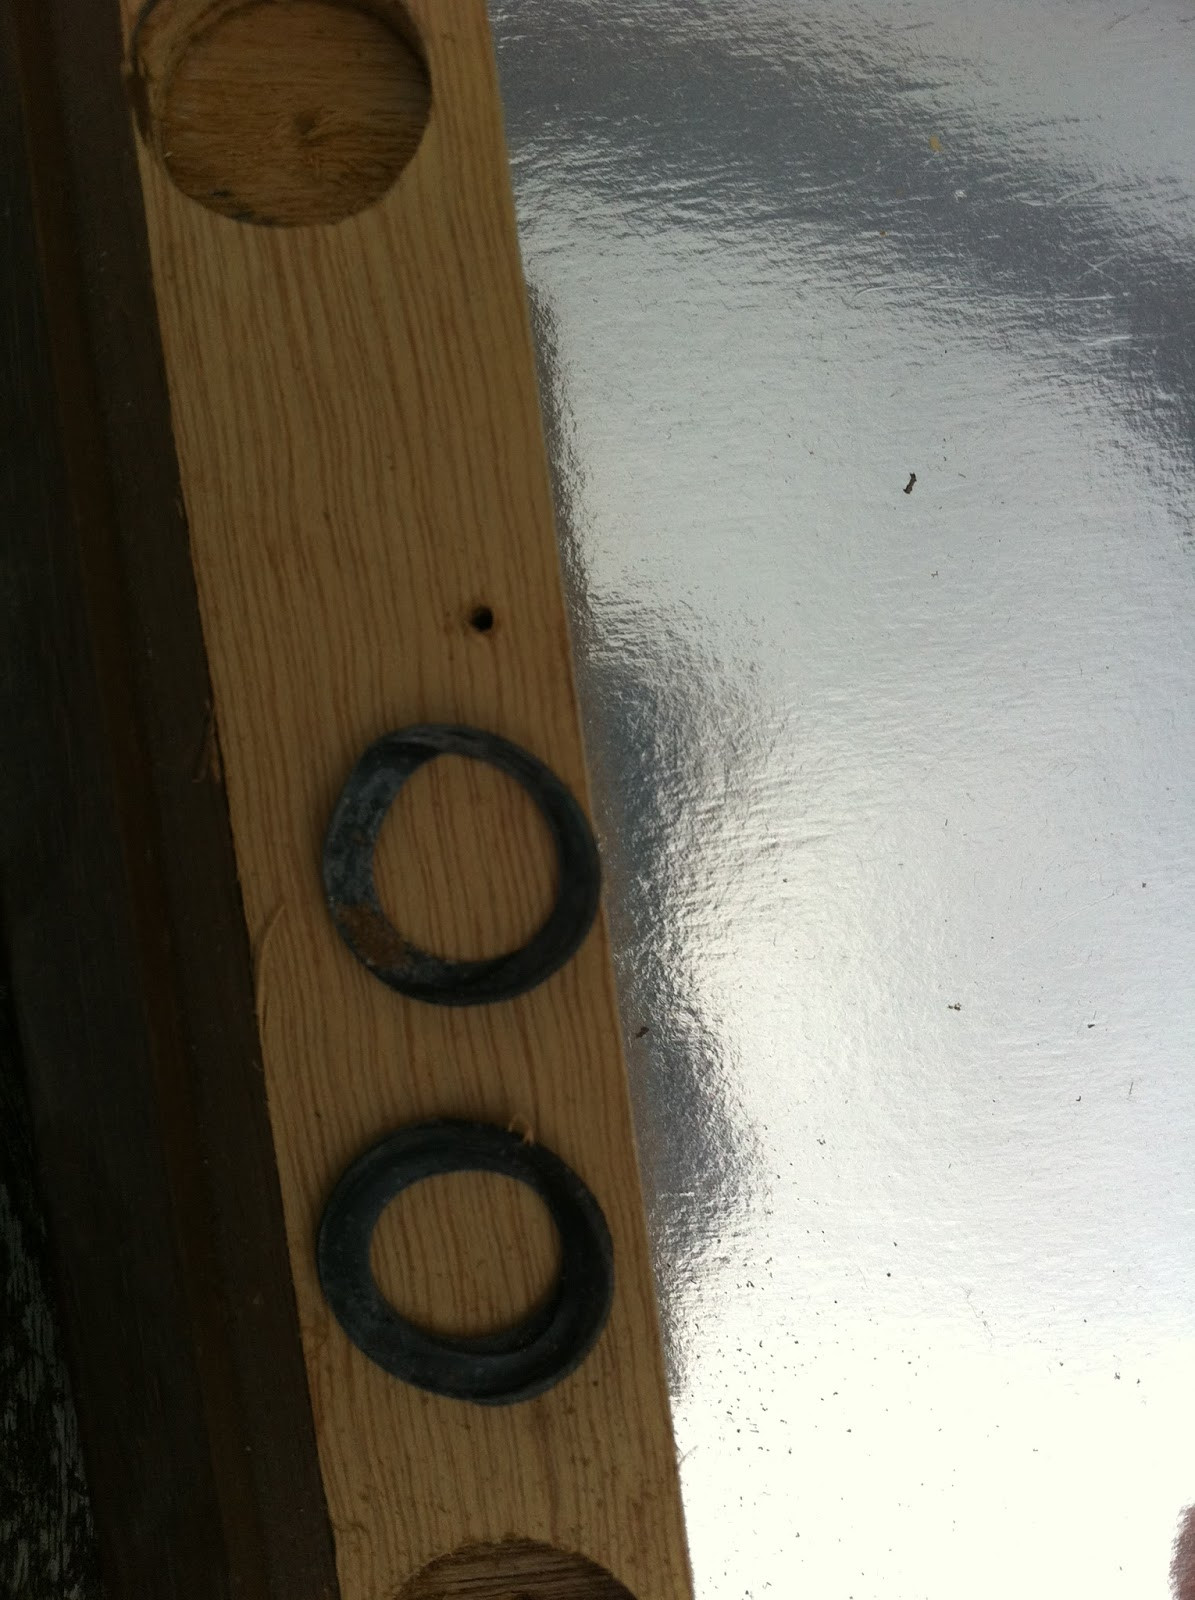
Of the four wooden recesses in the base for the springs, two contained rubber washers. One recess even had two washers, giving me a total of three. These might be for additional decoupling, but I suspect they were used as shims to balance the top plate. I removed these and set them aside.
 Close-up of Pioneer PL-12D spring recess with rubber washers, detailing their placement.
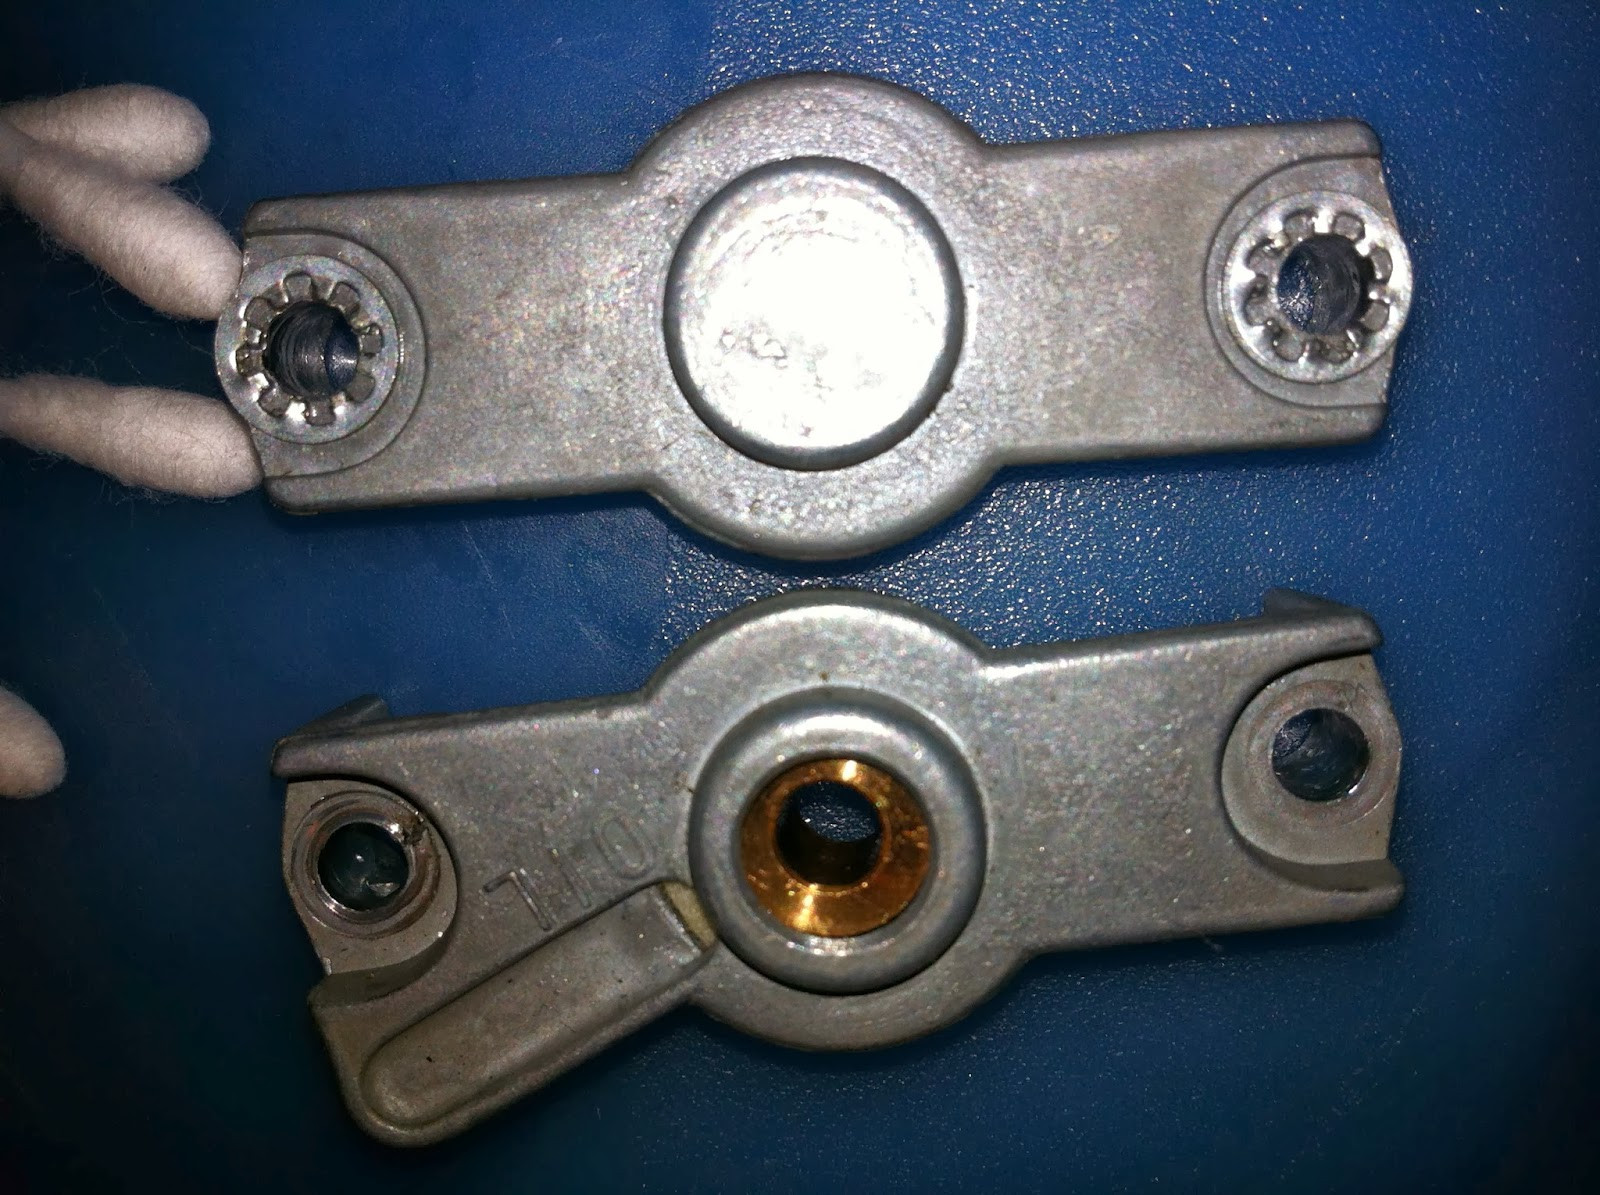
In the inverted view below, you can see the motor. Notice the black rubber bushes supporting the motor via three threaded rods. These rubber bushes can harden over time, reducing their ability to absorb motor vibrations, which can be picked up by the cartridge as a background hum.
 Inverted view of Pioneer PL-12D motor mounting, highlighting the rubber bushes and threaded rods.
UPDATE 2022: Tom Silvennoinen in Sweden now offers excellent replacement rubber mounts made of modern silicone rubber, custom-cast for the Pioneer PL-12D and reasonably priced. Feedback from the PL-12D Facebook group confirms these effectively eliminate hum. While I describe restoring the original mounts below, for optimal results, consider these replacements:
Link to silicone rubber mounts
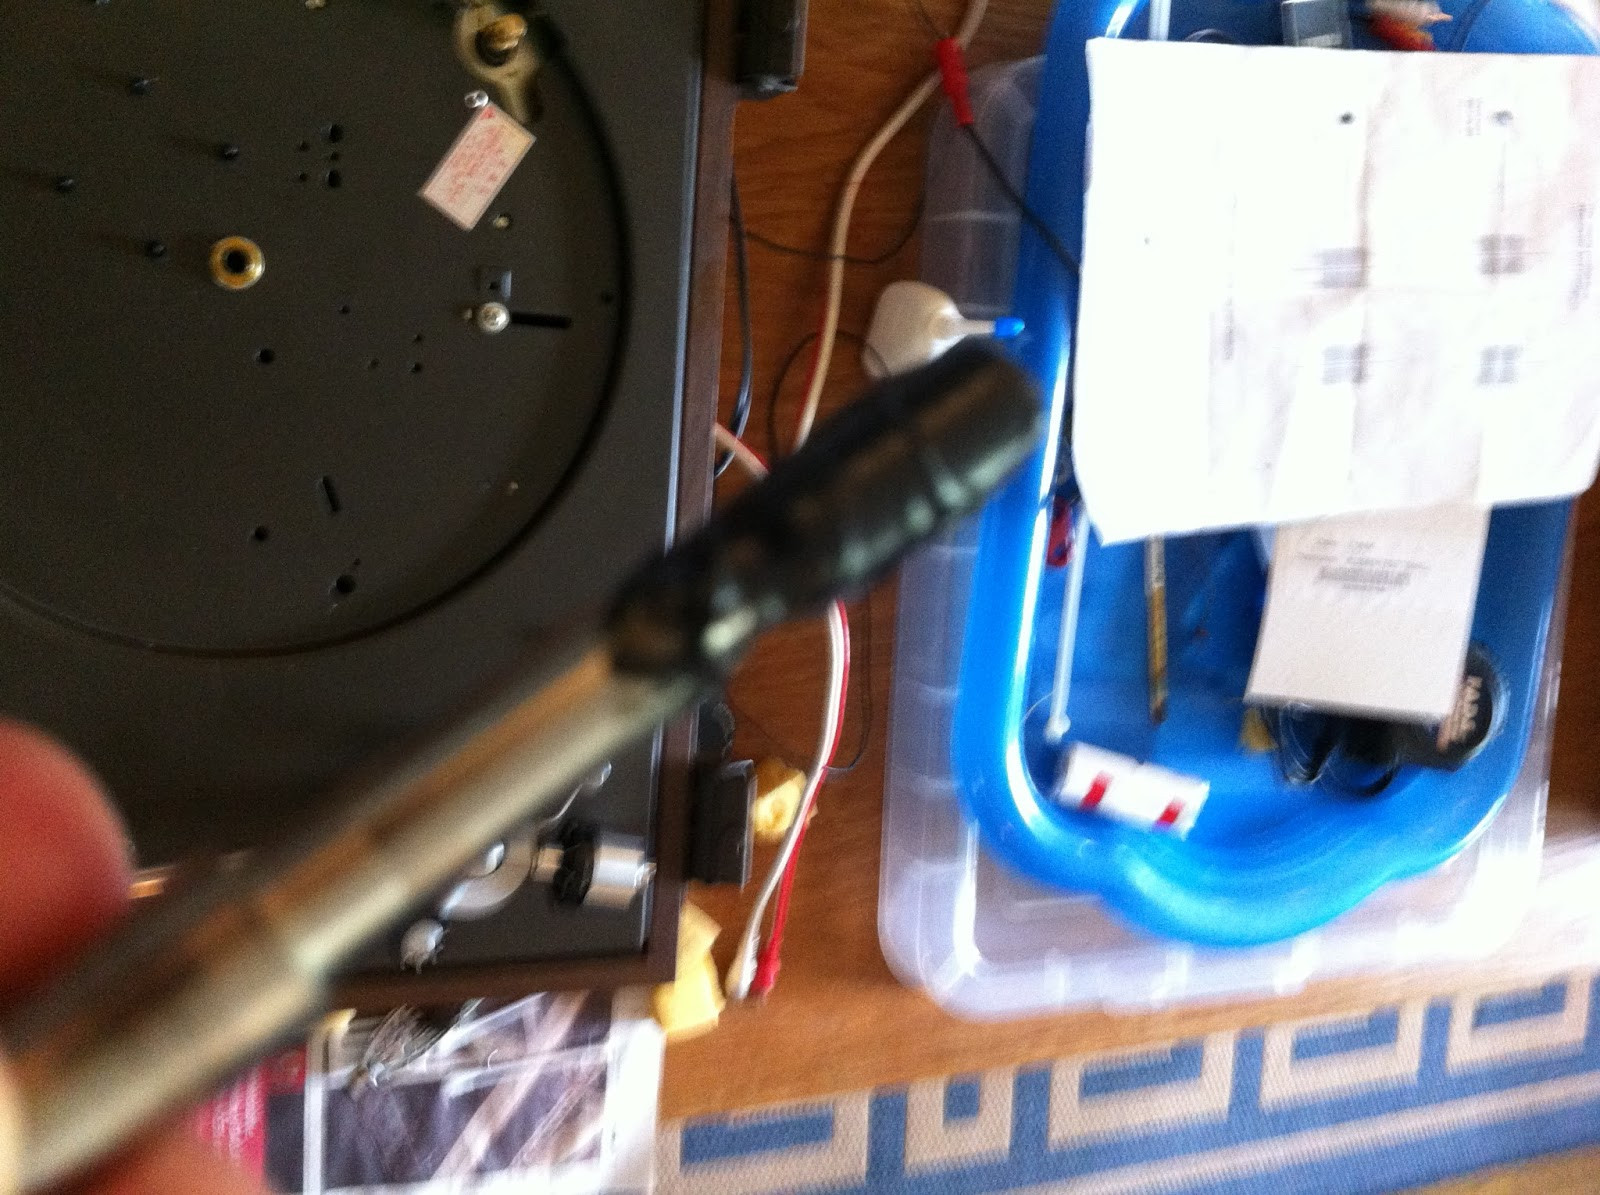
It’s easy to detach the motor from the top plate by unscrewing the three rods. Support the motor as it remains connected by wires and is quite heavy, a testament to its robust construction. My goal was to lubricate the motor. Complete motor dismantling allows for thorough cleaning and lubrication, but it’s a more complex procedure. I wanted to see if I could avoid that step initially.
 Pioneer PL-12D motor with one mounting rod removed, showing accessibility for servicing.
Here you can see the motor with one rod removed, detached from the plinth top.
 Pioneer PL-12D motor fully detached from top plate, showcasing rubber bushes and oil point.
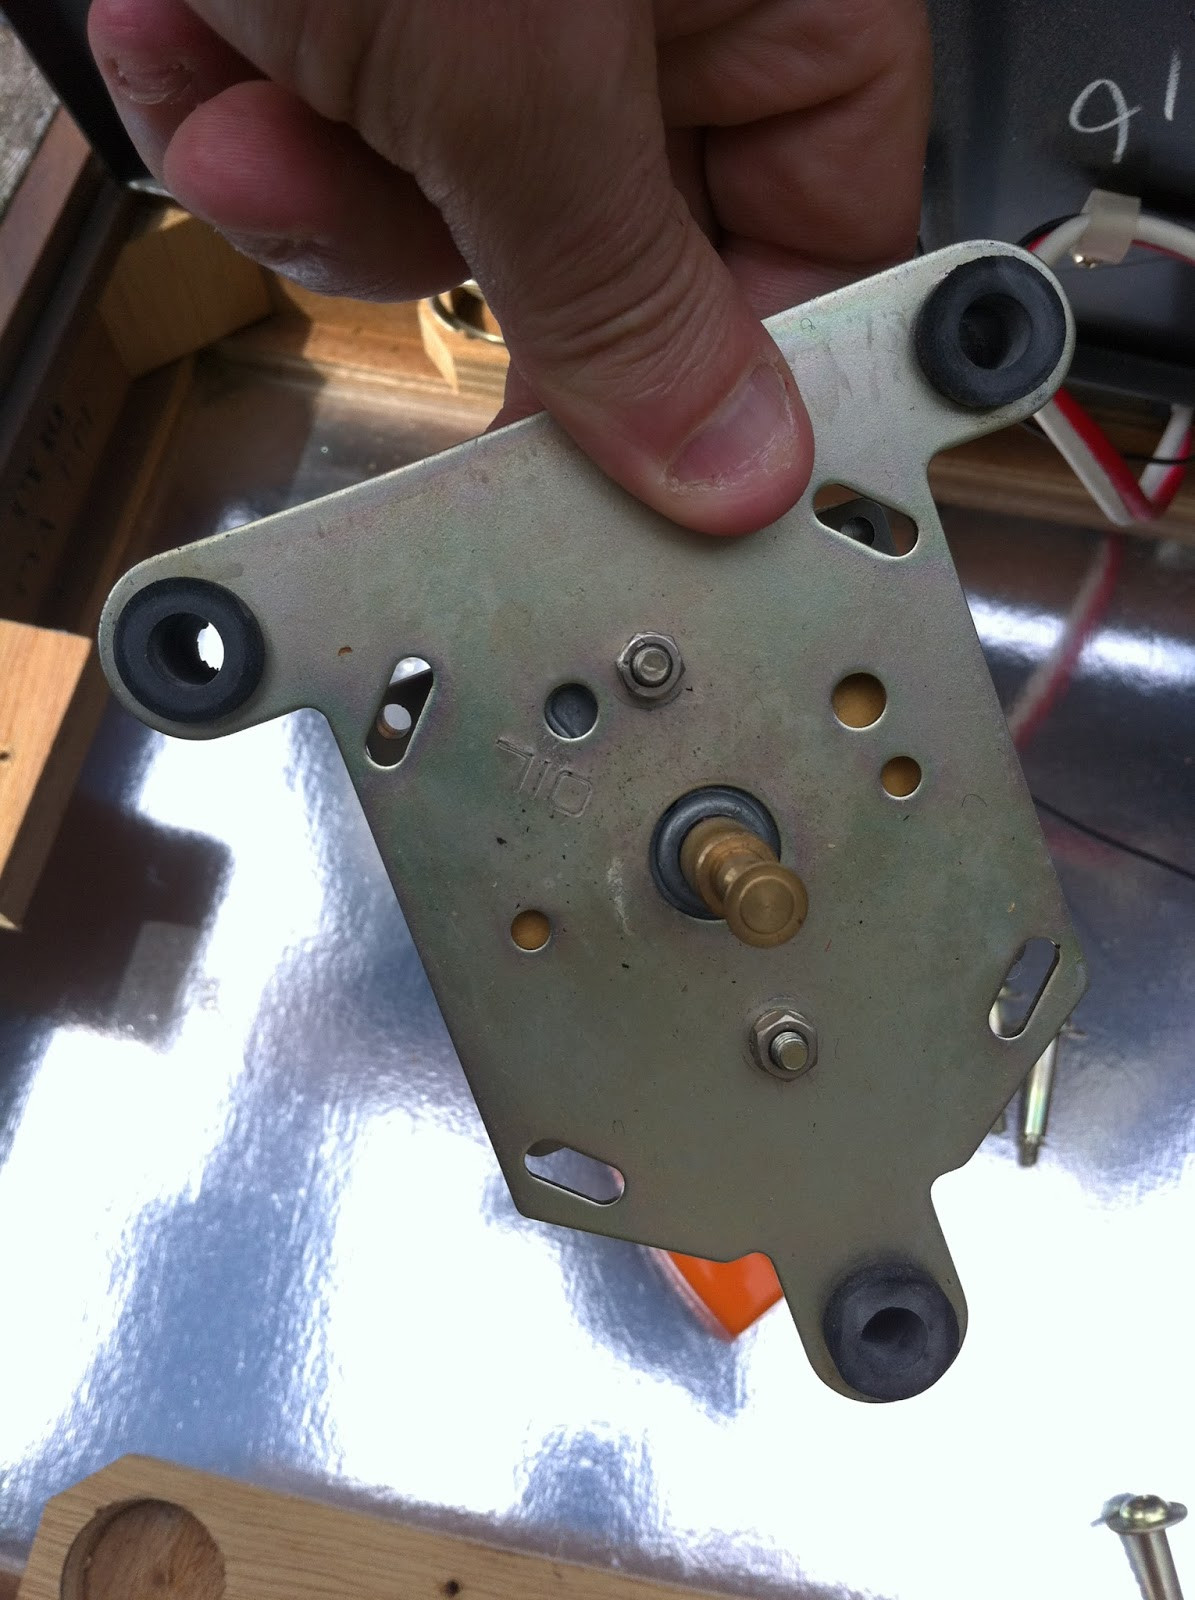
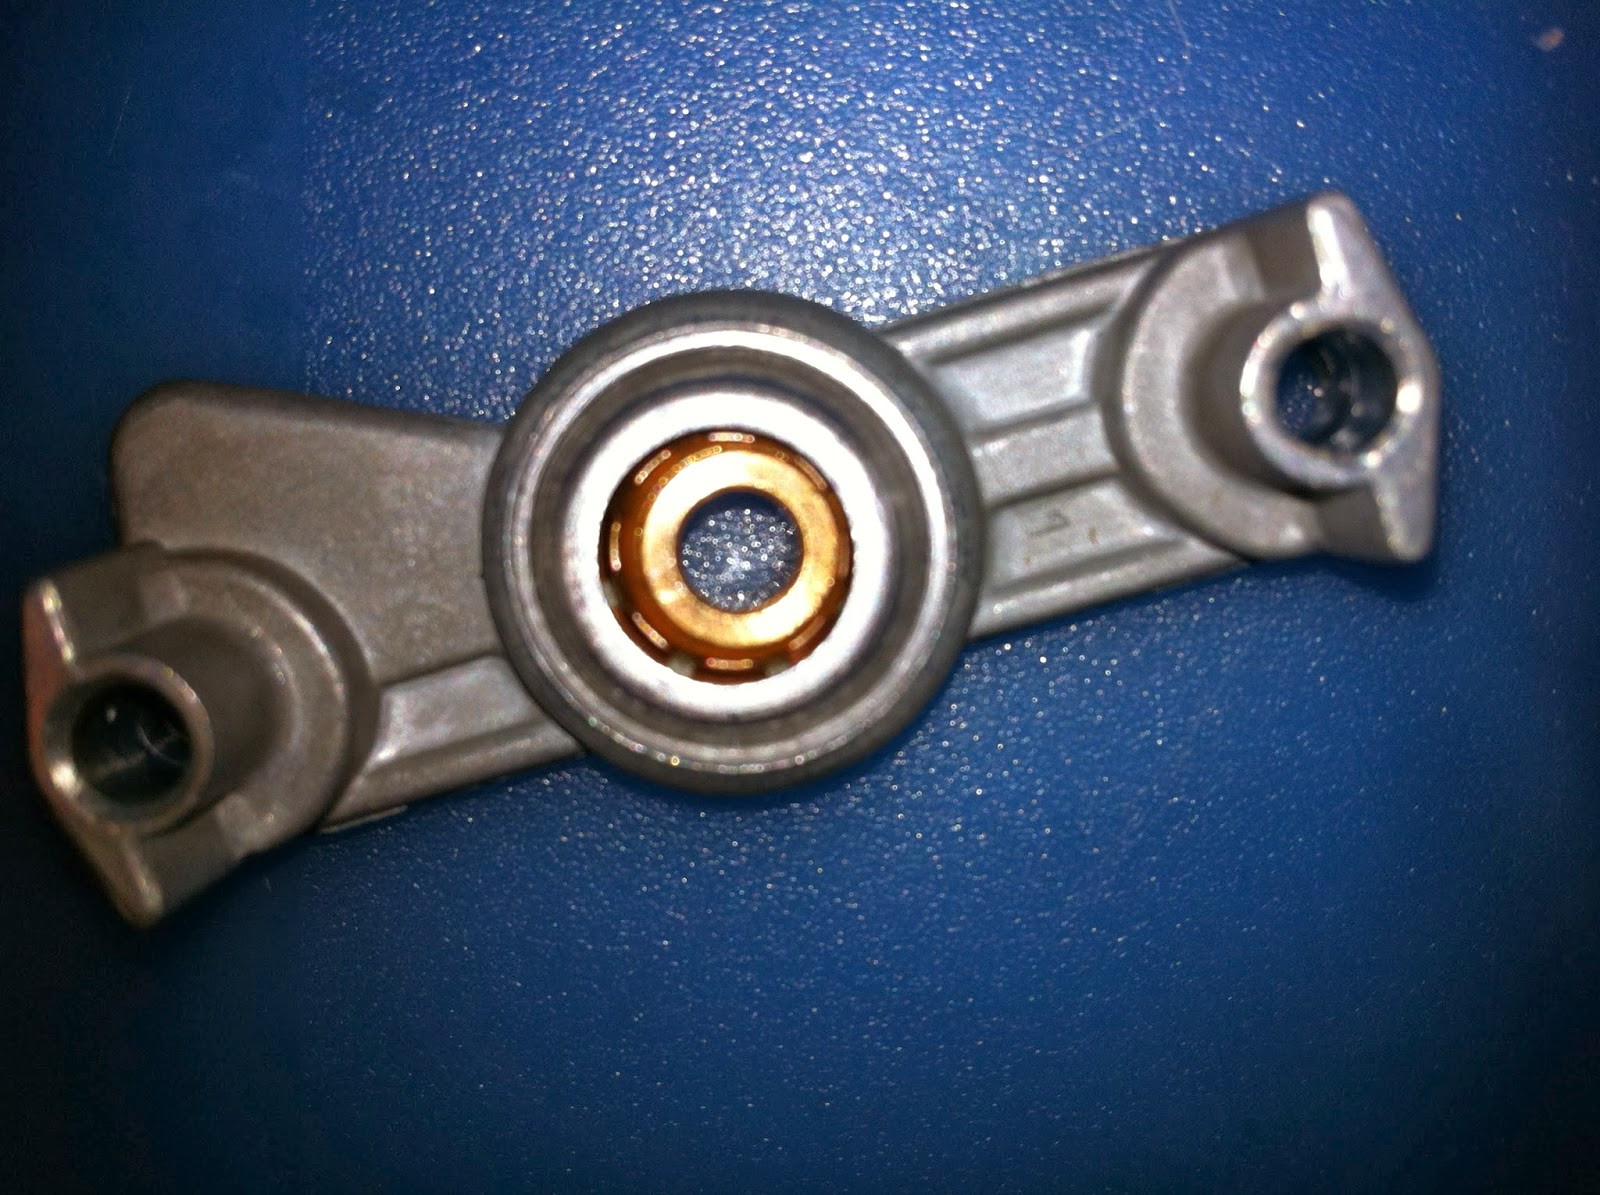
With all three rods removed, you can see the motor top plate with the three rubber bushes. The grey hole near the center spindle is the oil reservoir that the top plate oil point feeds into. I removed the three rubber bushes and set them aside. I carefully applied a few drops of sewing machine oil into the oil hole. The sticker on the top plate recommends 2-3 drops, but since this Pioneer PL-12D hadn’t been used in a while, I added six, assuming some might act as a flushing agent. I then carefully placed the motor in the plinth base, below its usual top-plate mounting position.
 Underside of Pioneer PL-12D top plate, showing motor mounting points and main bearing well.
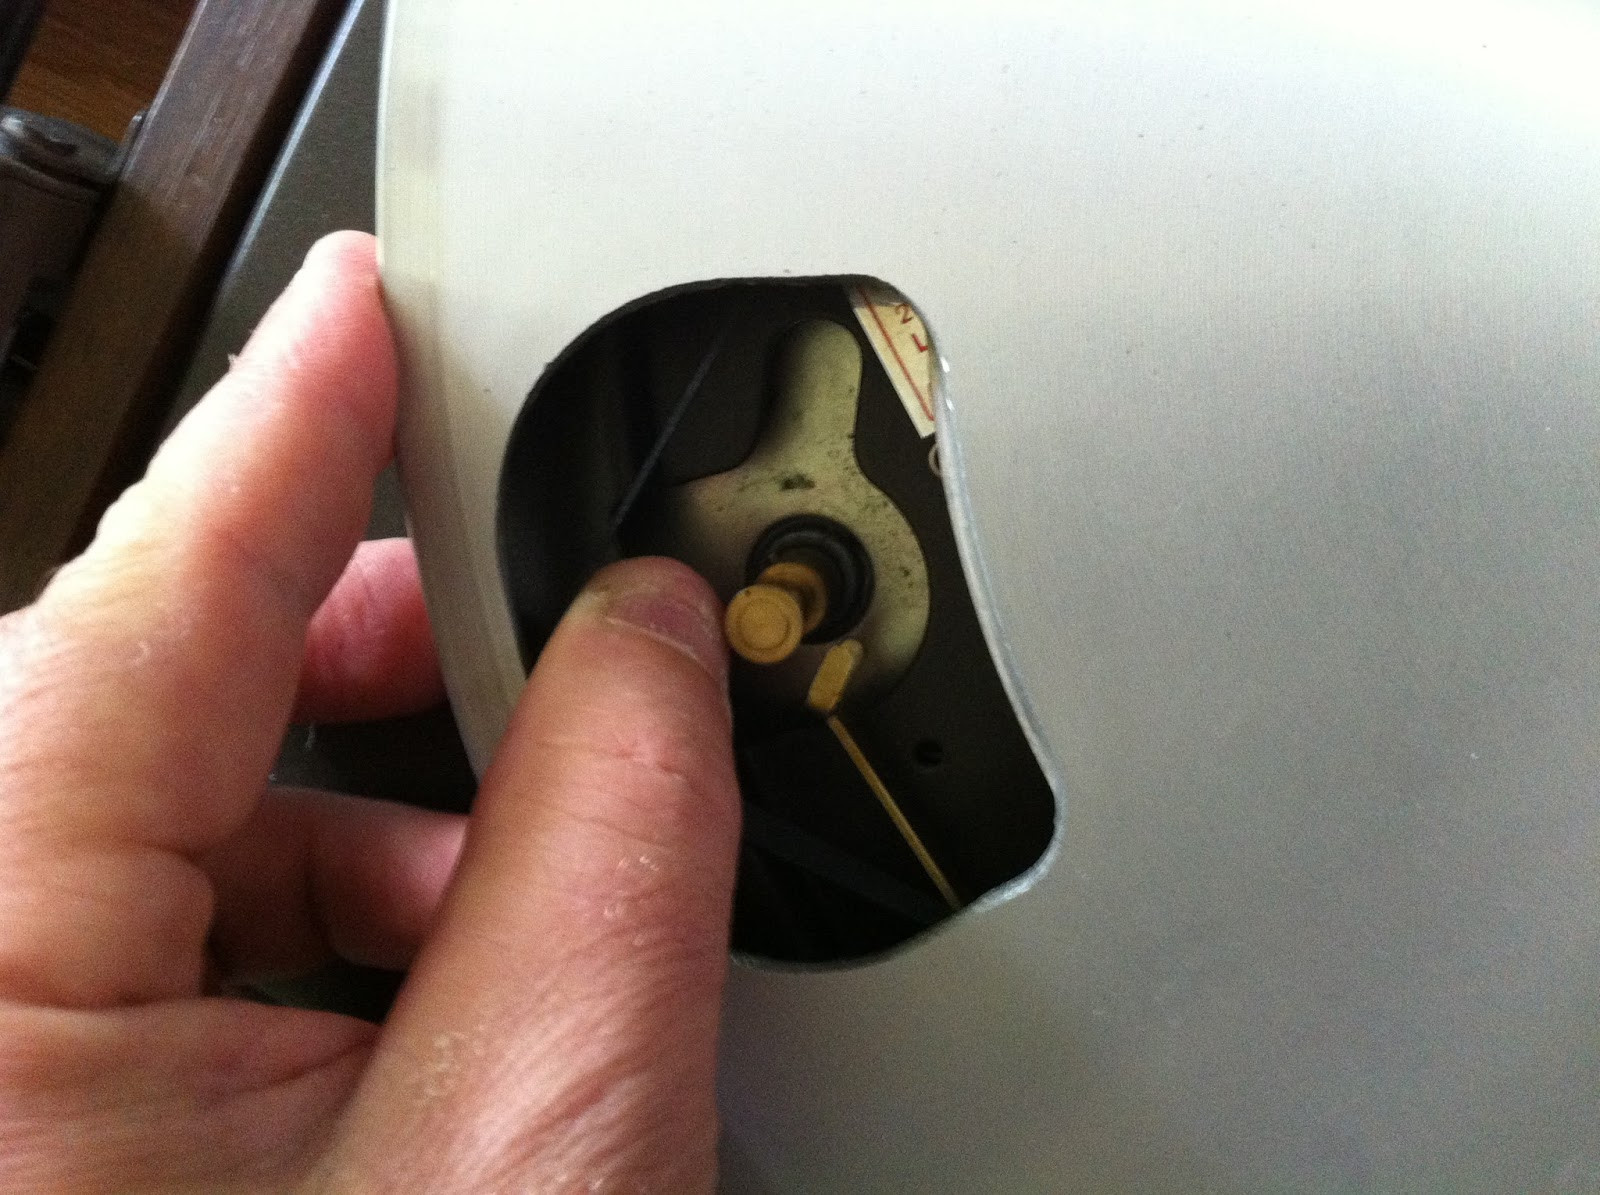
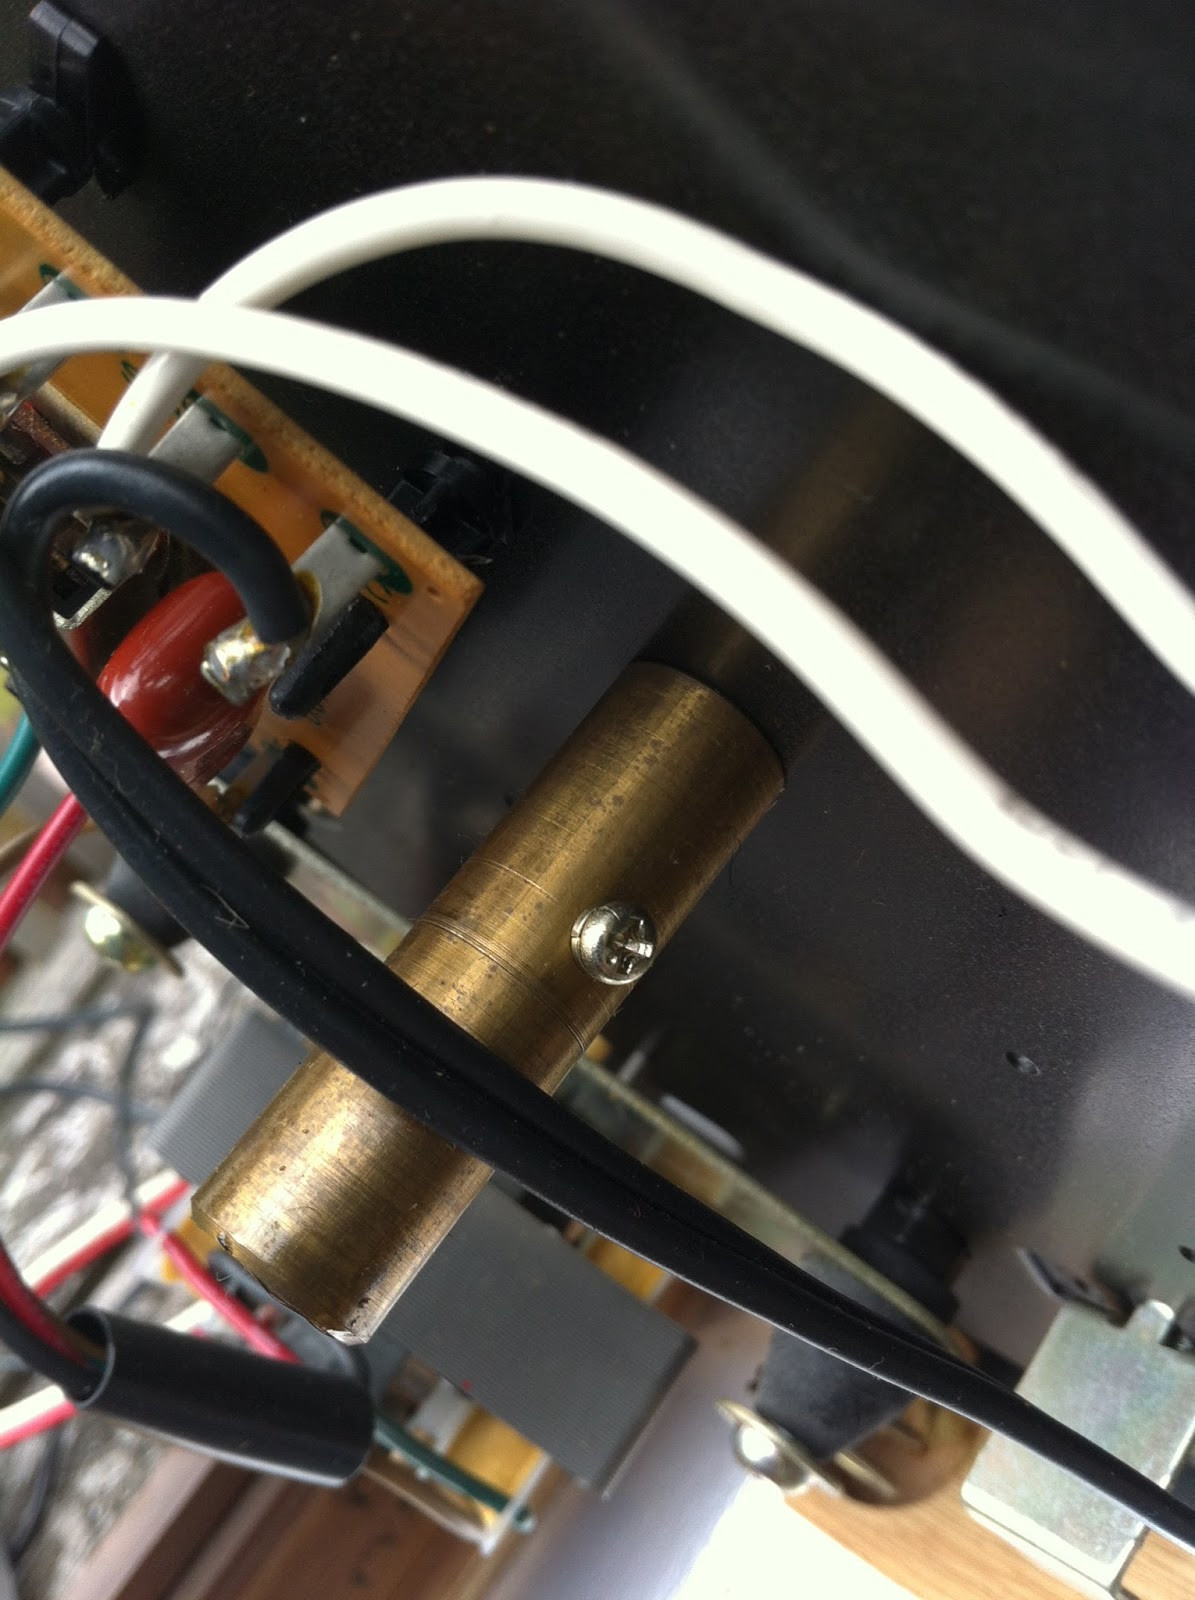
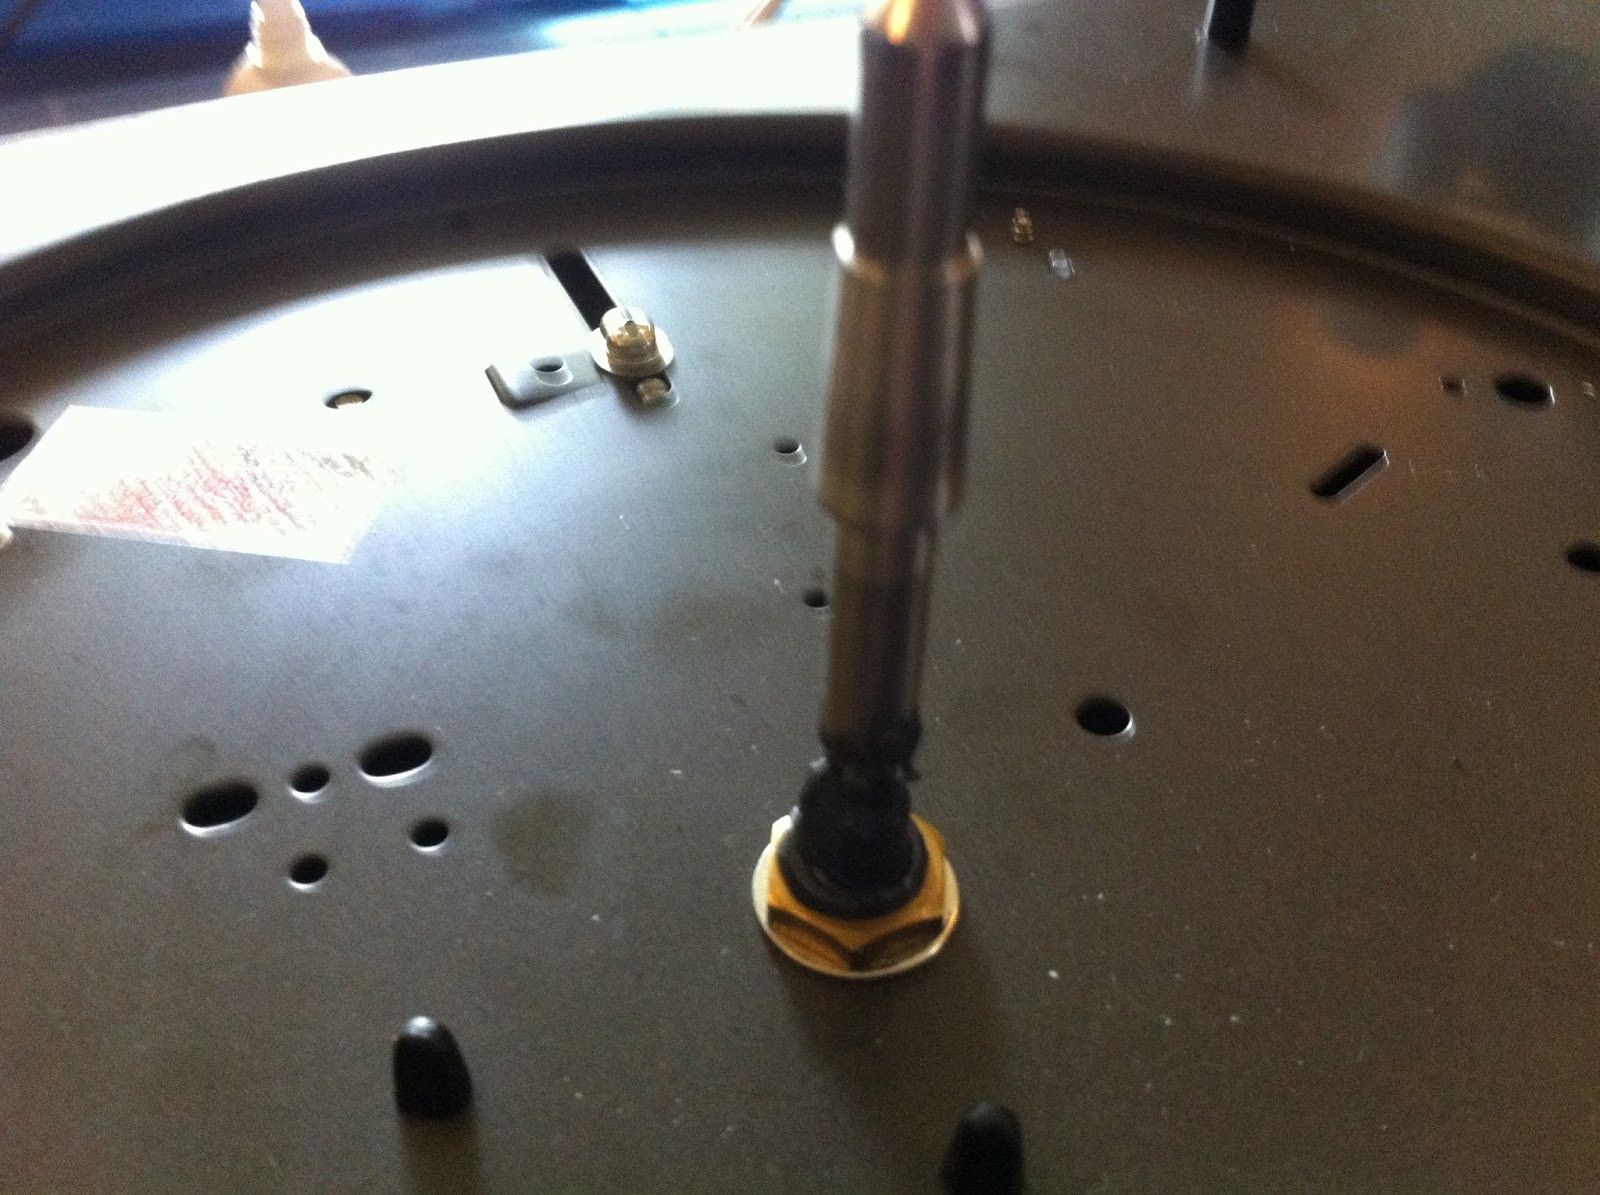
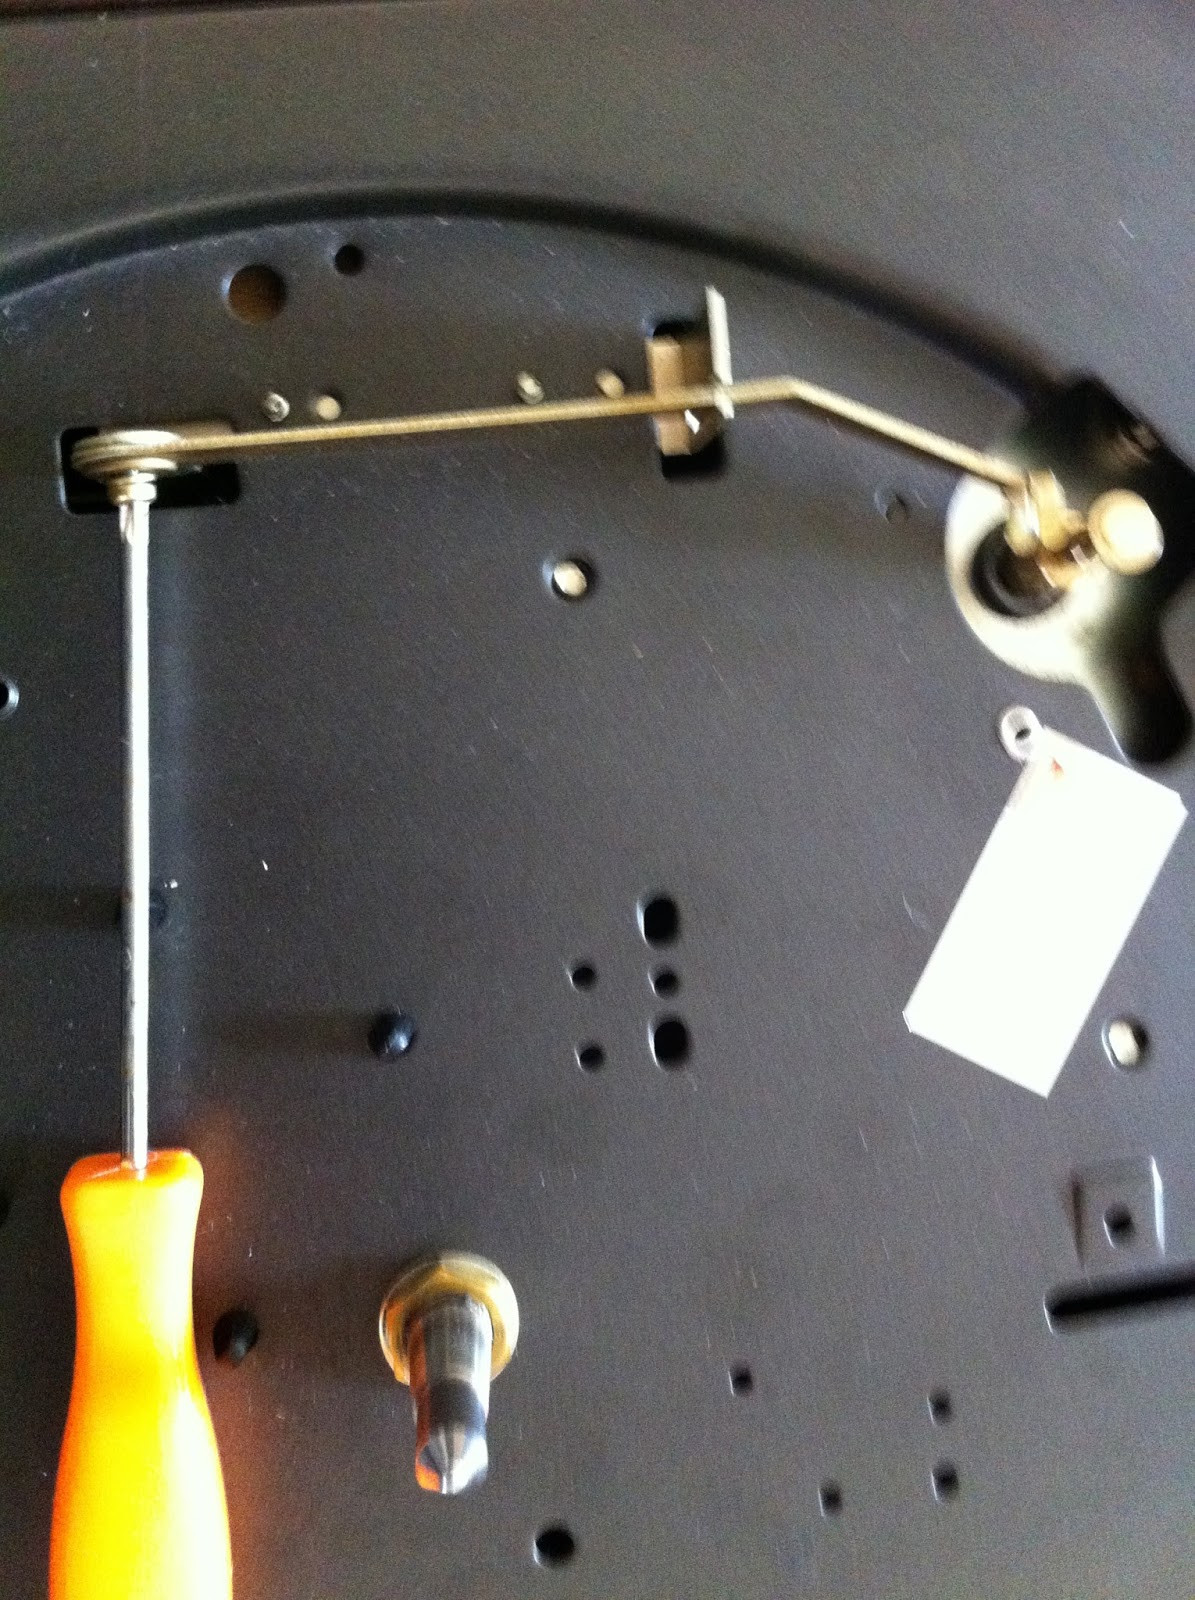
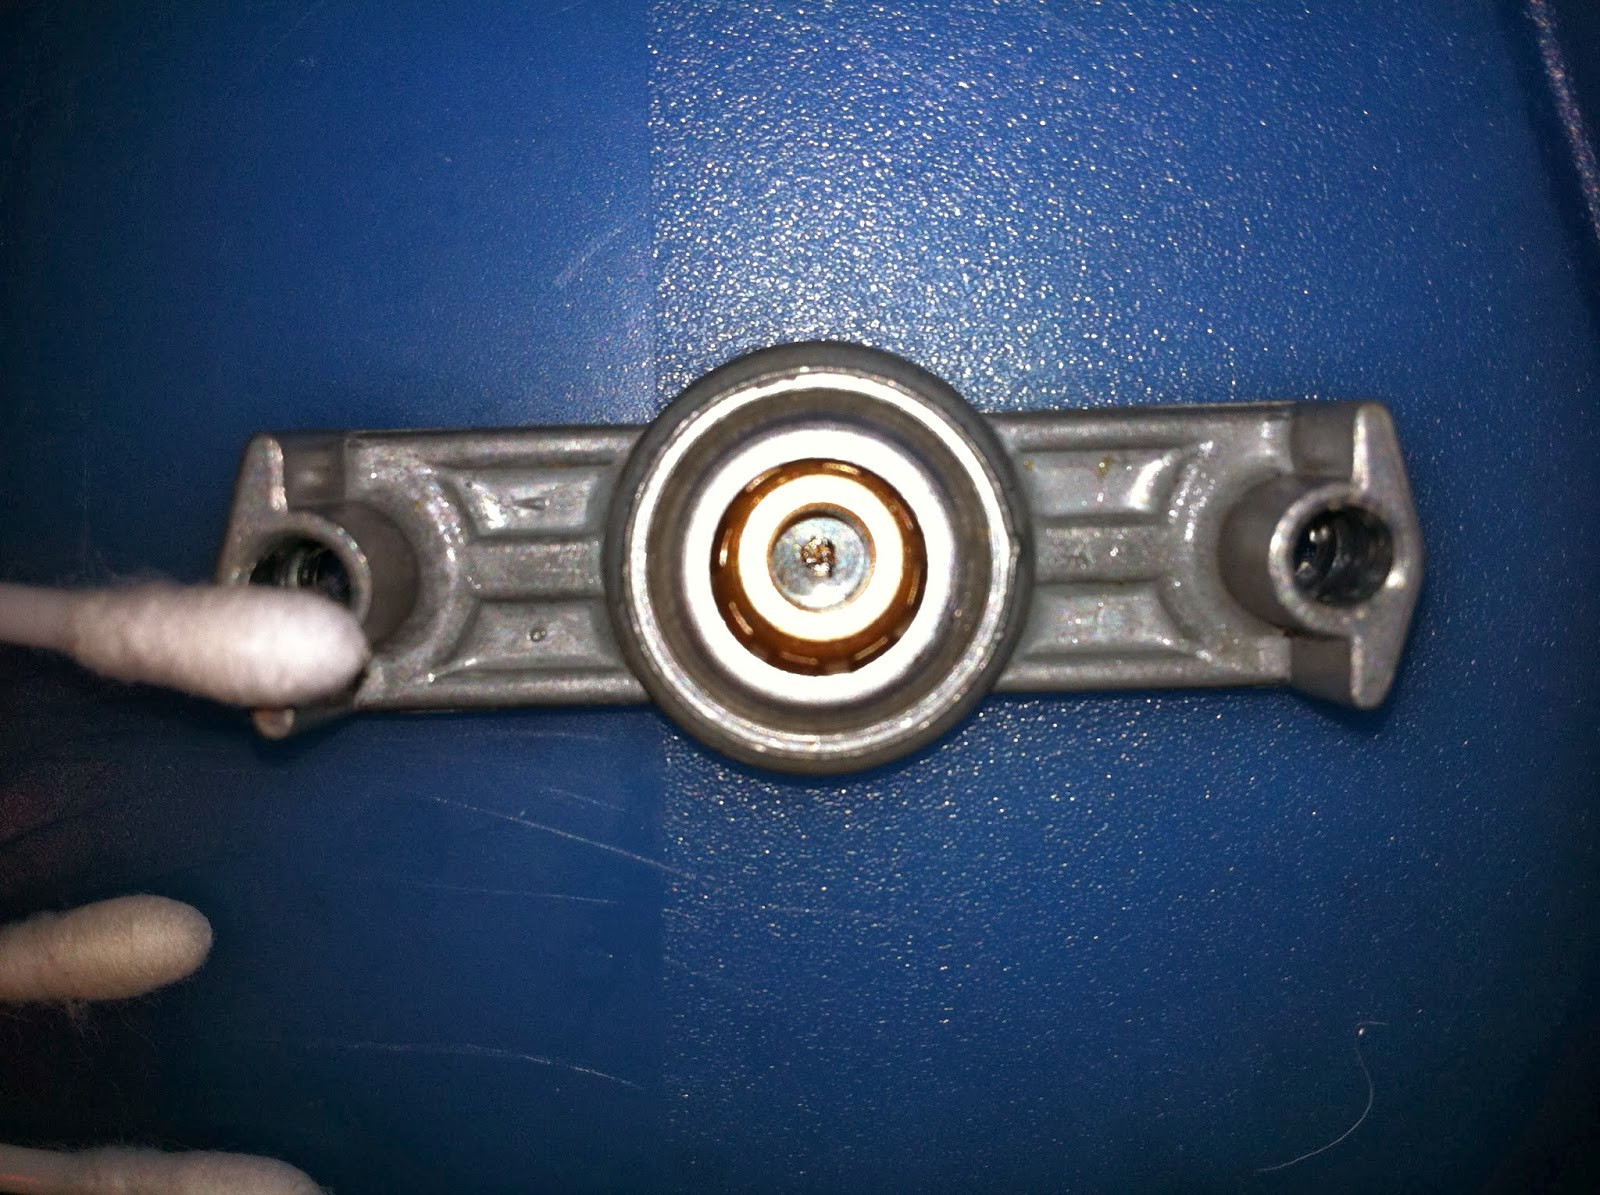
Here you can see the underside of the top plate. While the motor was soaking in oil, I turned my attention to the main bearing. The spindle, the steel rod supporting the platter and the record, is captive on the Pioneer PL-12D. It cannot be removed from above without first loosening a screw underneath. In the image above, you can see the brass well that the spindle sits in. The side screw engages with a recessed section on the spindle, preventing upward removal.
 Close-up of Pioneer PL-12D main bearing well and locking screw, illustrating spindle retention.
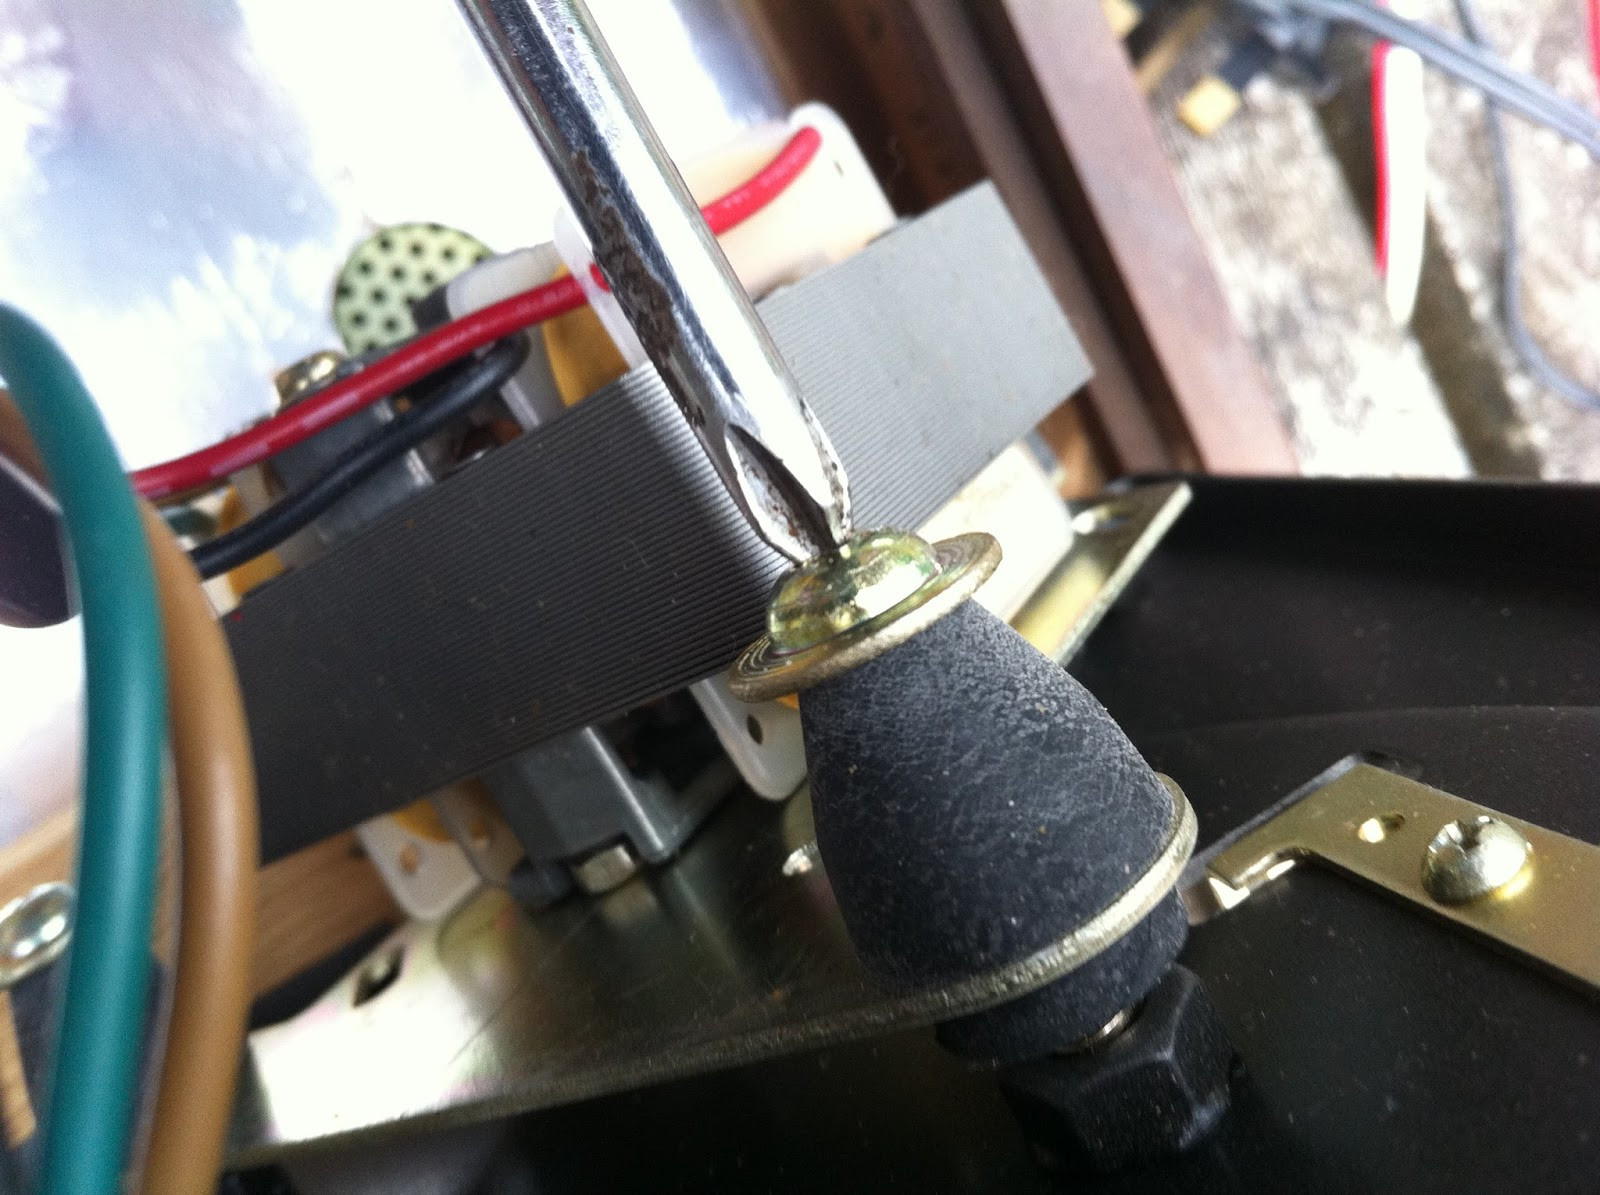
This inverted picture shows me loosening the screw. It doesn’t need to be fully removed, just enough to allow spindle extraction. After removing the spindle, I found hardened brown grease on the shaft. I soaked the spindle in hot soapy water to remove the worst of it. Inside the brass well, you should find more hardened grease and a ball bearing. The bearing might stick to the spindle’s end or be missing if a previous owner lost it. If it’s still in the well, carefully invert the deck or use a non-metallic tool like a drinking straw to extract it without scratching the well. Clean the bearing with soapy water. If lost or absent, it’s a standard 1/8″ steel ball bearing, readily available. I once lost a bearing on another PL-12 and bought a pack of 30 cheaply from a cycling shop. Worn bearings can become pitted, so inspect the old one (see Update May 2014 below). A clean bearing should be shiny and roll freely and quietly in any direction on a flat surface like a mirror. A worn bearing will be noisier, roll erratically, and may have a dull color. Replace it if in doubt; they are inexpensive.
 Pioneer PL-12D spindle and bearing components after cleaning, ready for reassembly.
While soapy water removed some grease, it didn’t eliminate it entirely. I used Servisol Switch cleaner and a soft cloth to polish the spindle shaft. I used the same cleaner and cotton buds to clean the brass well until the buds came out clean, free of grease or steel filings.
 Pioneer PL-12D spindle shaft being cleaned with Servisol and a soft cloth.
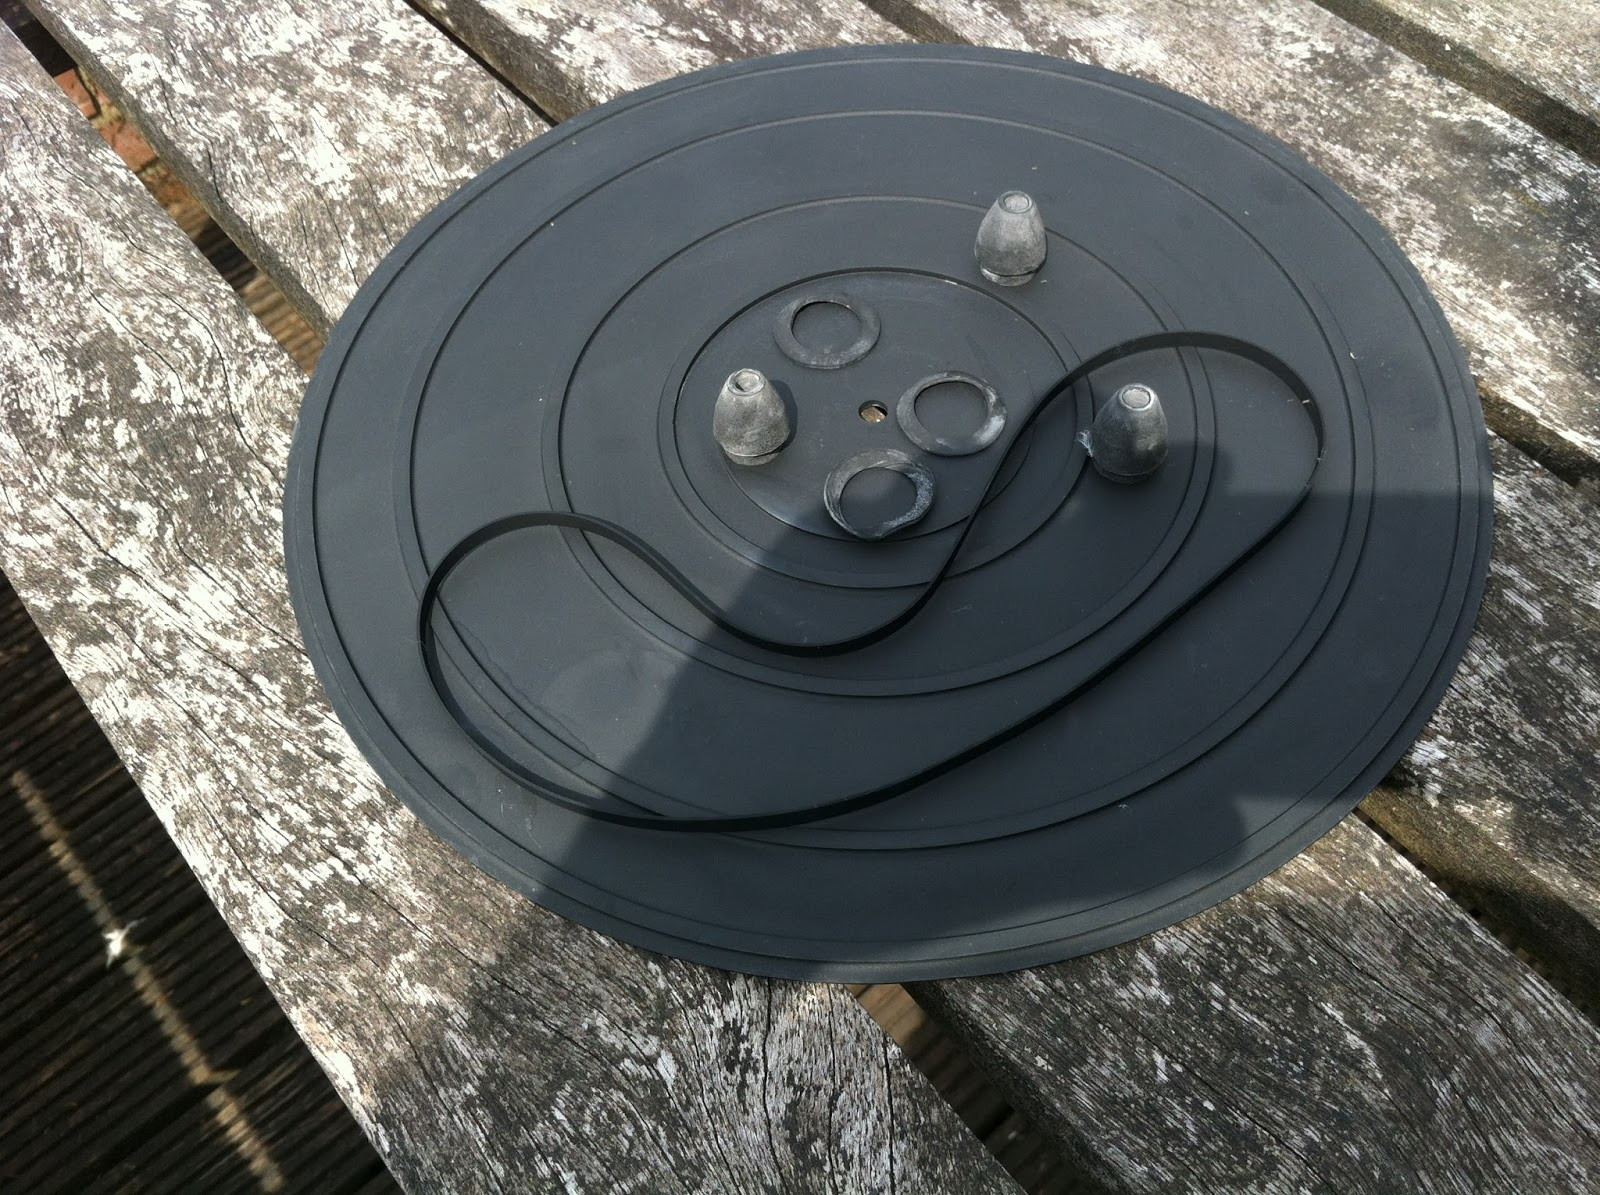
Next, I gathered all the removed rubber components: the mat, belt, three spring washers, and motor support bushes. I should have included the feet, but they appeared fine and didn’t seem to need the following treatment.
 Collection of Pioneer PL-12D rubber components ready for restoration treatment.
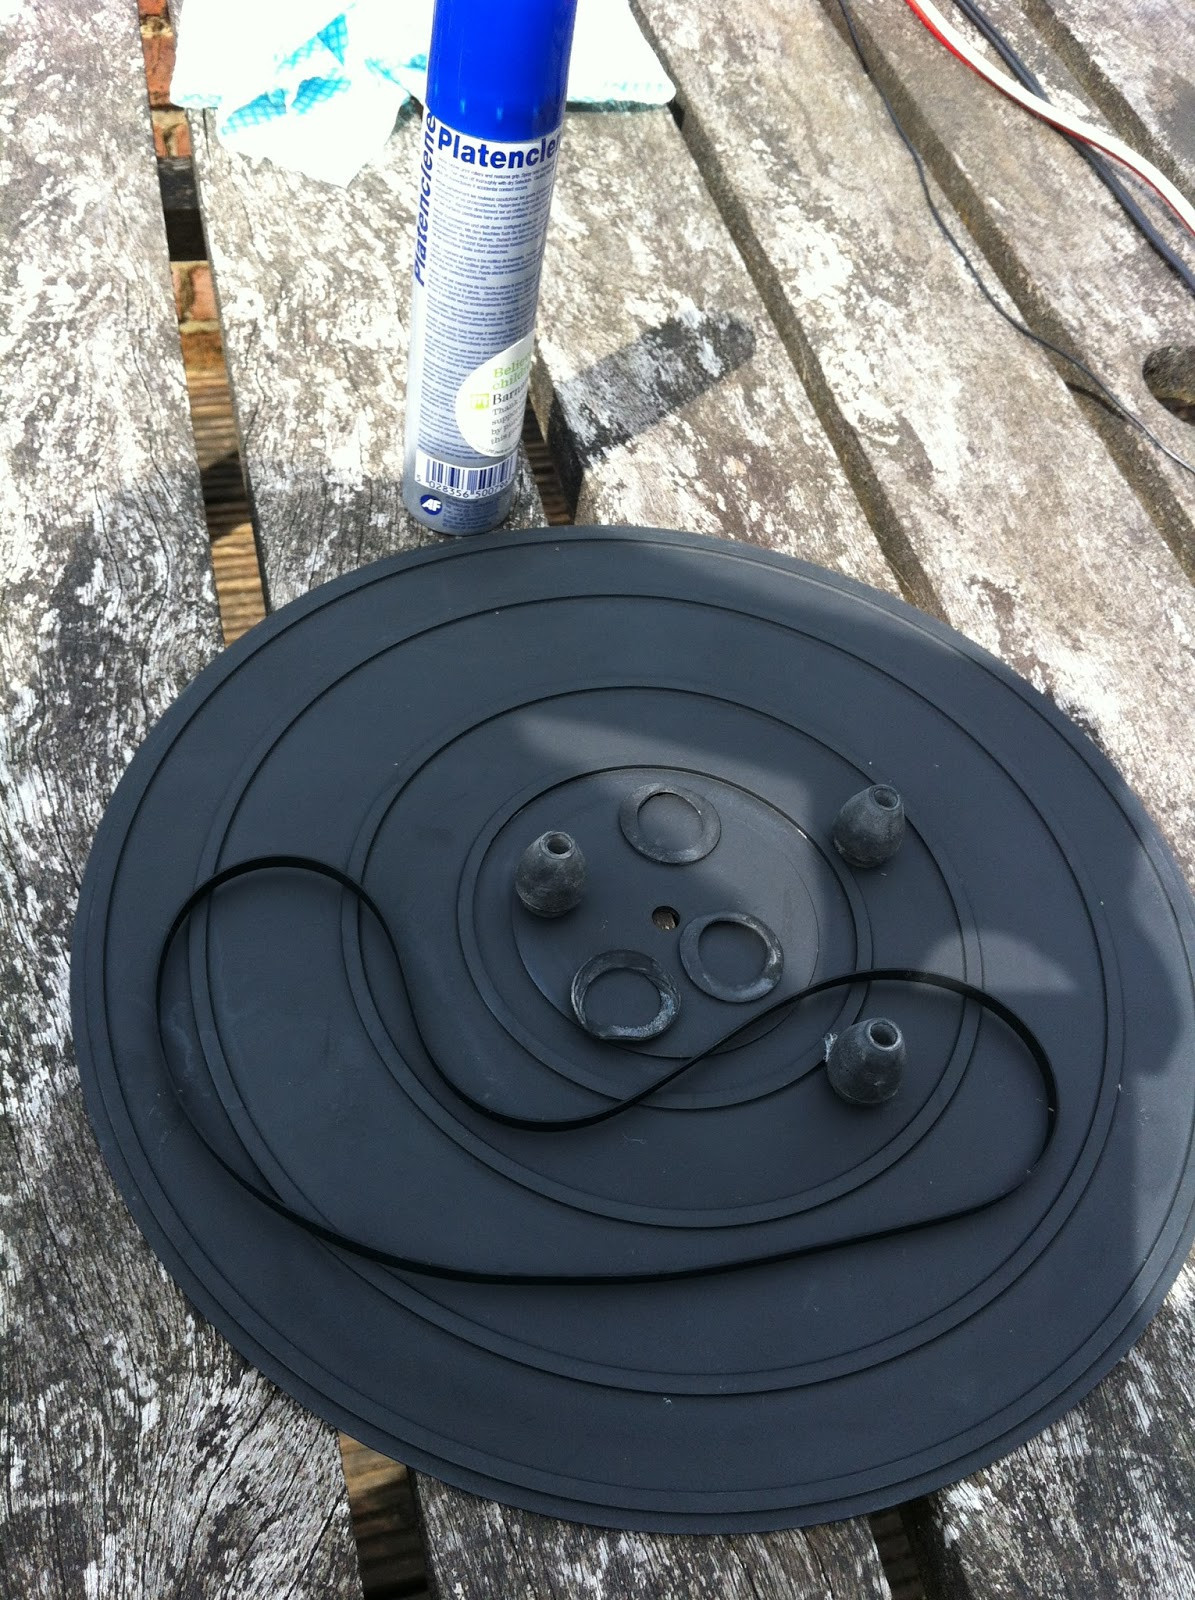
In a previous blog post, I detailed restoring a turntable mat from dull grey and hard to black and supple using Platenclene Printer Roller Restorer. Here, I placed all the smaller rubber parts in a plastic bag with Platenclene and worked the fluid into them, especially the motor bushes where they contact the top plate.
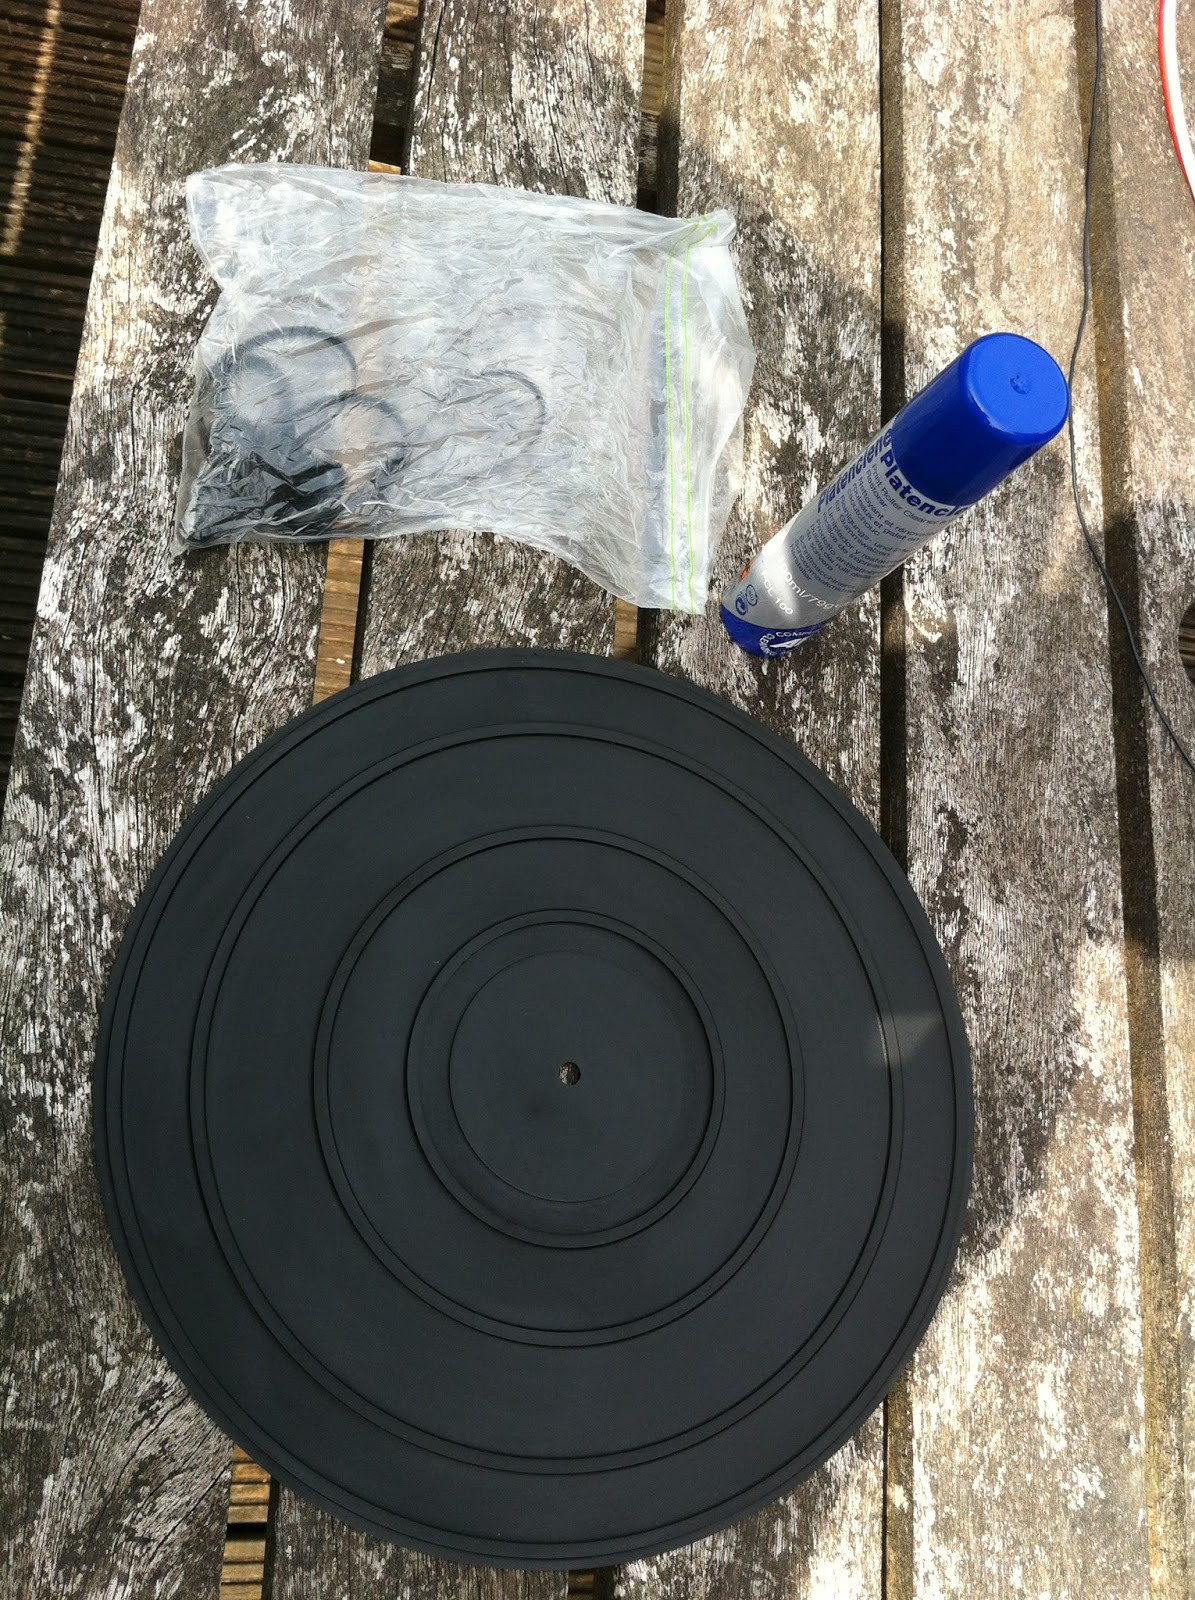 Pioneer PL-12D rubber components being treated with Platenclene roller restorer in a plastic bag.
I also sprayed Platenclene on the mat and wiped it down thoroughly on both sides.
 Pioneer PL-12D platter mat being treated with Platenclene roller restorer, improving suppleness and color.
While the Platenclene worked its magic, I dropped the ball bearing back into the well, dipped the lower half of the spindle in fresh oil, and reinserted it into the brass bearing well.
 Pioneer PL-12D spindle being re-lubricated with oil before reinsertion into the bearing well.
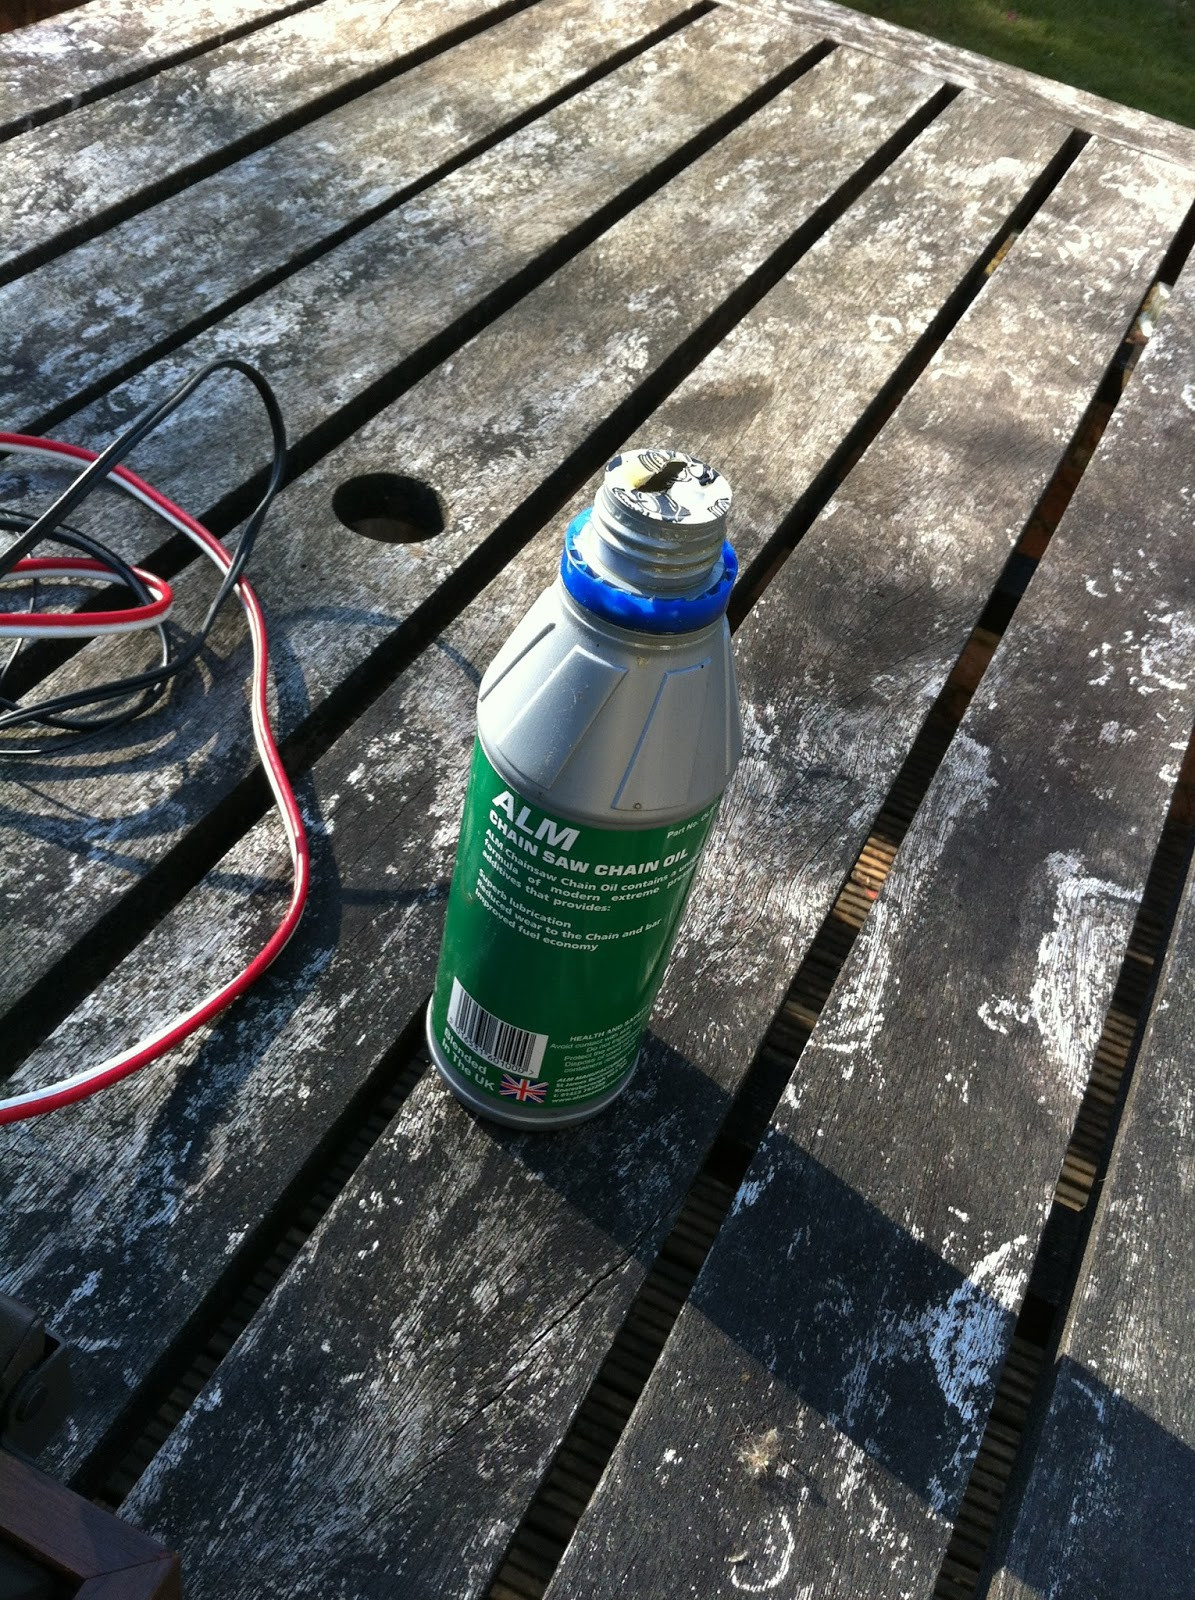
I used chainsaw oil, slightly thicker than sewing machine oil, though most synthetic oils will work. Some prefer sewing machine oil. Once the spindle was back in and settled, I tightened the retaining screw. The spindle now turned smoothly and effortlessly.
 Pioneer PL-12D main bearing reassembled, showing smooth spindle rotation after lubrication.
I reinstalled the rubber components onto the motor; they simply press back into place. I reattached the motor with its three screw-in rods and replaced the three spring washers. I didn’t yet have foam rubber for the springs, which I’d address later. I wiped down the plinth and top plate with a damp cloth. Don’t forget the two sliding retaining screws, which secure the top plate to the plinth. I then replaced the platter with the belt looped over the spindle via the access holes. Lastly, I placed the restored mat with its silver ring on top.
I didn’t reattach the headshell yet as I was awaiting a stylus replacement and planned a separate post detailing final setup, including foam rubber damping inserts for the springs. This stage focused solely on component restoration.
 Pioneer PL-12D chassis reassembled after component restoration, awaiting final setup.
With everything reassembled, I let the Pioneer PL-12D run for a few hours to allow the motor and bearing lubrication to distribute properly. The motor can get warm, aiding in the oil’s penetration into dry parts. After a couple of hours, listening closely, I detected minimal noise from the motor or bearing, indicating smooth operation.
Next steps: replacing foam inserts, fitting a new stylus, and setting tonearm geometry and settings.
 Selection of foam rubber and watch packaging foam, materials used for spring damping replacement.
I found some dark grey foam rubber from watch packaging. It seemed reasonably springy, as some camping mattress foam can be too dense.
 Cutting foam rubber wads to size for insertion into Pioneer PL-12D suspension springs.
I cut four foam wads, sized to fit snugly inside the springs, and inserted them into each of the four main springs. With this done and the top plate re-lowered, the deck’s excessive springiness was tamed. The suspension became stiffer and slower, with reduced bounce.
 Foam wads inserted into Pioneer PL-12D suspension springs, improving damping and stability.
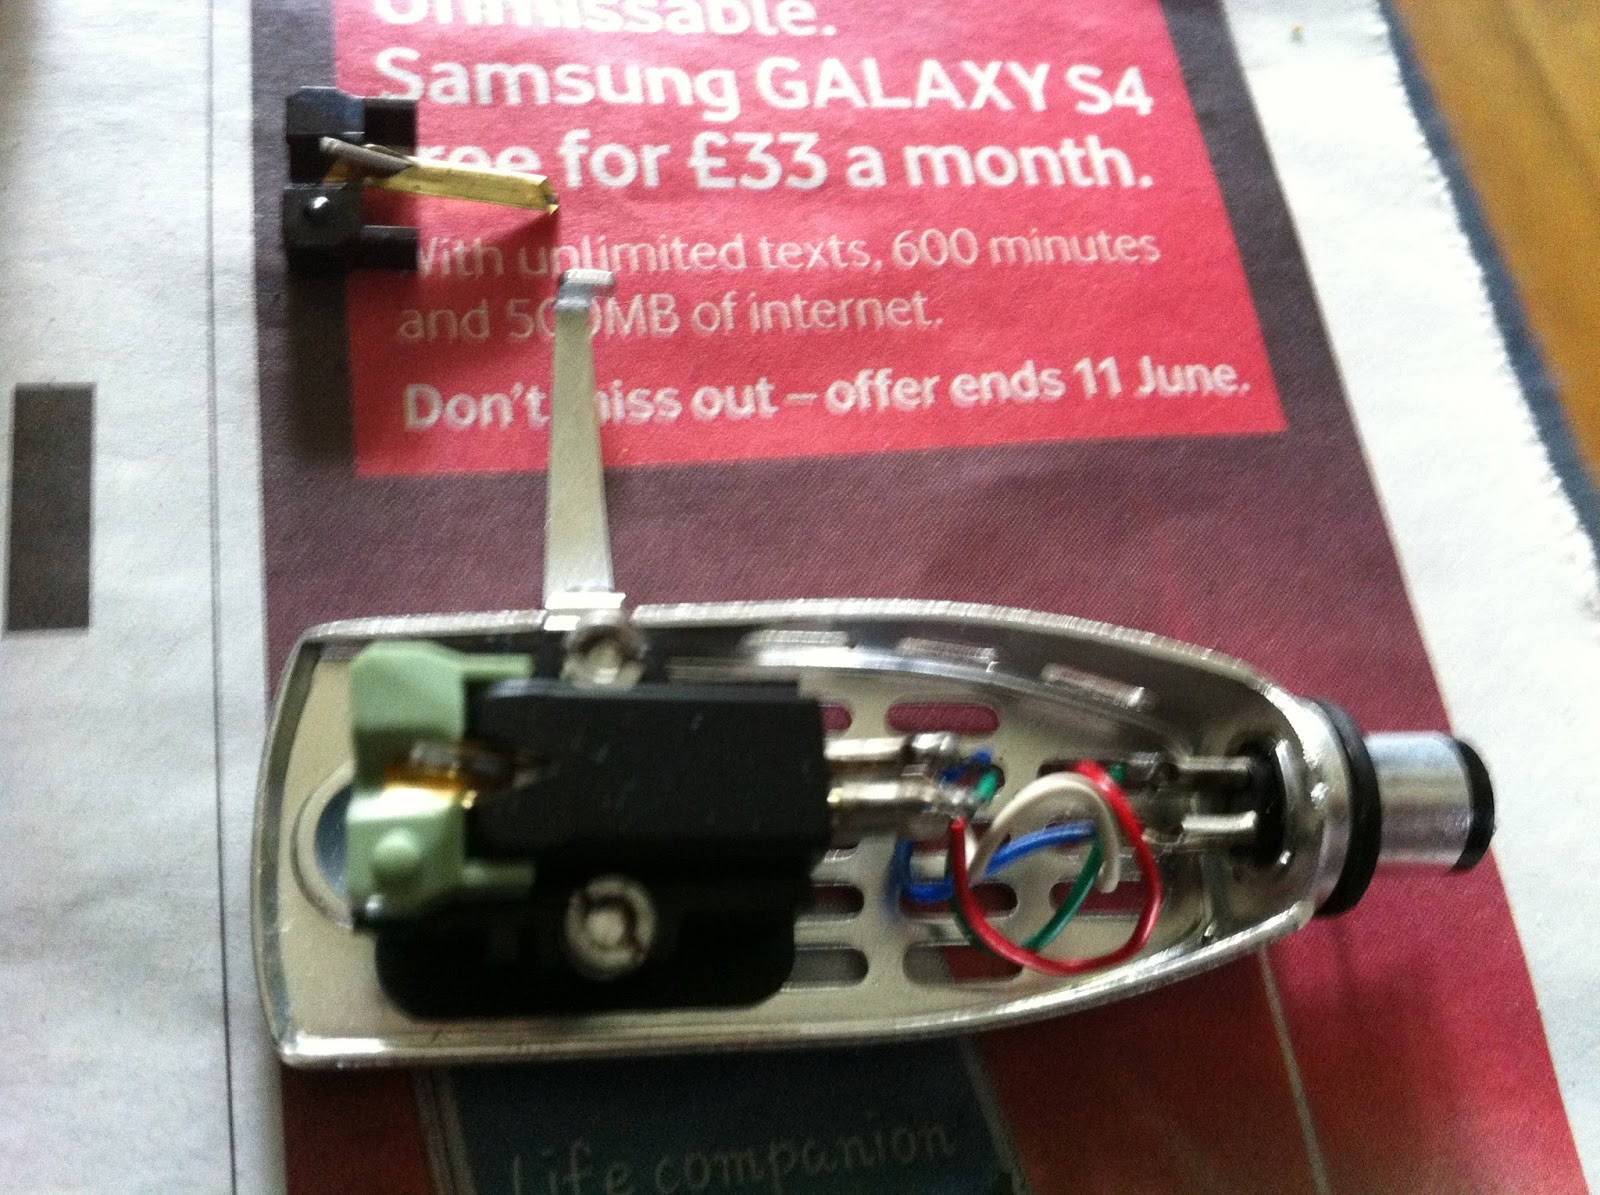
I had ordered a replacement stylus for the M75ED cartridge. Shure no longer manufactures this cartridge, and replacements are made by third parties. On CliveUK’s advice from the Vinyl Engine forum, I chose an N75EJ stylus from German eBay seller elec64, costing £18 and arriving quickly – excellent service. The old stylus slid out, and the new one pushed into the cartridge, distinguished by its light green front.
 Shure M75ED cartridge with old stylus removed and new replacement stylus ready for installation.
I carefully reattached the headshell to the tonearm. The next test was pitch accuracy: whether the platter rotated correctly at 33 1/3 and 45 RPM. Incorrect pitch would cause music to sound too high or low. Pitch issues can occur in belt-drive turntables if the belt slips. Motor speed is determined by mains frequency (50Hz in the UK/Europe, 60Hz in the US). Pioneer PL-12D models originally came with different motor spindles for different mains frequencies. This was a 50Hz unit.
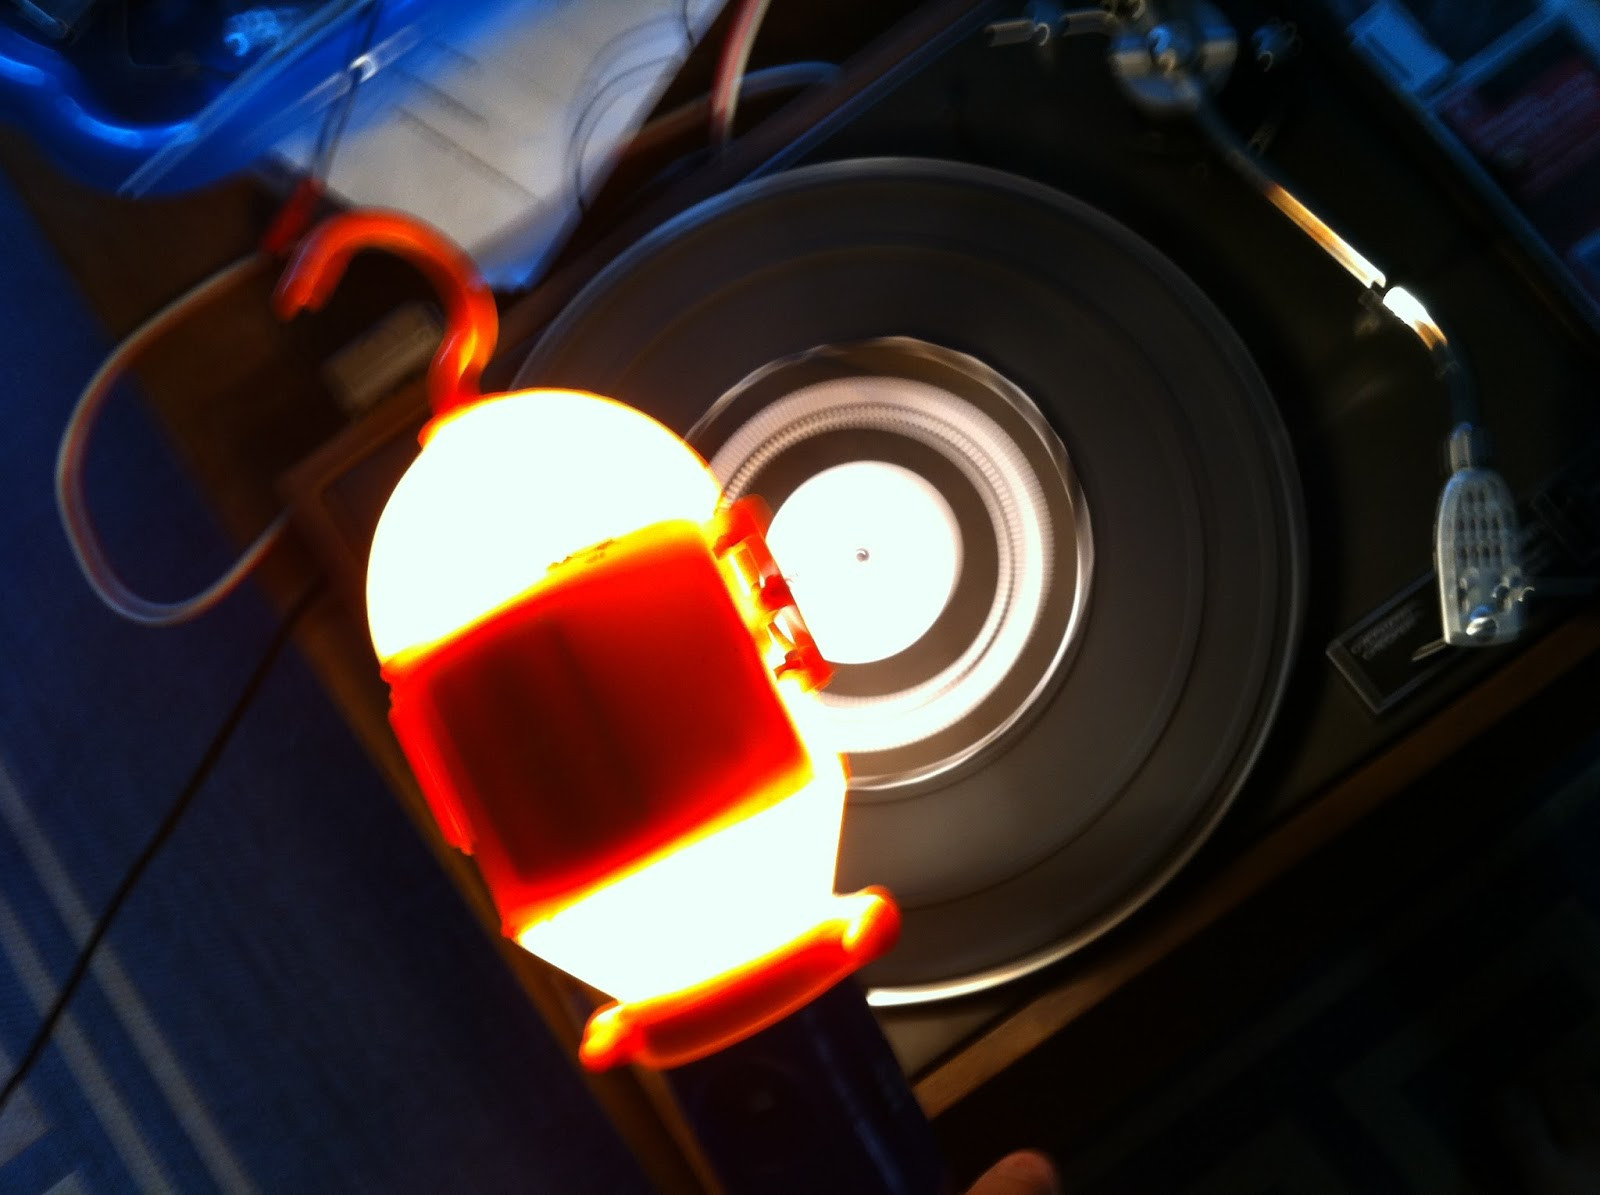
The easiest way to check pitch is with a vinyl engine pitch disc, printed on A4 paper. After printing and pricking out the center hole, place the disc on the platter and start the turntable. Shining a filament light on the spinning disc creates a stroboscopic effect with the markings. At the correct pitch, the dashed lines will appear stationary.
On this Pioneer PL-12D, the 45 RPM lines were stationary, correct. However, the 33 RPM lines appeared to advance clockwise, indicating a slight speed issue. I also noticed a gentle “motorboat” knocking sound and a scraping noise. I initially suspected insufficient lubrication.
 Vinyl Engine strobe disc printed and ready for pitch testing on the Pioneer PL-12D.
 Close-up of strobe disc under filament light, showing lines for pitch adjustment and verification.
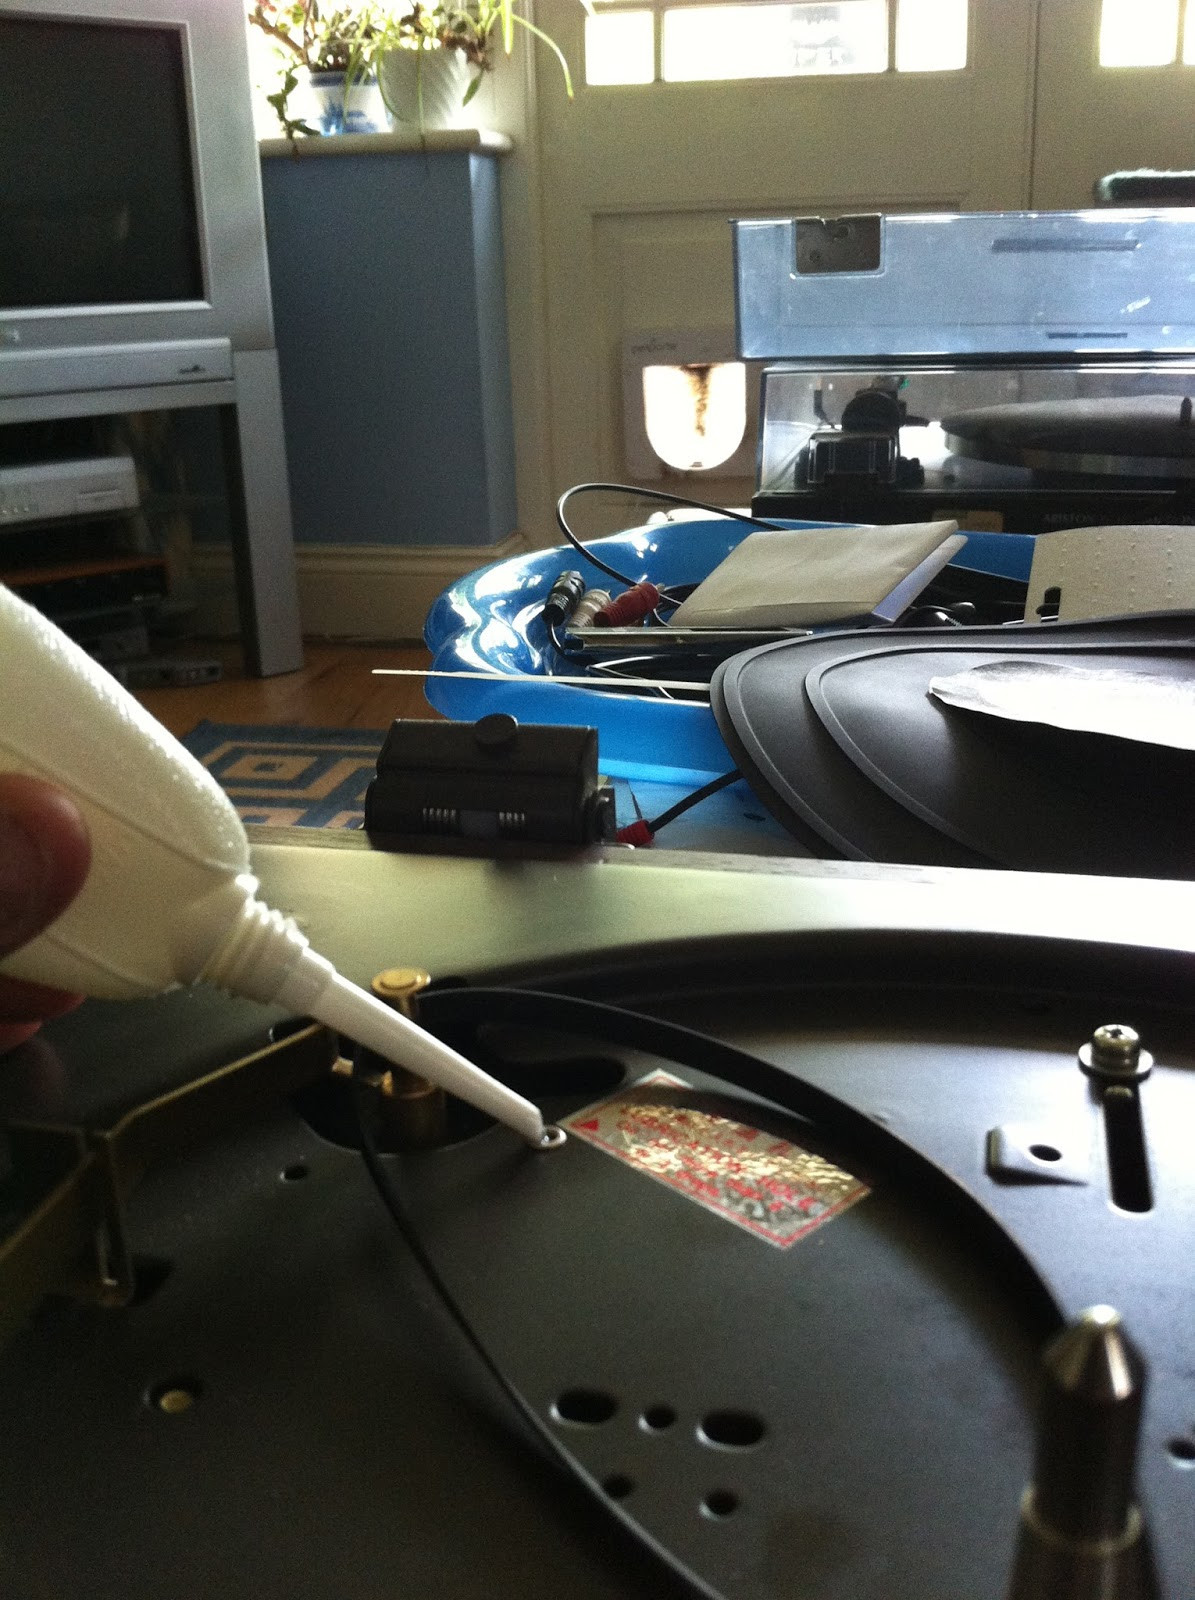
 Application of oil to the Pioneer PL-12D motor oil point for lubrication and noise reduction.
I added two more oil drops to the motor and replaced the spindle grease with thicker Castrol Moly Grease, suspecting bearing scraping. Neither resolved the issues. Then I realized that if 45 RPM was correct, the platter and spindle were fine at that speed.
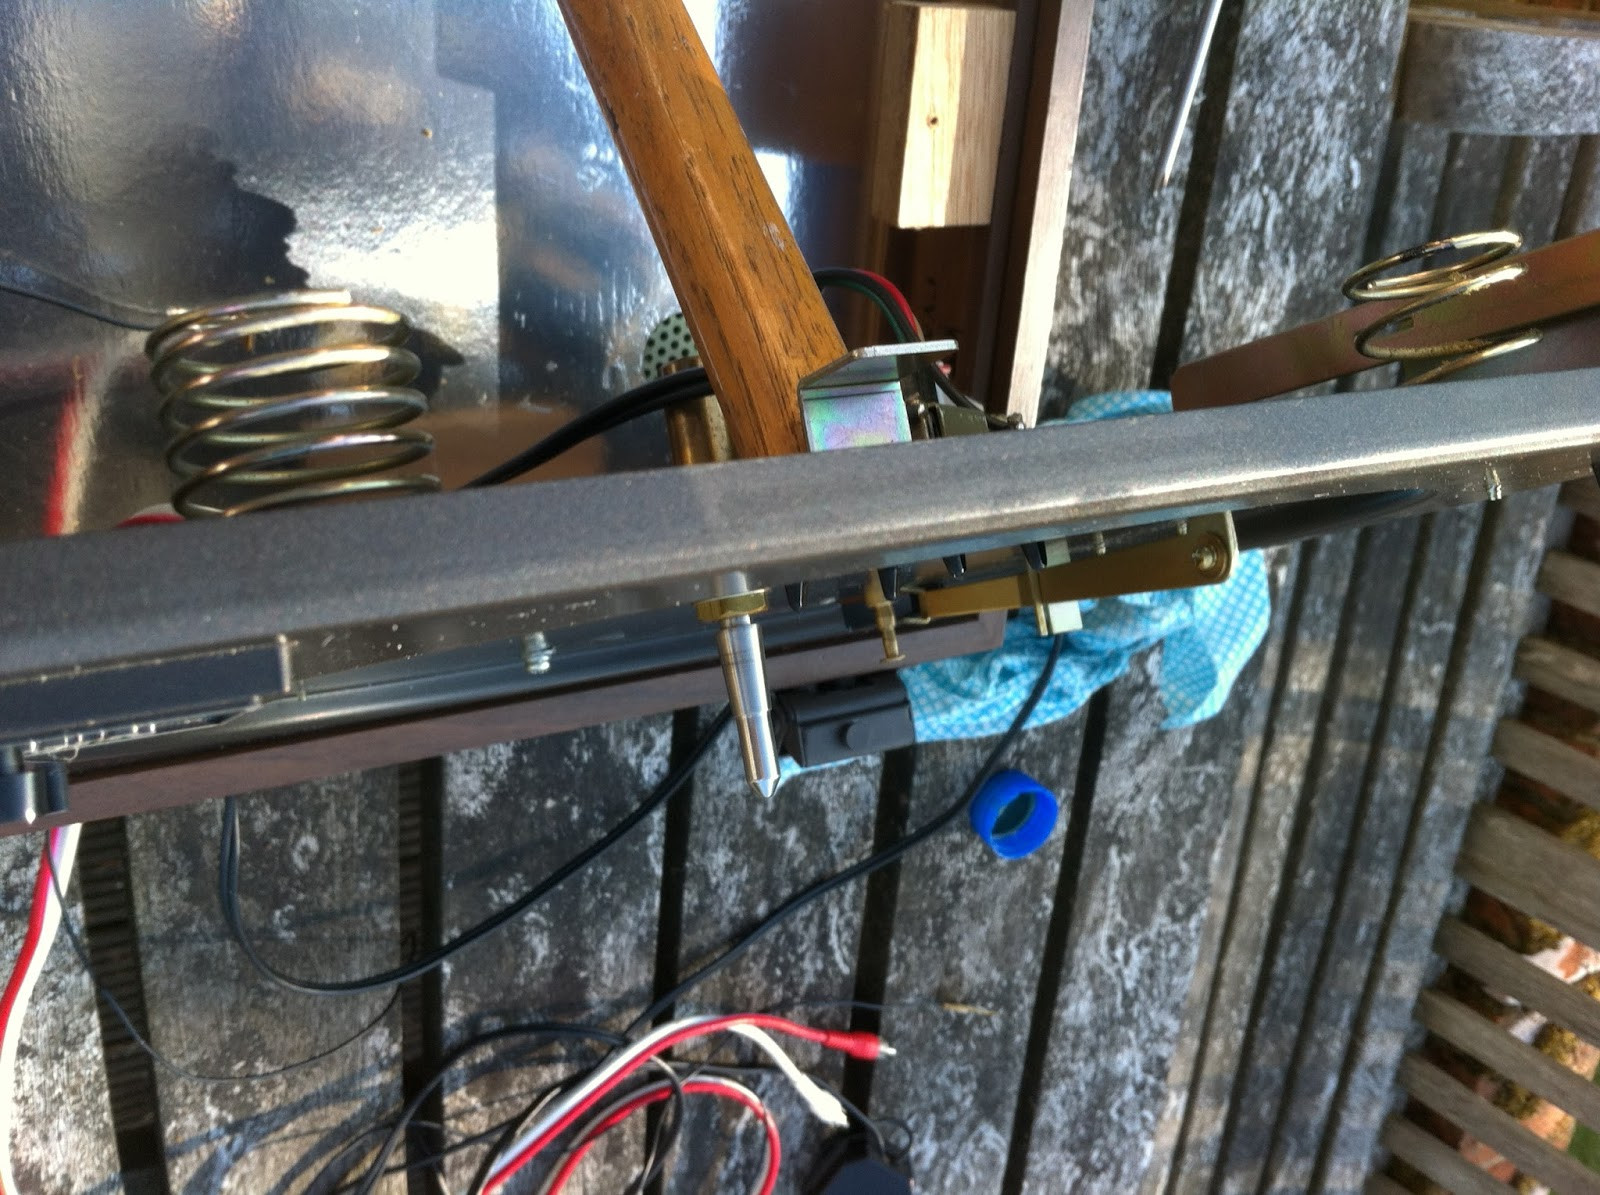
Closer inspection revealed that the speed selector wasn’t fully lifting the belt onto the 33 1/3 section of the spindle. The belt was partially on the conical section between the 45 and 33 1/3 diameters, causing the pitch issue. Additionally, the belt was rubbing against the alloy speed selector arm in the 33 position. Mystery solved!
 Speed selector mechanism on Pioneer PL-12D, showing belt misaligned between speed settings.
While tightening the speed selector arm screws might help, ideally, the spindle/capstan should be lowered slightly on the motor shaft by loosening its side screw. Instead, I gently widened the C-end of the selector arm until it cleared the belt and positioned it correctly on the 33 1/3 spindle section. The Pioneer PL-12D now spun at the correct speeds, verified with the strobe disc, and the scraping noise disappeared. A faint “motor boating” noise remained, but I decided to address that later.
 Adjusted speed selector arm on Pioneer PL-12D, belt correctly positioned for accurate speed.
Next, I focused on setting the tonearm geometry. While a detailed discussion is beyond this post, proper geometry is crucial for accurate stylus tracking. Ideally, the stylus should be tangential to the record groove from start to finish. However, pivoted tonearms like on the Pioneer PL-12D move in an arc, not a perfect tangent. This inherent compromise is well-understood in LP reproduction. Tangential tracking arms and complex designs like the Garrard Zero Deck have attempted to solve this, but pivoted arms remain the most common and often best compromise for sound quality.
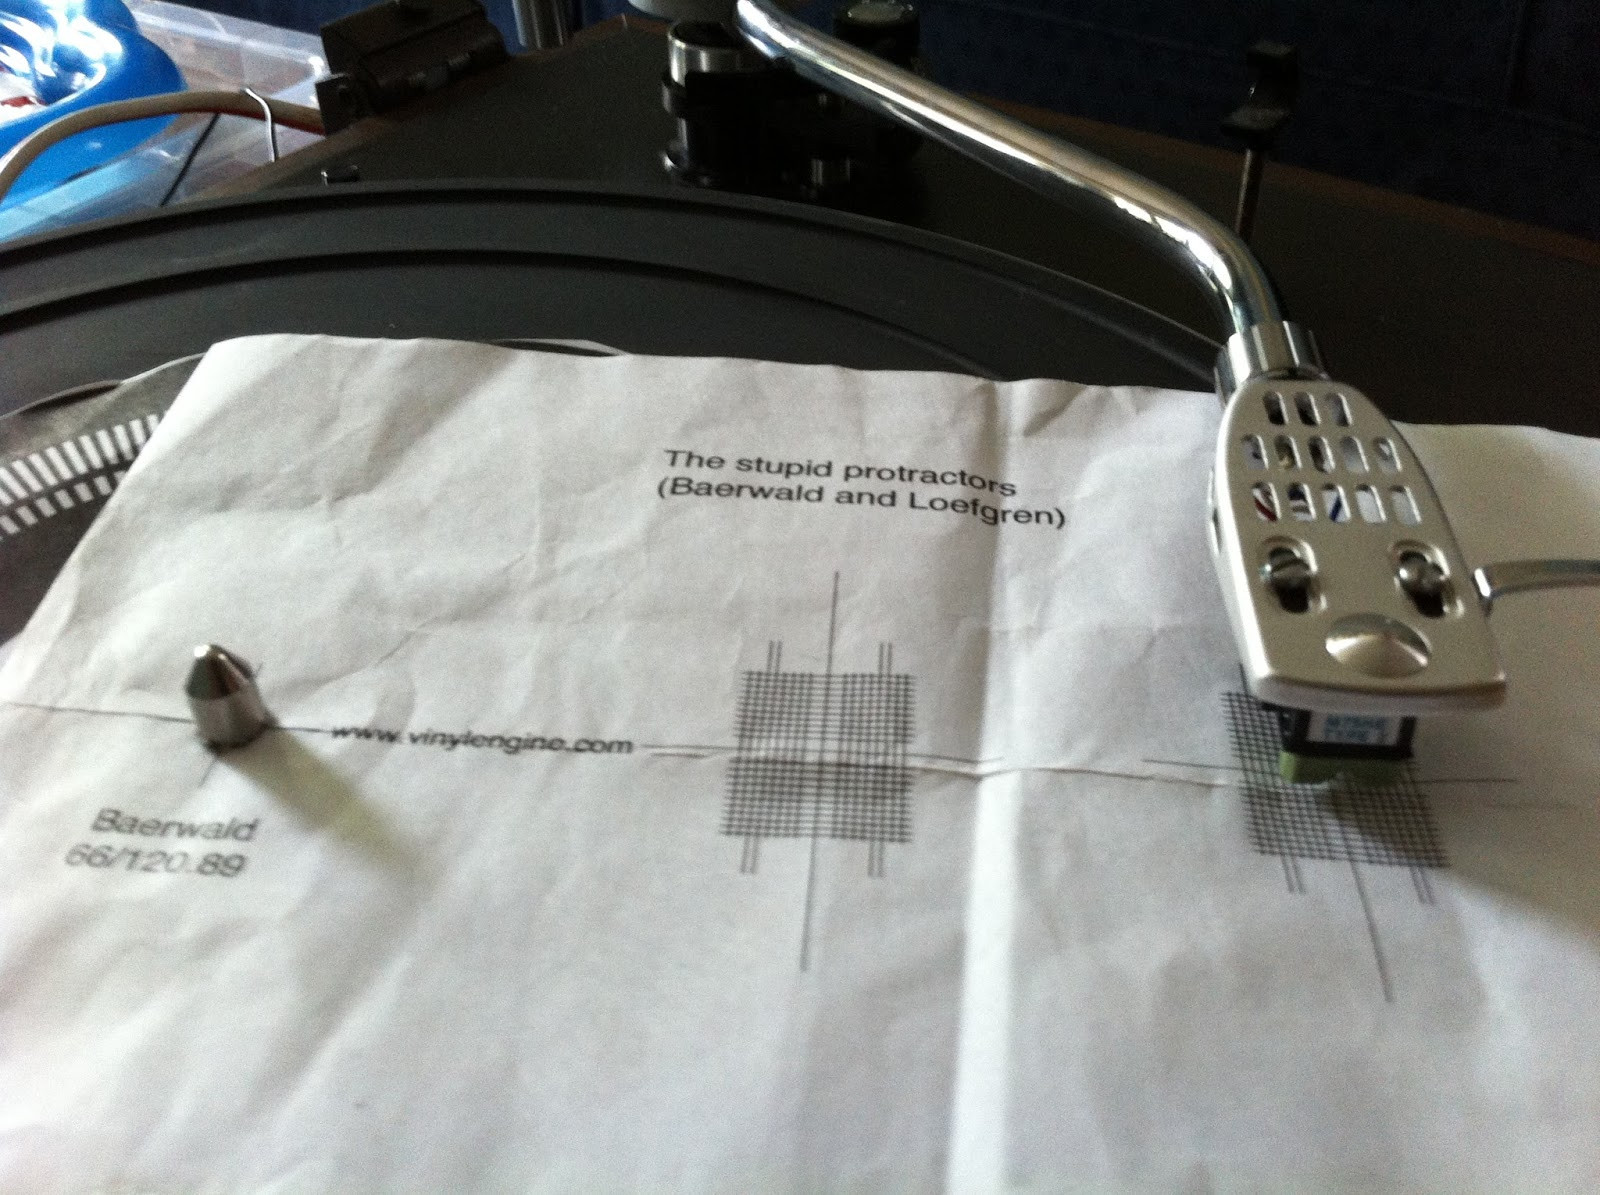
In practice, setting tonearm and cartridge alignment using two points on the record provides excellent results. I use Baerwald geometry, which optimizes for minimal tracking error at the beginning and end of the record side. Vinyl Engine provides printable protractors for various geometries, including Baerwald.
 Baerwald protractor printed from Vinyl Engine, placed on Pioneer PL-12D platter for alignment.
Lowering the tonearm carefully, I aligned the stylus with the crosshairs at each of the two Baerwald points on the protractor. After aligning the outer point, I rotated the protractor to align with the inner point. At each point, the cartridge sides should be parallel to the protractor’s grid lines. If not, gently loosen the cartridge screws and adjust its position in the headshell, moving it forward or backward until alignment is achieved at both points. This process can be fiddly and might require magnification. The Shure cartridge, with its square body, is relatively easy to align. Some cartridges with narrow bodies, like Ortofon OM models, are more challenging. Correct alignment might also require slightly skewing the cartridge in the headshell slots. Once aligned, tighten the cartridge screws, but avoid over-tightening.
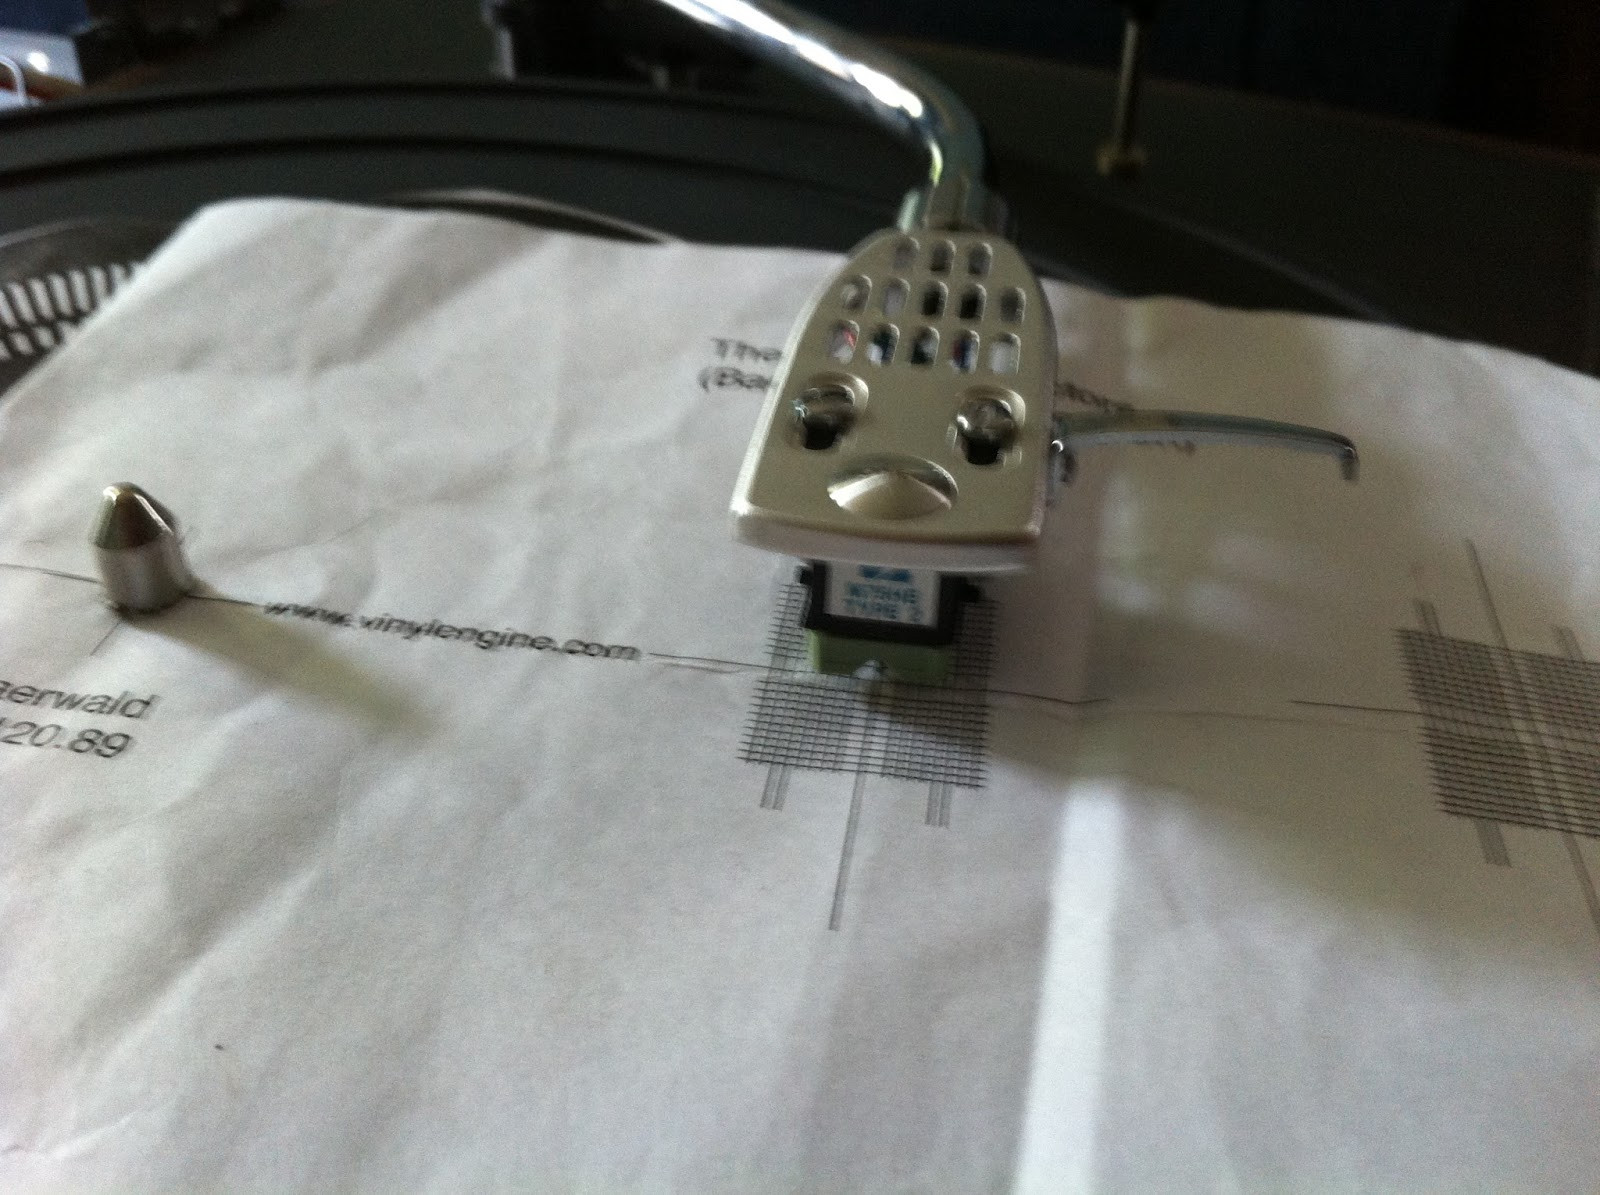 Cartridge alignment on Pioneer PL-12D using Baerwald protractor, showing cartridge parallel to grid lines.
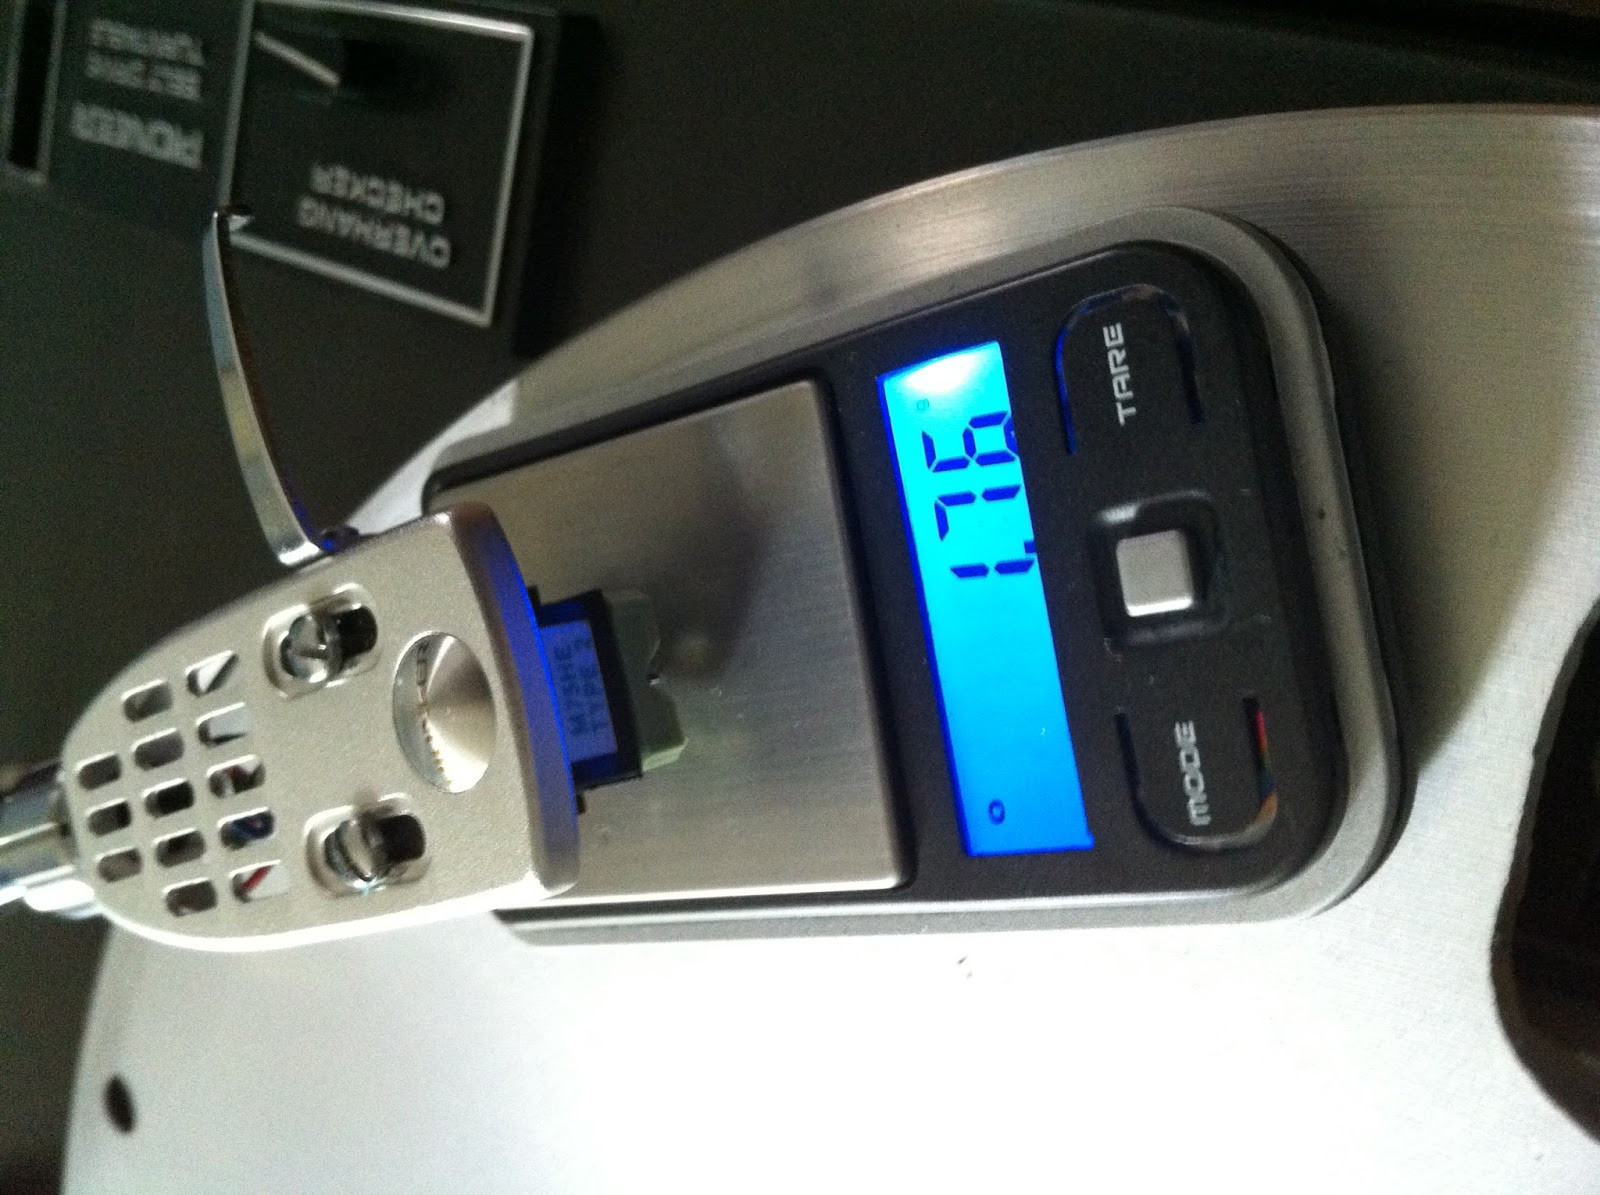
Next is setting tracking weight, the stylus pressure on the record, measured in grams. Too little weight results in thin, distorted sound; too much causes stylus and record damage. Manufacturers specify a tracking weight range for each stylus. I typically choose the middle of the Shure’s recommended range, 1.75 grams.
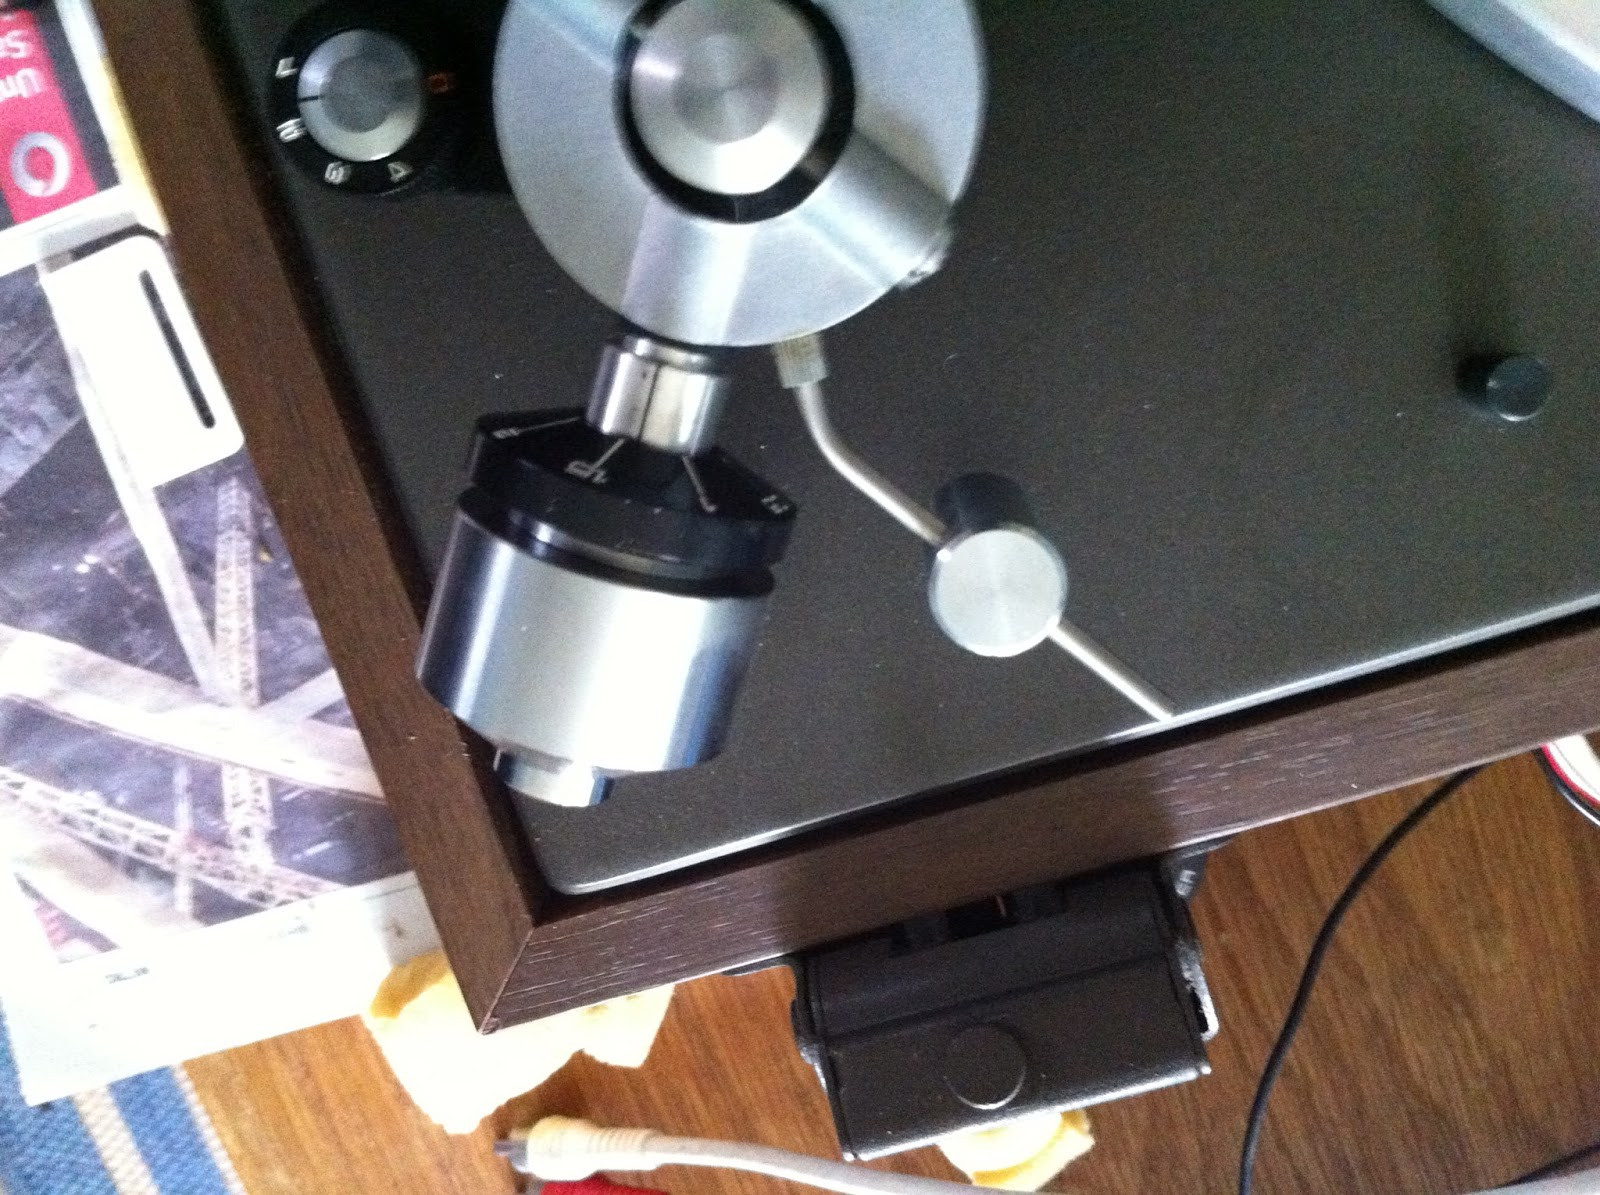
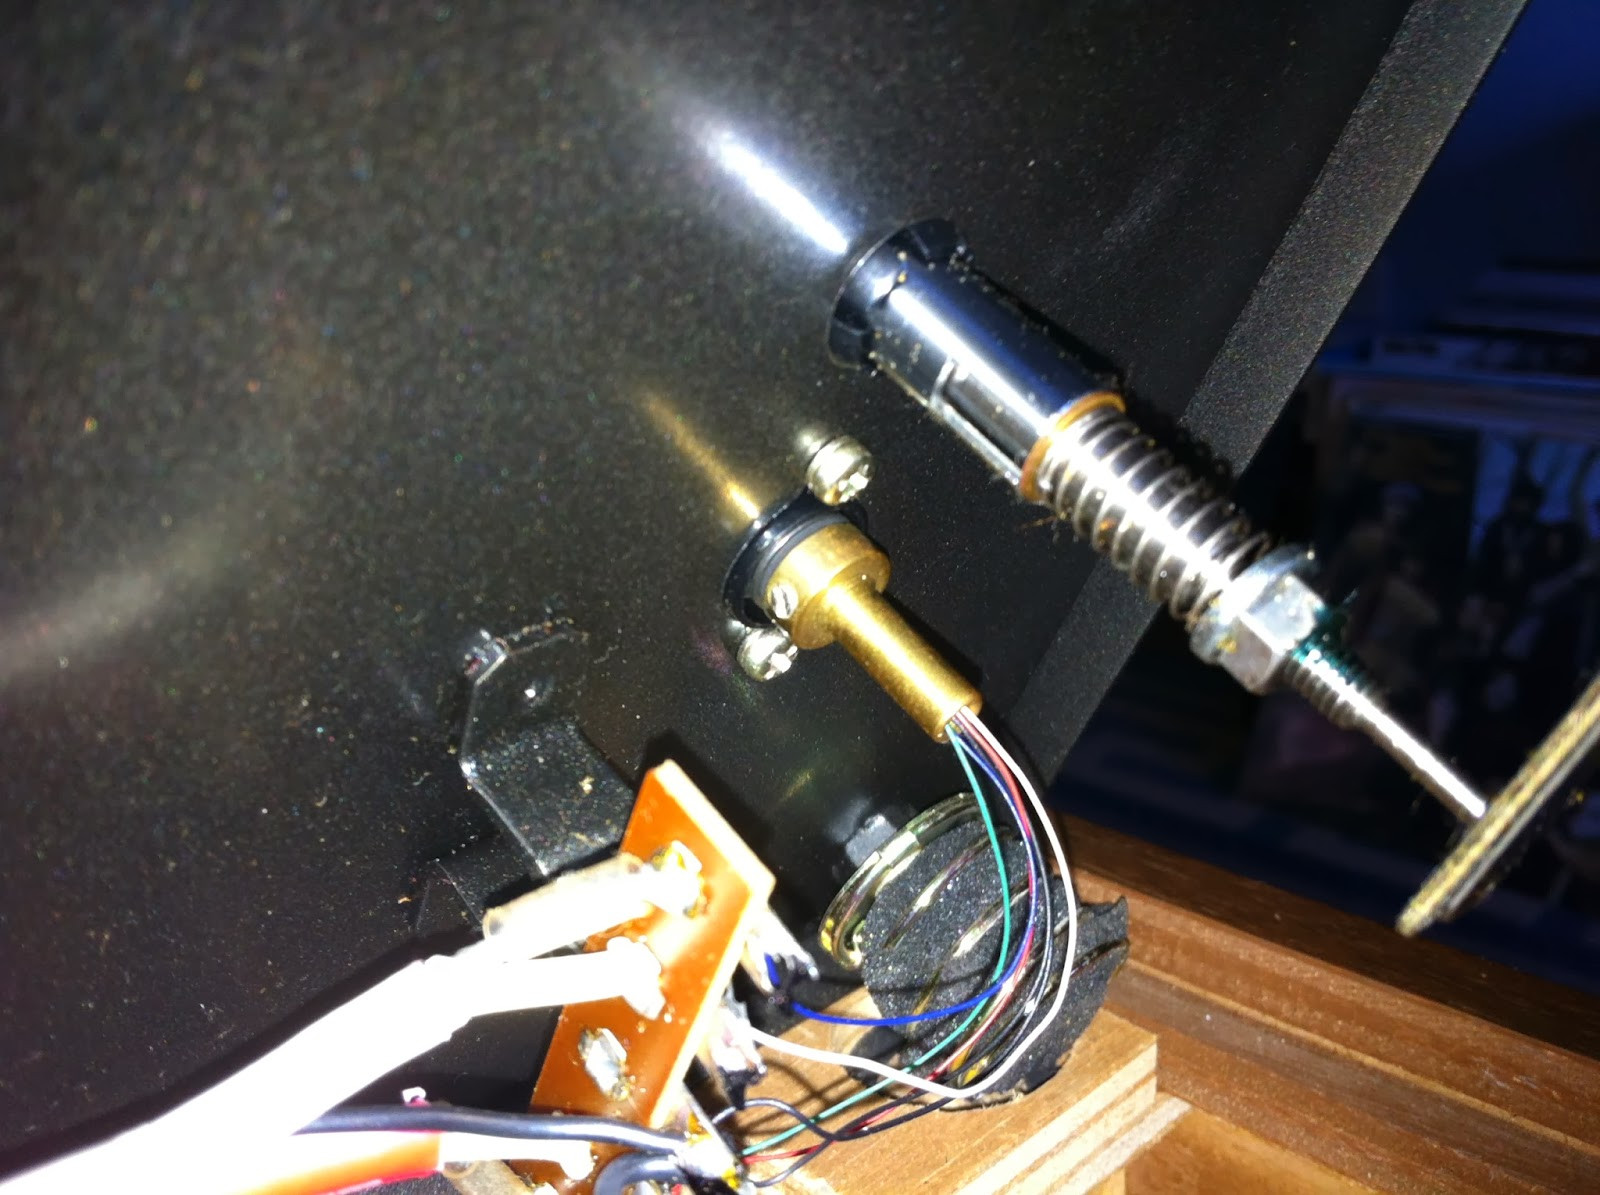
The Pioneer PL-12D user manual (available on Vinyl Engine) describes using the balance weight at the tonearm’s end for adjustment. Slide the weight back until it presses against the balance weight, aligning the “Zero” digit with the mark on the arm tube.
 Pioneer PL-12D tonearm balance weight and adjustment collar, showing zero setting for balancing.
Rotate the balance weight to adjust it in or out. First, find the point where the tonearm floats horizontally when released from its rest with the cue lever down and power off. This is the balance point, your zero point with the black adjustment collar set to zero. Now, turn the numbered collar and the weight together until you reach the desired tracking weight, 1.75 grams in my case. The tonearm will now no longer balance, tipping downwards with a gentle force.
I find this method somewhat imprecise. Instead, I use digital scales (around £15 from electronics retailers or online). These scales accurately measure stylus weight, and I adjust the balance weight until the scale reads the target weight.
 Digital scales used for precise tracking weight measurement on the Pioneer PL-12D tonearm.
With tracking weight set, you’re almost finished. Three settings remain. First, bias, or anti-skate. On the Pioneer PL-12D and many others, a small dial sets bias to the same value as tracking weight, 1.75 in my case. Bias compensates for inward skating force, ensuring even groove wall pressure.
The last two settings, VTA (Vertical Tracking Angle) and Azimuth, have no formal adjustments on the Pioneer PL-12D, but are worth checking. VTA is the tonearm angle relative to the record surface. Ideally, the tonearm should be parallel to the record surface when viewed from the side. Some tonearms, like SME, offer VTA adjustment. On integrated tonearms like the PL-12D, VTA adjustment is usually absent. Perfect VTA is elusive due to varying vinyl thickness, but the Pioneer PL-12D VTA is generally well-set with the original mat. Different mats can alter VTA.
Azimuth checks the cartridge’s vertical alignment from the front, ensuring it’s not leaning. Lowering the stylus onto a mirror allows you to check for headshell twist. If azimuth is significantly off, headshell collar screws might need adjustment. The Pioneer PL-12D uses SME-standard headshells, making replacements readily available. Some headshells offer azimuth adjustment, but significant azimuth errors often indicate a more serious problem. On this Pioneer PL-12D, azimuth was fine.
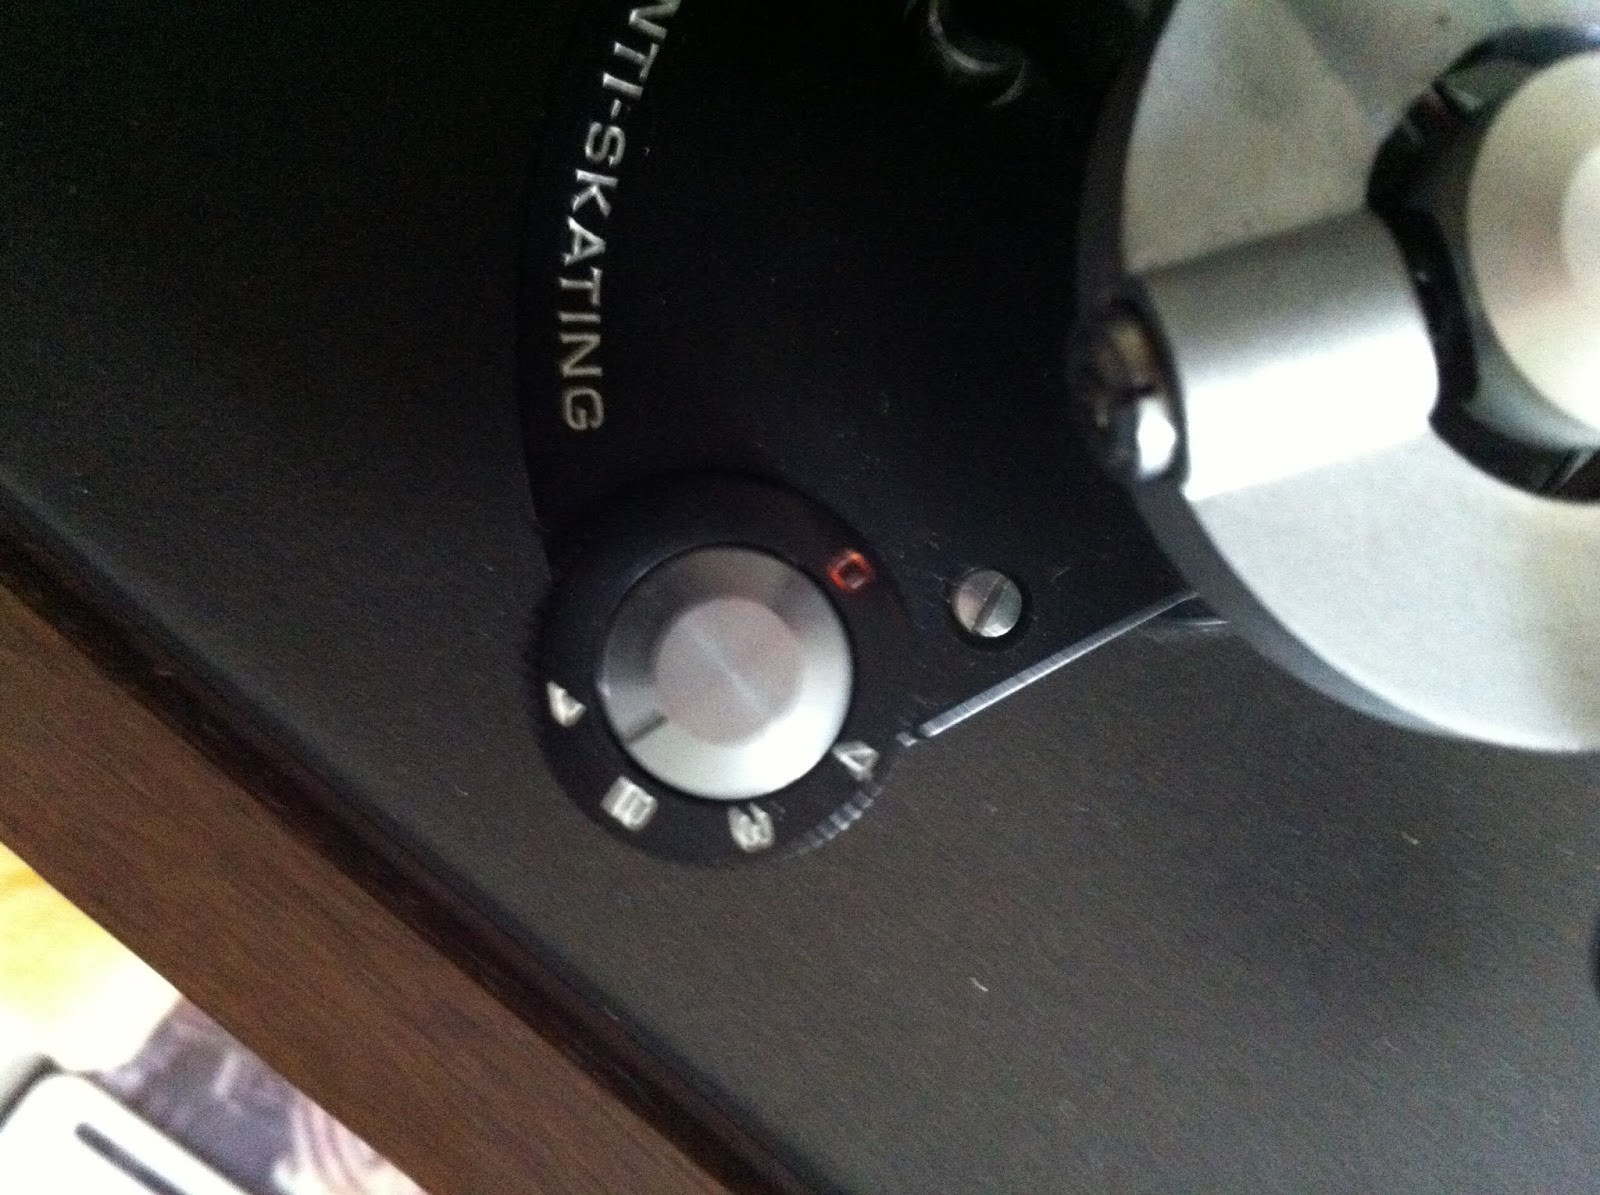 Anti-skate dial on Pioneer PL-12D, set to match tracking weight for balanced groove tracking.
 Tonearm azimuth check on Pioneer PL-12D, ensuring vertical cartridge alignment for optimal stereo separation.
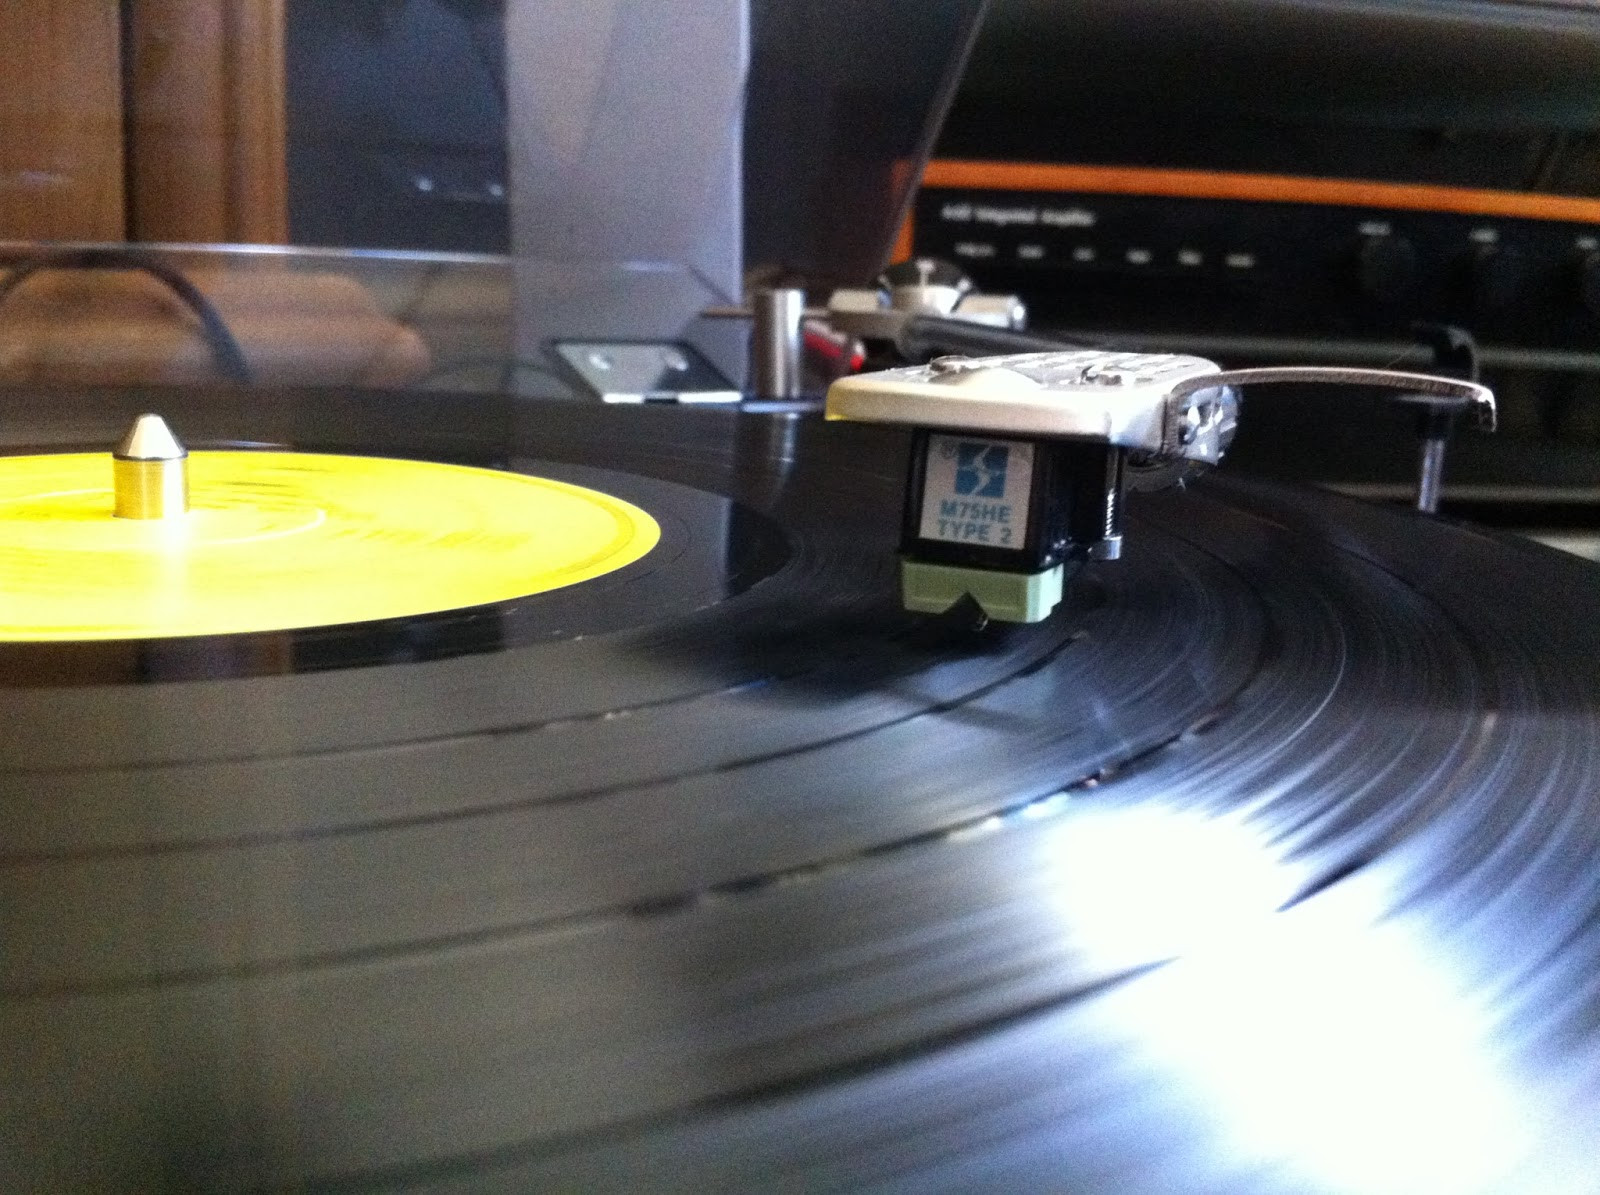
With all settings checked, it was time for music. The sound is excellent. Shure cartridges are known for a warm, lush sound, and this one doesn’t disappoint. Some motor noise persists, but it’s mechanical, not electrical, and hum is lower than on other turntables I’ve used. With no music playing, I can turn the volume up to around 90% before hearing any hum through the speakers.
I might eventually explore stripping and relubricating the motor, but for now, I’ll simply enjoy listening.
Update August 29th 2013
The Pioneer PL-12D has been sounding great, but I suspected it was playing slightly fast. While I fixed the major speed issue earlier with the speed adjuster, the speed was still slightly off even with the belt correctly positioned on the 33 RPM spindle section. Strobe disc testing confirmed this, and it was audible on familiar tracks. The previous owner had replaced the belt, and its measured circumference seemed correct. I decided to try a new belt from William Thakker, who offers specific belts for the Pioneer PL-12D. Service was excellent, taking about 5 days to the UK.
Comparing the new belt, two key differences emerged. The Thakker belt was slightly looser, while the original belt had been very tight around the platter. The new belt was also thinner in cross-section. This thickness difference likely altered the pulley geometry, affecting the precise 33 1/3 RPM speed.
With the new belt, the Pioneer PL-12D now plays at precisely the correct speed, confirmed by both the strobe and by ear.
I’m thoroughly enjoying this setup. The Pioneer PL-12D and Shure combination might not be the most detailed but offers a warm, lush sound that’s very forgiving of well-loved records. It makes even charity shop finds with surface noise and scratches sound their best.
Update November 2013
The Pioneer PL-12D has been sounding lovely. I’ve used both the original Shure M75 cartridge (with a new stylus) and a similar vintage M95, also with a replacement stylus. The M95 is more revealing than the M75, digging deeper for bass, similar to the Ortofon OM20. For great recordings, the M95 is excellent. I keep both cartridges mounted in headshells for easy swapping.
Two minor issues arose. First, slight play in the tonearm bearing. Side-to-side and up-and-down movement were fine, but I noticed some “play” when gently pushing and pulling the tonearm near the headshell. This indicated potential looseness in the horizontal arm bearings, often ball-race systems.
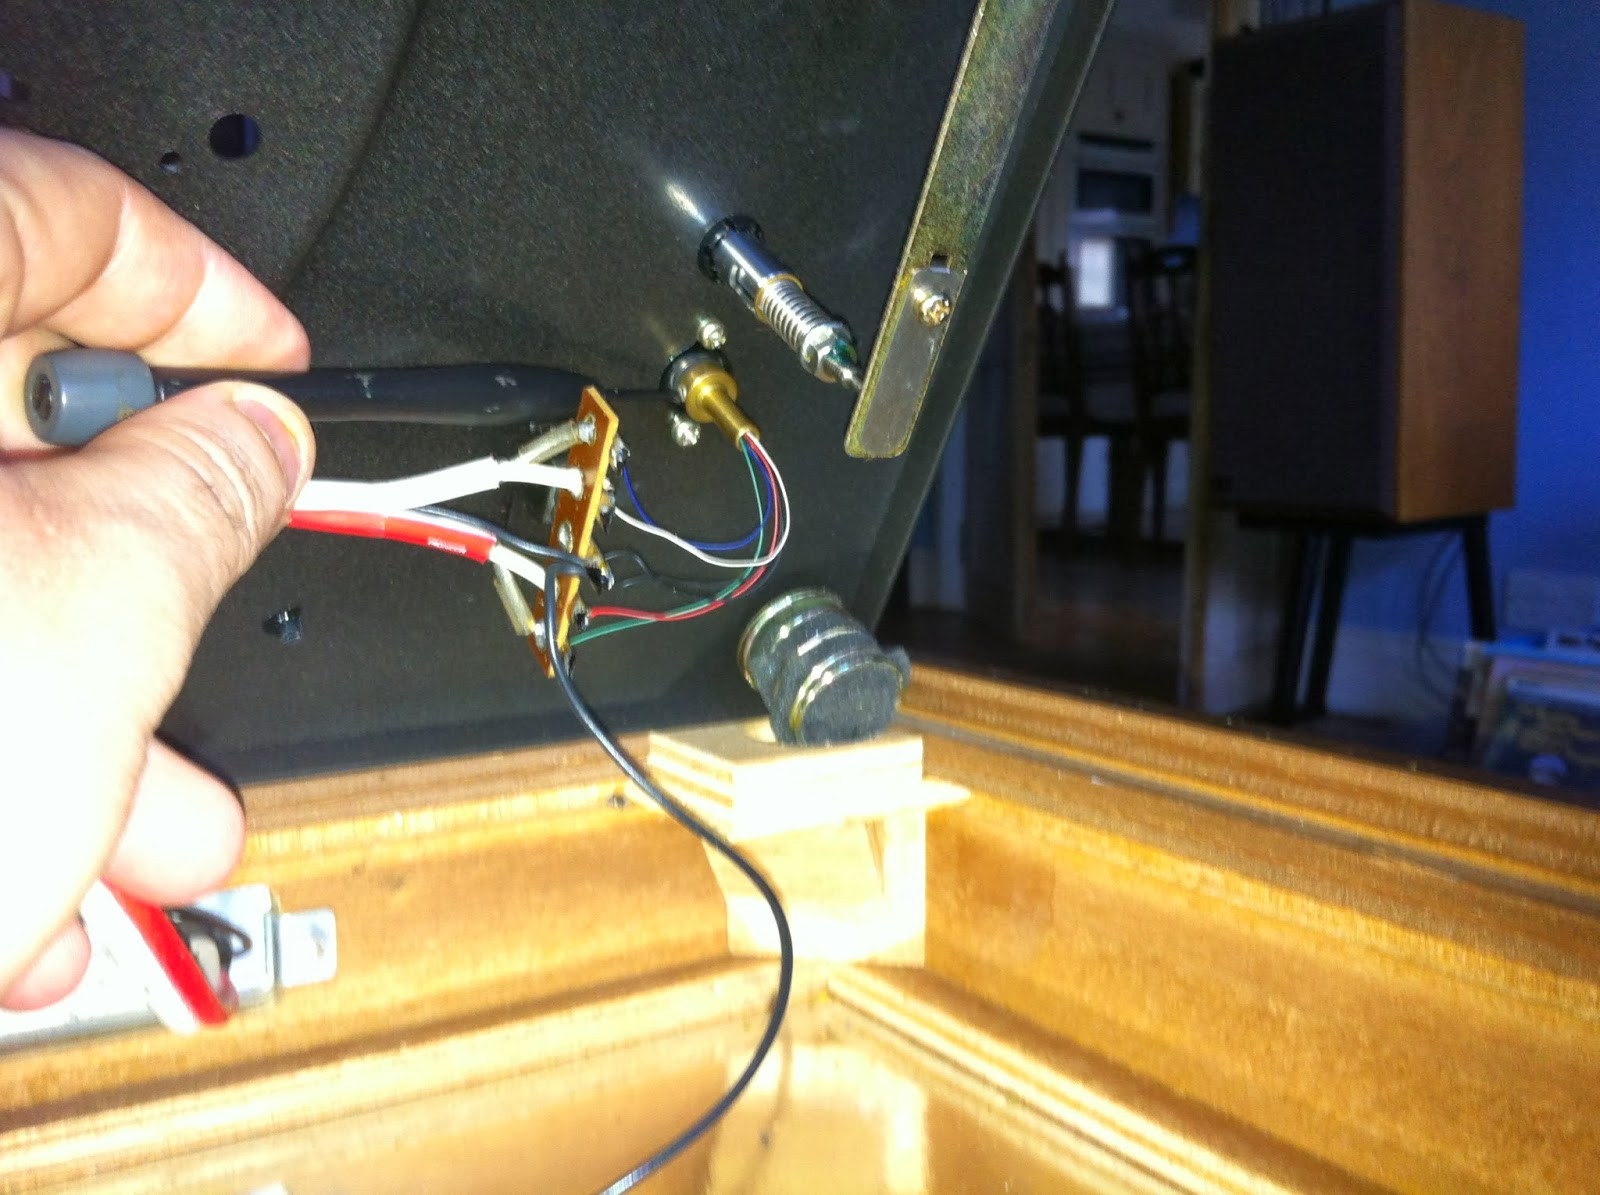
I reopened the Pioneer PL-12D, following the disassembly steps detailed earlier.
 Pioneer PL-12D tonearm bearing housing, showing brass tube and collar for bearing adjustment.
The tonearm wiring emerges through a brass tube. These wires are delicate, requiring care. Gently applying the push-pull force on the tonearm revealed slight movement in the brass tube. It has a threaded brass collar, likely securing ball bearings and forming the lower horizontal bearing section. A tiny side screw locks the collar. Age, wear, or loosening could cause play here.
 Close-up of Pioneer PL-12D tonearm bearing collar and locking screw, highlighting adjustment point.
I gently loosened the side screw with a small jeweler’s screwdriver. I could then finger-tighten the brass collar, like tightening a nut, just finger-tight to avoid excessive bearing friction. Using the side screw’s position as a reference, tightening it from the “9 o’clock” to “10 or 11 o’clock” position seemed optimal. Retightening the locking screw, the tonearm still moved freely side-to-side, but the push-pull play was gone. Excellent!
The second issue was slight motor noise, a rhythmic knocking at 50Hz. Very quiet, only audible close to the motor spindle, but I’ve had silent AC motors before, so I aimed for that.
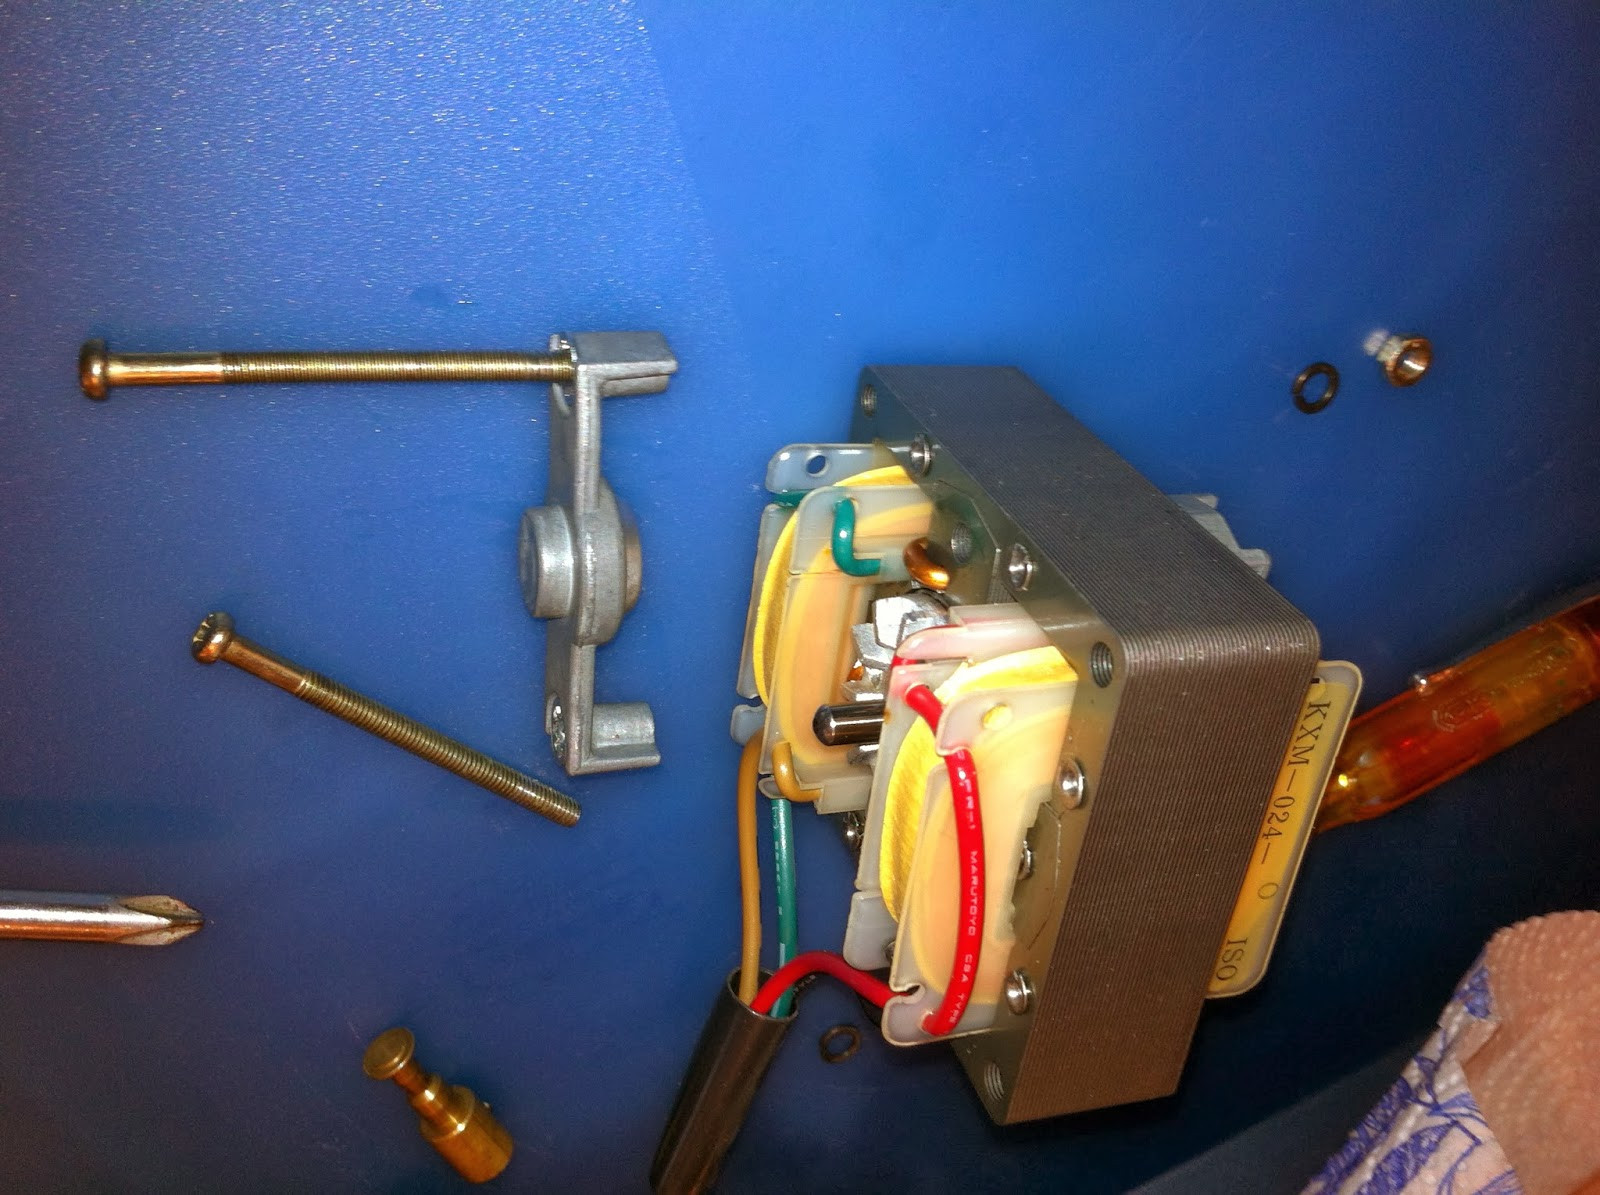
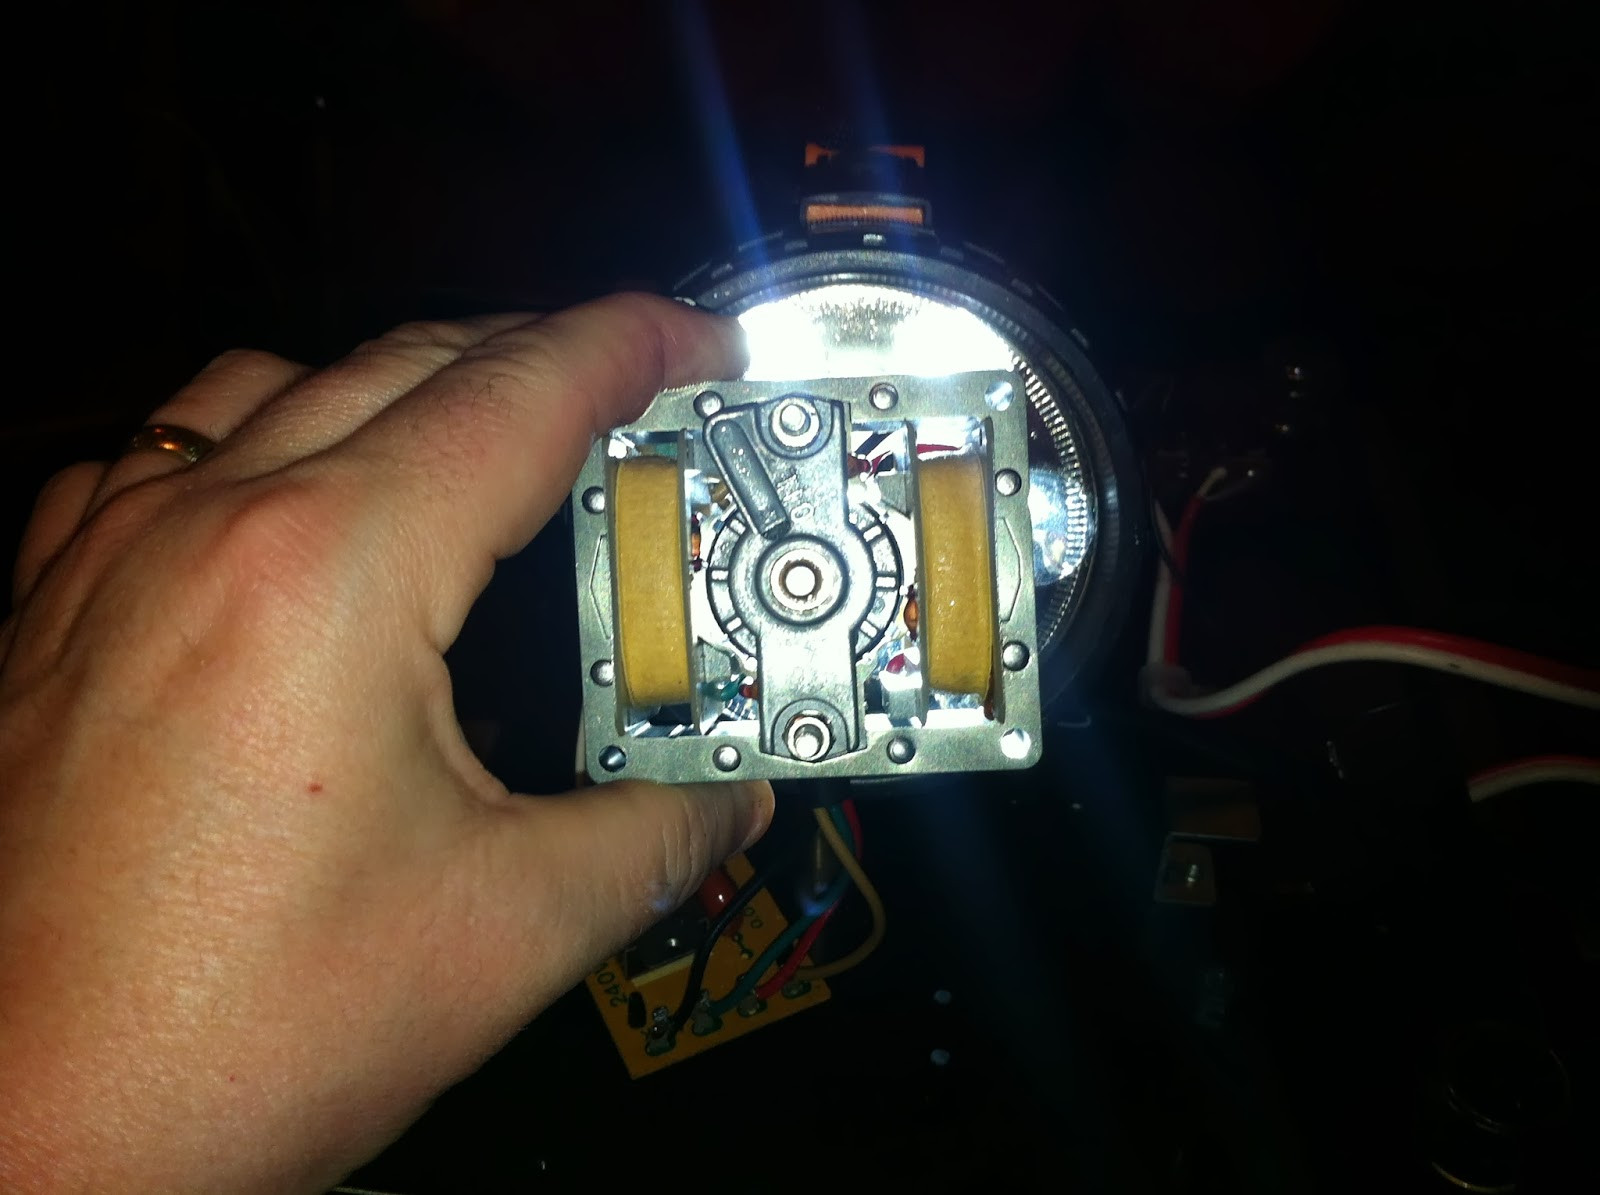
My theory was that while the top motor bearing was oiled, the lower bearing might be dry. Here’s a motor picture.
SAFETY WARNING: Mains lead and plug MUST be disconnected throughout this procedure. NEVER rely on the deck’s switch; internal components remain live.
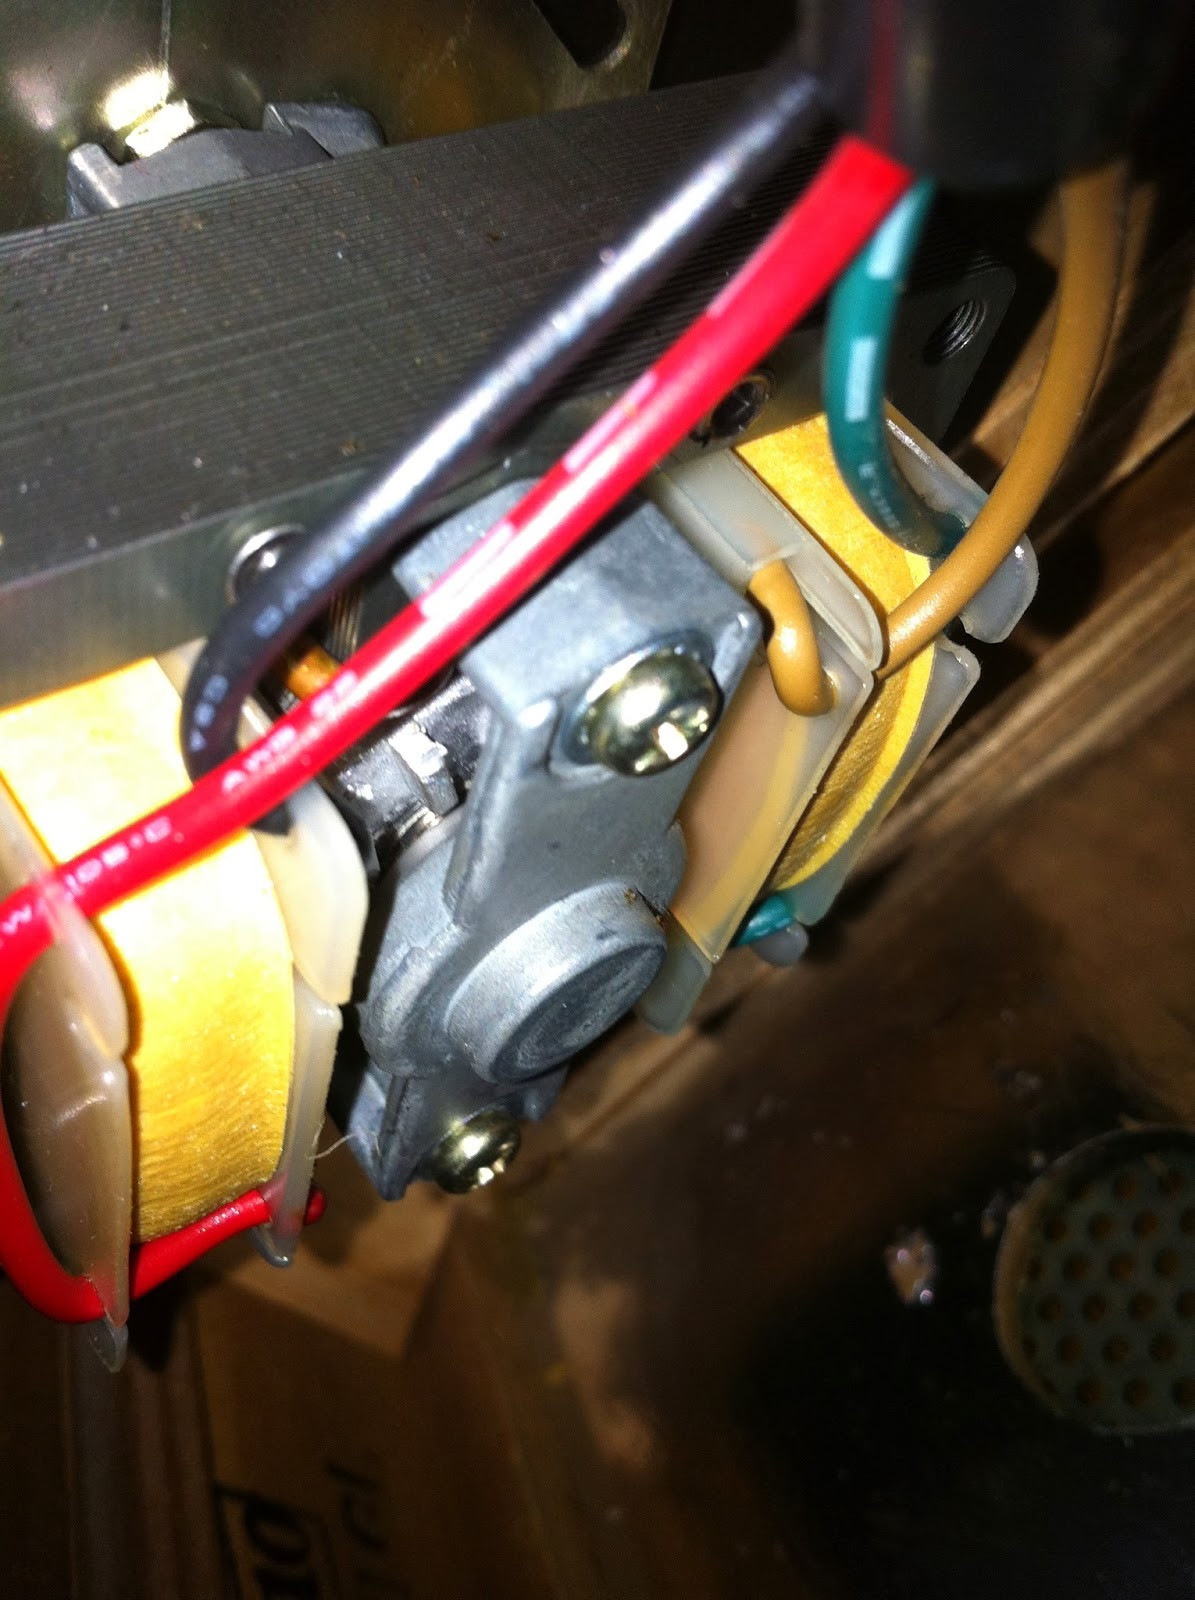 Side view of Pioneer PL-12D motor, showing fan and potential lower bearing access point.
While motor disassembly and relubrication is ideal, I was hesitant due to complexity and potential alignment issues. The motor bolts hold the bearing frames and core laminates, requiring precise alignment. The image above shows an aluminum tooth near the red wire inside the motor. A toothed gear at the motor base likely acts as a cooling fan.
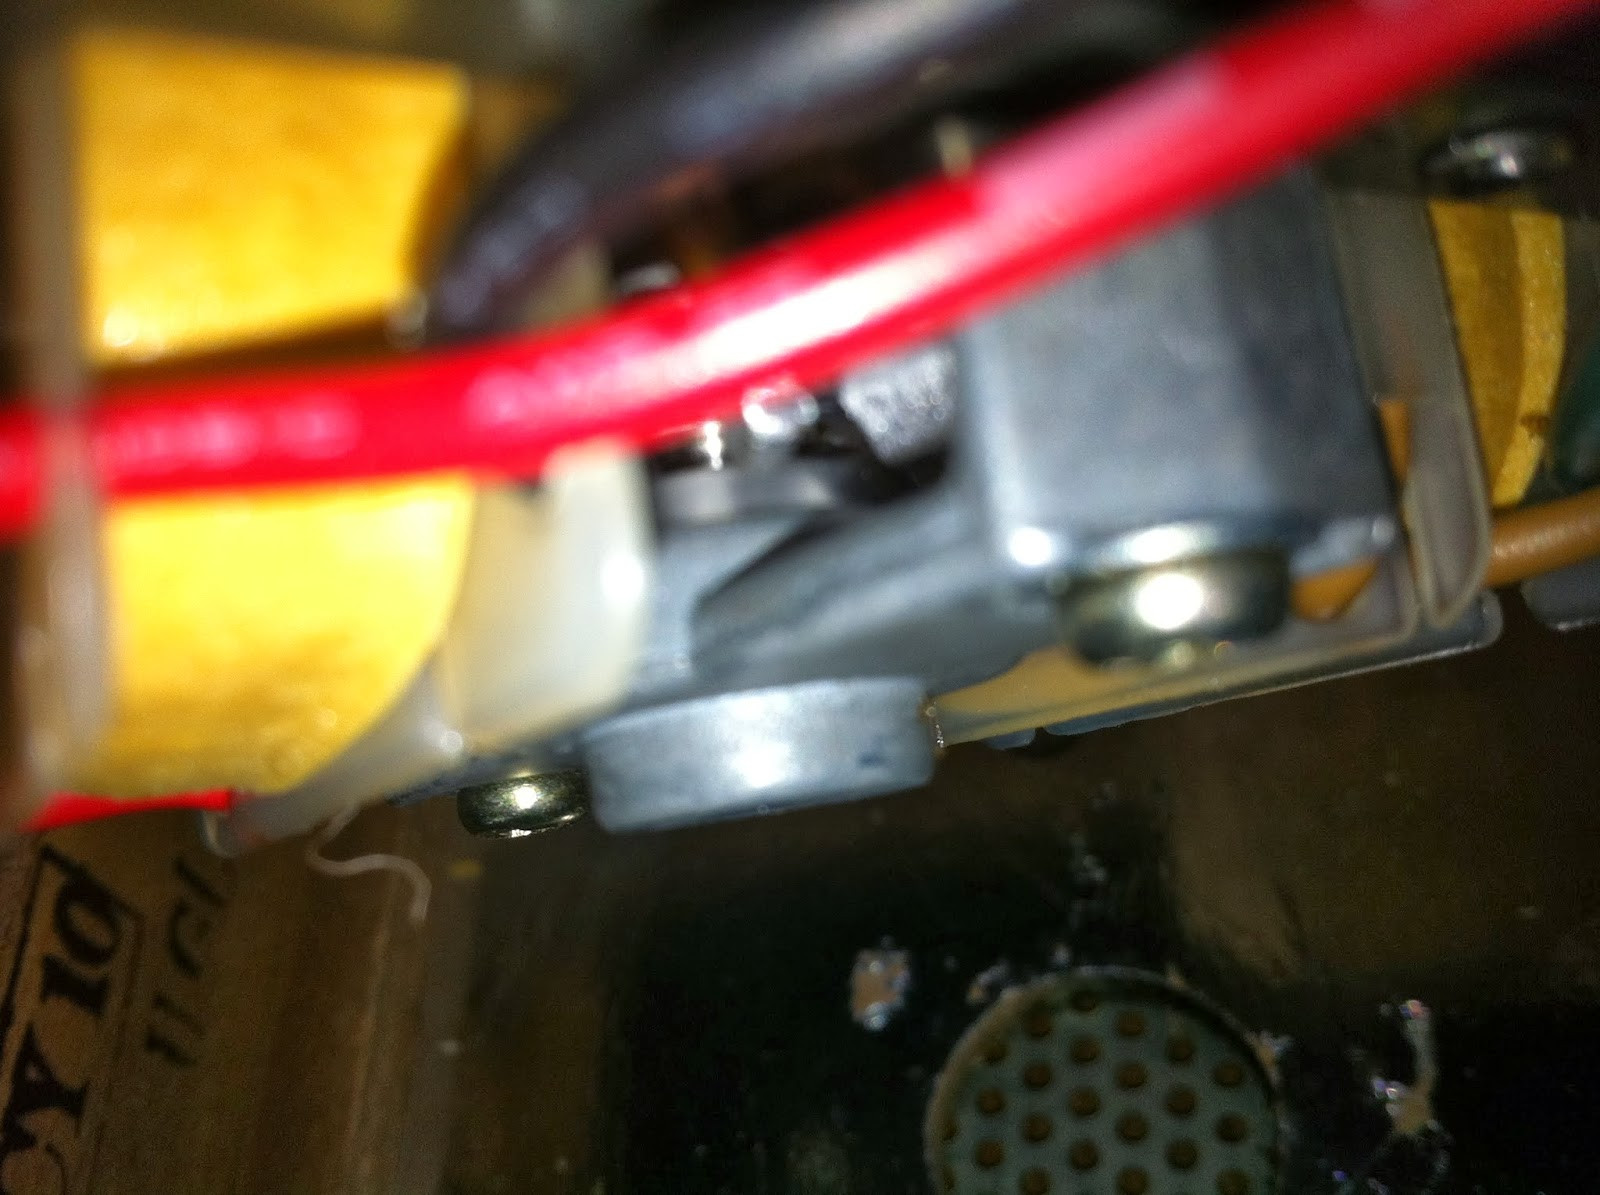 Close-up of Pioneer PL-12D motor fan, hinting at potential lower bearing access below.
 Precision oiler applying lubricant to Pioneer PL-12D motor spindle for lower bearing access.
My approach was to access the lower motor spindle bearing beneath the fan. Using a precision oiler, I carefully probed while lifting the motor pulley from above to create a gap, aiming for a single oil drop on the lower spindle. Indiscriminate oil squirting inside a motor is damaging.
Reassembling the Pioneer PL-12D top plate, I ran the motor without the platter. The noise seemed quieter, but still present. Perhaps lubrication wasn’t the issue, but armature oscillation due to loose bearings.
It wasn’t a major problem, but a silent motor was the goal. Maybe a practice disassembly on a dead Pioneer PL-12D motor from eBay would be worthwhile.
Update December 2013
I couldn’t resist attempting full AC motor disassembly and cleaning to resolve the mild “knocking” sound. This is NOT as simple as other Pioneer PL-12D servicing steps and is a last resort for noisy motors. My experience wasn’t perfect, indicating motor servicing complexity. Your results may vary. WARNING: Proceed ONLY if competent with soldering and electrical safety. These decks contain live AC mains; work ONLY with the deck unplugged. If unsure, seek professional help.
First, as before, remove platter, mat, belt, and cartridge, storing them safely. Loosen the top plate screws and remove the two bolts securing the rear signal/power plate, allowing it to fall inside the deck.
Carefully lift off the top plate assembly, disconnecting the grounding wire attached to the baseboard. Flip the top plate upside down, resting the tonearm inside the plinth, taking care not to damage it. Full motor access requires this more drastic approach.
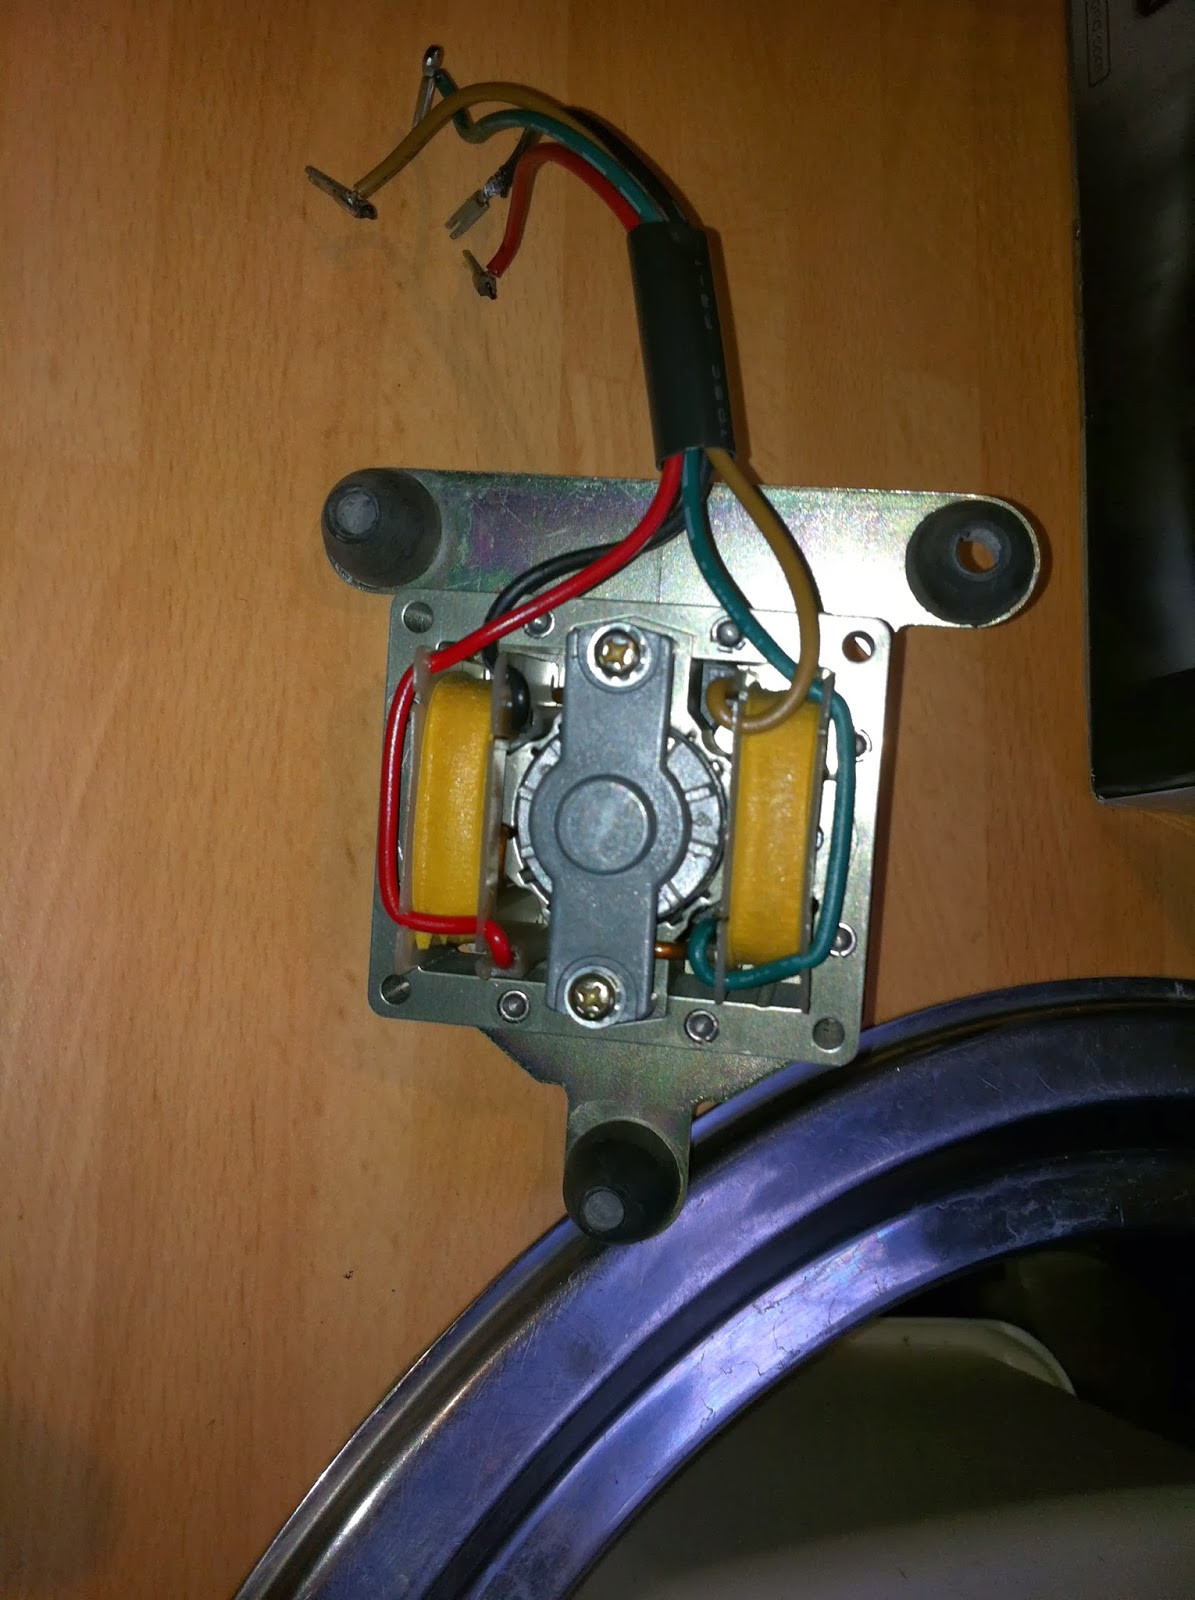
 Pioneer PL-12D top plate assembly flipped over for motor access, showing wiring and components.
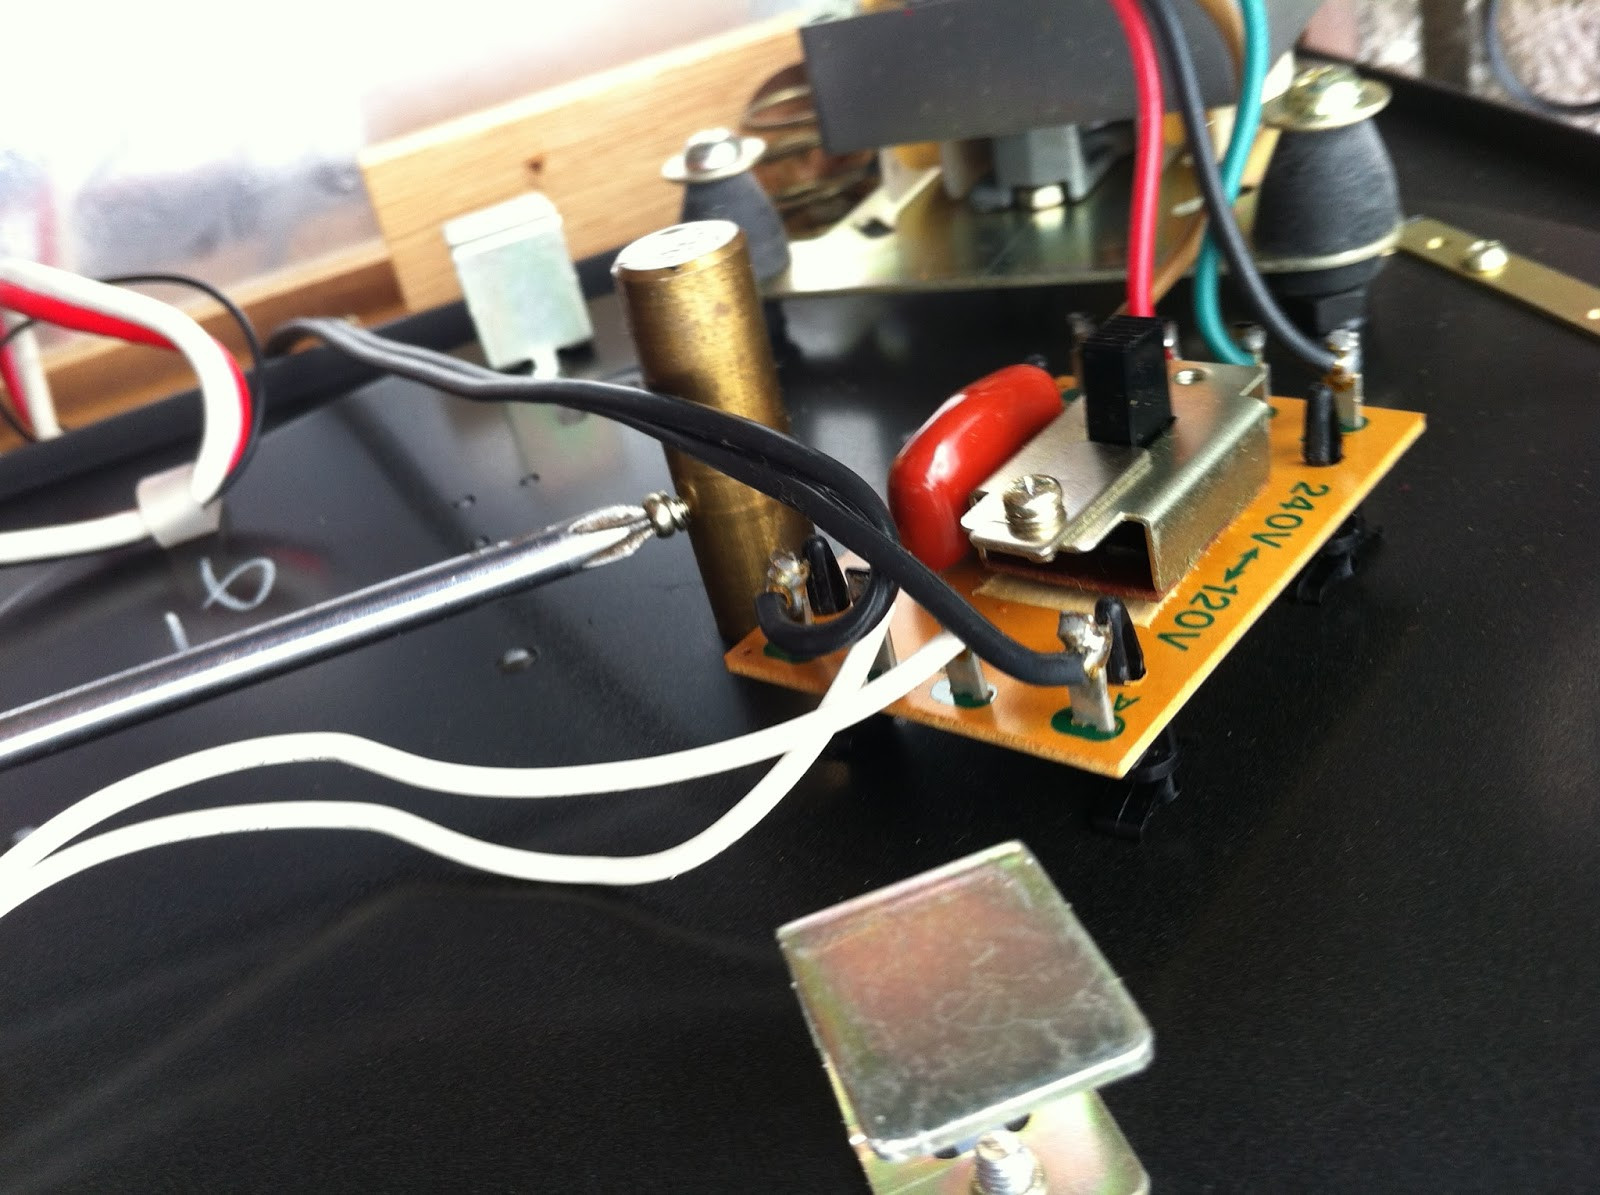
The motor is mounted on three rubber mounts with four colored wires connecting to a small circuit board. This board includes a voltage selector switch secured by a metal plate. Motor removal is easier if completely detached from the deck. Each wire is soldered to a tab soldered onto the circuit board. Removing wires from tabs is difficult; desoldering the tabs from the board is easier using a desoldering pump or solder wick.
First, detach the circuit board from the four plastic clips securing it to the top plate by squeezing the clips and carefully prying the board off.
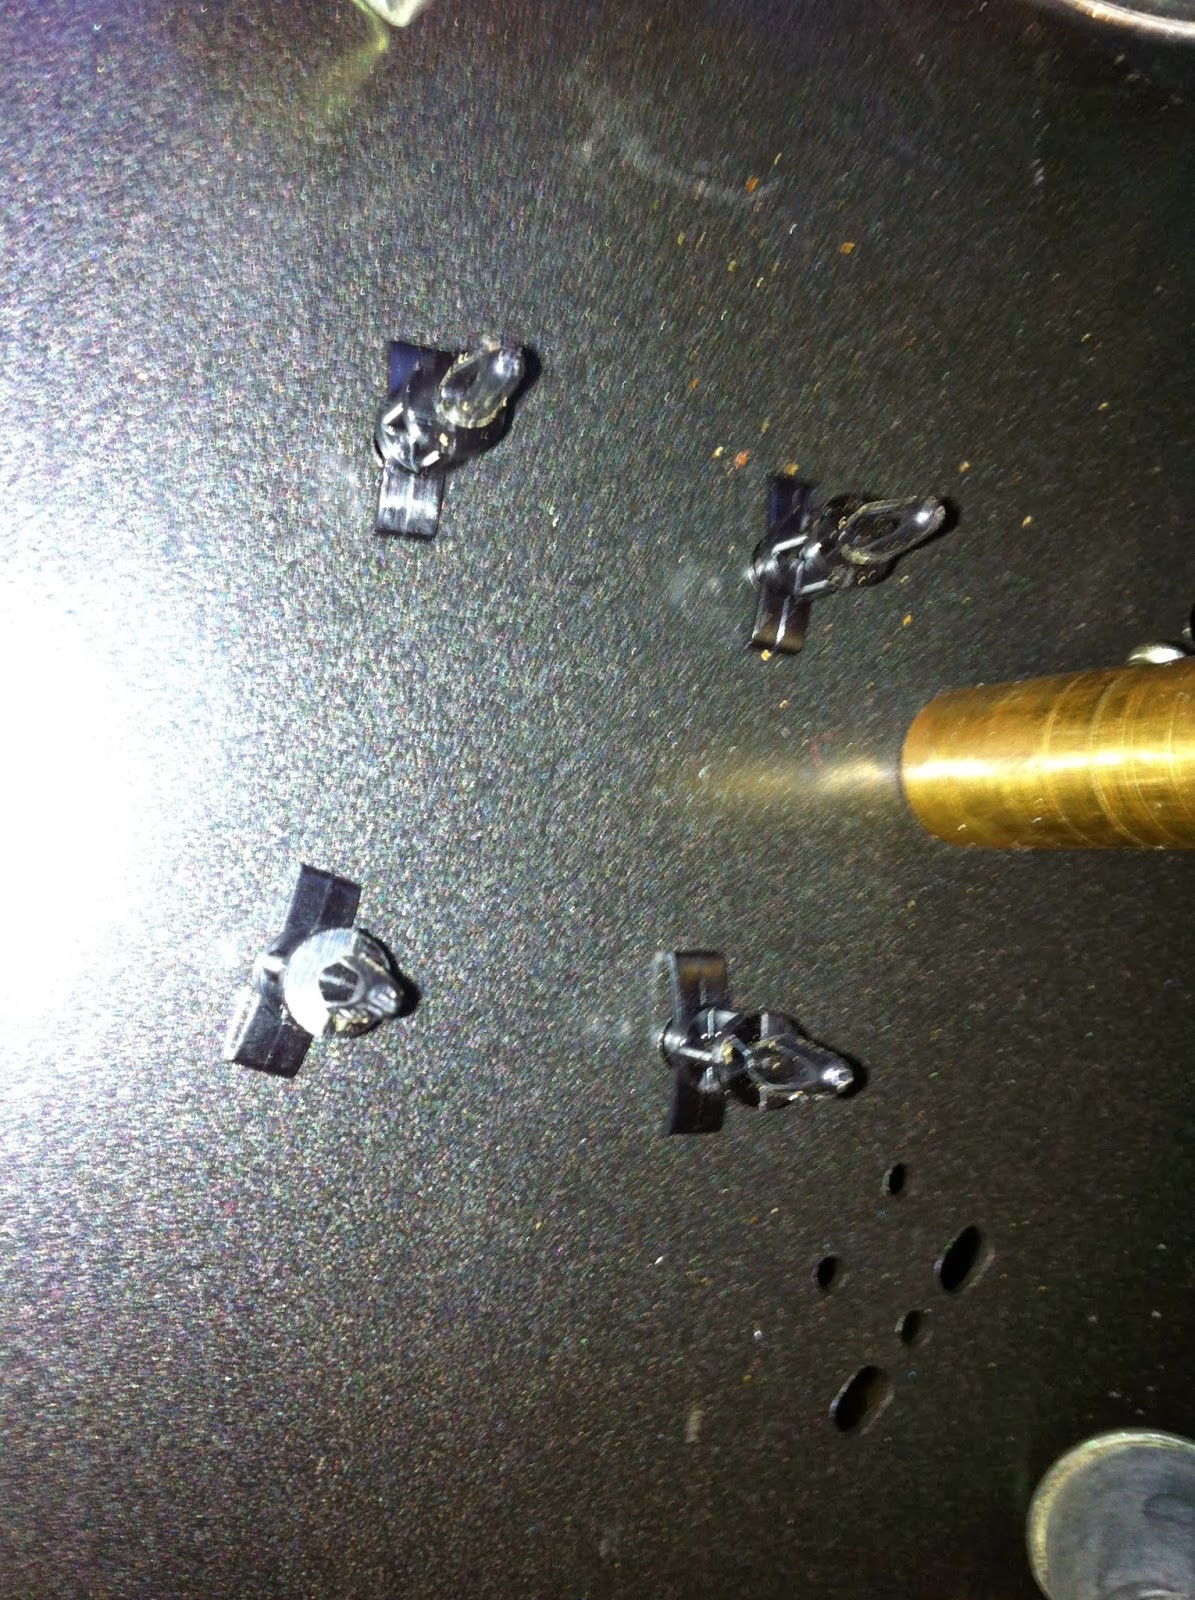 Pioneer PL-12D motor circuit board, showing wire connections and plastic mounting clips.
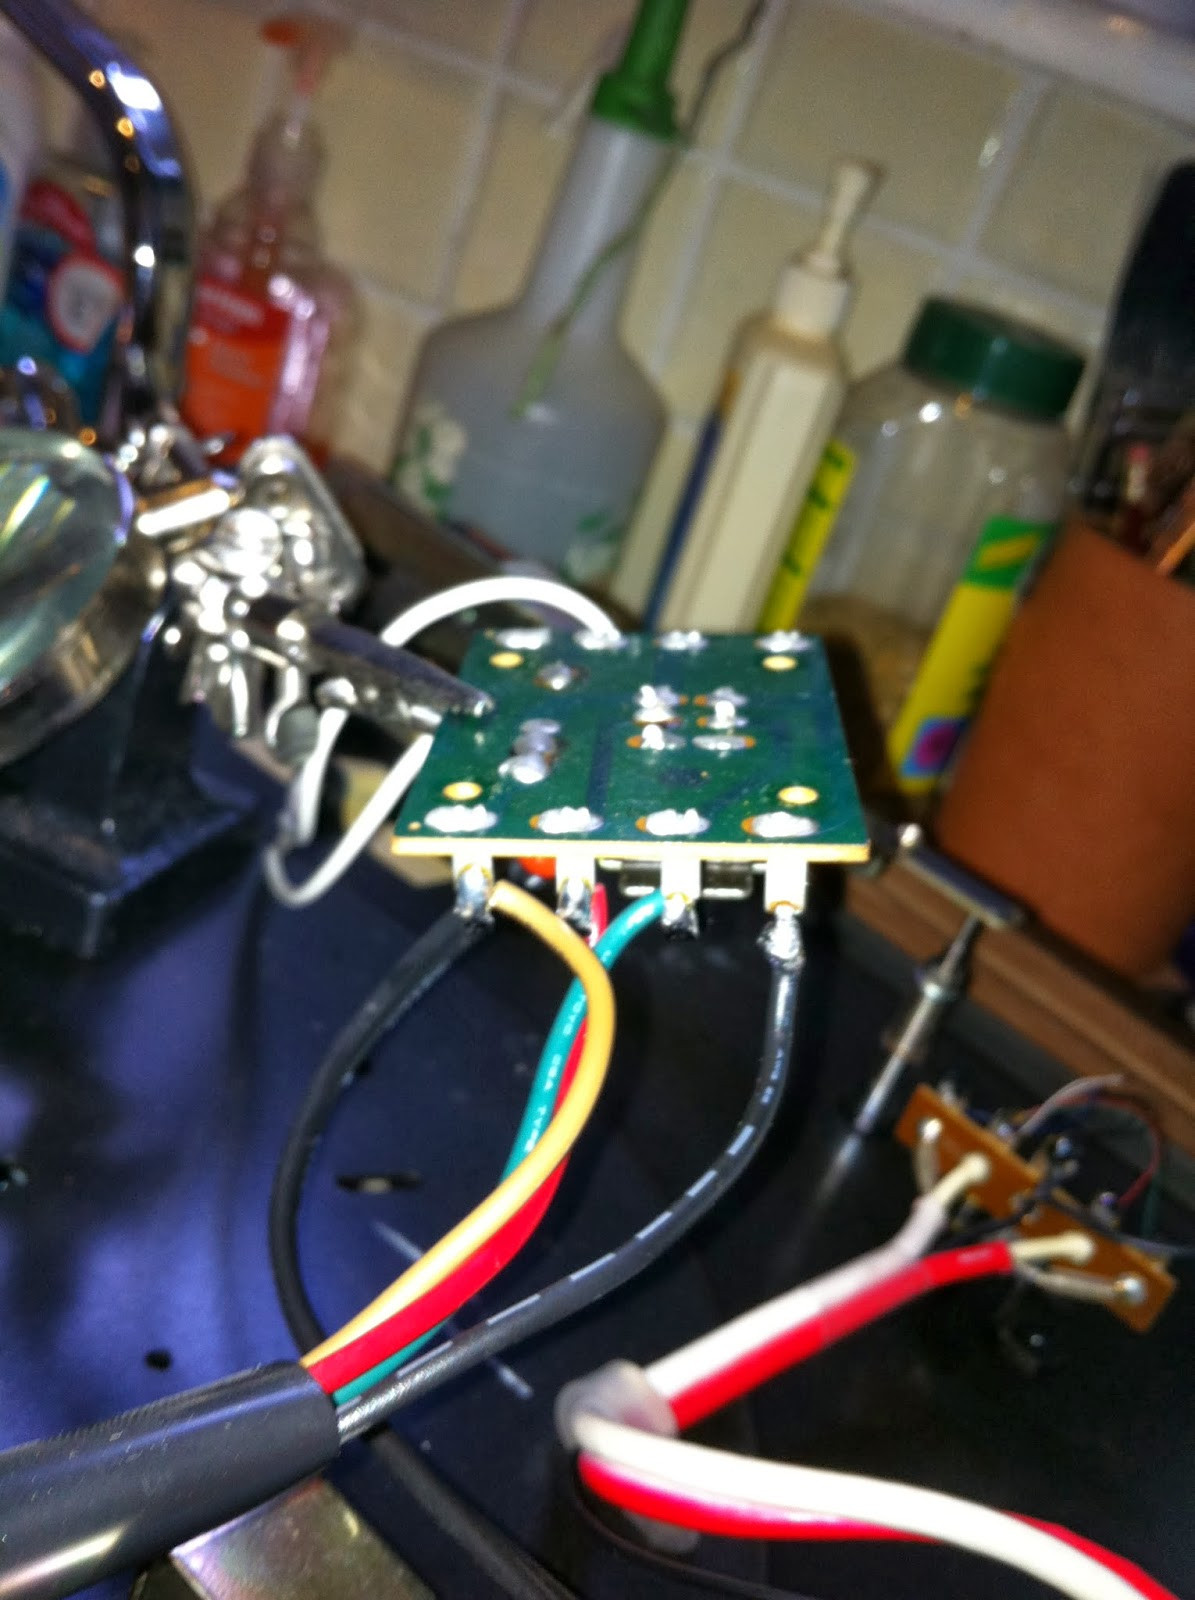 Close-up of Pioneer PL-12D motor circuit board and wire connection tabs, ready for desoldering.
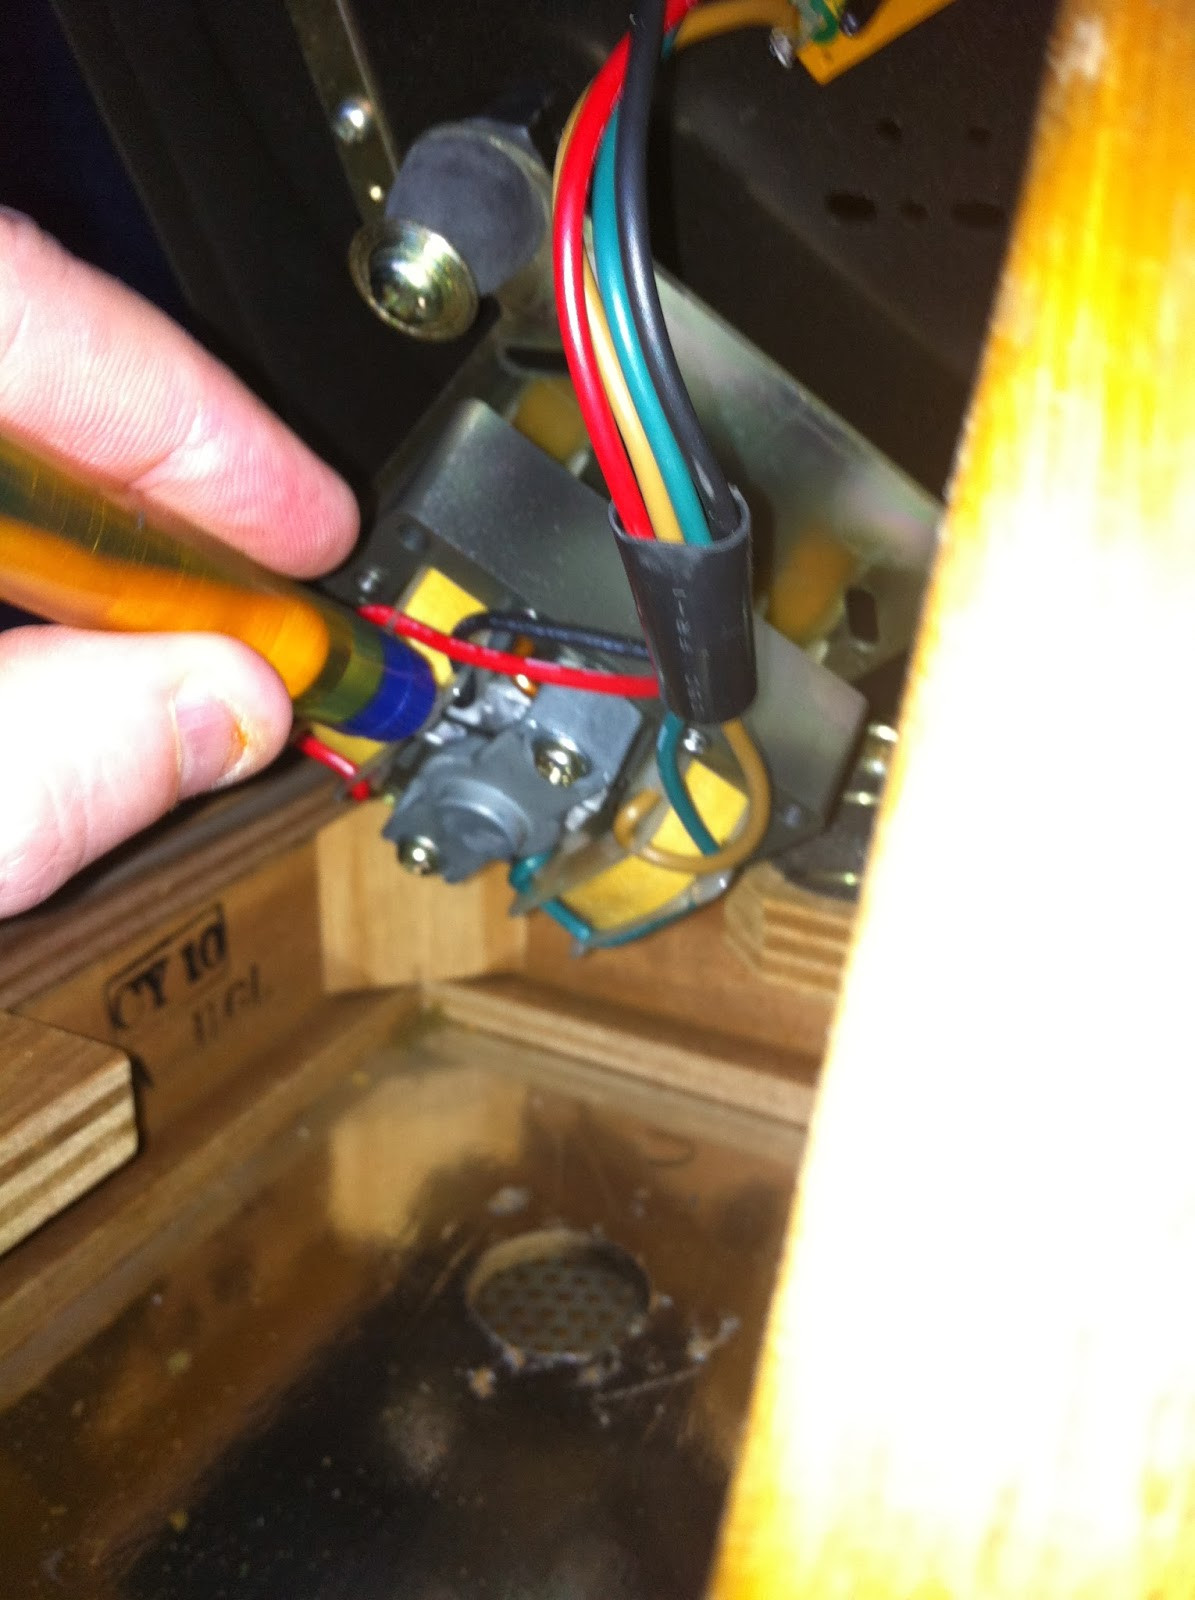
 Desoldering Pioneer PL-12D motor wire tabs from the circuit board using a desoldering pump.
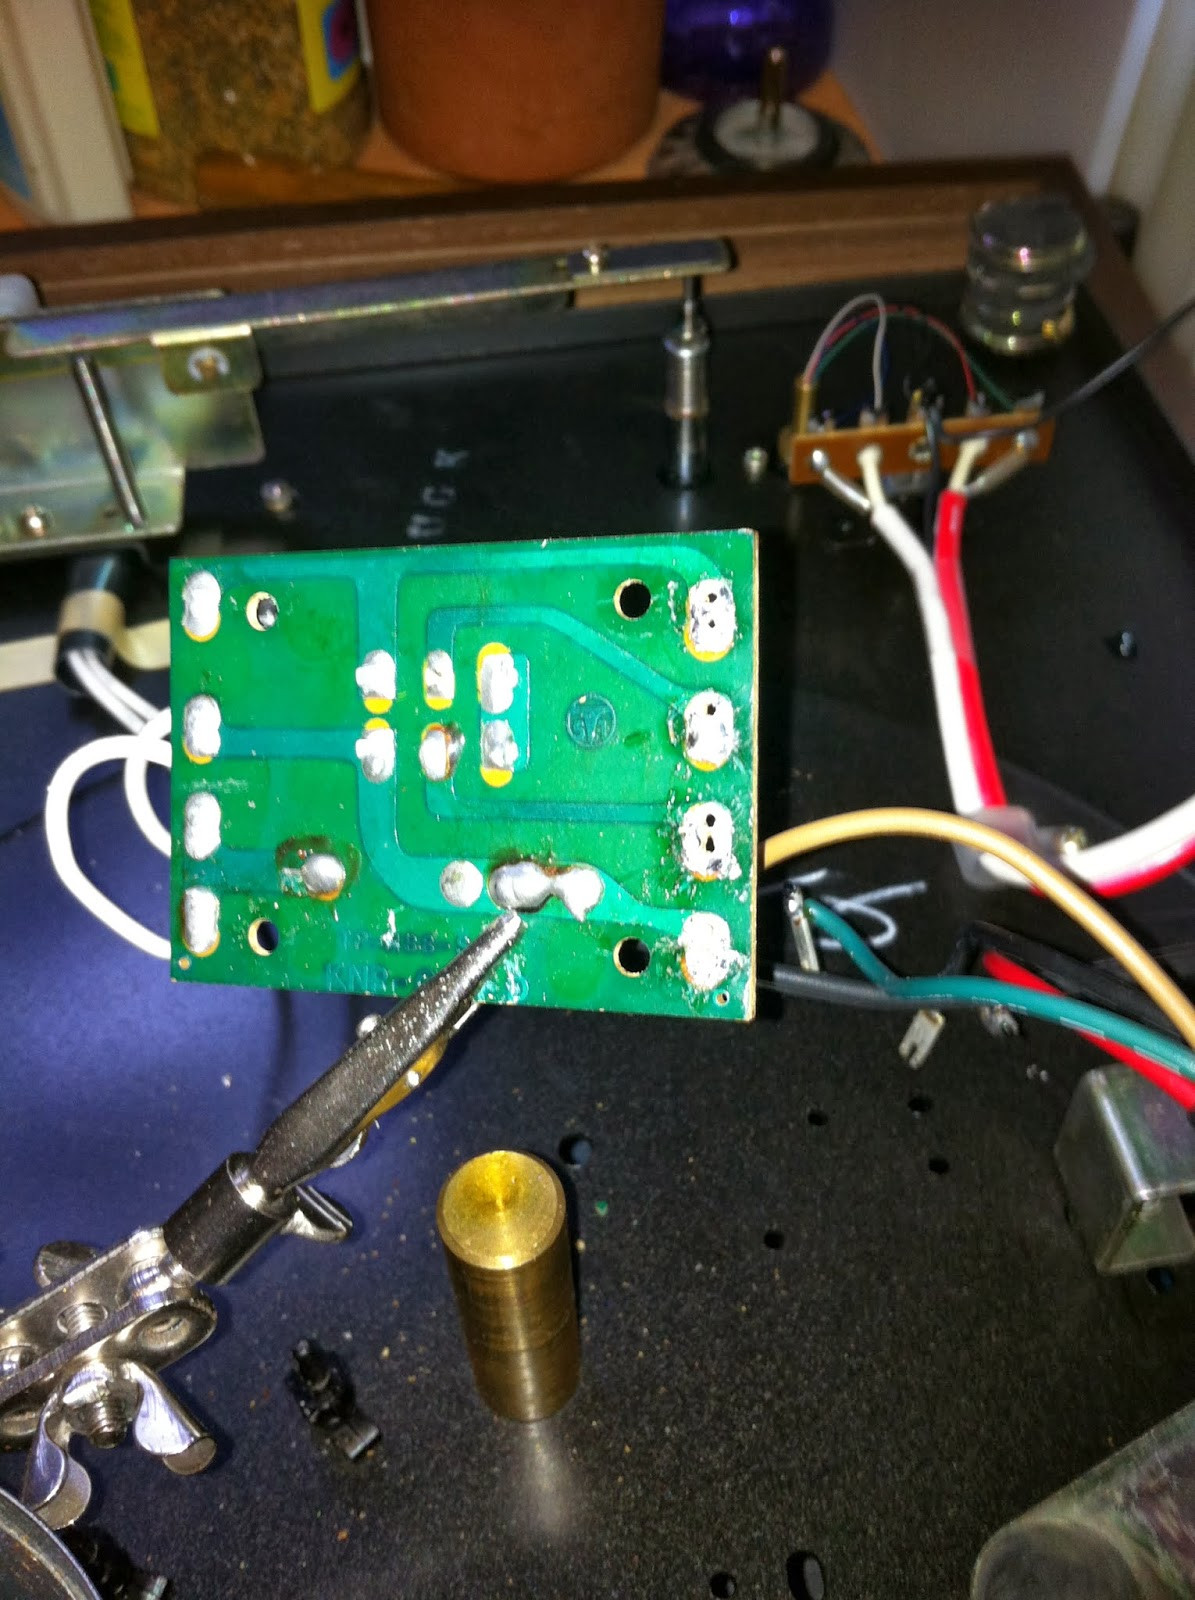
Using a clamp stand to hold the board, apply heat with a soldering iron and desolder each of the four solder pads, removing as much solder as possible from each tab base before gently working them loose. Eventually, all four tabs will detach, disconnecting the motor from the top plate via its three bolts.
 Pioneer PL-12D motor detached after desoldering wires, ready for disassembly and cleaning.
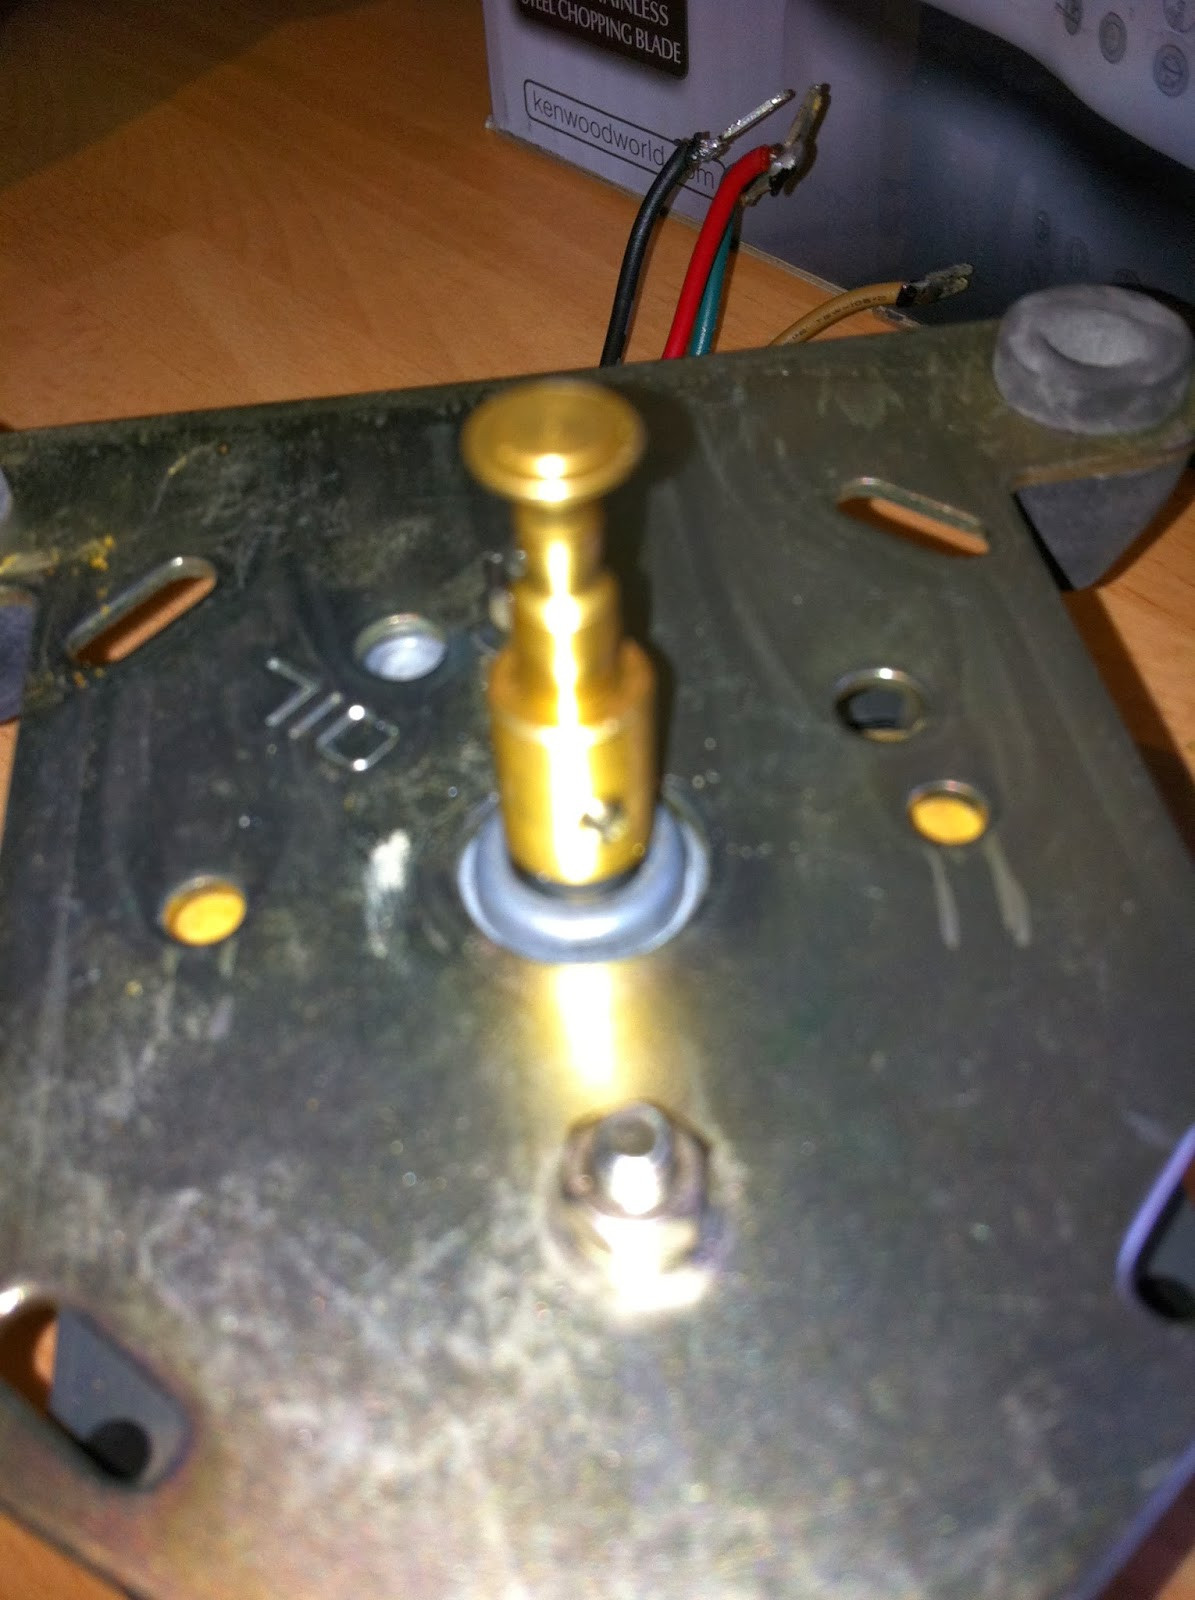 Pioneer PL-12D motor mounting plate removed, exposing motor frame bolts for disassembly.
 Pioneer PL-12D motor mounting plate, spindle, and hardware removed, preparing for motor frame separation.
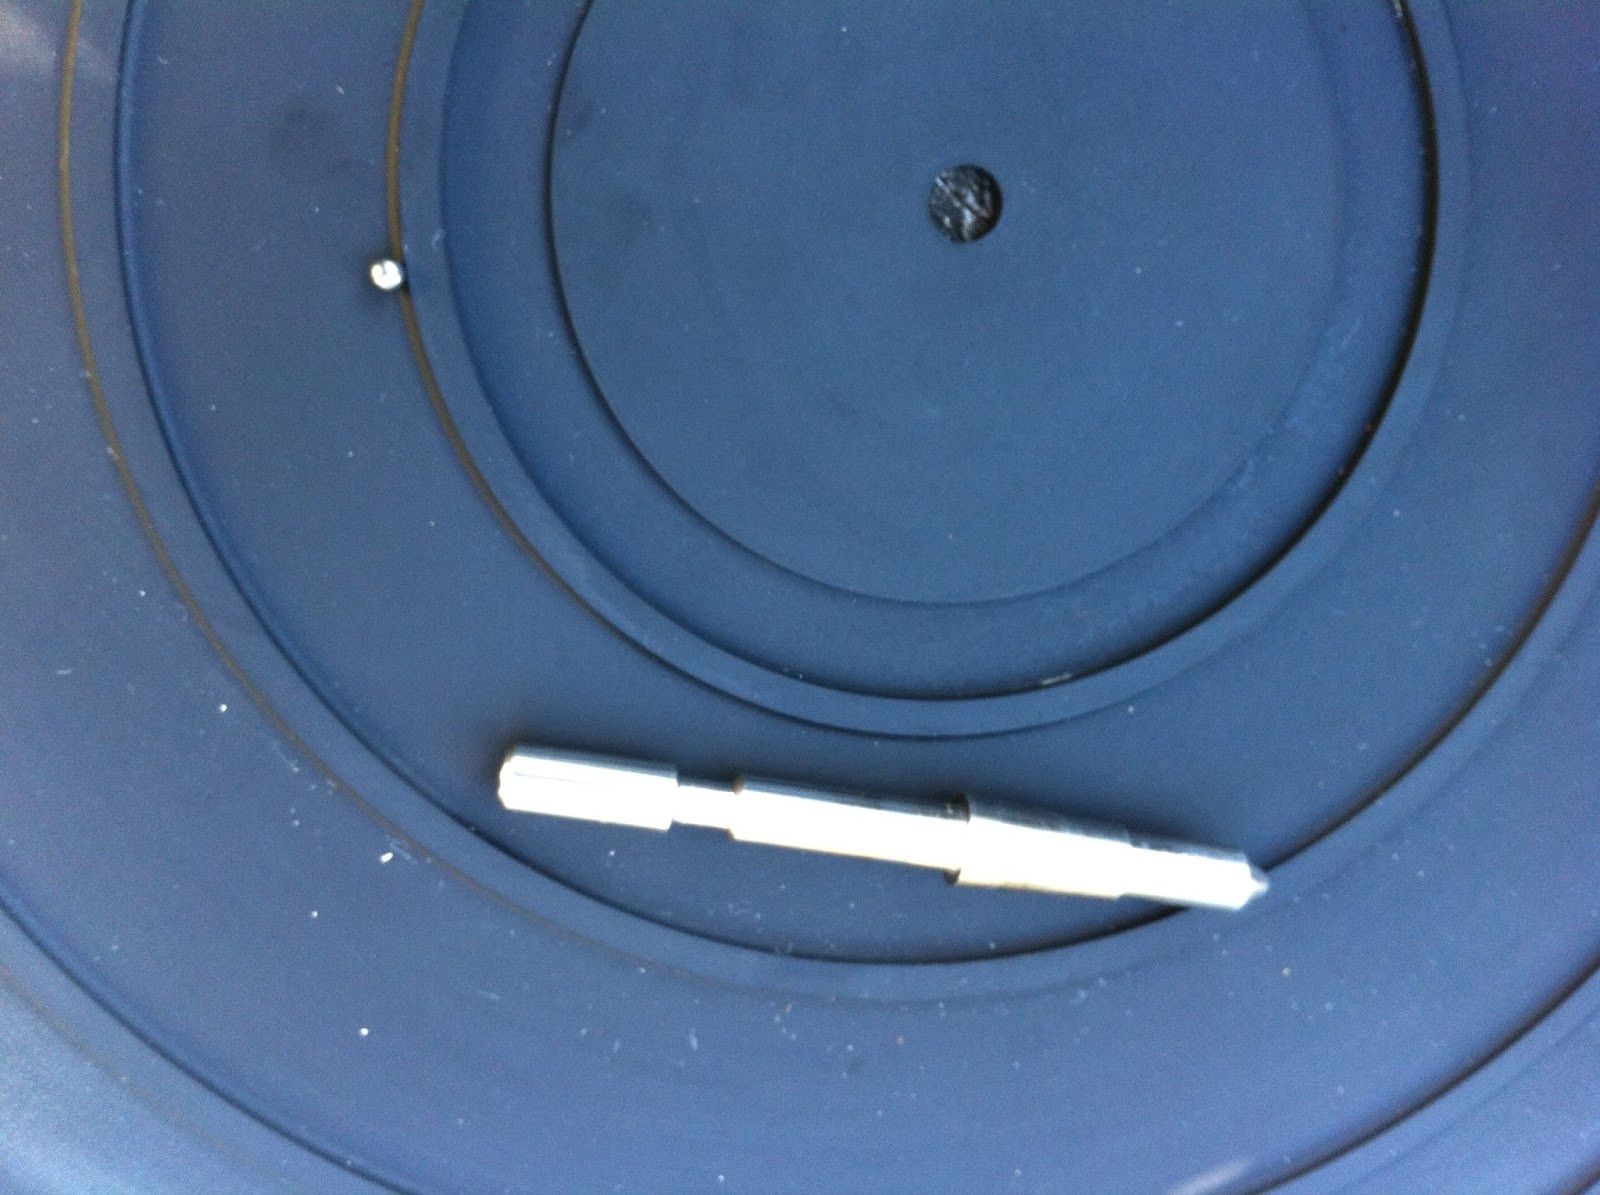
Remove the top mounting plate from the motor, held by two nuts and split washers. Also remove the brass 45/33 RPM spindle held by a grub screw. Store all parts safely.
 Pioneer PL-12D motor frame bolts and hardware, ready for motor frame separation.
The motor frame is bolted together. Remove these bolts using a good Philips screwdriver. These screws are soft; avoid power screwdrivers to prevent damage. The nuts on the other side are recessed and difficult to access with box spanners, but the bolts usually loosen anyway.
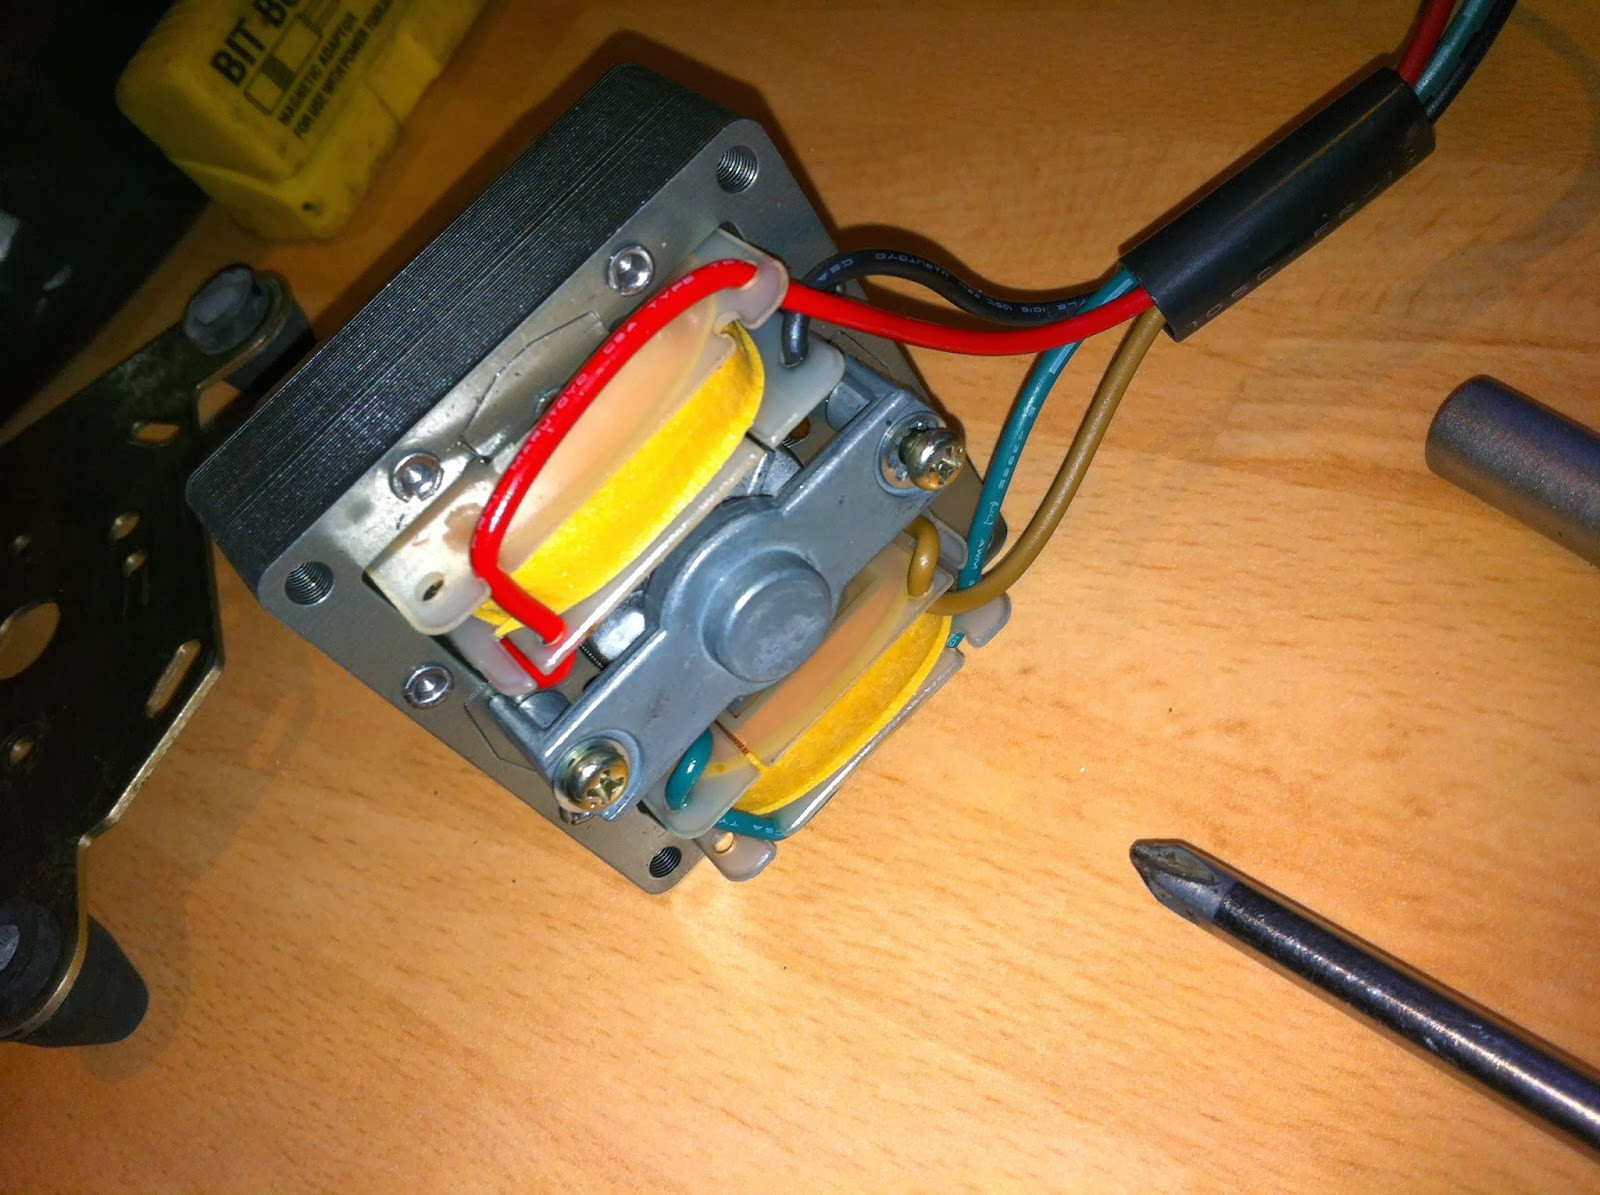
 Pioneer PL-12D motor bolts being removed, separating motor frame for bearing access.
On the upper motor spindle, a small plastic washer fits tightly. Slide this off and store safely.
 Pioneer PL-12D motor spindle plastic washer, removed and stored for reassembly.
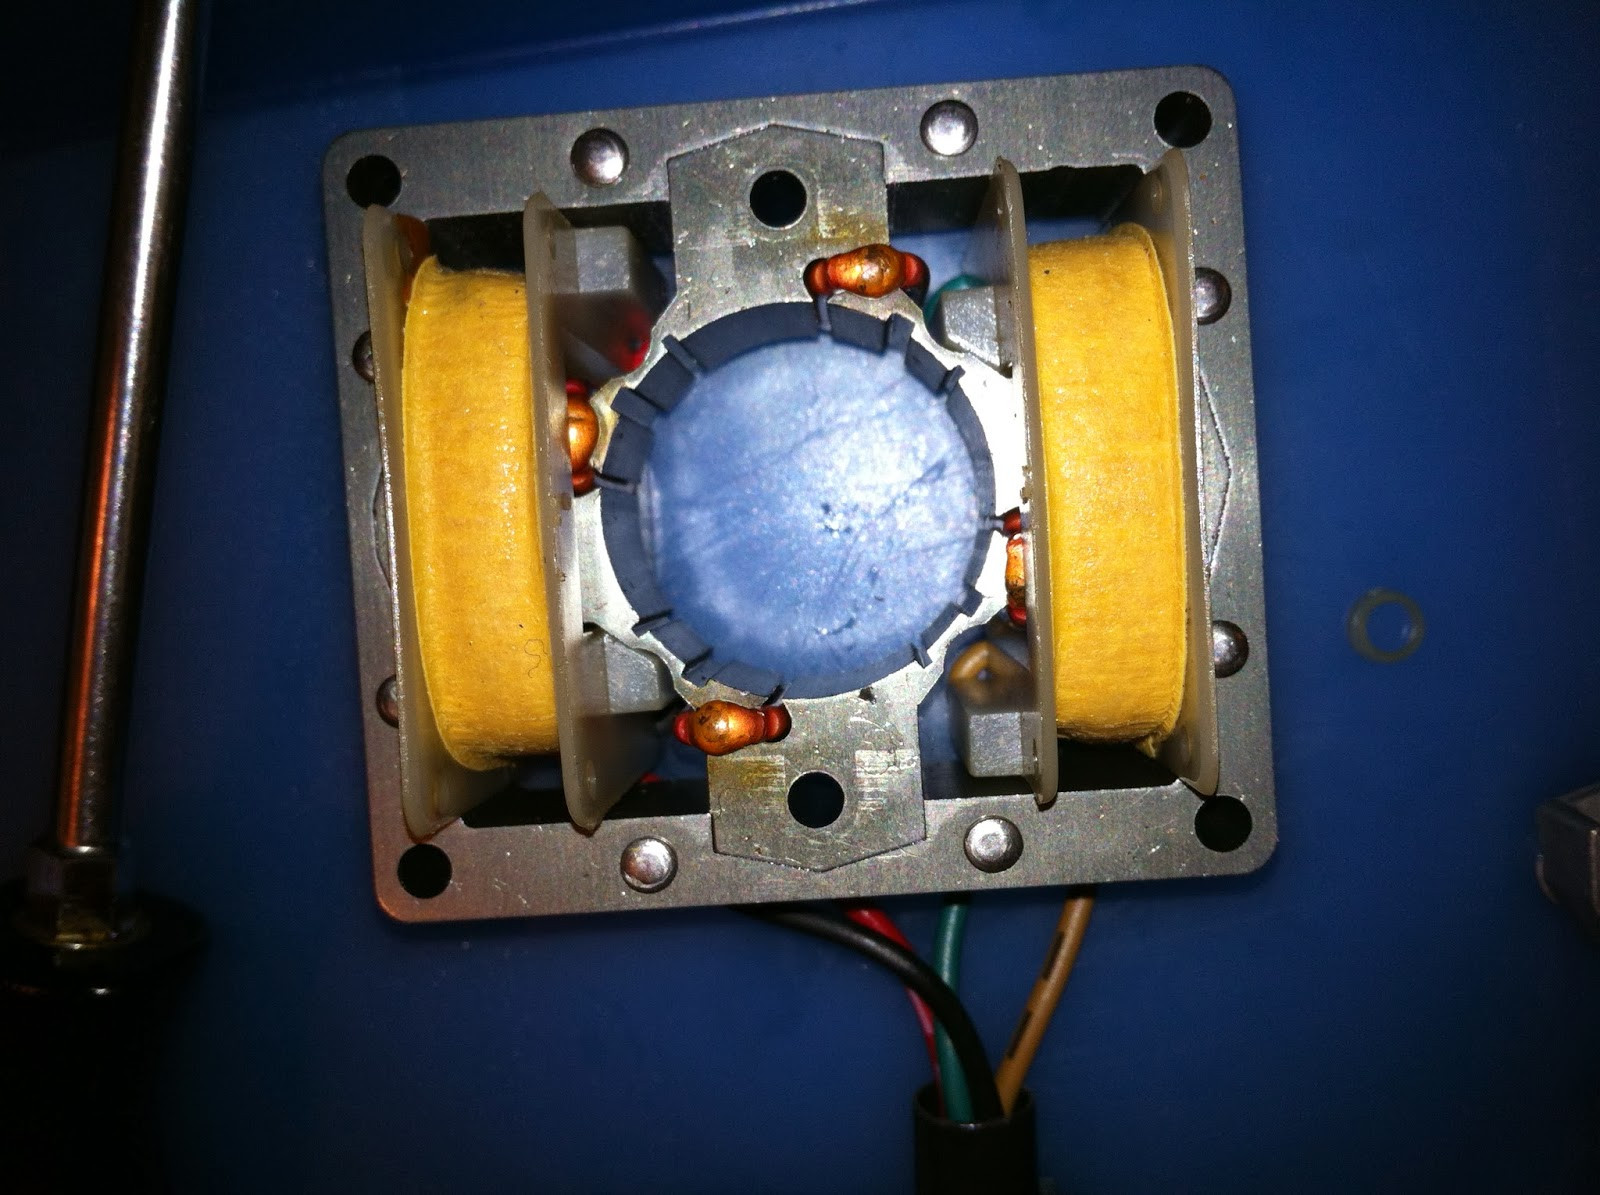
With bolts removed, access the central rotor and remove the upper and lower bearing mounts, leaving the stator.
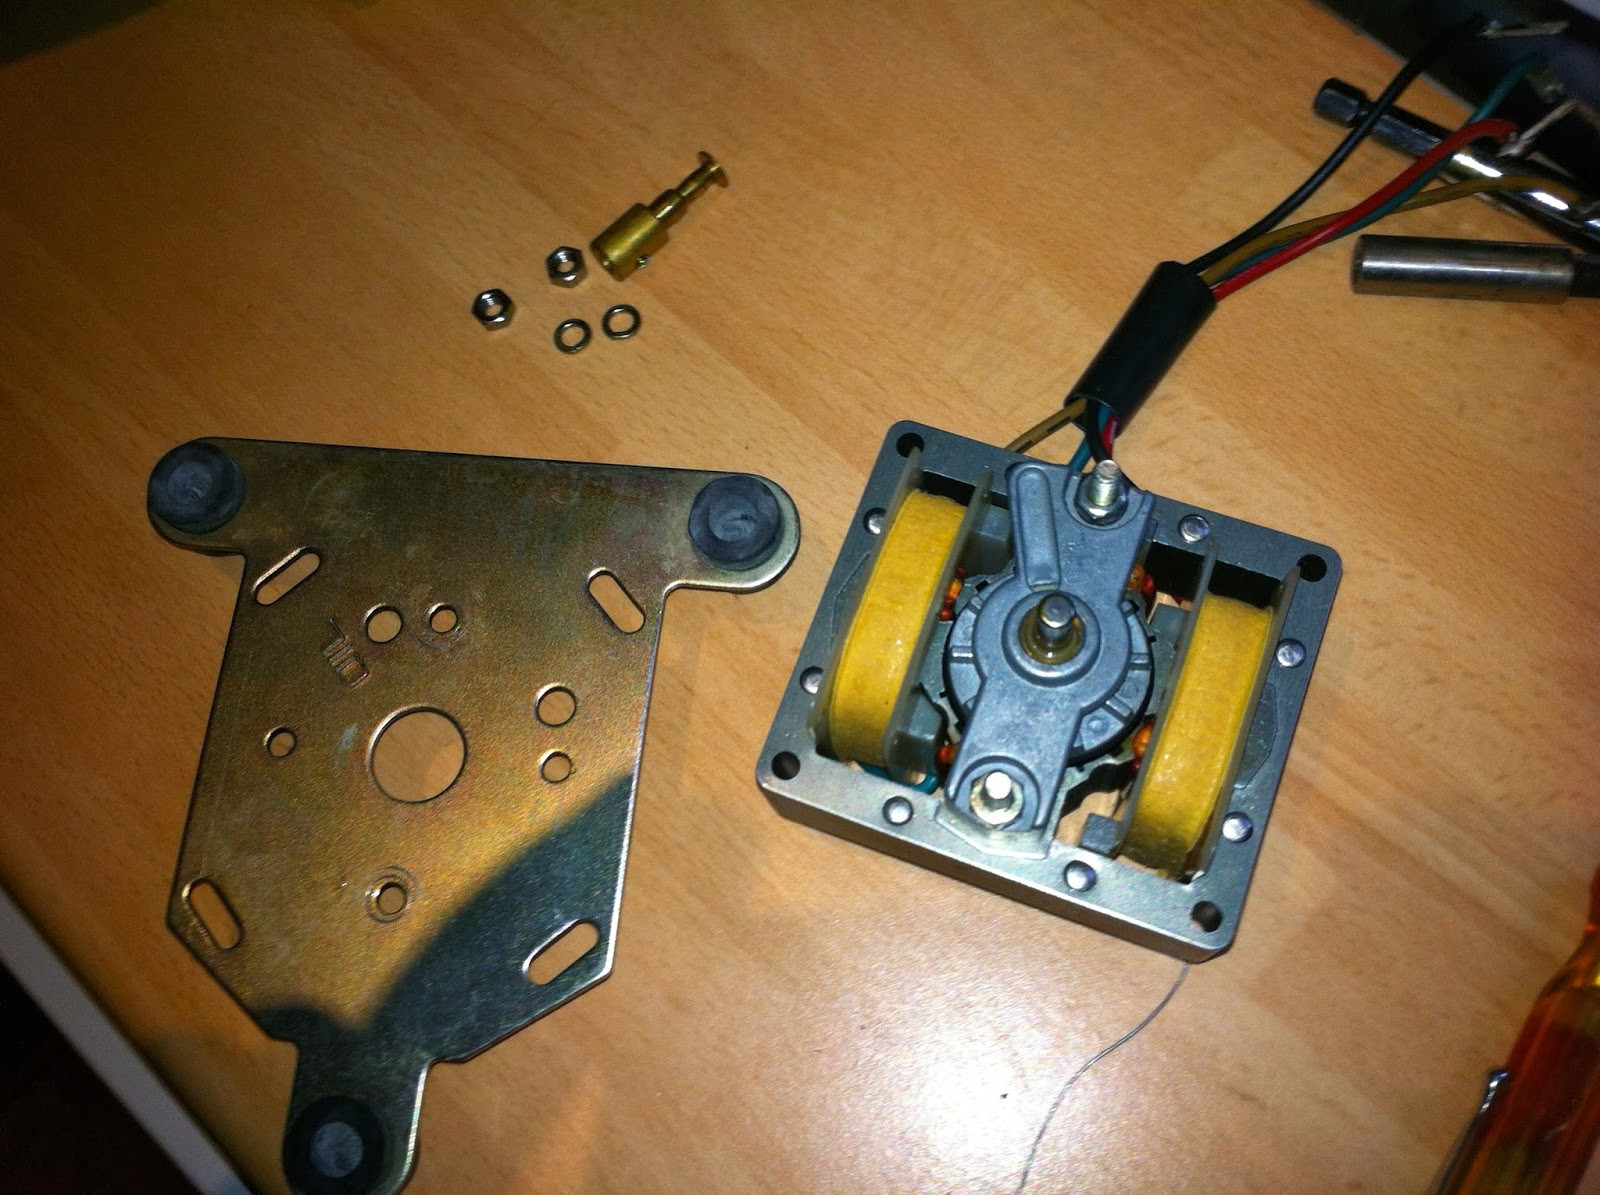
 Pioneer PL-12D motor stator, rotor, and bearing frames separated after disassembly.
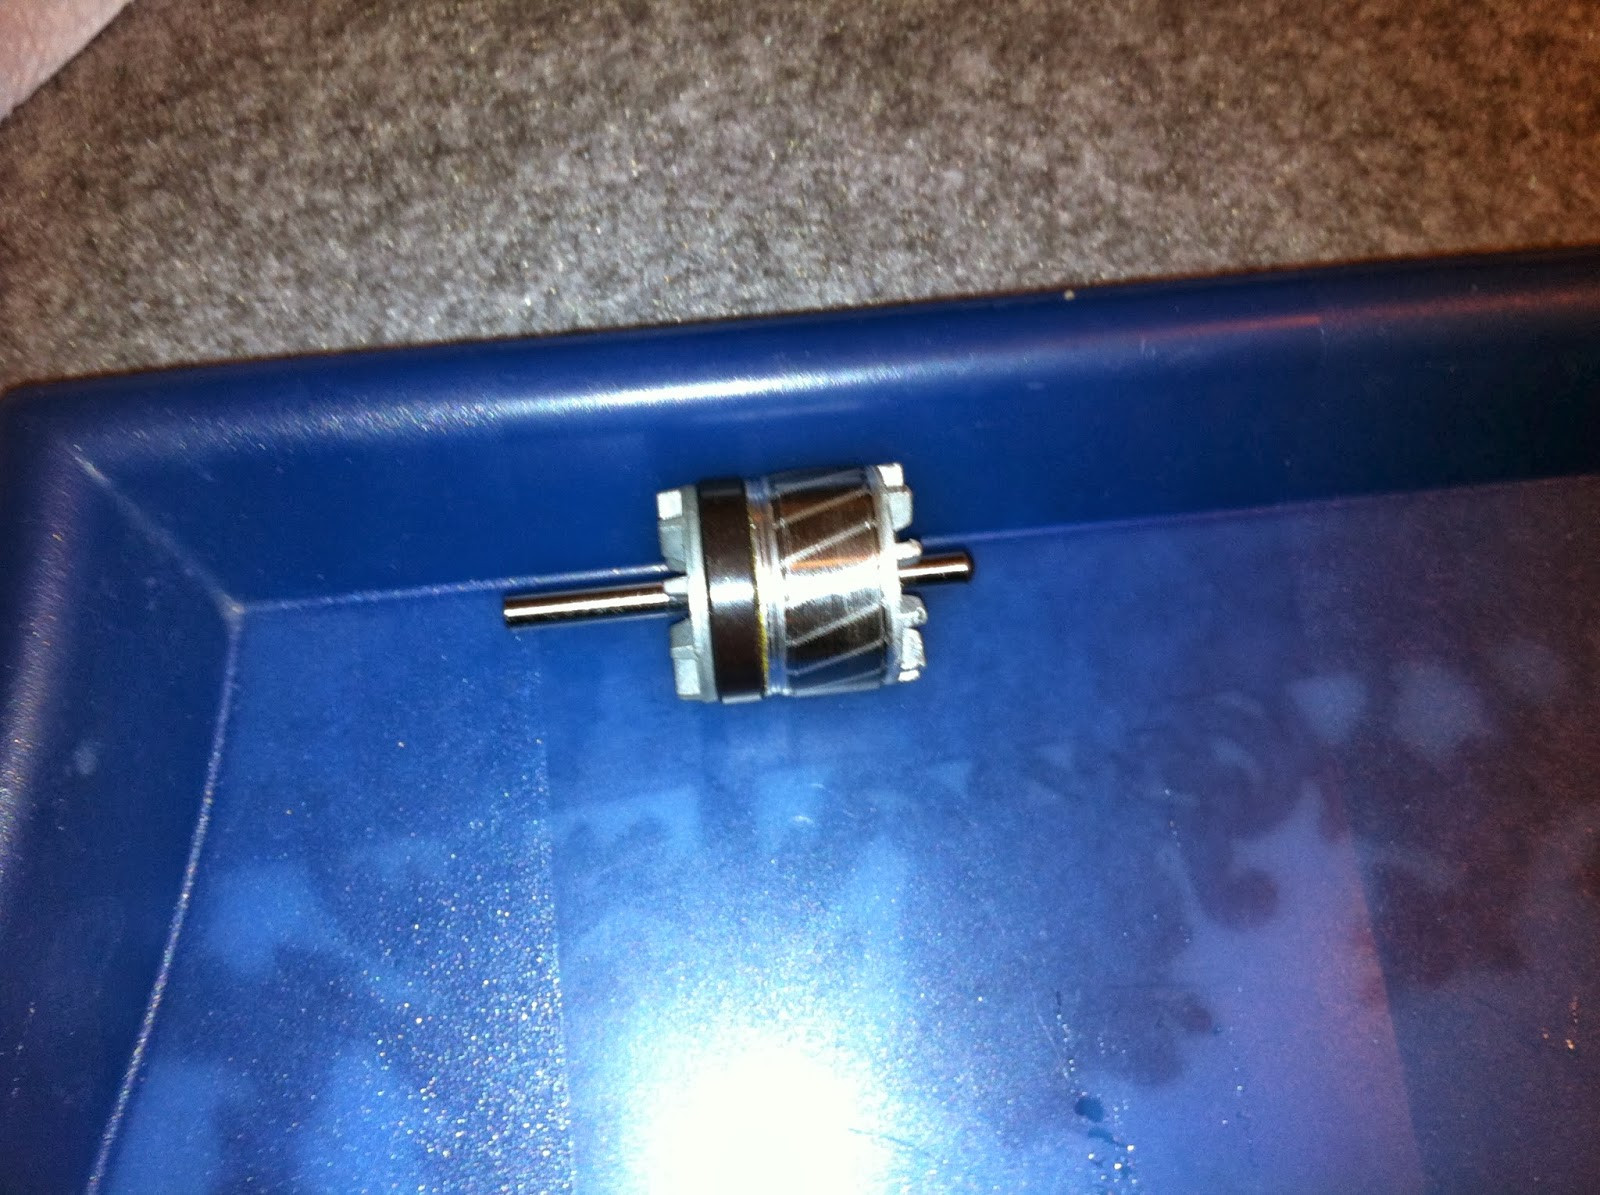
Here’s the rotor. Both rotor and stator were clean; I only wiped the rotor’s steel rod ends with a cloth.
 Pioneer PL-12D motor rotor, cleaned and ready for bearing frame reassembly.
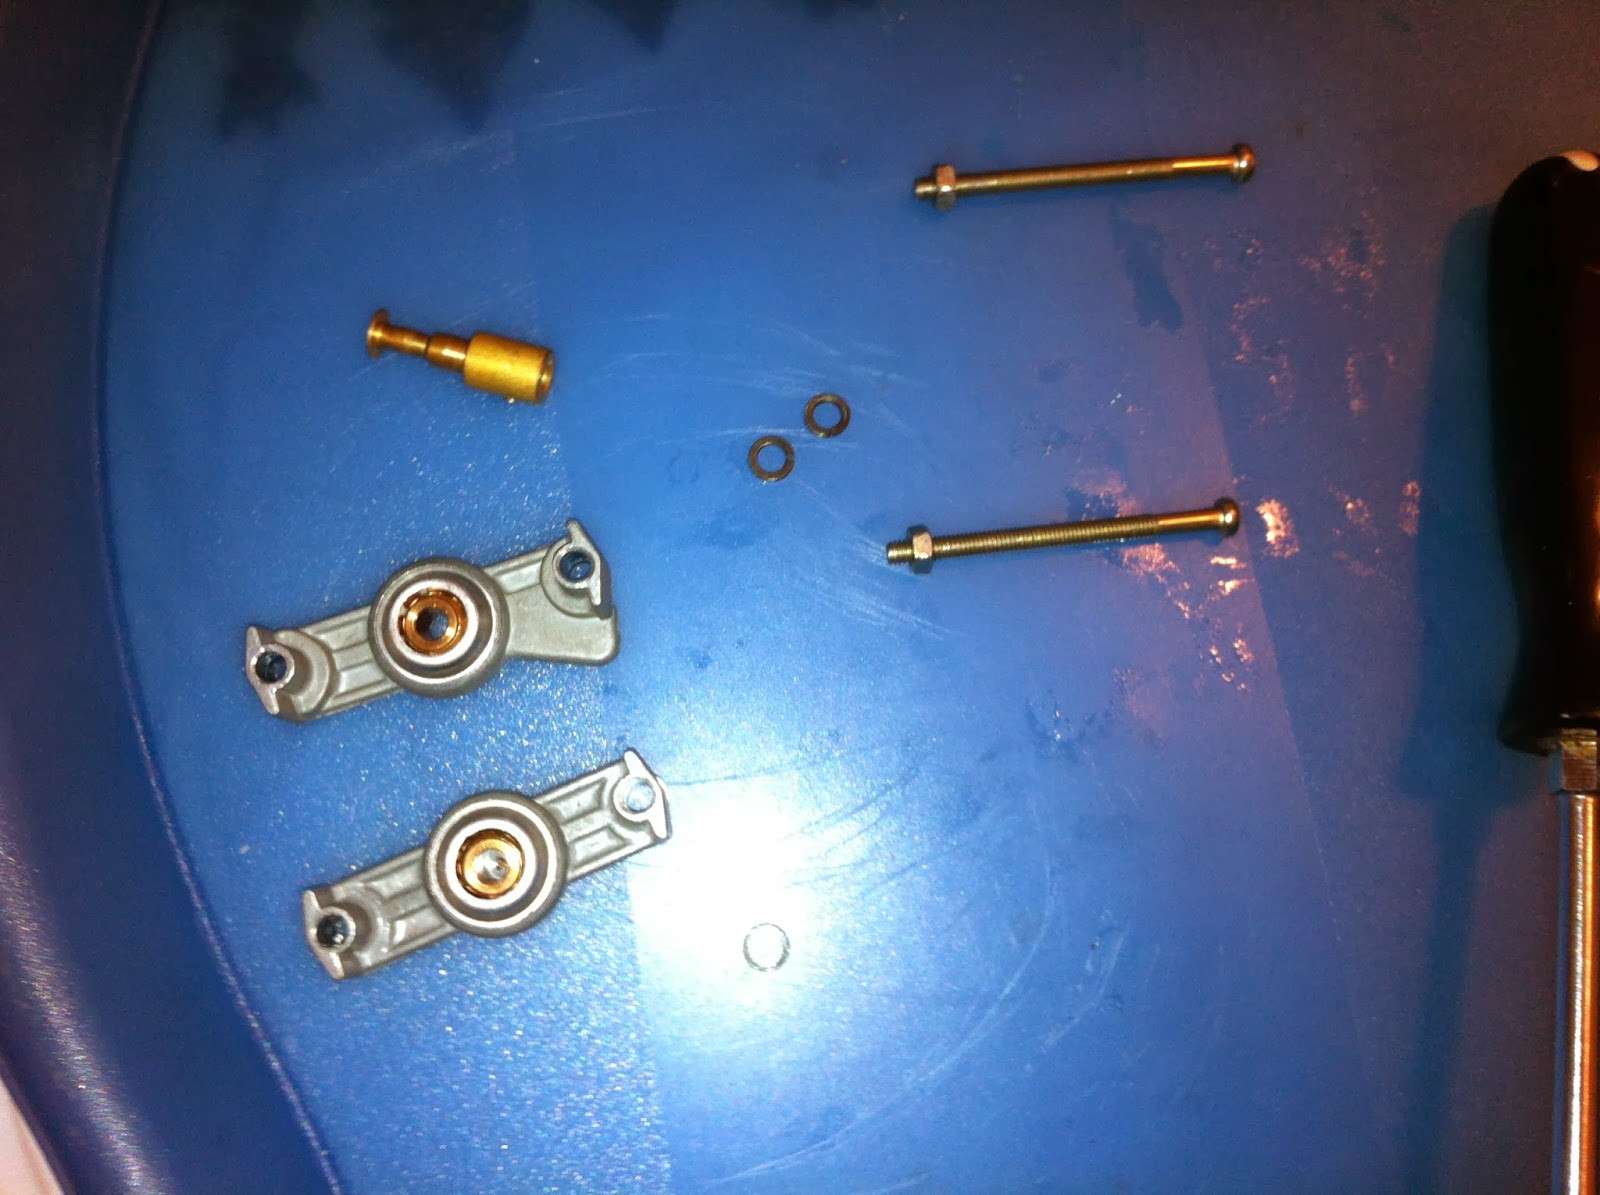
These are the bolts, nuts, split washers, brass spindle, and bearing frames. The bearing frames were the focus.
 Pioneer PL-12D motor components: bolts, spindle, bearing frames, cleaned and ready for reassembly.
The lower bearing interior reveals a bronze bearing well. A mark in the center was removed with a cotton bud – likely dirt and worn grease.
 Pioneer PL-12D lower motor bearing frame interior, showing bronze bearing and cleaning process.
The lower bearing frame (top) and upper bearing (below) with its oil trough and felt collar are shown. The felt collar around the bronze bearing retains oil.
Pioneer PL-12D upper and lower motor bearing frames, showing oil trough and felt collar.
The upper bearing frame underside shows the bronze collar bearing clearly. I cleaned dirt from bearings with cotton buds, then sprayed Servisol contact cleaner to dissolve old lubricant. I repeated cleaning and drying, working the rotor spindle in the bearings to dislodge grime.
 Pioneer PL-12D upper motor bearing frame underside, showing bronze collar bearing and cleaning process.
After drying, I soaked both bearing interiors with sewing machine oil, filling the lower bearing well, letting it soak for 10 minutes, then draining excess. I added a small blob of silicone grease to the lower well for long-term lubrication, as oil from the top trough doesn’t reach it.
Reassemble the motor with rotor, bearing frames, bolts, washers, and plastic spindle washer. Tighten bolts just enough. Align bearings for free rotor spin. Rotor misalignment can cause rubbing against the stator. Check for even air gap around the rotor by shining a torch from behind.
 Pioneer PL-12D motor rotor and stator reassembled, checking for even air gap for smooth operation.
 Close-up of Pioneer PL-12D motor air gap check, ensuring even spacing for smooth rotor movement.
Ensure even rotor gap from both ends. Tighten bolts and recheck rotor spin. Reverse disassembly to reassemble the deck, resoldering motor wires and reattaching components.
Initial reassembly resulted in louder motor knocking due to rotor misalignment. I realigned the motor without desoldering, loosening and retightening bolts. Motor stripping is possible with wiring intact, but less accessible. If uncomfortable with soldering, consider this approach.
After careful rotor centering, the motor was near silent. However, after 30 minutes, noise returned. Retightening motor and rubber mount bolts temporarily silenced it again, but knocking returned after 40 minutes. The motor noise returned to its original level. Motor stripping was inconclusive.
Fitting platter, mat, and belt reduced noise significantly. Belt tension or platter cooling might improve motor operation. The motor still gets hot.
Update May 2014: “I hear you knocking …“
A random knocking sound emerged, shaking the platter. It wasn’t motor spindle catching. Even hand-spinning the platter produced knocks, indicating main bearing issue. I removed the platter, loosened the bearing screw, removed the spindle, and extracted the ball bearing with a magnetic screwdriver.
The bearing looked dull and pitted compared to a new one. Rolling it on glass revealed erratic, noisy movement. Magnification confirmed pitted surfaces.
I replaced the bearing and relubricated the spindle. The spindle end had a dimple, potentially wear from the worn bearing. (User vs_music on Vinyl Engine suggests this dimple is machined, but I suspect wear.)
A neighbor polished the spindle end smooth on a lathe. I reassembled with a new bearing and sewing machine oil. Initial grinding resolved after oil distribution, and the platter spun freely for minutes from a gentle push.
The knocking stopped, and the Pioneer PL-12D sounds excellent with a Shure M95 cartridge and Jico stylus. I’ve acquired a Denon DL-110 to try next.
Update July 2019
Dirk Sipes provided a detailed servicing article, worth reading:
https://mr-ives.blogspot.com/2019/07/pioneer-pl12d-service-revisited.html
Update Feb 2021
Join the excellent Pioneer PL12D Facebook group for tips and advice:
https://www.facebook.com/groups/1800061146950818
Update 2022
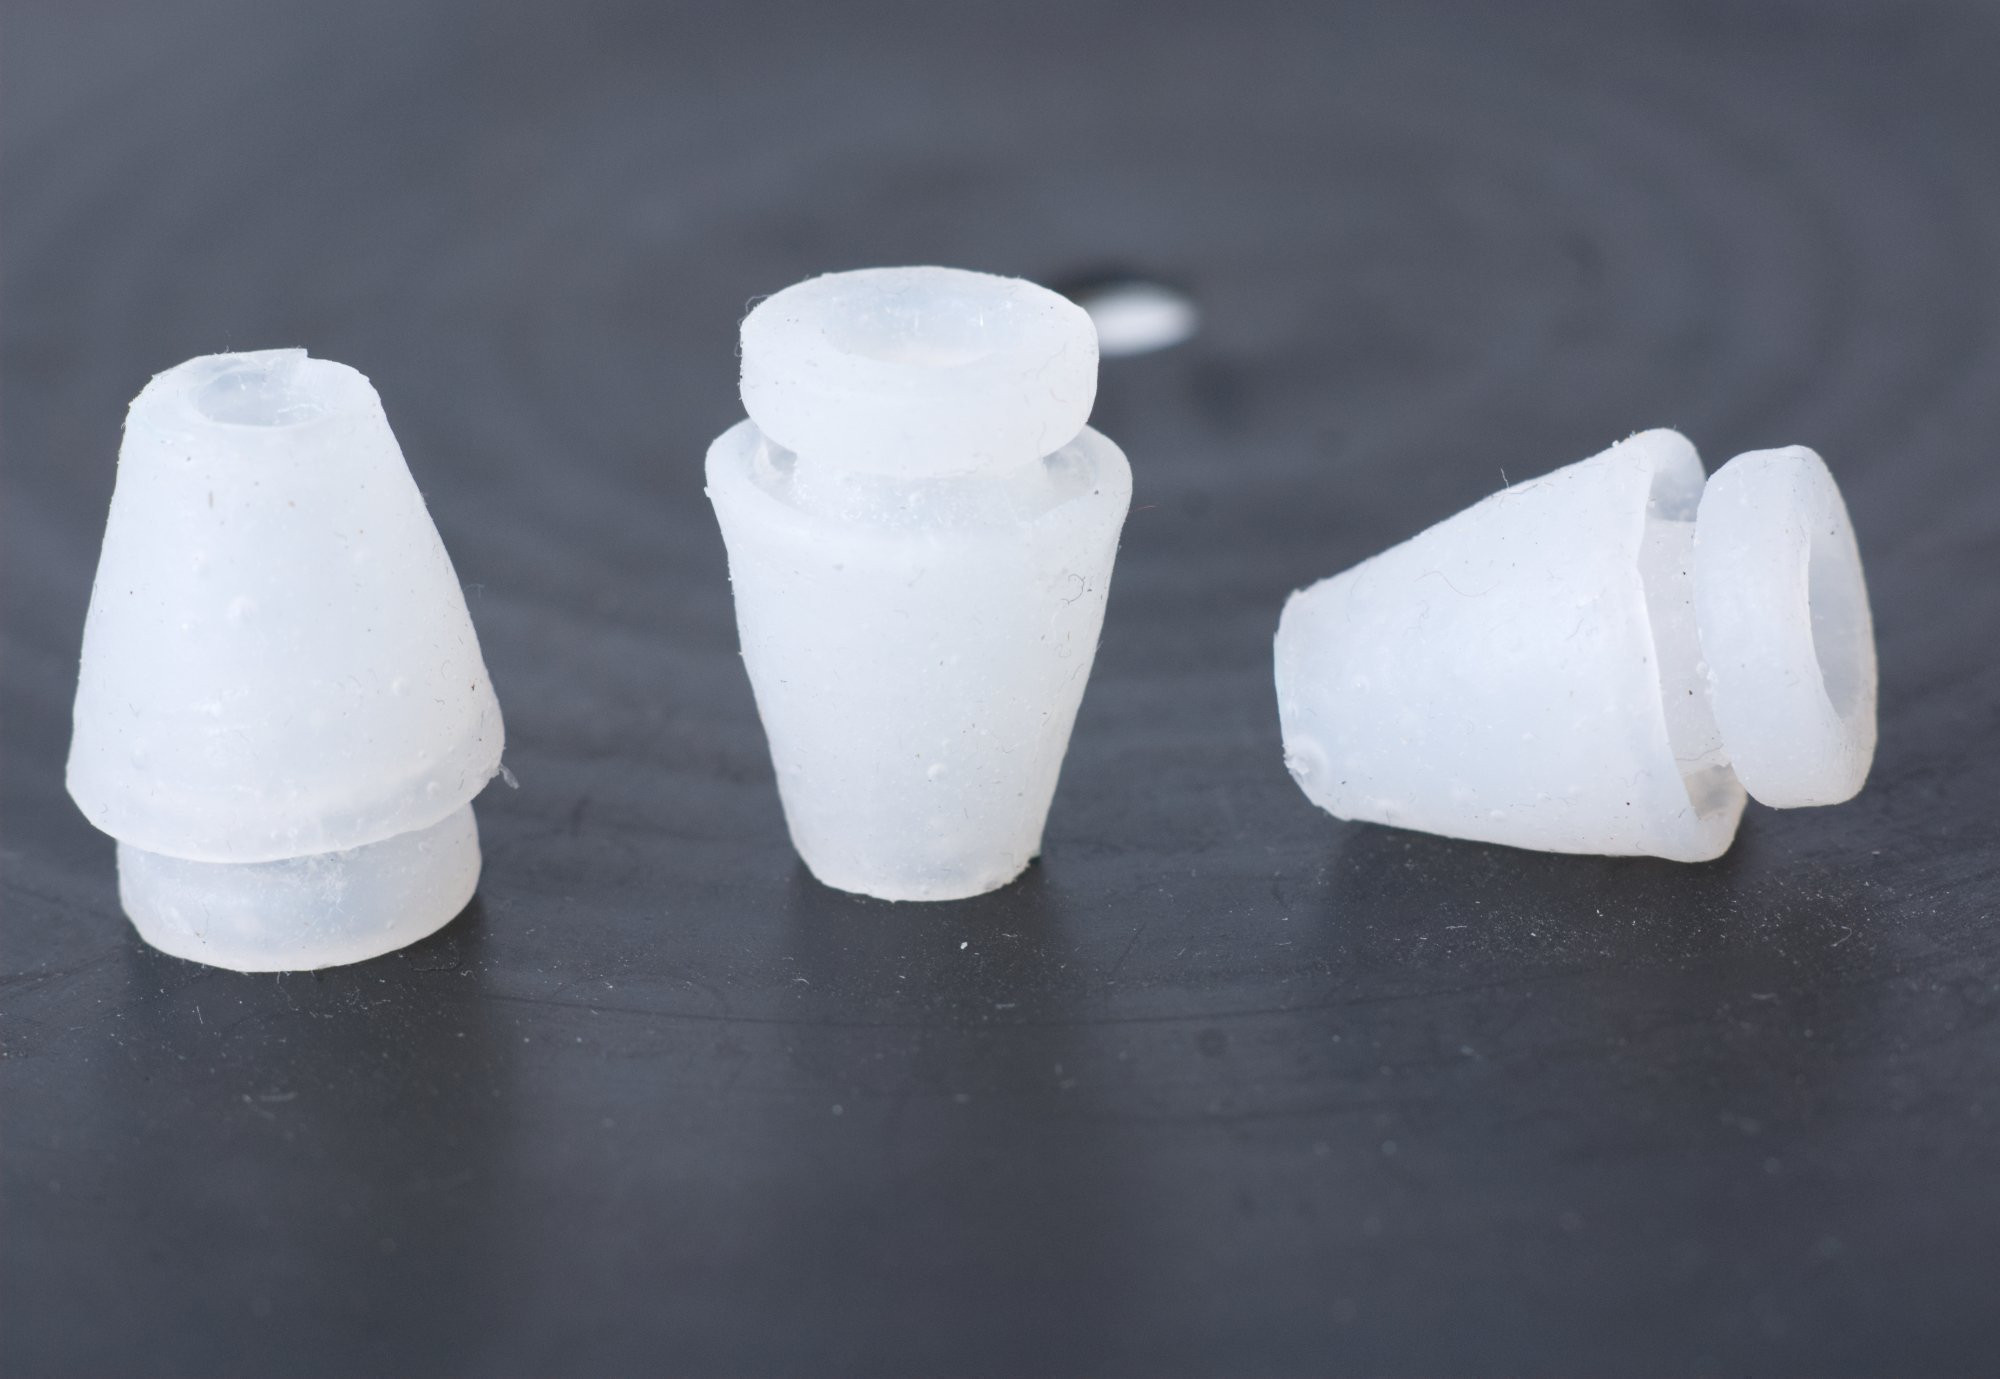 Silicone rubber motor mounts for Pioneer PL-12D, replacement parts for hum reduction.
Tom Silvennoinen in Sweden offers new silicone rubber motor mounts for the Pioneer PL-12D, effectively eliminating hum. While original rubber mount restoration is described above, these replacements are recommended: