Like many vintage audio enthusiasts, I’m always on the lookout for undervalued gems. Recently, I stumbled upon a Pioneer PL-516 turntable being sold for a song. Despite being non-functional at the time of purchase – the belt was missing, and the mechanism seemed jammed – I saw potential beneath the dust and grime. The presence of a Grado F3+ cartridge hinted that this Pioneer Pl 516 had once been cherished, sparking my interest in restoring it to its former glory.
My initial assessment confirmed the missing belt and a mechanically bound tonearm, preventing proper operation. However, the motor showed signs of life, humming faintly when the tonearm was manually moved. This gave me hope that the core components were intact. Disassembly revealed the culprit: the automatic mechanism beneath the tonearm had jumped its track, causing the binding.
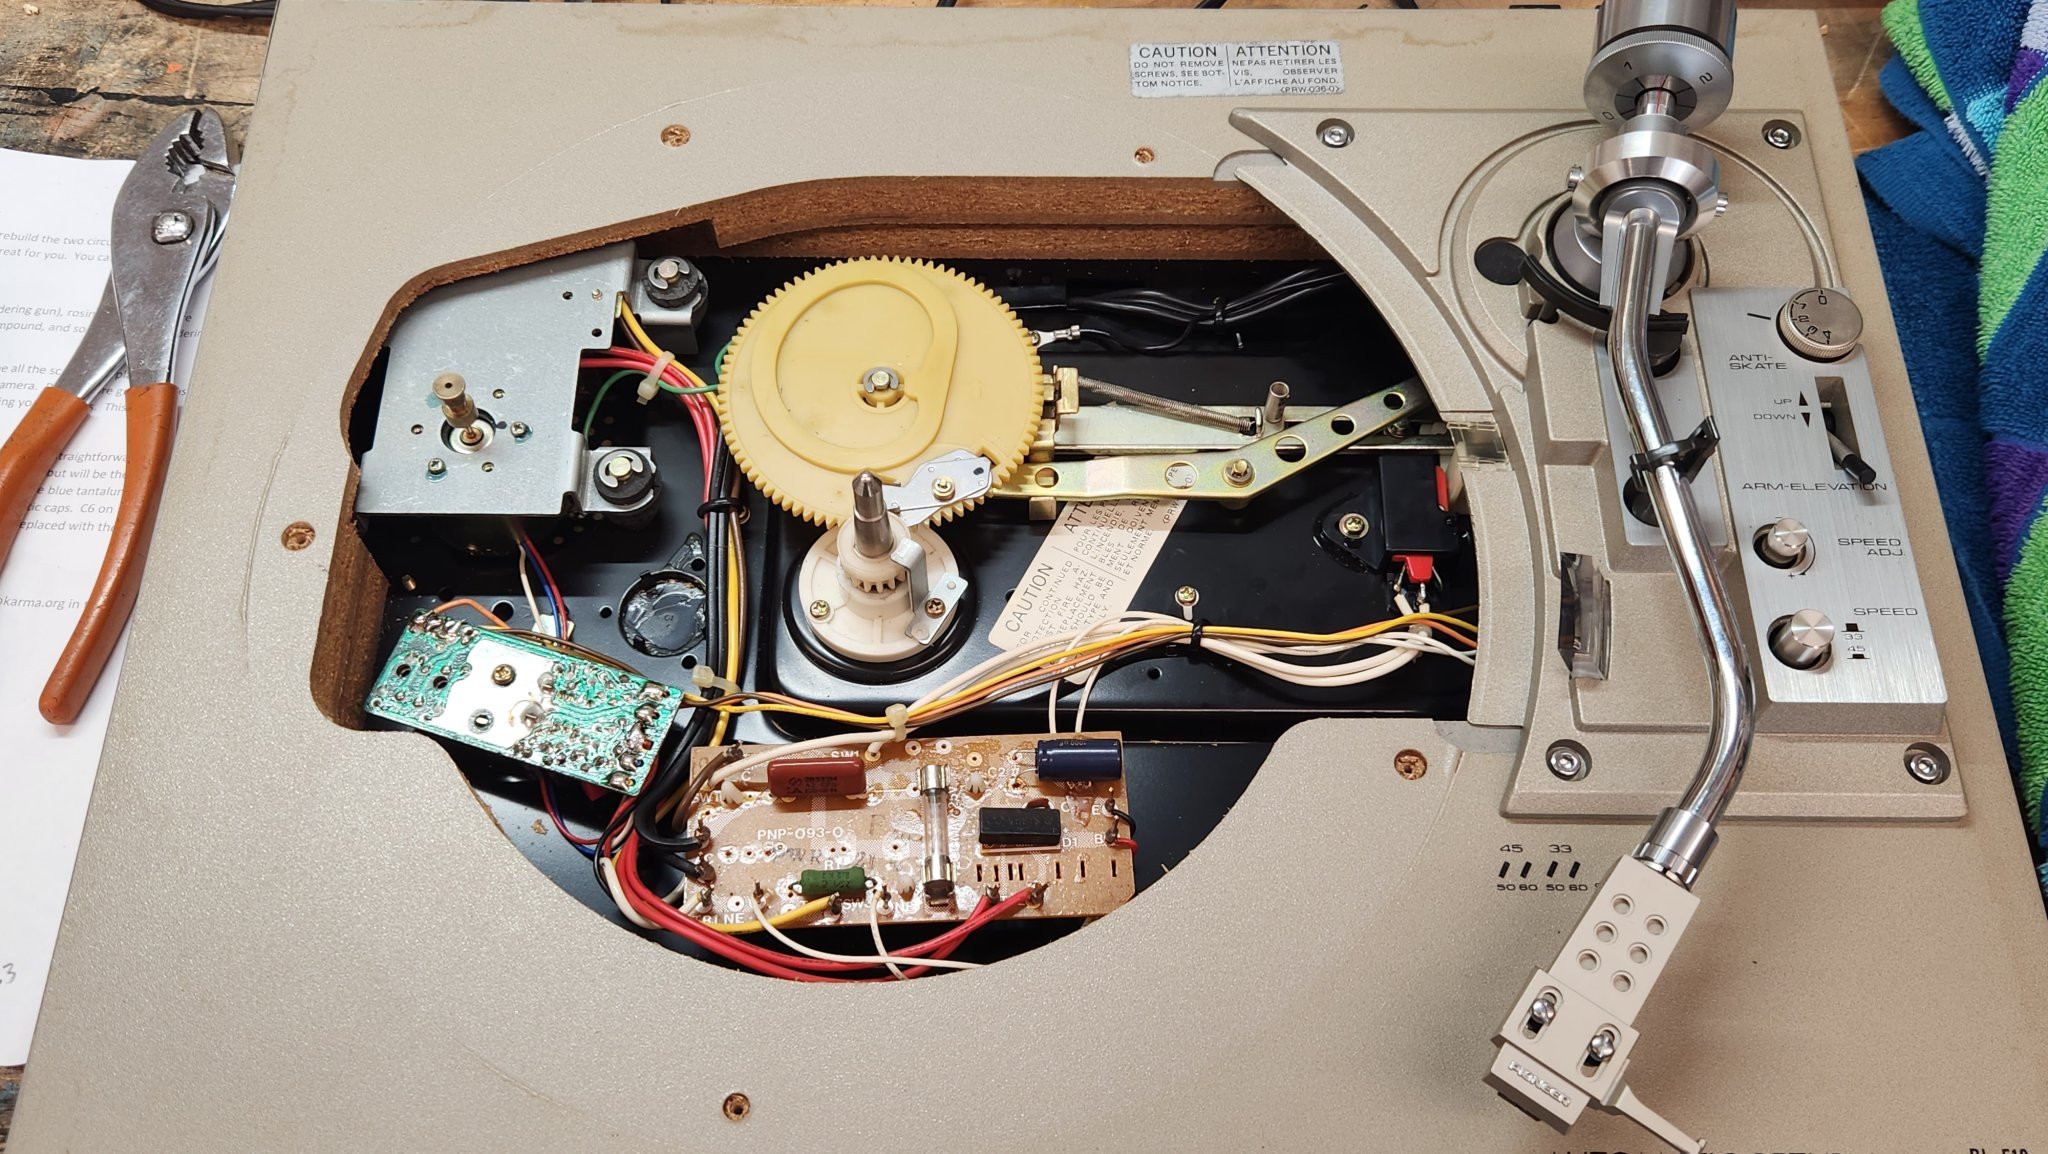 Pioneer PL-516 turntable with platter and top plate removed, showcasing internal components.
Armed with the service manual’s precise adjustment specifications, I carefully disassembled the automatic mechanism. It was a delicate process, but with patience, I managed to realign everything correctly, restoring smooth and free movement. A new belt was sourced and installed, essential for getting the pioneer pl 516 spinning again. To ensure optimal performance and longevity, I also replaced the capacitors on the motor control board with a readily available kit from eBay. This proactive measure addresses a common age-related issue in vintage electronics.
The pioneer pl 516 boasts independent fine-tuning adjustments for both 33 and 45 RPM speeds on its motor control board. With the coarse speed adjustment at the tonearm base centered, I was able to precisely dial in both speeds using these fine adjustments. Standard maintenance followed: a thorough cleaning and lubrication of all switches and potentiometers. Coupled with the capacitor replacement and new belt, the speed stability became rock solid, a testament to the inherent quality of this vintage turntable.
Despite the initial tonearm mechanism issue, the pioneer pl 516 appeared to be in remarkably good condition. The components felt robust, suggesting a durable design that could withstand the test of time. The plinth is constructed from a dense particle board, wrapped in vinyl. Interestingly, the power transformer and motor are mounted to a small steel sub-chassis. This sub-chassis is then bolted to the main steel bottom plate and further isolated from the plinth using rubber bumpers – a thoughtful detail to minimize vibration and noise. The cast metal tonearm plate assembly is also easily removable as a unit, simplifying servicing without disturbing the delicate tonearm wiring.
Eager to hear the results of my efforts, I integrated the restored pioneer pl 516 into my audio system. The immediate improvement was undeniable. To my surprise, this resurrected turntable outperformed my existing Technics SL-B2 paired with a Shure M97 cartridge, a combo I had previously been content with. The improvement was significant enough to abandon my original plan of flipping the Pioneer for profit. This pioneer pl 516 was a keeper.
Having decided to keep the turntable, I embarked on an aesthetic upgrade: veneering the plinth. The original vinyl veneer peeled off relatively easily with the aid of a heat gun, and any remaining adhesive was removed with a scraper. A quick sanding with 80-grit sandpaper prepared the plinth surface for the new veneer, ensuring clean edges and corners. I opted for paper-backed veneer and contact cement for this project, utilizing some zebrawood scraps I had on hand.
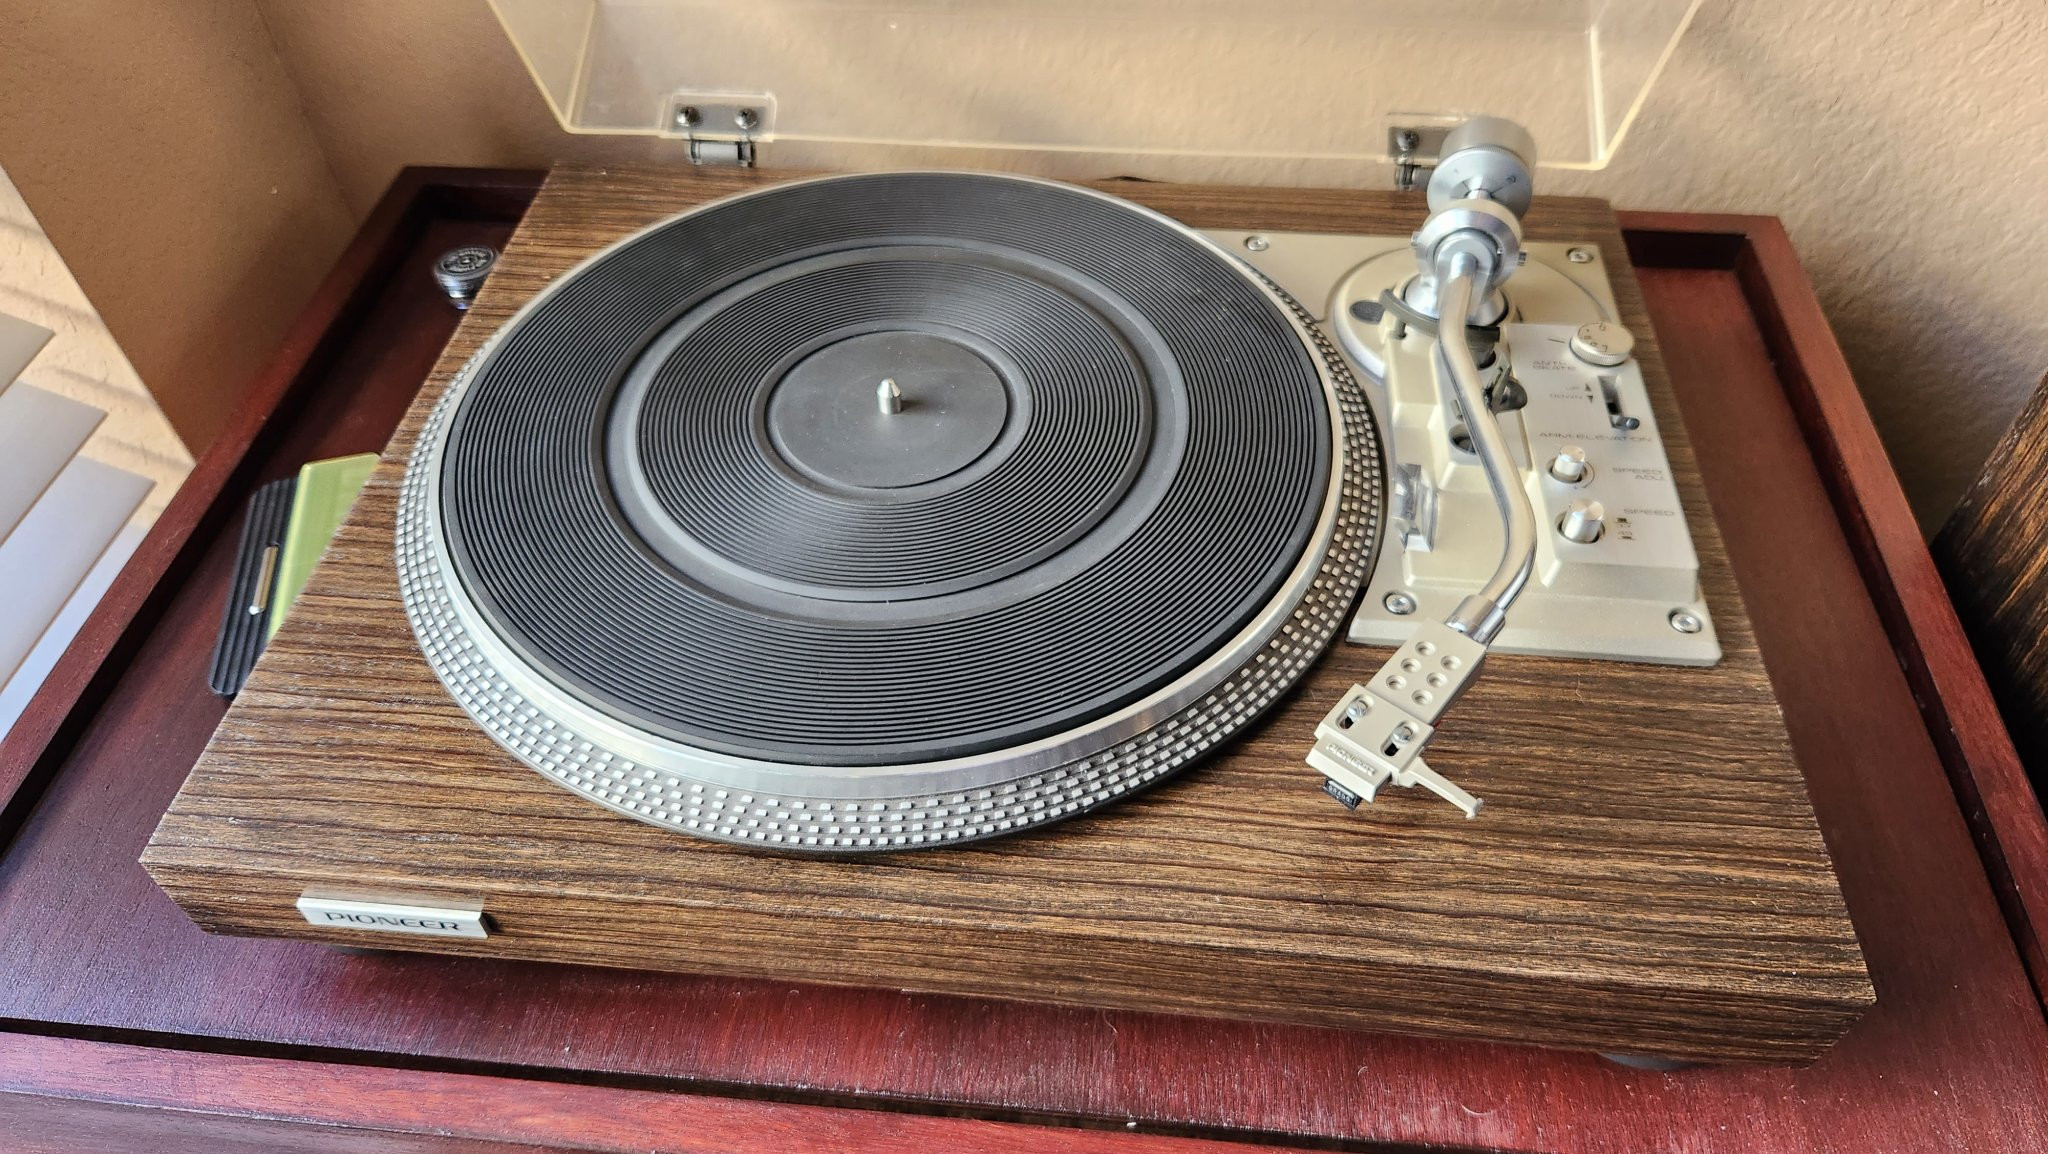 Restored Pioneer PL-516 turntable plinth veneered with zebrawood and coated with polyurethane.
Veneering itself is a straightforward process, but it inevitably covers the screw holes for reassembling the hardware. While these locations can sometimes be transferred from paper templates, I employed a more direct method. Using a tiny pin vise twist drill, I drilled pilot holes from the top, passing completely through the plinth. This allowed me to easily locate the screw holes after veneering by drilling upwards from the bottom with the same tiny drill bit, creating precise openings in the veneer. For connectivity, I installed new, thicker RCA cables, routing them through the stock location. Care was taken to ensure these thicker cables didn’t interfere with the operation of the automatic mechanism.
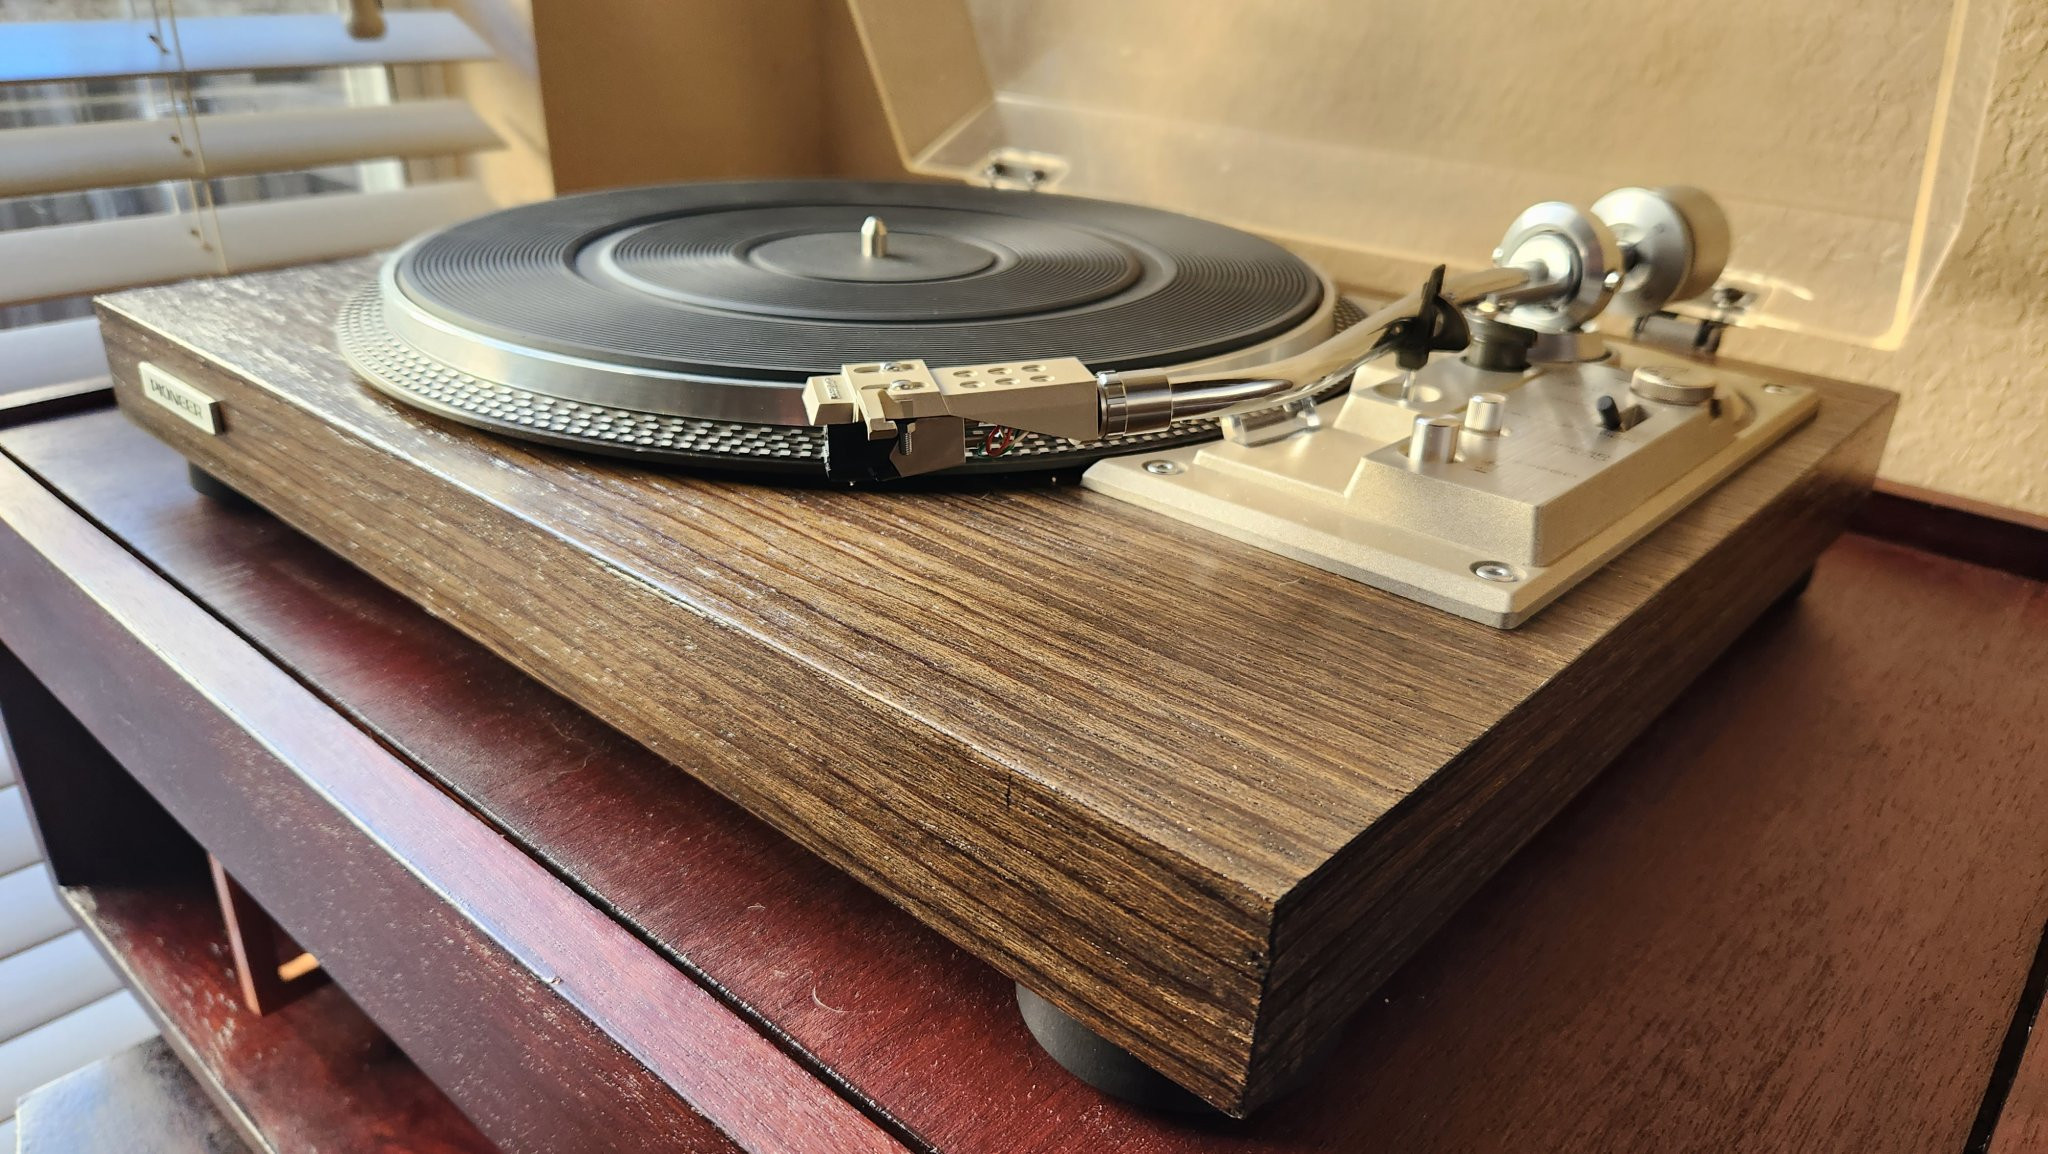 Fully restored Pioneer PL-516 turntable in listening setup, highlighting the zebrawood plinth and original tonearm color.
The final result is a beautifully restored pioneer pl 516 turntable. While the dust cover still needs some sanding and polishing, the overall transformation is remarkable. I briefly considered painting the tonearm base satin black, but ultimately decided to retain the original, almost champagne color, which complements the zebrawood veneer nicely. In my listening setup, driving a Pearl 2 phono preamp, the pioneer pl 516 and Grado F3+ cartridge combination is a clear winner. It surpasses the Technics SL-B2/Shure M97 in every aspect, delivering a quieter and more refined audio experience. Experimenting with cartridge swapping confirmed my initial impressions: the Technics seemed to synergize best with the Shure, while the pioneer pl 516 truly shines with the Grado. Rescuing this broken pioneer pl 516 turned out to be a surprisingly rewarding endeavor, yielding a turntable that not only looks fantastic but also sounds exceptional.