The Pioneer SX-680 is a beloved vintage stereo receiver, a product of the late 1970s golden age of audio. Introduced in 1978, this receiver, while not the most powerful in Pioneer’s lineup, delivers a respectable 30 watts per channel into 8 ohms with a low 0.1% Total Harmonic Distortion (THD) and a wide frequency response spanning from 5Hz to 100kHz. It may not be an SX-1980 monster receiver, but the SX-680 boasts a classic Pioneer aesthetic and a sound quality that can fill a room with rich, warm audio.
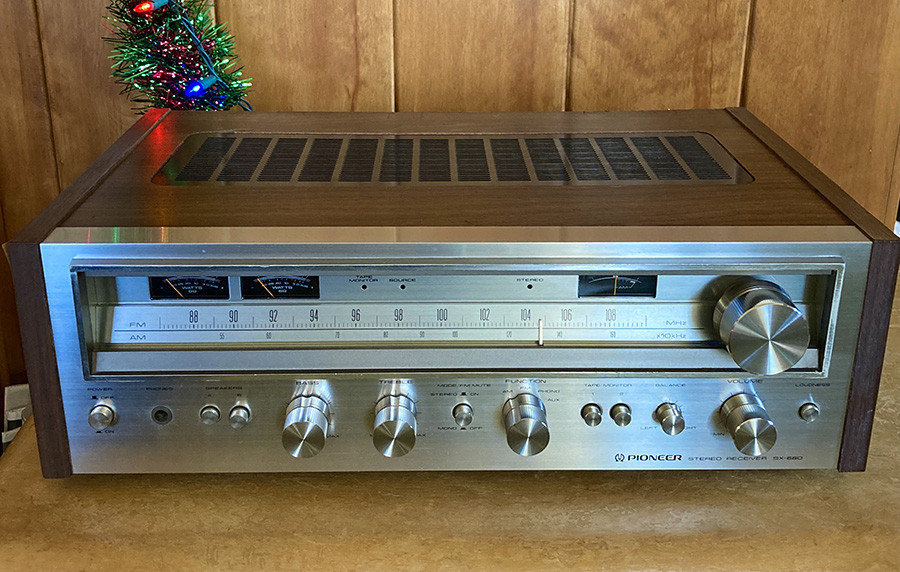 Front view of Pioneer SX-680 stereo receiver showcasing its classic design.
Recently, I acquired a non-functional Pioneer SX-680 from Facebook Marketplace for a modest $40. My intention was to potentially restore it as an audio upgrade for my brother-in-law, replacing his aging and underperforming Fisher all-in-one system. Despite the risk of encountering irreparable damage, the potential reward of reviving this classic piece of audio equipment was too tempting to pass up.
Upon bringing it home, initial testing revealed a discouraging silence. The power lights illuminated, indicating basic functionality, but no audio output could be coaxed from any input source. The Pioneer SX-680 was, in technical terms, dead on arrival (DOA). 😭
Initial Troubleshooting Steps for the Pioneer SX-680
Before diving into component-level repair, a systematic approach is crucial. My preliminary troubleshooting process typically involves these essential steps:
- Service Manual and Schematic Acquisition: The first step is always to locate and download the service manual and schematic diagrams. For vintage audio equipment, HiFiEngine is an invaluable resource.
- Audiokarma Forum Research: Forums like Audiokarma are treasure troves of collective knowledge. Searching for threads related to the specific model can reveal common issues, repair tips, and recommended component substitutions.
- Visual Inspection: A thorough visual inspection can often uncover obvious problems before even reaching for a multimeter.
My Audiokarma research led me to two particularly helpful threads. This thread documented user Johnny_Law’s successful repair of an SX-680 with a similar no-output issue. Additionally, this comprehensive thread provided a detailed list of replacement capacitors and suggested substitutes for a full restoration. These resources proved instrumental in guiding my repair and restoration efforts.
Disassembly and Visual Inspection of the SX-680
The next stage in the Pioneer SX-680 repair process is to open up the unit and perform a detailed visual inspection of the internal components.
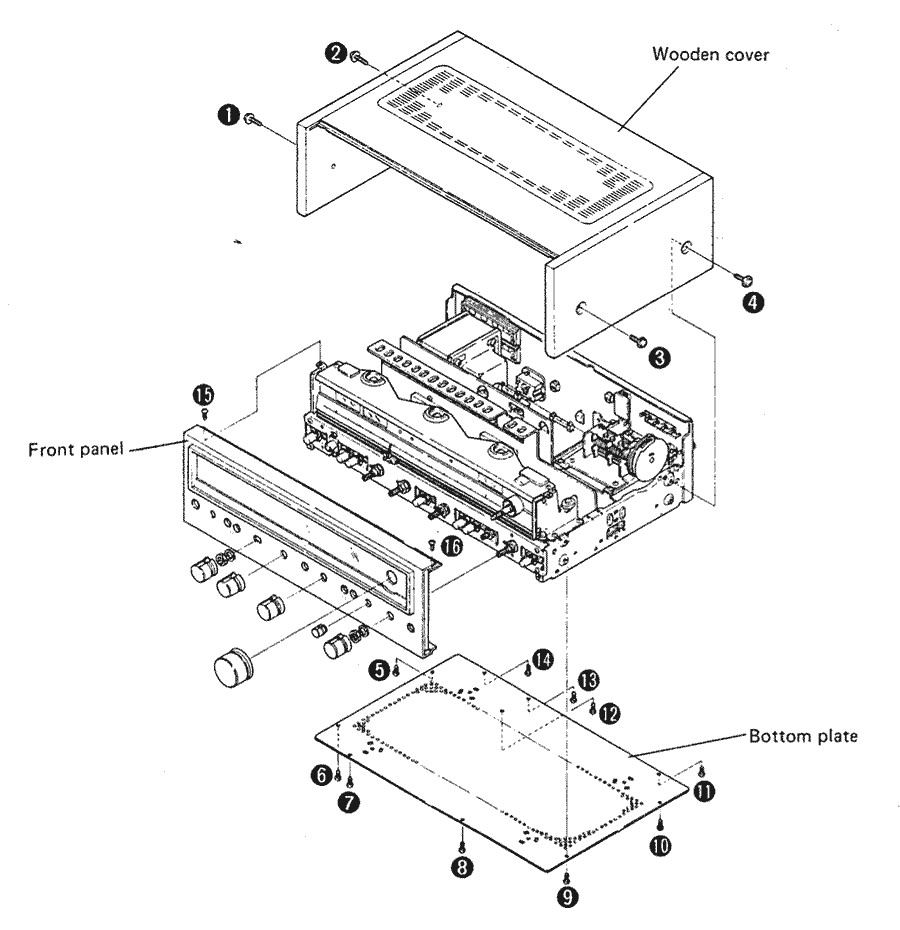 Exploded view diagram of the Pioneer SX-680 receiver, illustrating component locations.
During the visual inspection, I look for several key indicators of potential problems:
- Visually Damaged Components: Check for burnt resistors, cracked capacitors, or any parts that appear physically damaged.
- Capacitor Issues: Examine electrolytic capacitors for bulging tops or signs of leakage, which are common failure points in vintage electronics.
- Dust Accumulation: Excessive dust can contribute to overheating and component failure.
- PCB Condition: Look for discolored or burnt areas on the printed circuit boards (PCBs), which can indicate overheating or component failure.
- Previous Repairs: Assess if there are any signs of prior repair attempts, which might suggest previous issues or complications.
To gain a clearer view of the components, I carefully removed the substantial heat sink located in the center of the receiver. This heat sink is coupled with the two STK-0039 power packs. Removal involved unscrewing fasteners from both sides of the heat sink and detaching the associated PCBs.
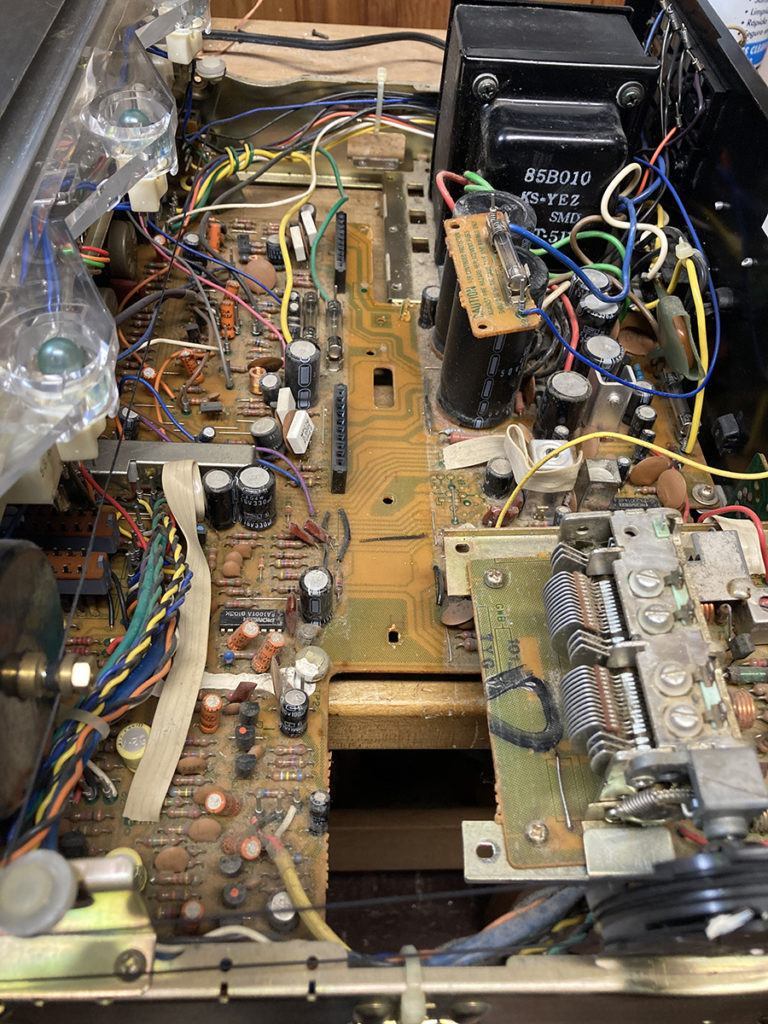 Internal view of the Pioneer SX-680 with the heat sink and STK power amplifier modules removed for inspection.
In this particular SX-680 unit, the initial visual inspection was surprisingly reassuring. No immediately obvious signs of damage or catastrophic failure were apparent. Components appeared to be in good condition, providing hope for a relatively straightforward repair.
Voltage Testing and Fault Isolation
My typical approach to troubleshooting audio receiver issues begins with the power supply section. The goal is to verify if the power supply is delivering the correct voltages to the various circuit stages.
Drawing upon insights from the previously mentioned Audiokarma thread, I started by testing the voltage at pins 11 and 12 of the power supply PCB. I then traced these voltages back through the test points indicated in the schematic diagram. Safety Warning: Exercise extreme caution in this area, as capacitors C403 and C404 can retain dangerous high voltage charges even after the unit is unplugged. Always discharge capacitors before working in the power supply section.
Upon reaching resistor R401, I encountered a significant discrepancy. One side of R401 measured a healthy 54.1 Vdc, while the other side, which feeds transistor Q402, registered a mere -0.6 Vdc! This dramatic voltage drop strongly suggested a problem with R401.
Further investigation confirmed the issue. After removing R401 from the circuit board and testing it with a multimeter, it was revealed to be open – meaning it was no longer conducting electricity. The voltage was not passing through the resistor. The solution was to replace the faulty R401 with a new 1/2 W metal film resistor of the same value.
After replacing R401 and carefully reassembling the receiver, the Pioneer SX-680 miraculously sprang back to life! Connecting a cassette deck to the AUX input confirmed successful audio output – sound was restored!
STK-0039 Power Pack Evaluation
The Pioneer SX-680 utilizes STK-0039 power packs in its amplifier section. These integrated circuits (ICs) employ a Darlington circuit configuration to deliver 35 watts of output power in a single, convenient package. Each channel of the SX-680 amplifier uses one STK-0039 module.
A common issue with vintage receivers using STK power packs is their susceptibility to failure. Unfortunately, authentic replacements for STK-0039 modules are scarce and often expensive. When faced with a failed STK-0039, many restorers opt to construct their own replacements using discrete components. This Audiokarma thread details a successful discrete component replacement build for the STK-0050, which is similar to and can be adapted for use in place of the STK-0039.
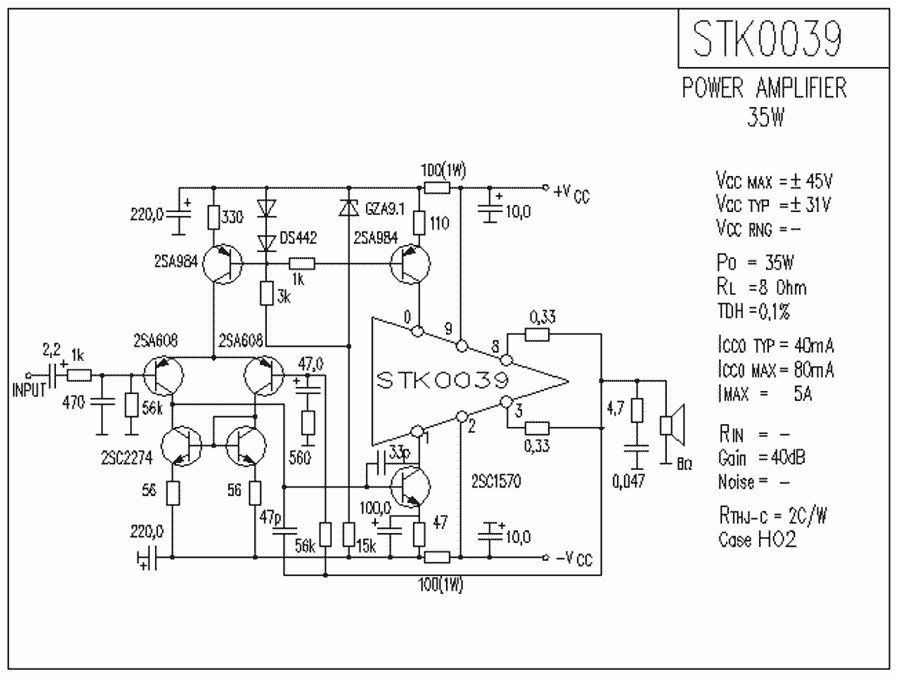 Schematic diagram of the internal circuitry of a STK-0039 power pack, showing its discrete component makeup.
A quick voltage test can help determine the operational status of the STK-0039 power packs. Using a multimeter set to DC voltage, connect the negative probe to the receiver chassis (ground). Then, carefully probe the pins of the STK-0039, noting the voltage readings and comparing them to the specified values:
| Pin | Specified Voltage (Vdc) |
|---|---|
| 1 | -1.4 |
| 2 | -34.5 |
| 3 | 0 |
| 8 | 0 |
| 9 | +34.5 |
| 10 | +1.4 |
In my case, the voltage readings on the STK-0039 modules were within the expected ranges, confirming that these power packs were functioning correctly. This was a welcome discovery, saving considerable time and potential complication in the restoration process.
Moving Forward: Restoration and Component Upgrades
With the primary issue diagnosed and resolved, the Pioneer SX-680 is now operational. The next phase involves a comprehensive electrical restoration to ensure long-term reliability and optimal performance. This will include replacing aging electrolytic capacitors, addressing known failure-prone components, and upgrading noisy transistors in sensitive sections like the phono preamplifier.
To delve deeper into the restoration process, continue to part 2 of this Pioneer SX-680 repair, where we will detail the component-level rebuild and further enhancements to this classic vintage receiver.