
 Overhead view of a perfectly sliced apple pie showcasing geometric precision and inviting warmth.
The quest for the perfect apple pie can feel like chasing a delicious, yet elusive, dream. Many bakers embark on this journey, only to be met with the common pitfalls of crunchy apples, a soggy crust, and a filling that runs like water the moment a slice is cut. It’s a frustrating reality, even store-bought pies often fail to deliver on the promise of tender apples nestled in a flaky embrace. For years, I myself was among those who believed a truly exceptional apple pie existed only in culinary fantasy. That was until I decided to confront my apple pie anxieties head-on, starting with a recipe that seemed to hold so much promise: the Pioneer Woman Caramel Apple Pie.
Like many home bakers, I was drawn to the Pioneer Woman’s recipe. Her approach to cooking is often comforting and approachable, and the idea of a caramel apple pie sounded utterly irresistible. The recipe called for a straightforward mix of raw Granny Smith apples tossed with lemon juice, flour, sugar, and salt – a seemingly simple filling. This was to be crowned with a crumb topping of flour, butter, brown sugar, and quick-cooking oats. Intriguingly, the final step was to drench the baked pie in a generous amount of caramel sauce. Enthusiastically, I even went the extra mile and made my own caramel sauce, convinced this would be the key to apple pie perfection.
However, my initial foray into Pioneer Woman’s Caramel Apple Pie was far from the blissful experience I had envisioned. Despite my best efforts, the result was, to put it mildly, a culinary catastrophe. The caramel sauce, while delicious on its own, cascaded over the pie like a sugary flood, creating a sticky mess that threatened to engulf my kitchen. But the aesthetic disaster was only the beginning. Upon tasting, the apples were shockingly crunchy, practically raw, as if they had stubbornly refused to cook in the oven’s heat. And the filling, far from being thick and luscious, was disconcertingly thin, escaping the moment my knife dared to pierce the crust. The crumb topping, studded with uncooked oats, added an unwelcome textural element – hard and gritty against the crunchy apples. It was a bizarre symphony of textural disappointments, a far cry from the “ethereal delight” I was aiming for.
 Close-up of a ceramic knife effortlessly slicing through a delicious apple pie, highlighting the tender texture.
Undeterred, or perhaps fueled by stubbornness, I attempted a second rendition of the Pioneer Woman inspired pie. This time, I opted for a traditional pie crust to replace the crumb topping, and, learning from my previous caramel deluge, I omitted the caramel sauce entirely. Surely, I reasoned, simplifying the recipe would yield better results. Alas, even without the caramel chaos and crumbly topping, the pie remained stubbornly flawed. The apples were still stubbornly crisp, the filling stubbornly runny, and the overall experience remained stubbornly disappointing. Dejected, I relegated the second pie to the trash and, for a long time, banished apple pie from my baking repertoire.
Years passed, filled with other baking triumphs and tribulations, but the ghost of the failed apple pies lingered. Then, driven by a renewed determination, I decided to revisit the apple pie challenge, this time armed with a different approach. I turned to the meticulous minds at Cook’s Illustrated, renowned for their rigorous recipe testing and dedication to kitchen science. Their deep dive into the science of apple pie revealed a crucial insight: pectin, the natural substance in apples that helps them gel, behaves in a peculiar way under heat. At the high temperatures of pie baking, pectin tends to break down, leading to softened apples and runny filling. However, Cook’s Illustrated discovered a game-changing technique: gently pre-cooking the apples at a lower temperature (between 140°F and 160°F for about 10 minutes) converts the pectin into a heat-stable form. This pre-treatment allows the apples to retain their shape and texture during the final pie baking, resulting in tender, yet perfectly formed, apple slices. This revelation was a pivotal moment in my apple pie journey. It explained why tart apples, often recommended for pies, work better – they naturally contain more pectin, providing a structural advantage.
Inspired by this scientific understanding, I began to experiment. While Cook’s Illustrated offered a solid apple pie recipe, I had a hunch that further enhancing the filling’s thickening power would be beneficial. I explored various apple pie recipes and discovered that some bakers incorporated pectin directly into the filling mixture, often alongside cornstarch. This double-pronged approach to thickening seemed promising. I decided to adopt this strategy, adding both pectin and cornstarch to my adapted recipe. The result was a dramatically improved filling – thick, luscious, and perfectly sliceable, banishing the runny filling woes of my past attempts. Regarding spices, while the original Pioneer Woman recipe and many classic recipes lean heavily on cinnamon, I considered adding a touch of nutmeg, ginger, and allspice for added complexity. However, mindful of not overpowering the apple flavor, I opted to remain conservative with just cinnamon for this iteration, recognizing that subtle hints of other spices could be explored in future variations.
 Playful image of an apple pie with a slice removed, suggesting irresistible deliciousness and prompting to 'fork around'.
Beyond the filling, the crust was another crucial element. Soggy bottom crusts are a common apple pie lament. To combat this, I employed a multi-pronged strategy. First, I opted for a robust, thick crust recipe, the same one I successfully used for my pecan pie. Second, I blind-baked the bottom crust – baking it partially before adding the filling. Finally, I brushed the pre-baked crust with a thin layer of melted butter, a technique some bakers swear by to create a moisture barrier. The combination of a sturdy crust, blind baking, and butter seemed to work wonders. The resulting bottom crust was anything but soggy – it was flaky, crisp, and provided the perfect textural counterpoint to the tender apple filling.
The culmination of this journey, inspired by the initial spark of the Pioneer Woman recipe but refined through scientific understanding and baking experimentation, was a truly exceptional apple pie. It wasn’t simply “good”; it was the apple pie I had long dreamed of – a harmonious blend of tender, flavorful apples, a perfectly thickened filling, and a golden, flaky crust that held its own with every bite. It was a testament to the fact that even seemingly simple recipes like apple pie can be elevated to new heights with a bit of knowledge, perseverance, and a willingness to learn from both successes and, yes, even caramel-sauce-induced failures.
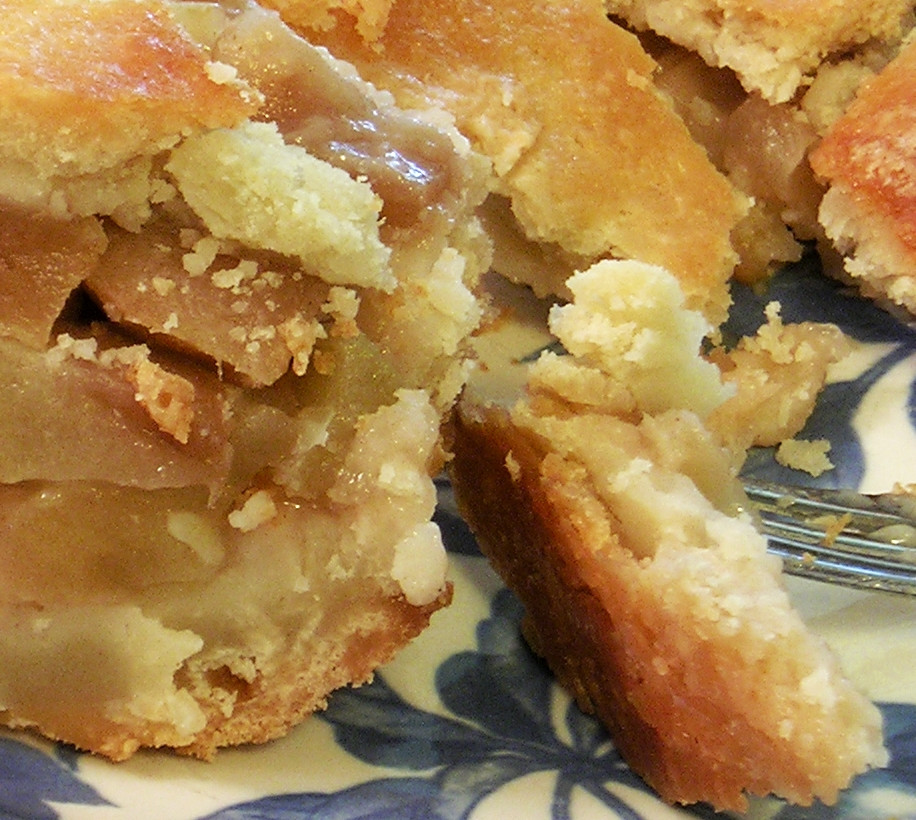
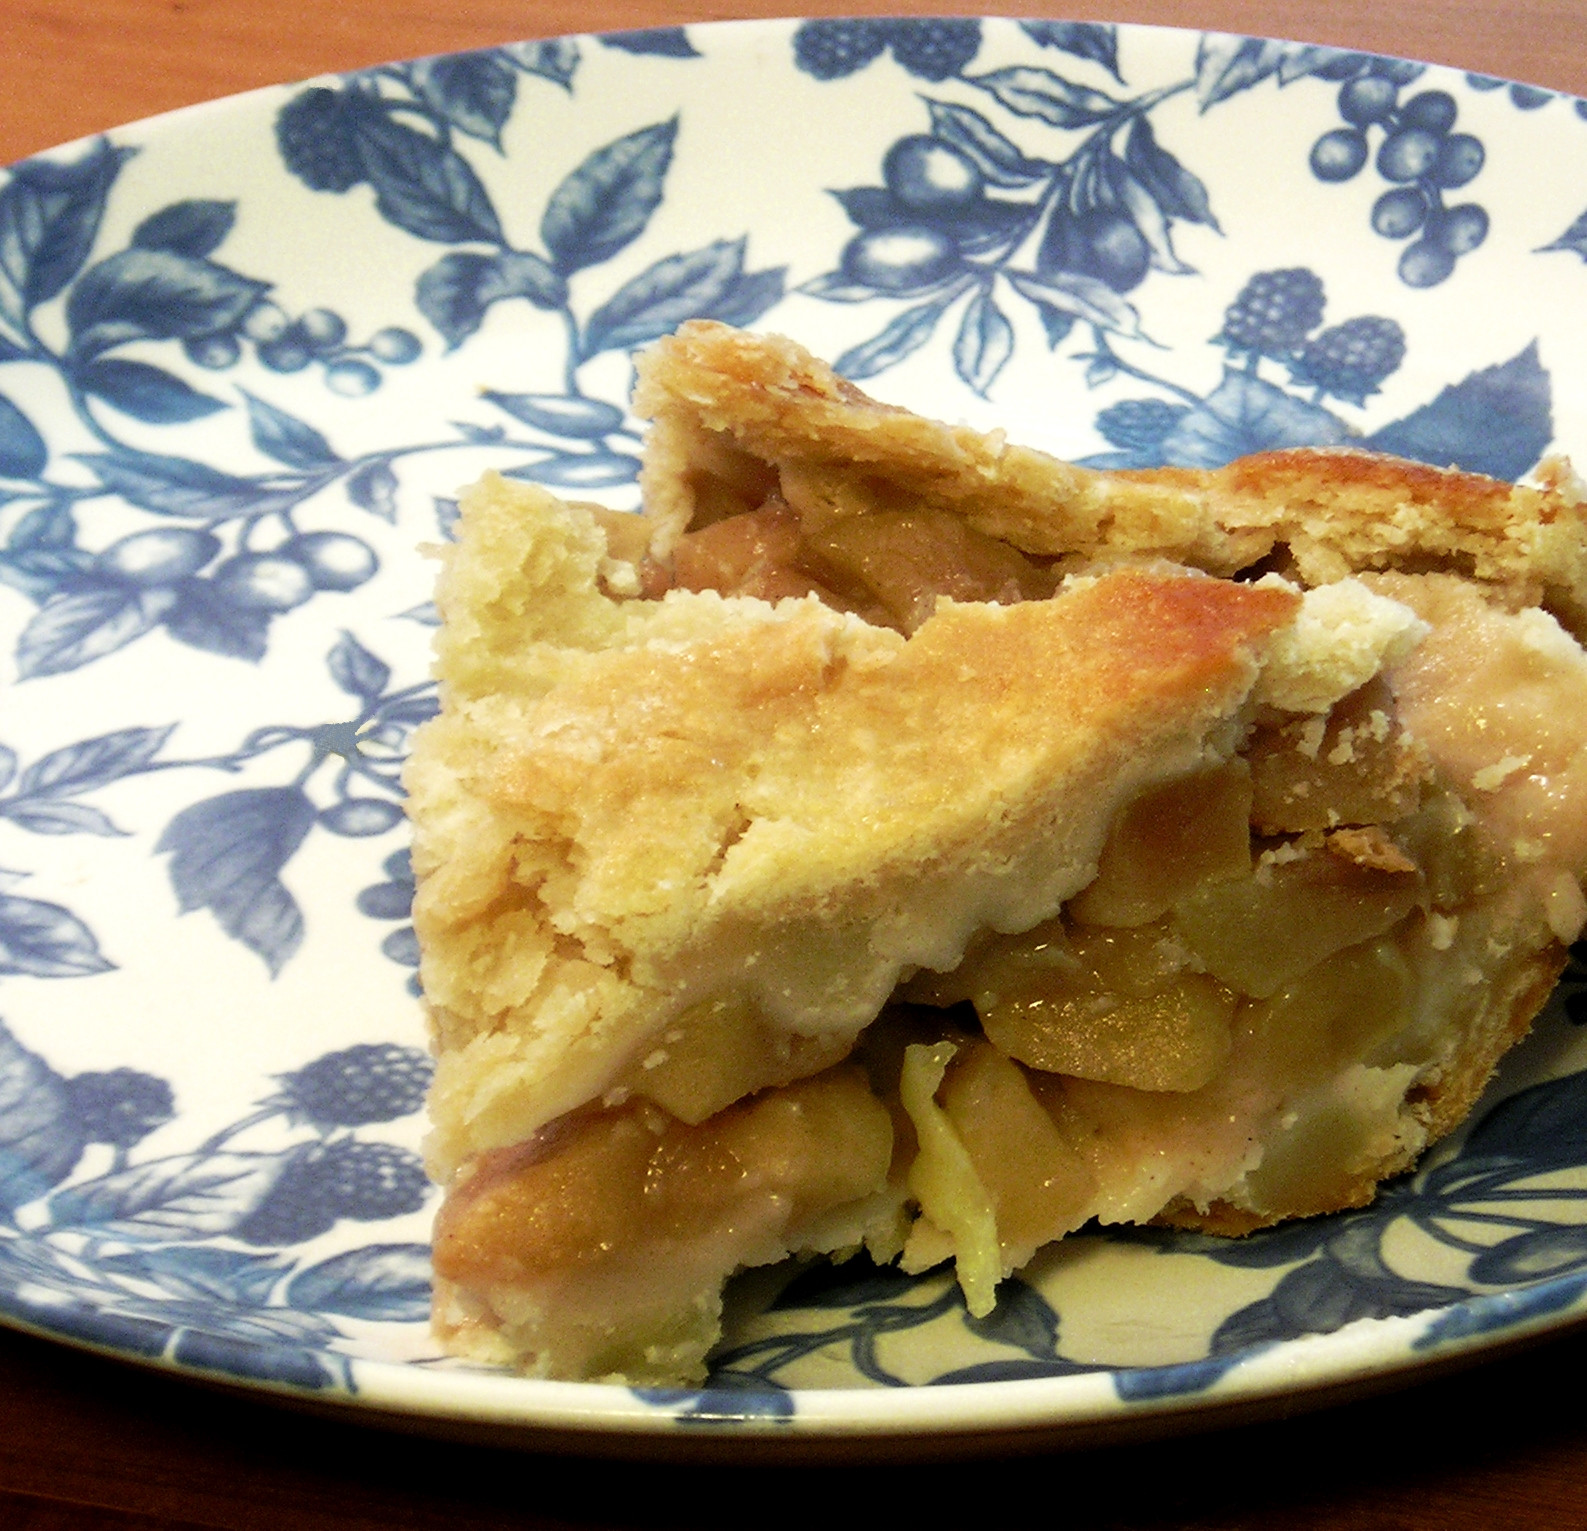 Side view of a luscious apple pie slice, revealing the generous and tender apple filling within a flaky crust.
Classic Apple Pie (Inspired and Refined)
Yield: One 9-inch apple pie
Ingredients:
For the Crust: (Double the recipe for top and bottom crusts)
- 2 ½ cups (300g) all-purpose flour, plus extra for dusting
- 2 tablespoons (25g) granulated sugar
- 1 teaspoon salt
- 12 tablespoons (1 ½ sticks) unsalted butter, very cold, cut into ¼-inch pieces
- 8 tablespoons (1 stick) lard (or vegetable shortening), very cold, cut into 6-8 pieces
- ¼ cup chilled vodka
- ¼ cup ice water
- 2 tablespoons heavy cream, for brushing
- ¼ cup granulated sugar, for sprinkling
For the Filling:
- 1 cup granulated sugar
- ⅓ cup light brown sugar, packed
- 1 teaspoon ground cinnamon
- 1 generous tablespoon cornstarch
- 3 teaspoons powdered pectin (adjust based on pectin type)
- 4 tablespoons unsalted butter, cut into ¼-inch pieces
- 1 ¼ lbs Granny Smith apples, peeled, cored, and thinly sliced (⅛-inch)
- 1 ¼ lbs Golden Delicious apples, peeled, cored, and thinly sliced (⅛-inch)
- Boiling water (1.875 quarts for 2.5 lbs apples)
Method:
Crust:
- Chill Ingredients: Freeze butter and lard for 15 minutes. Freeze vodka and ice water mixture.
- Combine Dry Ingredients (Food Processor – First Batch): Pulse 1 ½ cups flour, sugar, and salt in a food processor until combined.
- Add Cold Fats (Food Processor – First Batch): Scatter butter and lard over flour mixture. Process until a paste forms (about 15 seconds).
- Add Remaining Flour (Food Processor – Second Batch): Add remaining 1 cup flour. Pulse until mixture looks crumbly, like it’s starting to break apart (4-8 seconds). Avoid over-processing.
- Hydrate Dough: Transfer to a bowl. Pour vodka and ice water over dough. Use a spatula to press and flip until liquids are absorbed and a sticky ball forms.
- Chill Dough: Wrap in plastic wrap. Refrigerate for at least 1 hour.
- Repeat: Make a second dough ball for the top crust.
Filling:
- Combine Dry Filling Ingredients: In a bowl, mix granulated sugar, brown sugar, cinnamon, cornstarch, and pectin. Add butter and toss. Set aside.
- Prepare Apples – Hot Water Bath: Place sliced apples in a large heatproof bowl. Pour boiling water over apples; let sit for 10 minutes, stirring occasionally.
- Drain and Combine Filling: Drain apples. Return to bowl. Add sugar mixture; toss to combine. Let cool completely.
Assembly & Baking:
- Preheat & Prepare Bottom Crust: Preheat oven to 425°F (adjust if your oven runs hot). Roll out one dough ball for the bottom crust. Fit into pie pan, crimp edges, and poke holes with a fork. Refrigerate for 30-60 minutes.
- Blind Bake Bottom Crust: Cover crust with foil and pie weights (or dried beans). Bake for 45 minutes (or 25-35 minutes at 425°F). Remove weights and foil; bake 4-7 minutes more, until lightly golden. Cool completely.
- Prepare Top Crust: Roll out second dough ball for the top crust. Refrigerate.
- Assemble Pie: Preheat oven to 350°F (adjust if oven runs hot). Place cooled bottom crust on a baking sheet. Fill with cooled apple mixture. Top with chilled top crust. Crimp edges to seal. Brush top with heavy cream and sprinkle with sugar. Cut slits for steam vents.
- Bake Pie: Bake uncovered for 30 minutes. Tent with foil; bake 1 hour more. Remove foil; bake 30 minutes more, until golden brown.
- Cool Completely: Cool pie completely on a rack to allow filling to thicken properly (essential!).
Notes:
- Filling Amount: This filling recipe makes enough for two pies. Halve the filling recipe or save half for another use (apple crisp, topping, etc.).
- Sugar Adjustment: Adjust sugar levels to your preference.
- Spice Variations: Add ¼ teaspoon each of nutmeg, ginger, or allspice for a more complex spice profile, but be mindful of not overpowering the apple flavor.
Sources:
- Crust: Cook’s Illustrated All-Time Best Holiday Baking, 2013.
- Apple Pie Filling: Adapted from Cook’s Illustrated All-Time Best Holiday Baking, 2013, Leite’s Culinaria, and Serious Eats.
- Helpful Tips: Serious Eats.