You simply can’t beat the taste of a homemade berry pie, especially when it’s bursting with a medley of fresh or frozen berries. This Pioneer Woman Berry Pie inspired recipe takes the classic dessert to the next level, ensuring a perfect balance of sweetness, a beautifully set filling, and a flaky, golden crust every single time. Whether you’re a seasoned baker or just starting out, this triple berry pie is surprisingly easy to make and guaranteed to impress.
If you’re a fan of classic, comforting desserts like those championed by the Pioneer Woman, Ree Drummond, then you’re in for a treat. This recipe channels that same home-style goodness, delivering a berry pie that’s both delicious and approachable. It’s perfect for any occasion, from summer barbecues to holiday gatherings, and especially Thanksgiving. Forget store-bought pies – once you taste this homemade version, you’ll never go back.
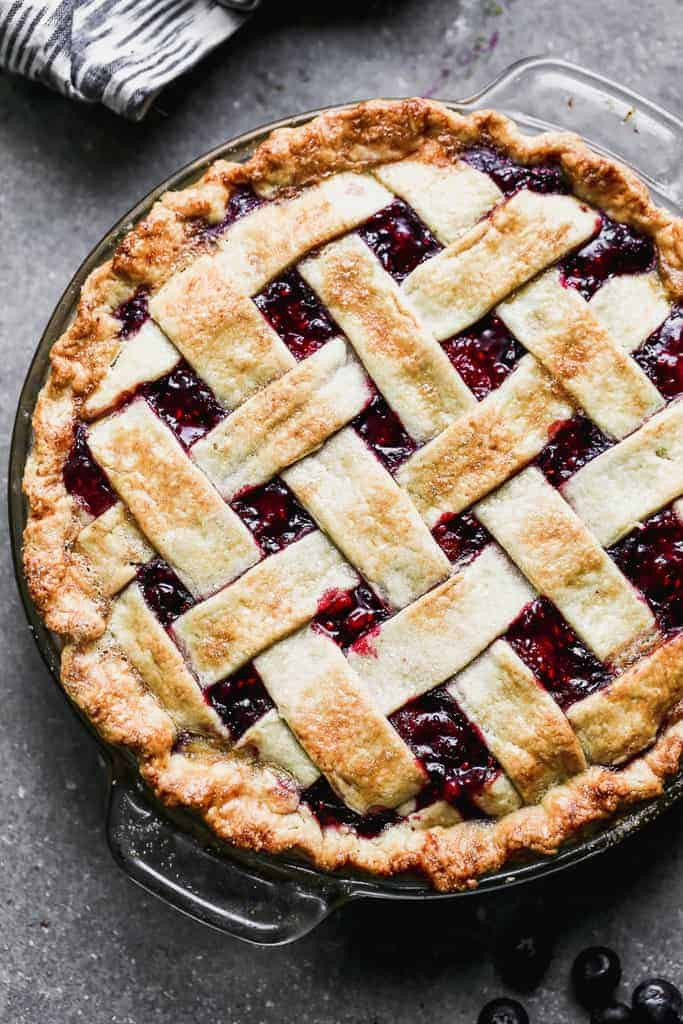 Overhead view of a berry pie with a lattice crust.
My family requests this triple berry pie year after year, and it disappears faster than any other dessert on the table. Even those who typically shy away from seeded berries rave about it! What makes this pie so special? It’s the combination of a perfectly balanced filling that’s not too sweet and holds its shape beautifully, paired with a truly exceptional homemade crust.
This recipe draws inspiration from traditional pie-making techniques, emphasizing fresh, quality ingredients and simple steps to create a truly outstanding dessert. It’s reminiscent of the kind of recipes you’d find in the Pioneer Woman’s kitchen – wholesome, satisfying, and made with love.
Why This Berry Pie Recipe Stands Out
What makes this triple berry pie recipe a cut above the rest? Here are a few key reasons why it’s destined to become your new go-to:
-
Perfectly Balanced Sweetness: Unlike some berry pies that can be overwhelmingly sweet, this recipe uses just the right amount of sugar to enhance the natural flavors of the berries without being cloying. This allows the tartness of the raspberries and blackberries to shine through, creating a more complex and satisfying flavor profile.
-
Sliceable Filling: Say goodbye to runny berry pies! This recipe utilizes a simple trick to ensure the filling sets up perfectly, giving you beautiful, clean slices that hold their shape. No more soggy pie bottoms or fillings that spill out the moment you cut into it.
-
Easy to Make Crust: Inspired by Grandma’s “Prize Winning” pie crust, this recipe simplifies the process of making homemade pie crust. Even beginner bakers can achieve a flaky, tender crust that’s far superior to anything store-bought. You can find the easy pie crust recipe here.
-
Versatile Berry Blend: Use fresh, seasonal berries for the ultimate summer treat, or opt for frozen berries for year-round baking convenience. This recipe works beautifully with both, making it a flexible choice no matter the time of year. Using a mix of blueberries, raspberries, and blackberries creates a depth of flavor that’s simply irresistible.
-
Make-Ahead Friendly: Planning ahead? No problem! This berry pie can be made a day in advance, or even frozen for future enjoyment. This makes it ideal for holidays and gatherings when you want to get ahead of the dessert rush.
How to Make Pioneer Woman Style Berry Pie: Step-by-Step
Let’s dive into the simple steps to create this incredible Pioneer Woman inspired berry pie. Don’t be intimidated by the idea of homemade pie – this recipe breaks it down into manageable steps, ensuring success every time.
Step 1: Prepare the Berry Filling
This is where the magic begins! Cooking the berries slightly before baking helps to concentrate their flavors and thicken the juices, preventing a soggy pie.
 Cooked berries in a saucepan and a small bowl with berry juice and cornstarch.
- Combine Berries and Sugar: In a large saucepan, combine your mixed berries (fresh or frozen), granulated sugar, and lemon juice.
- Simmer: Cook over medium heat, stirring gently occasionally, for about 5-10 minutes, or until the berries are warm and juicy. The sugar will dissolve and the berries will start to release their juices.
- Thicken the Filling: Spoon out about ½ cup of the warm berry juice from the saucepan into a separate small bowl.
- Cornstarch Slurry: Add cornstarch to the bowl of berry juice and stir until completely smooth, creating a slurry. This is the key to a perfectly set pie filling.
- Combine and Thicken: Return the saucepan of berries to a simmer. Slowly pour in the cornstarch slurry, stirring gently to incorporate it evenly. Continue to simmer and stir for another 2-5 minutes, or until the filling has thickened slightly. Be careful not to over-stir or mash the berries.
- Add Butter and Cool: Remove the saucepan from the heat and stir in the butter until melted and incorporated. The butter adds richness and flavor to the filling. Allow the berry filling to cool for at least 15 minutes before pouring it into the pie crust. This prevents the hot filling from making the crust soggy.
Step 2: Assemble and Bake Your Berry Pie
Now it’s time to put it all together and bake your masterpiece!
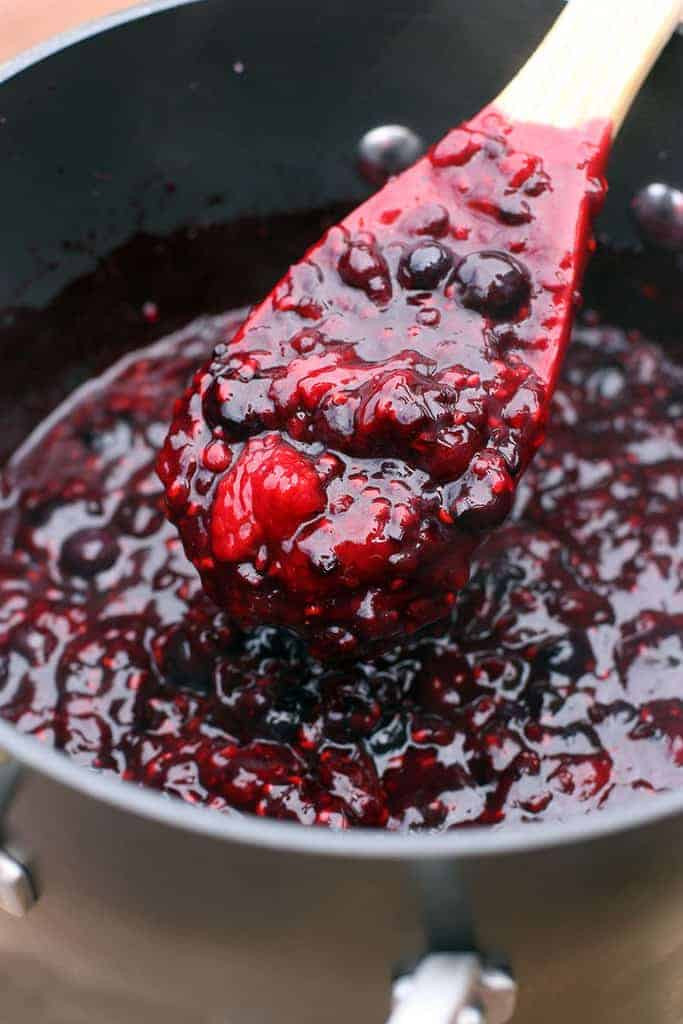 A saucepan full of homemade berry pie filling with a wooden spoon in it.
- Prepare Pie Crust: Place one pie crust in a 9-inch deep-dish pie pan. Crimp the edges if desired.
- Fill the Crust: Pour the cooled berry filling into the unbaked pie shell, spreading it evenly.
- Top Crust: Top with either a lattice crust (instructions below) or a full pie crust. If using a full crust, be sure to cut several vents or slits in the top to allow steam to escape during baking.
- Crimp Edges: If using a top crust, pinch the edges of the top and bottom crusts together to seal. Crimp the edges decoratively if desired.
- Egg Wash and Sugar: Brush the top crust lightly with a beaten egg white. This will give it a beautiful golden-brown sheen. Sprinkle lightly with granulated sugar for added sparkle and sweetness.
- Bake: Bake in a preheated oven at 400°F (200°C) for 40-45 minutes. After about 25 minutes, check the pie. If the crust is browning too quickly, loosely tent it with aluminum foil to prevent burning.
- Cool Completely: Remove the baked pie from the oven and place it on a wire cooling rack. Allow the pie to cool completely for several hours before slicing and serving. This is crucial for the filling to set properly and for clean slices.
 Before and after photos of an unbaked and then baked berry pie with lattice crust.
Step 3: Master the Lattice Crust (Optional but Recommended!)
A lattice crust adds a touch of elegance and allows for even baking. Don’t worry, it’s easier than it looks!
- Roll Out Top Crust: Roll out your second pie crust into a circle slightly larger than your pie dish.
- Cut Strips: Use a pizza cutter or knife to cut the crust into even strips. The width is up to your preference.
- First Layer: Lay the longest strip across the center of the pie. Arrange several more strips parallel to the center strip, spacing them evenly.
- Folding and Weaving: Fold back every other strip (e.g., the 2nd and 4th). Place a new strip perpendicular to the first layer. Unfold the folded strips back over the new strip.
- Repeat Weaving: Now, fold back the strips that were not folded in the previous step (e.g., the 1st, 3rd, and 5th). Place another new strip perpendicular and unfold the folded strips back over.
- Continue: Repeat steps 4 and 5 until the entire pie is covered in a lattice.
- Trim and Crimp: Trim the edges of the lattice strips to be even with the bottom crust. Pinch and crimp the edges to seal.
 Process photos for adding a lattice crust to a berry pie.
Make-Ahead and Freezing Tips
Make Ahead: This Pioneer Woman inspired berry pie is a fantastic make-ahead dessert. You can bake it completely up to a day in advance. Alternatively, you can prepare the berry filling up to 3 months ahead of time and freeze it. Thaw the filling overnight in the refrigerator before using.
Freezing Baked Pie: For longer storage, you can freeze the baked pie for up to 3 months. Wrap it tightly in plastic wrap and then foil. Thaw it overnight in the refrigerator and let it come to room temperature before serving, or warm it gently in a low oven.
Enjoy Your Homemade Berry Pie!
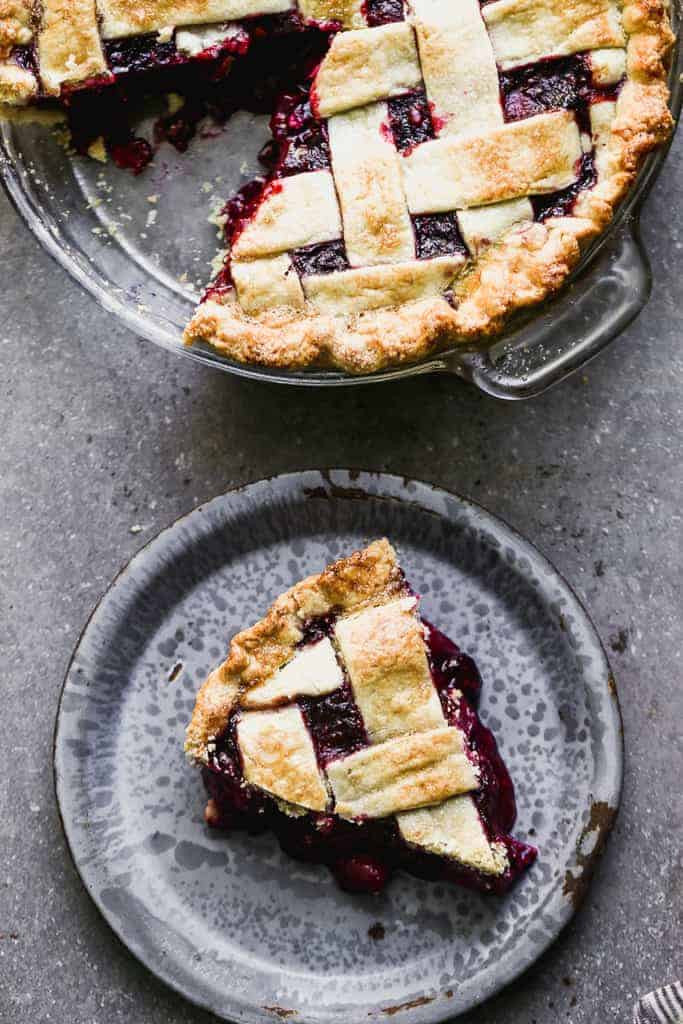 Overhead photo of a slice of berry pie on a plate.
There you have it – a truly delicious and surprisingly easy Pioneer Woman Berry Pie inspired recipe that’s perfect for any occasion. From the perfectly balanced filling to the flaky, homemade crust, every bite is a taste of pure comfort and homemade goodness. Gather your berries, roll out your crust, and get ready to bake a pie that will impress your family and friends. Don’t forget to serve it with a scoop of vanilla ice cream or a dollop of whipped cream for the ultimate dessert experience!
Get the Recipe:
(Recipe card – reproduce recipe card from original article here with minor formatting adjustments if needed, ensure keyword presence in recipe intro text if possible within the card)
(Nutrition information – reproduce nutrition information from original article)
Have you tried this recipe? Rate and comment below! I’d love to hear about your experience!