
Applesauce is a versatile and delicious treat, perfect as a side dish, snack, or ingredient in baking. For those looking to preserve the fall harvest and enjoy homemade flavors year-round, canning applesauce is a fantastic option. If you’ve been inspired by the resourceful spirit of the Pioneer Woman and want to try your hand at canning, applesauce is a wonderful place to start. This guide will walk you through the process of canning applesauce safely and easily, bringing the taste of orchard-fresh apples to your pantry.
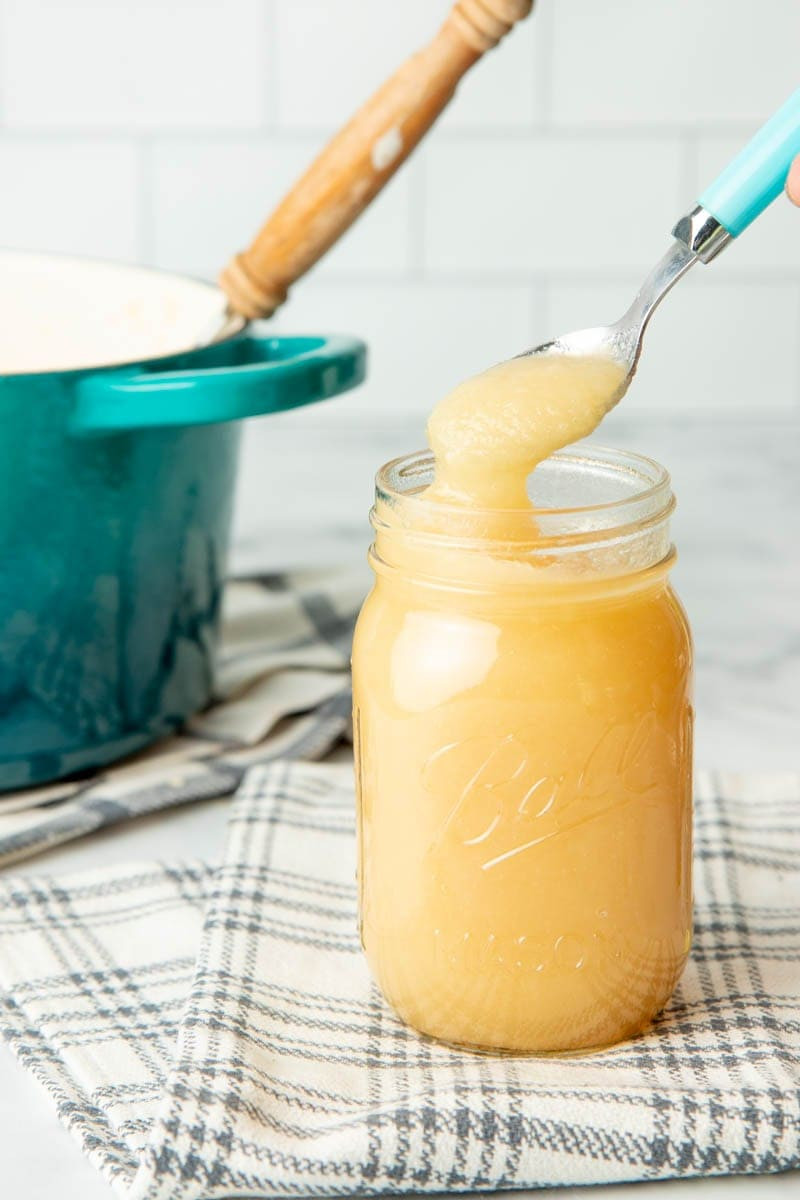 A spoon takes a spoonful of canned applesauce out of a full pint jar, showcasing the texture and homemade quality.
Applesauce vs. Apple Puree: What’s the Difference?
You might encounter recipes calling for “apple puree” and wonder if it’s different from applesauce. The good news is, they are essentially the same! Apple puree is simply applesauce in its purest form – typically smooth, unsweetened, and without added spices. Applesauce, on the other hand, can have varying textures, sweetness levels, and added flavors like cinnamon. For canning purposes, you can use the terms interchangeably and adjust sweetness and texture to your preference.
 A full bowl of homemade applesauce with a spoonful hovering above, highlighting its appealing texture and color.
Choosing the Best Apples for Your Homemade Applesauce Canning Recipe
The best apples for applesauce are truly the ones you have readily available. Whether you’ve picked them from your own trees, visited a local orchard, or found a great deal at the grocery store, a variety of apples will create the most flavorful sauce. For an optimal balance, aim for a mix of about two-thirds sweet apples and one-third tart apples.
Pro Tip: If you’re choosing just one type, Golden Delicious apples are a top pick. They offer a delightful blend of sweetness and tartness, and their flesh cooks down beautifully and evenly. Many orchards even offer “utility” or “seconds” Golden Delicious at reduced prices, perfect for making large batches of applesauce.
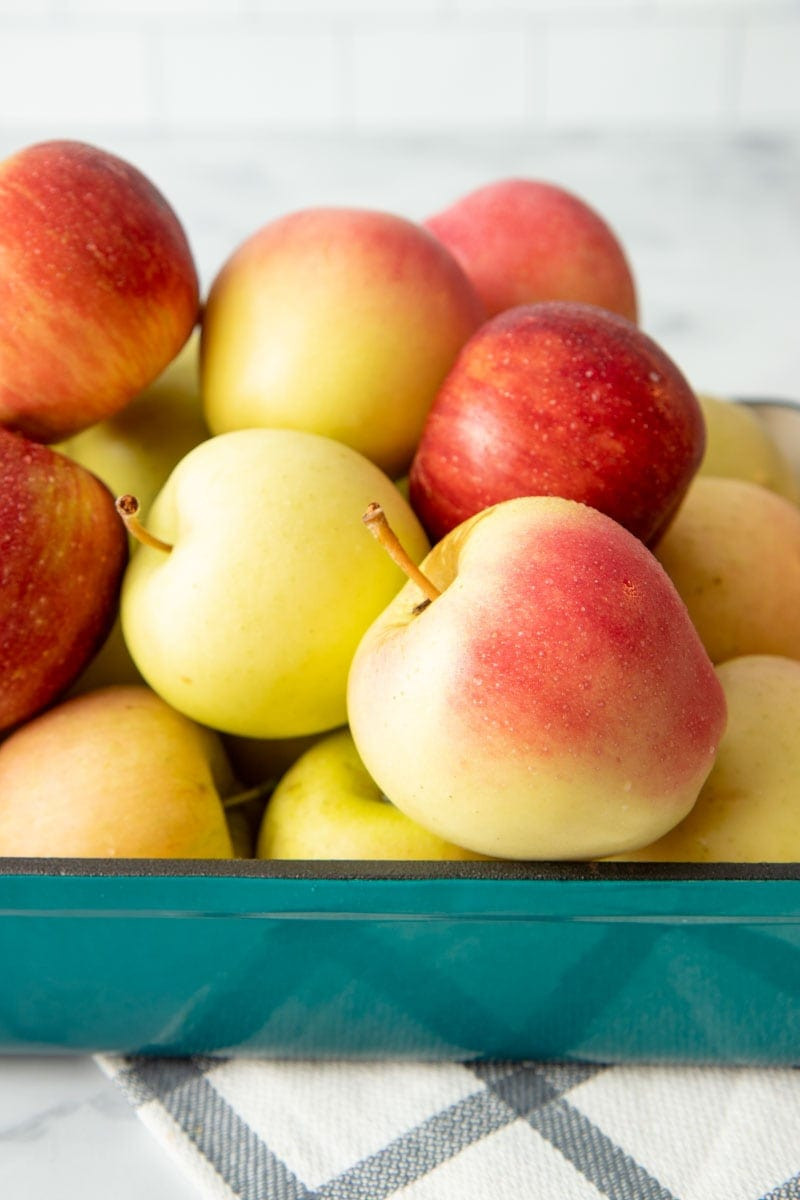 Freshly picked apples piled high in a white baking dish on a kitchen counter, illustrating the abundance of the apple harvest.
Water Bath Canning Applesauce: Safety First
Applesauce is safely canned using the water bath method, which is excellent for high-acid foods. However, apple varieties have varying pH levels, and some might not be acidic enough for safe water bath canning on their own. To ensure safety and peace of mind, it’s crucial to add lemon juice to every batch of your canned applesauce.
Pro Tip: Lemon juice is your canning friend! Not only does it guarantee safe acidity for water bath canning, but it also brightens the flavor of the applesauce with a hint of citrus and helps prevent the apples from browning during preparation.
Selecting the Right Jars for Canning Applesauce at Home
One of the great things about canning applesauce is its flexibility when it comes to jar sizes. Pint jars, quart jars – both regular mouth and wide mouth – work wonderfully. The best size depends on your household and how quickly you’ll use opened jars of applesauce. Once opened, homemade canned applesauce is best enjoyed within a week. For smaller families or individuals, pint jars are often ideal for single meals or smaller portions.
 Overhead view of a sealed jar of canned applesauce next to a bowl of fresh applesauce, showcasing the final product of home canning.
Step-by-Step Guide: How to Can Applesauce Like a Pioneer Woman
Canning applesauce is a straightforward process, especially if you’ve tried canning before. It’s a perfect beginner-friendly canning project! Before you begin, make sure your canning equipment is clean and ready, and your water bath canner is prepared. Let’s get started on making and canning your delicious homemade applesauce:
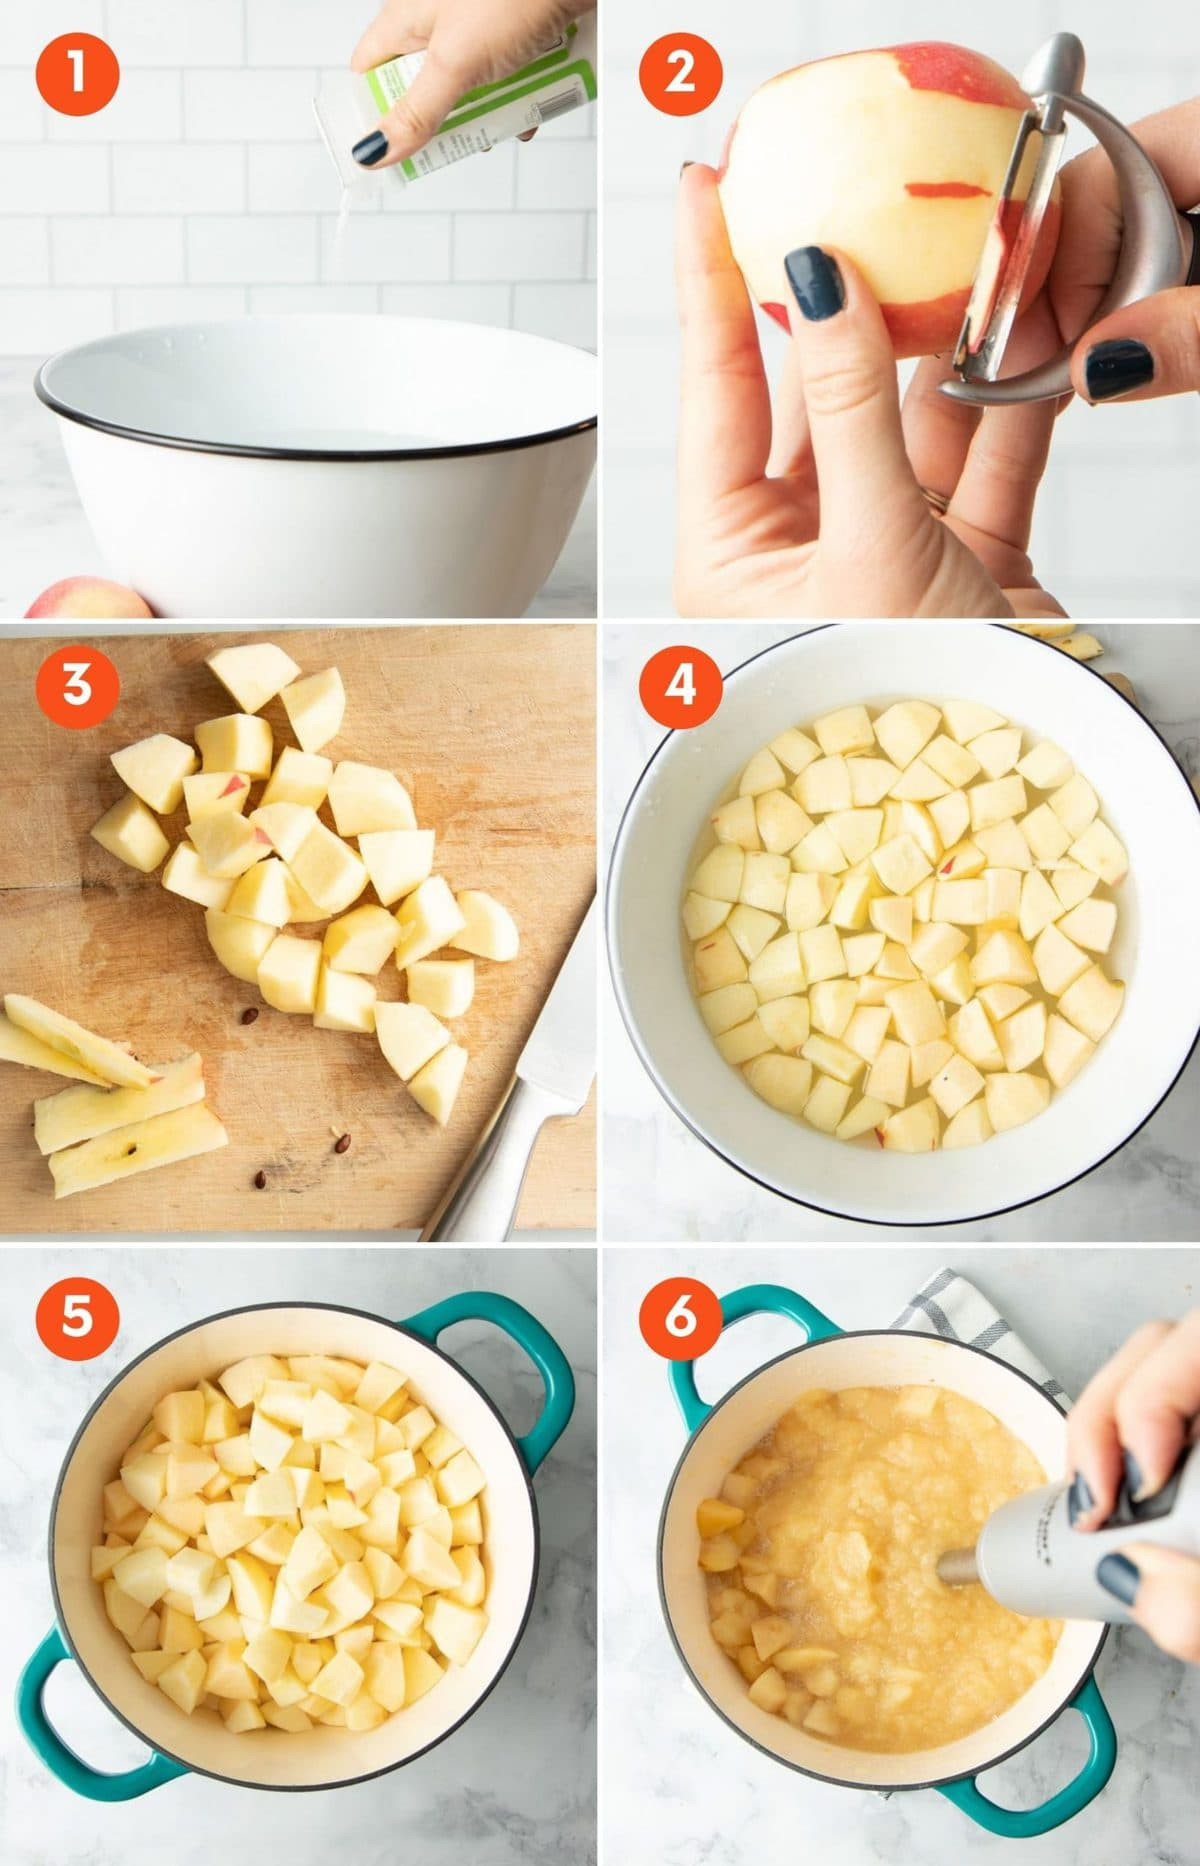 Collage showing six sequential steps for making homemade applesauce, from peeling apples to filling jars.
- Prevent Browning: Prepare a solution to prevent your peeled and cut apples from browning. You can use a commercial product like Ball® Fruit Fresh or a simple mixture of lemon juice and water (about ¼ cup lemon juice to 4 cups of water).
- Peel the Apples: Peel all your apples. You can use a vegetable peeler or a paring knife.
- Core and Chop: Remove the cores from the apples and cut them into medium-sized pieces.
- Browning Treatment: Immediately submerge the cut apple pieces in your prepared browning treatment to prevent discoloration.
- Cook the Apples: Transfer the treated apple pieces to a large pot, like a Dutch oven or stockpot. Add just enough water to the bottom of the pot to prevent scorching. Bring the apples to a boil over medium-high heat, then reduce the heat to low and simmer gently, stirring occasionally. Cook for 5 to 20 minutes, or until the apples are tender and easily mashed with a spoon. Cooking time will vary based on the apple variety and ripeness. Let the cooked apples cool slightly for about 5 minutes.
- Puree the Applesauce: Blend the slightly cooled apples into a smooth puree. You can use an immersion blender directly in the pot for convenience. Alternatively, you can transfer the apples in batches to a food mill or a food processor fitted with a metal blade. Process until smooth. Return the pureed applesauce to the pot. Stir in the lemon juice.
- Hot Pack into Jars: Ladle the hot applesauce into your hot, sterilized canning jars, leaving ½ inch of headspace at the top. Remove any air bubbles by gently tapping the jars or using a bubble remover tool. Wipe the jar rims clean with a damp cloth. Center canning lids on the jars and apply screw bands fingertip-tight.
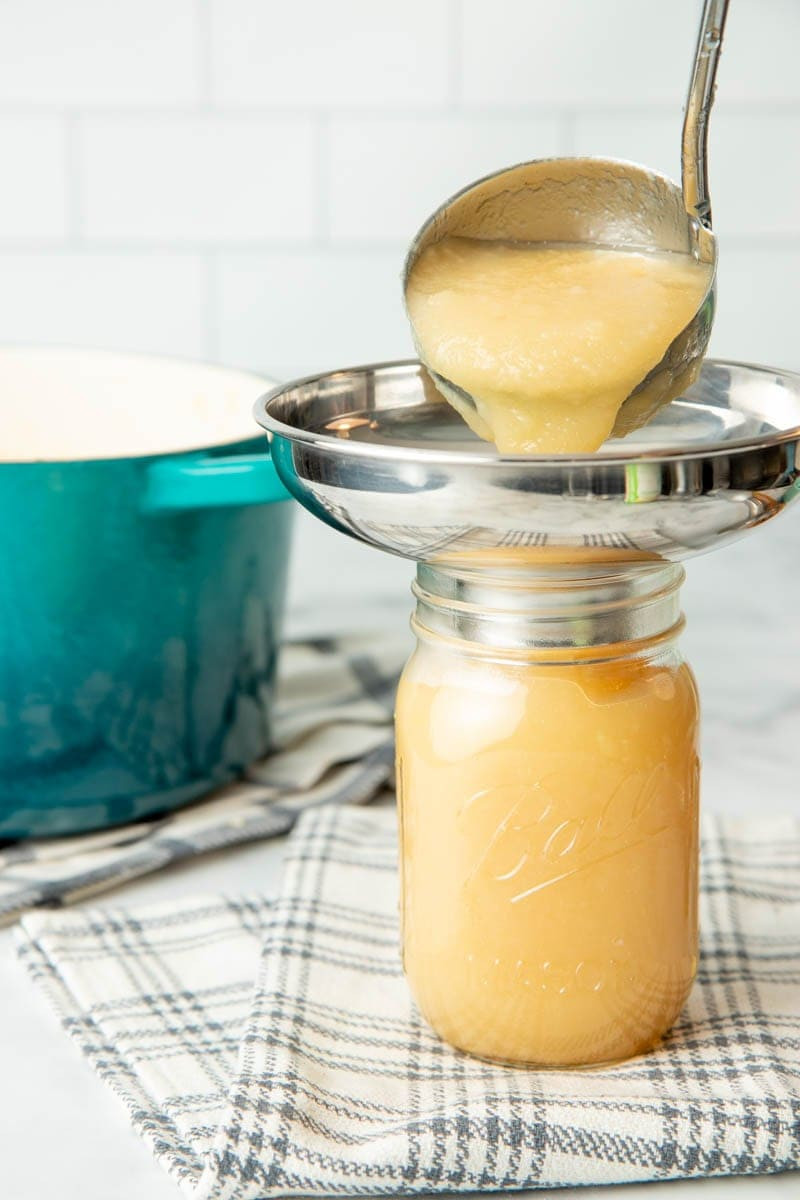 A ladle pouring warm homemade applesauce through a canning funnel into a sterilized pint jar for the canning process.
Processing Time for Canned Applesauce in a Water Bath Canner
Process your filled jars of applesauce in a boiling water bath canner for 20 minutes. Remember to adjust the processing time if you live at a higher altitude, according to altitude adjustment guidelines. Once the processing time is complete, turn off the heat, remove the canner lid, and let the jars sit in the hot water for 5 minutes before carefully removing them to a cooling rack or towel-lined surface to cool completely.
Pro Tip: After 24 hours, check the seals on your jars. A properly sealed jar will have a lid that doesn’t flex up and down when you press the center. If a lid doesn’t seal, you can store that jar of applesauce in the refrigerator and enjoy it within a week.
Making Unsweetened Applesauce for Canning
Want to reduce or eliminate added sugar? You absolutely can! This recipe is delicious with or without added sugar. With the right blend of naturally sweet and tart apples, your applesauce will be plenty flavorful without any extra sugar. Simply omit the sugar from the recipe if you prefer unsweetened applesauce.
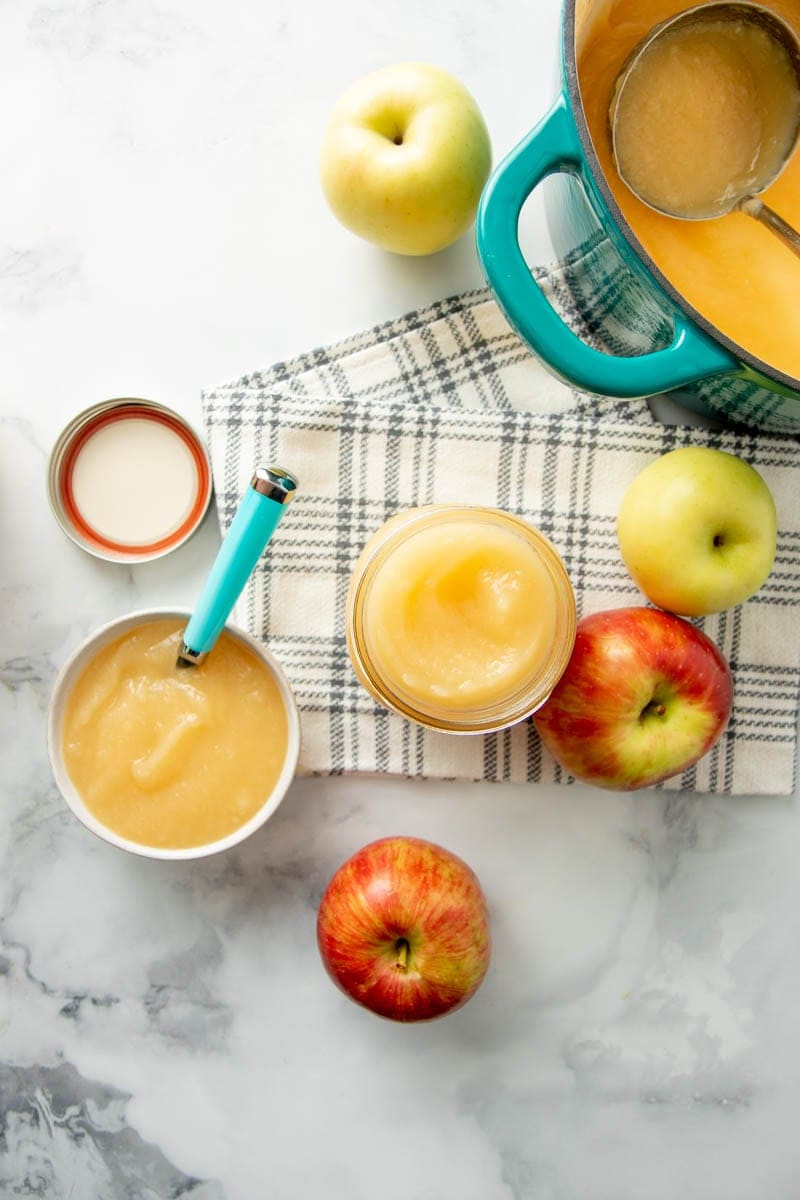
 Overhead shot of a pint jar of canned homemade applesauce next to a bowl of fresh applesauce and whole fresh apples, emphasizing the natural ingredients.
Hot Pack Canning: Is it Necessary for Applesauce?
Yes, this recipe uses the hot-pack method, where hot applesauce is packed into hot jars. This is crucial for safe canning. Hot packing helps prevent thermal shock, reducing the risk of jars breaking, and ensures proper heating and processing times for safe preservation. The 20-minute processing time is specifically tested and designed for hot-packed applesauce. Using cold pack method might not achieve sufficient temperatures to eliminate harmful microorganisms and create a shelf-stable product.
Chunky or Smooth: Your Choice of Applesauce Texture
Customize your applesauce to your liking! Whether you prefer a smooth, velvety texture or a chunkier sauce, the choice is yours.
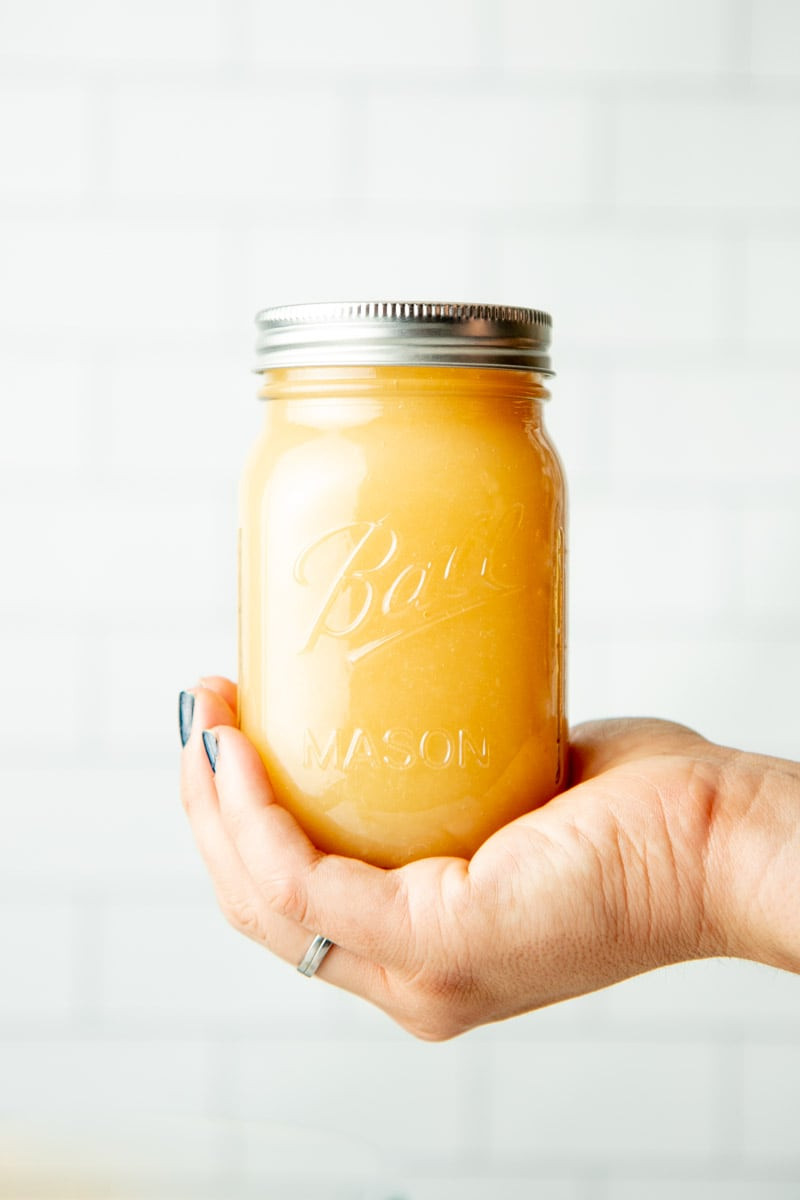 A hand gently cupping the base of a pint jar of homemade applesauce, showing appreciation for the preserved food.
What to Do with Apple Peels and Cores After Canning Applesauce
Don’t let those apple peels and cores go to waste! If you have chickens or worms, they’ll happily devour them. If not, there are many creative ways to reuse apple scraps. You can make apple scrap vinegar, apple peel tea, or even use them to infuse flavor into water or cider.
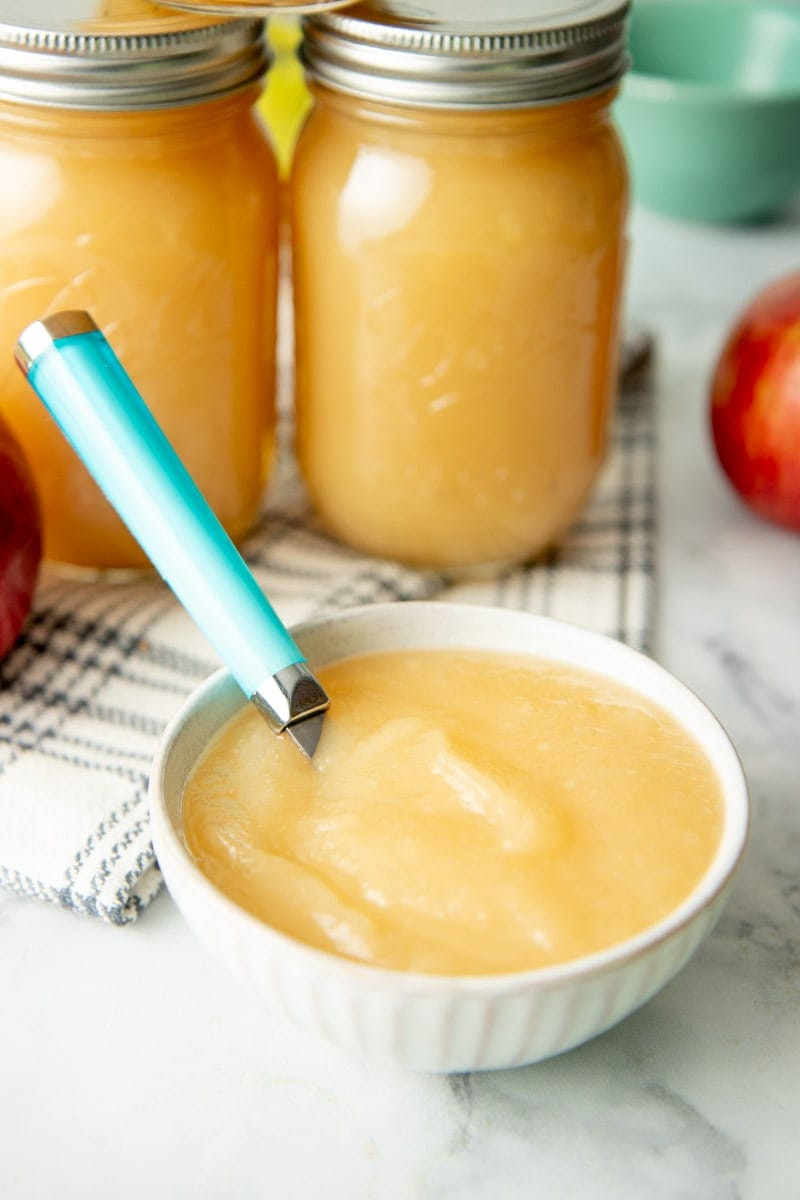 A bowl of canned applesauce with a spoon in it, ready to be enjoyed, highlighting the delicious result of canning.
Shelf Life and Storage of Homemade Canned Applesauce
When properly canned and sealed, your homemade applesauce will maintain its best quality for at least 18 months when stored in a cool, dark place. After this time, the color, flavor, or texture might gradually decline, but as long as the jar remains properly sealed, it’s still safe to eat.
Pro Tip: Once you open a jar of your home-canned applesauce, refrigerate any leftovers and use them within a week for optimal freshness and flavor.
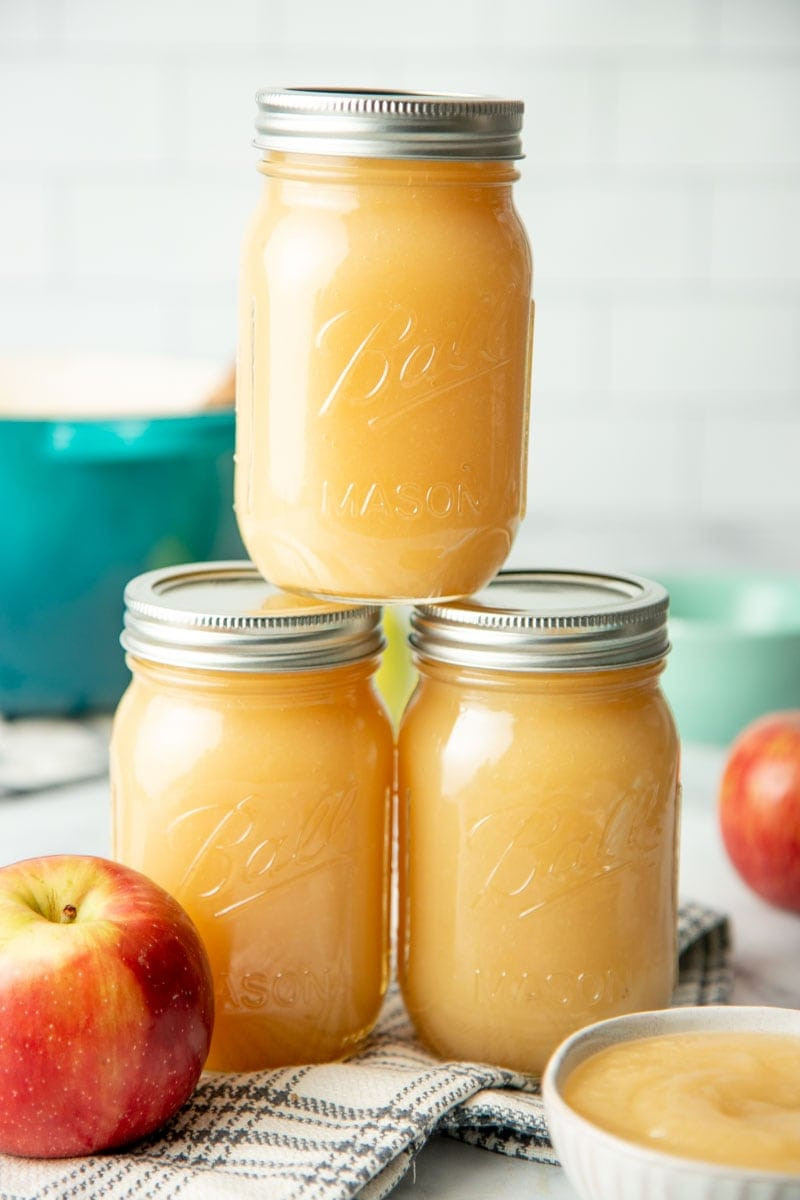 Close-up of three pint jars of homemade applesauce stacked in a pyramid, showcasing the beautiful presentation of home-canned goods.
How to Tell if Canned Applesauce Has Gone Bad
Trust your senses! If you followed the canning instructions and achieved a good seal, and the applesauce looks, smells, and tastes normal, it should be safe to eat. However, always discard any canned goods if the lid is unsealed, bulging, or shows signs of mold.
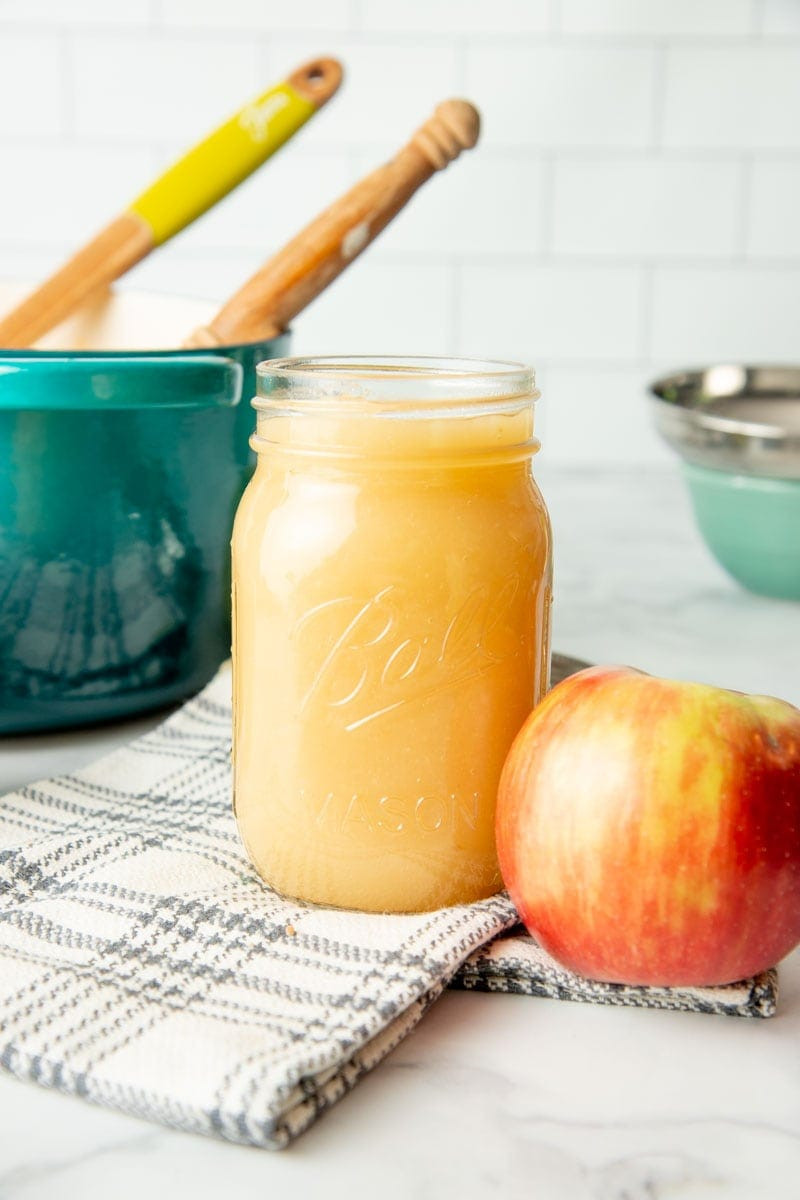 A full pint jar of applesauce prepared for canning positioned next to a fresh apple, emphasizing the homemade and natural qualities.
Freezing Applesauce: An Alternative to Canning
Yes, you can freeze applesauce instead of canning it! Applesauce freezes exceptionally well. Just be sure to use freezer-safe jars or containers, and leave appropriate headspace to allow for expansion during freezing. Straight-sided jars like Ball® Wide Mouth Pint and a Half Jars or Ball® Wide Mouth Pint Jars are excellent choices for freezing.
Delicious Ways to Use Your Homemade Applesauce
Now that you’ve stocked your pantry with homemade canned applesauce, how will you enjoy it? The possibilities are endless! Applesauce is fantastic as:
- A healthy side dish for pork, chicken, or latkes.
- A topping for yogurt, oatmeal, or pancakes.
- A base for smoothies.
- A baking ingredient to add moisture to cakes, muffins, and breads (it can even substitute for some of the oil or butter in recipes!).
- A simple and satisfying snack on its own.
Enjoy the fruits (pun intended!) of your labor and the satisfaction of having shelf-stable, homemade applesauce ready whenever you crave it. Happy canning!
Pioneer Woman Inspired Canned Applesauce Recipe
This recipe yields approximately 8 pint jars of delicious homemade applesauce.
Prep Time 40 minutes
Cook Time 40 minutes
Total Time 1 hour 20 minutes
Ingredients
- 12 pounds apples, peeled, cored, quartered, and treated to prevent browning (about 36 medium apples)
- Water (just enough to prevent sticking)
- Up to 3 cups granulated sugar (optional, adjust to your sweetness preference)
- 4 tablespoons lemon juice
- 8 Ball® (16 oz) pint glass preserving jars with lids and bands
Instructions
- Prepare Canning Equipment: Prepare your boiling water canner according to manufacturer’s instructions. Heat your canning jars in simmering water until you’re ready to fill them. Do not boil the jars. Wash canning lids in warm, soapy water, and set the bands aside.
- Cook the Apples: Combine the prepared apples in a large stainless steel saucepan with just enough water to prevent sticking to the bottom of the pan. Bring to a boil over medium-high heat. Reduce the heat to medium-low and boil gently, stirring occasionally, for 5 to 20 minutes, or until the apples are tender. Remove from heat and let cool slightly for about 5 minutes.
- Puree the Applesauce: Working in batches, transfer the cooked apples to a food mill or food processor fitted with a metal blade. Puree until smooth.
- Combine and Heat: Return the pureed applesauce to the saucepan. If using, add sugar and lemon juice. Bring the mixture to a boil over medium-high heat, stirring frequently to prevent sticking and scorching. Maintain a gentle boil over low heat while you fill the jars.
- Fill Jars: Ladle the hot applesauce into the hot, sterilized pint jars, leaving ½ inch headspace. Remove air bubbles. Wipe the jar rims clean. Center lids on jars and apply bands until fingertip tight.
- Process in Water Bath Canner: Process the jars in a boiling water canner for 20 minutes, adjusting for altitude if necessary. Remove jars from the canner and let them cool completely on a rack or towel-lined surface. Check lids for a proper seal after 24 hours. The lid should not flex when the center is pressed down.
Recipe Notes
- Preventing Browning: To prevent apple slices from browning, use Ball® Fruit-Fresh® Produce Protector according to the package directions, or submerge the cut apples in a mixture of ¼ cup lemon juice and 4 cups water.
- Chunky Applesauce Variation: For chunky applesauce, coarsely crush about half of the cooked apples and puree the remaining half. Then, combine the two mixtures for a chunkier texture.
Nutrition Information:
Yield: 32 servings
Serving Size: 1/2 cup
Amount Per Serving (approximate, may vary based on apple type and sugar added):
Calories: 161
Total Fat: 0g
Saturated Fat: 0g
Trans Fat: 0g
Unsaturated Fat: 0g
Cholesterol: 0mg
Sodium: 3mg
Carbohydrates: 42g
Fiber: 4g
Sugar: 36g
Protein: 0g
Disclaimer: Nutritional information is an estimate and may vary. At Pioneer-Technology, we believe that good nutrition is about much more than just numbers. Please use this information as a general guide.
This post is brought to you by Pioneer-Technology, your source for practical home and food preservation tips, inspired by the resourceful spirit of the Pioneer Woman.