There’s nothing quite like the aroma of freshly fried doughnuts wafting through the house, a scent that instantly evokes feelings of warmth and comfort. My mom and I experienced this firsthand when we decided to whip up Ree Drummond’s famous homemade glazed doughnuts. The experience was so delightful, it felt like we were sharing a cup of pure joy with everyone we encountered. These aren’t just any doughnuts; they are a taste of pure, unadulterated happiness, the kind that makes even busy New Yorkers stop in their tracks. We knew we couldn’t keep a whole batch of these tempting treats to ourselves, so we packed them up and took them to share the love, and the sugary goodness, at my brother Andy’s office. The reaction was incredible, turning ordinary moments into something special, much like how the perfect cup of coffee can elevate your morning. If you’re looking to create a memorable treat that’s guaranteed to impress and bring smiles, look no further. This Pioneer Woman doughnut recipe is your ticket to becoming a kitchen hero, and perhaps, to filling someone’s “cup” with happiness.
 Ree Drummond's Homemade Doughnuts
The Pioneer Woman’s Homemade Glazed Doughnuts Recipe
This recipe, inspired by the beloved Pioneer Woman, Ree Drummond, will guide you through creating soft, fluffy, and utterly irresistible glazed doughnuts right in your own kitchen. Perfect for a weekend brunch, a special treat, or anytime you crave a sweet indulgence that rivals any bakery, these doughnuts are surprisingly easy to make and are guaranteed to be a crowd-pleaser. Get ready to experience the joy of homemade doughnuts, a sweet treat that truly fills the “Pioneer Woman Cup” of home baking perfection.
Ingredients
For the Doughnuts:
- 1 1/8 cup Warm Whole Milk (ensure it’s warm to the touch, not hot)
- 1/4 cup Granulated Sugar
- 2 1/4 teaspoons Instant or Active Dry Yeast (one standard packet)
- 2 Large Eggs, Beaten
- 1 1/4 sticks Unsalted Butter, Melted and slightly cooled
- 4 cups All-Purpose Flour
- 1/4 teaspoon Salt
- Canola Oil, for frying
For the Glaze:
- 3 cups Powdered Sugar
- 1/2 teaspoon Salt
- 1/2 teaspoon Vanilla Extract
- 1/2 cup Cold Water or Milk
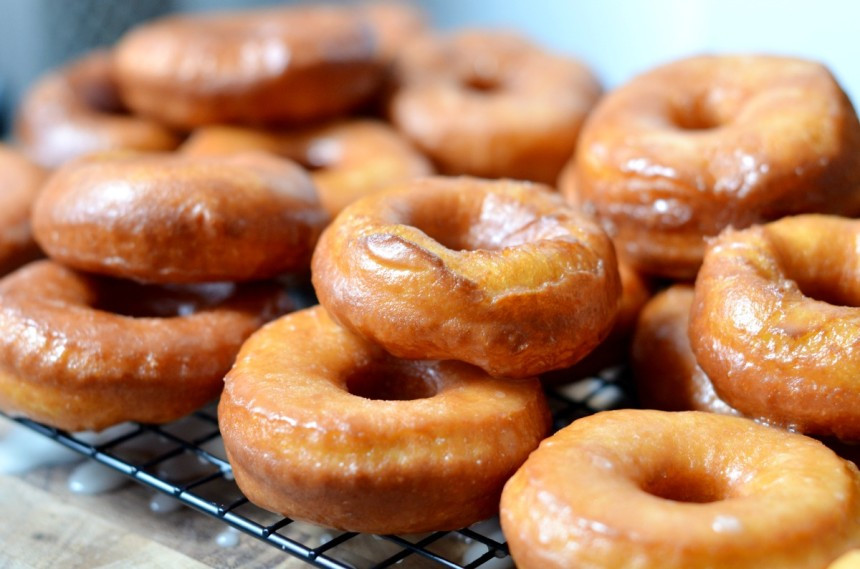
 Close-up of Pioneer Woman Doughnuts
Instructions
To Make the Dough:
- Begin by warming the milk to a comfortable temperature. It should feel warm, not hot, to ensure it activates the yeast properly without scalding it.
- In a large mixing bowl, dissolve the granulated sugar into the warm milk, stirring until fully incorporated.
- In a separate small bowl, measure out the yeast.
- Pour the warm milk and sugar mixture over the yeast. Gently stir to combine and then let it sit for approximately 10 minutes. This allows the yeast to activate and become frothy, which is crucial for light and airy doughnuts.
- Melt the unsalted butter in a separate bowl. Heat it until almost completely melted, then stir to melt any remaining solids. This prevents overheating. Allow the butter to cool slightly.
- Add the beaten eggs to the melted butter. Stir continuously to temper the eggs and prevent them from cooking from the residual heat of the butter.
- Pour the egg and butter mixture into the bowl of an electric mixer fitted with the dough hook attachment.
- With the mixer set to a low speed (setting 3 or medium-low), gradually pour in the yeast mixture.
- Allow the dough hook to mix these wet ingredients for a couple of minutes until they are thoroughly combined.
- With the mixer still running at the same speed, begin adding the all-purpose flour mixture in increments of 1/4 to 1/2 cup at a time. Continue adding flour until all of it is incorporated into the dough.
- Stop the mixer and use a spatula to scrape down the sides and bottom of the bowl, ensuring all ingredients are incorporated. Then, resume mixing on the same speed for a full five minutes. This kneading time is essential for developing the gluten and creating the right texture for the doughnuts.
- After five minutes of kneading, stop the mixer again and scrape the bottom of the bowl to ensure no dough is sticking.
- Turn the mixer back on for just 30 seconds for a final mix.
- Turn off the mixer and let the dough rest in the bowl, undisturbed, for 10 minutes. This rest period allows the gluten to relax slightly, making the dough easier to handle.
- After resting, transfer the dough to a lightly oiled bowl. Toss the dough gently to coat it with oil, which prevents sticking and drying. Cover the bowl tightly with plastic wrap and place it directly into the refrigerator.
- Refrigerate the dough for a minimum of 8 hours, or ideally overnight. This slow, cold rise develops flavor and improves the dough’s texture.
To Make the Doughnuts:
- Remove the bowl of dough from the refrigerator. Turn the dough out onto a lightly floured surface.
- Roll out the dough to a thickness of approximately 1/4 to 1/3 inch. Aim for even thickness to ensure uniform cooking.
- Use a 3-inch doughnut cutter to cut out as many rounds as possible. After the initial cuts, gather the remaining dough scraps, gently re-roll them, and continue cutting out more doughnuts until you’ve used as much dough as possible.
- Using a smaller, 1 1/2-inch cutter, cut holes out of the center of each doughnut round. These doughnut holes are just as delicious and cook even quicker!
- Place both the doughnut rings and the doughnut holes onto a floured baking sheet, ensuring they have some space between them to rise.
- Cover the baking sheet with a large, clean tea towel. Place the sheet in a warm, draft-free area of your kitchen to proof. If your kitchen is cool, you can create a warmer environment by briefly warming a griddle or oven surface (then turning it off) and placing the baking sheet on top.
- Allow the doughnuts and holes to rise, undisturbed, for at least 1 hour, and up to 1 hour and 15 minutes if necessary. They should become visibly puffier and appear airy, indicating they are ready for frying.
To Fry the Doughnuts:
- Pour a generous amount of canola oil into a large, heavy-bottomed pot. Heat the oil over medium heat until it reaches a temperature between 375°F and 380°F. It’s crucial to maintain this temperature range; frying at too low a temperature will result in greasy doughnuts, while too high a temperature will cause them to burn on the outside before cooking through. Use a thermometer to continuously monitor the oil temperature.
- Gently place the risen doughnuts, one or two at a time, into the hot oil. Be careful not to overcrowd the pot, as this will lower the oil temperature.
- Fry the doughnuts for approximately 1 minute on each side. They will brown quickly, so watch them closely and flip after one minute.
- Remove the fried doughnuts from the oil using a slotted spoon or tongs, allowing excess oil to drip back into the pot.
- Immediately place the doughnuts onto several layers of paper towels to drain excess oil. Let them sit for about five seconds, then flip them onto a clean section of paper towels. Repeat this flipping process once more to remove as much grease as possible before it soaks into the doughnut.
- Repeat the frying process with the remaining doughnuts and doughnut holes. Remember that the holes will cook much faster than the doughnuts, typically about 30 seconds per side.
- Allow the fried doughnuts to cool slightly before glazing. They can be glazed while still warm or at room temperature.
To Glaze:
- In a medium-sized mixing bowl, combine all the glaze ingredients: powdered sugar, salt, vanilla extract, and cold water or milk. Whisk together until the glaze is completely smooth and has a pourable consistency. Add a touch more water or milk if needed to reach the desired consistency.
- Take each doughnut, one by one, and dip it into the glaze, submerging it halfway to coat the top evenly. For the doughnut holes, you can completely submerge them in the glaze, then remove them with a slotted spoon or fork to let excess glaze drip off.
- After glazing, place the doughnuts right side up on a cooling rack set over a cookie sheet. This setup allows excess glaze to drip off and prevents the doughnuts from becoming soggy on the bottom.
- Serve the glazed doughnuts warm if possible for the ultimate treat, or at room temperature. They are best enjoyed fresh but can be stored in an airtight container for a day or two.
Enjoy these delightful homemade glazed doughnuts, a recipe that’s sure to fill your “pioneer woman cup” with baking success and sweet satisfaction!