
Summer is the perfect time to refresh your front porch decor, and what better way to add a touch of whimsy than with a handmade kite? This year, ditch the conventional store-bought decorations and embrace your creativity by crafting a unique decorative kite. Using readily available materials, including the delightful Pioneer Woman Dish Towels from Walmart, you can create a charming and eye-catching piece that will impress your neighbors and welcome guests.
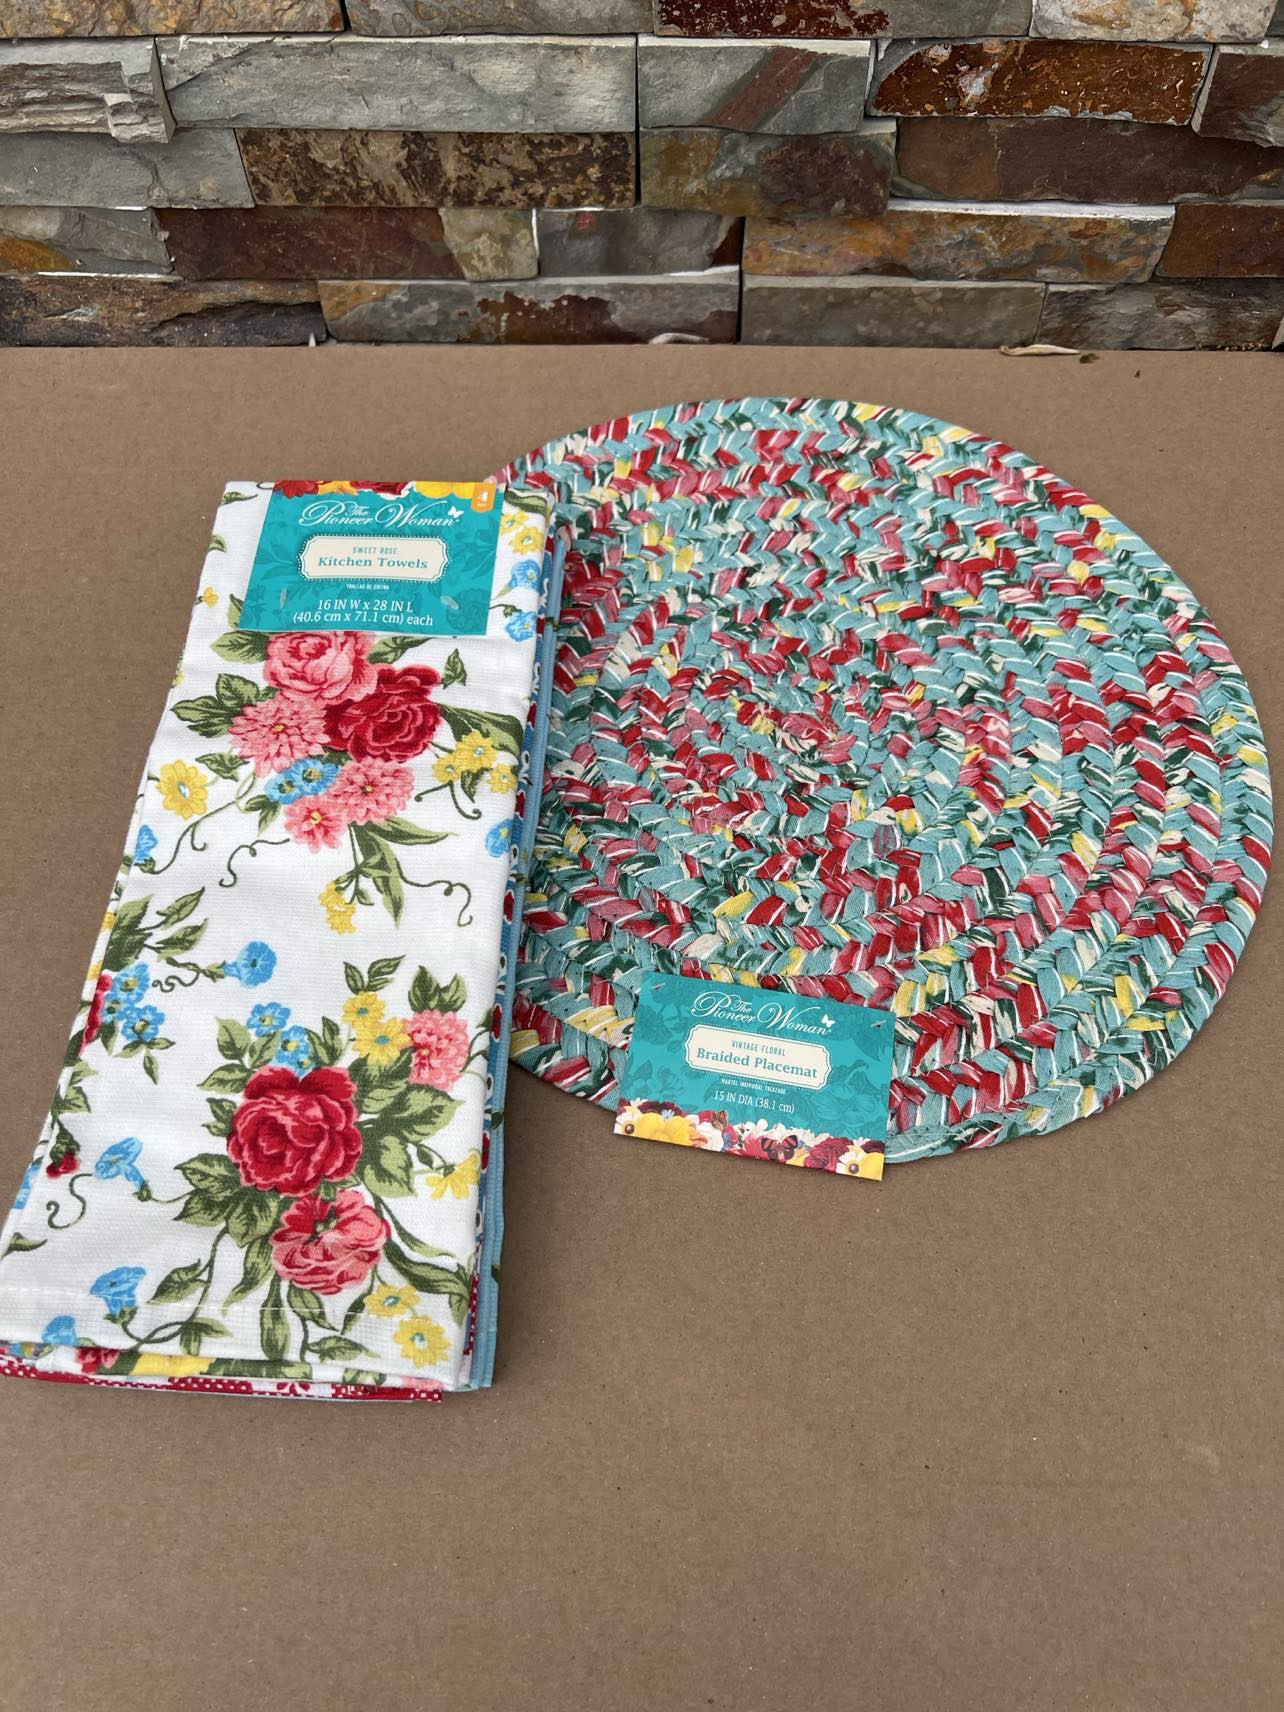 Pioneer Woman dish towels and braided placemat for DIY kite craft
This easy-to-follow DIY project utilizes the beautiful patterns and soft texture of Pioneer Woman dish towels to construct a vibrant kite. The addition of a Pioneer Woman braided placemat adds a rustic touch and provides material for the kite’s tail. This project is not only simple but also a budget-friendly way to enhance your summer porch decorations.
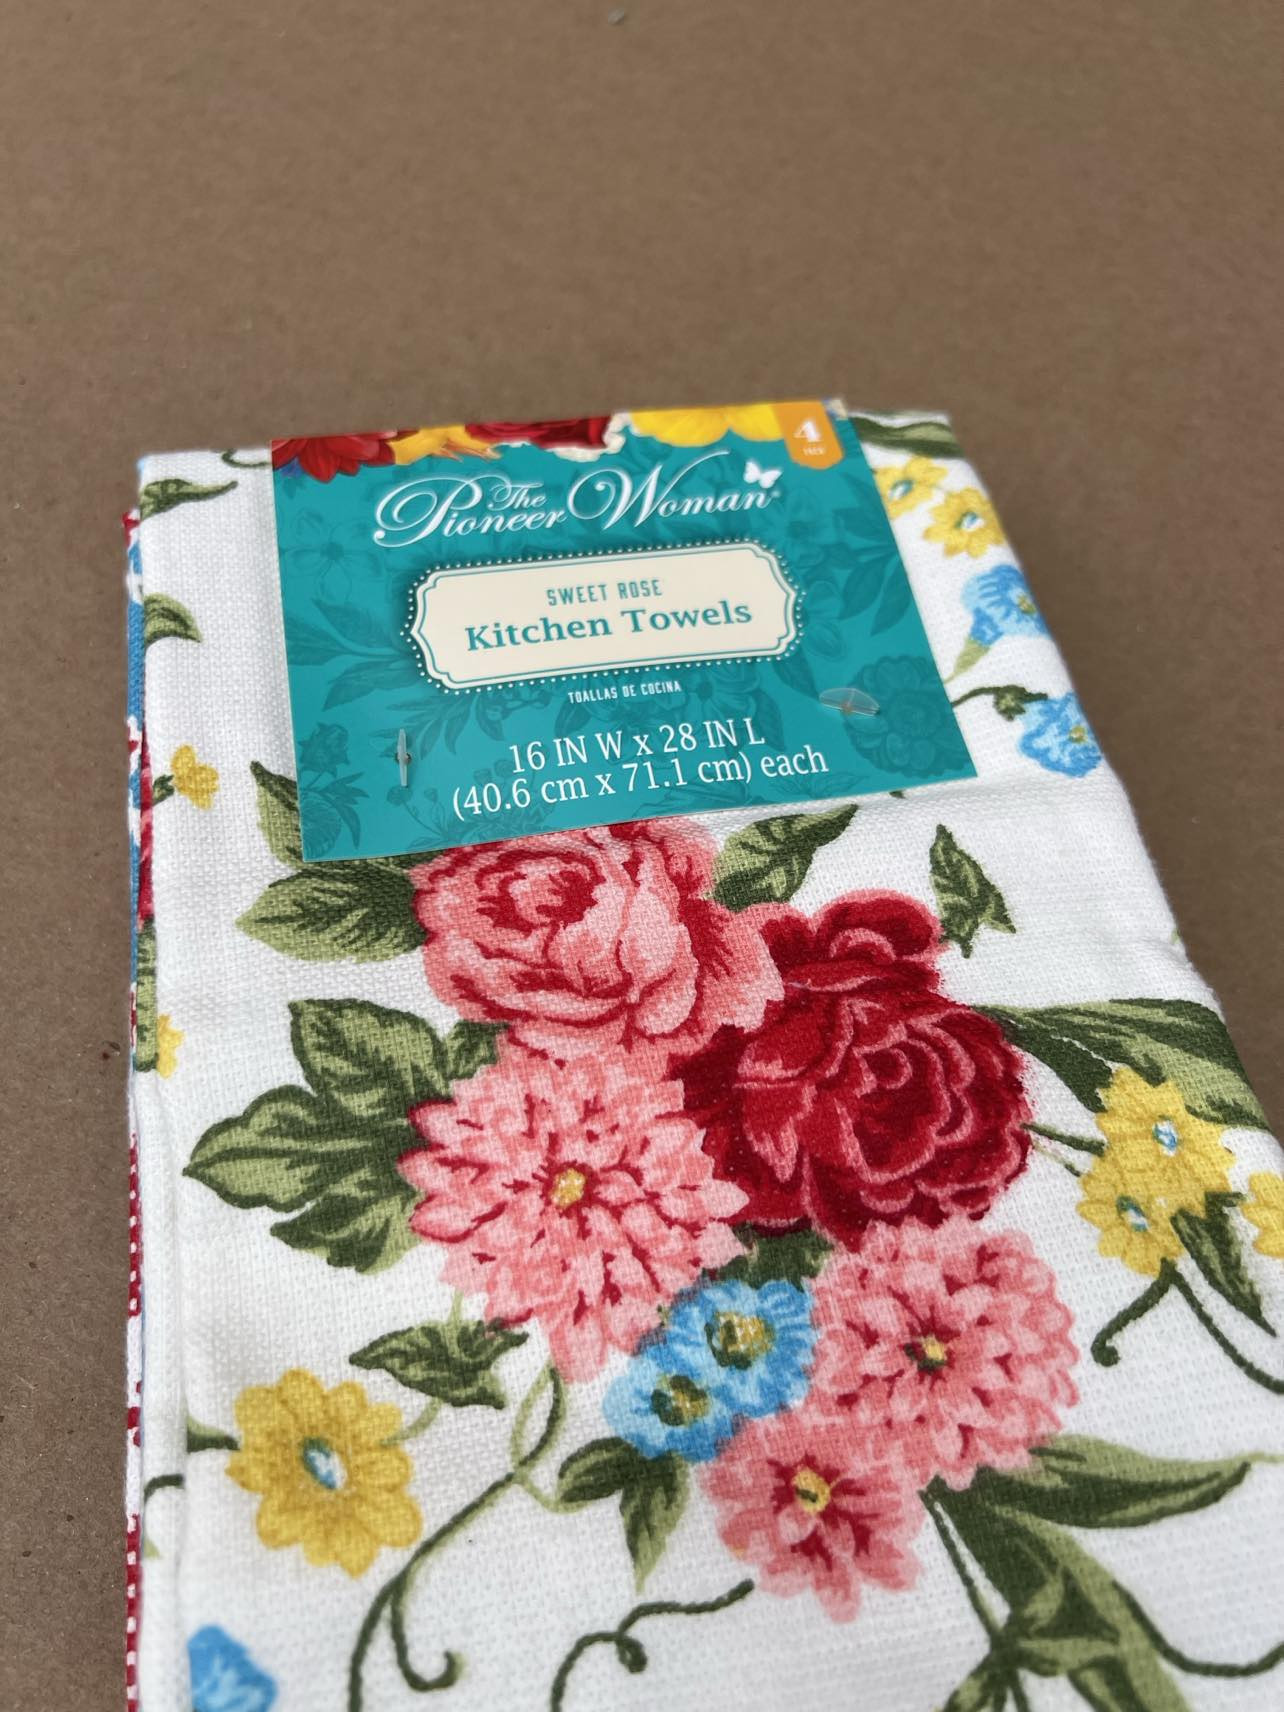
 Close up of Pioneer Woman dish towels and braided placemat packaging from Walmart
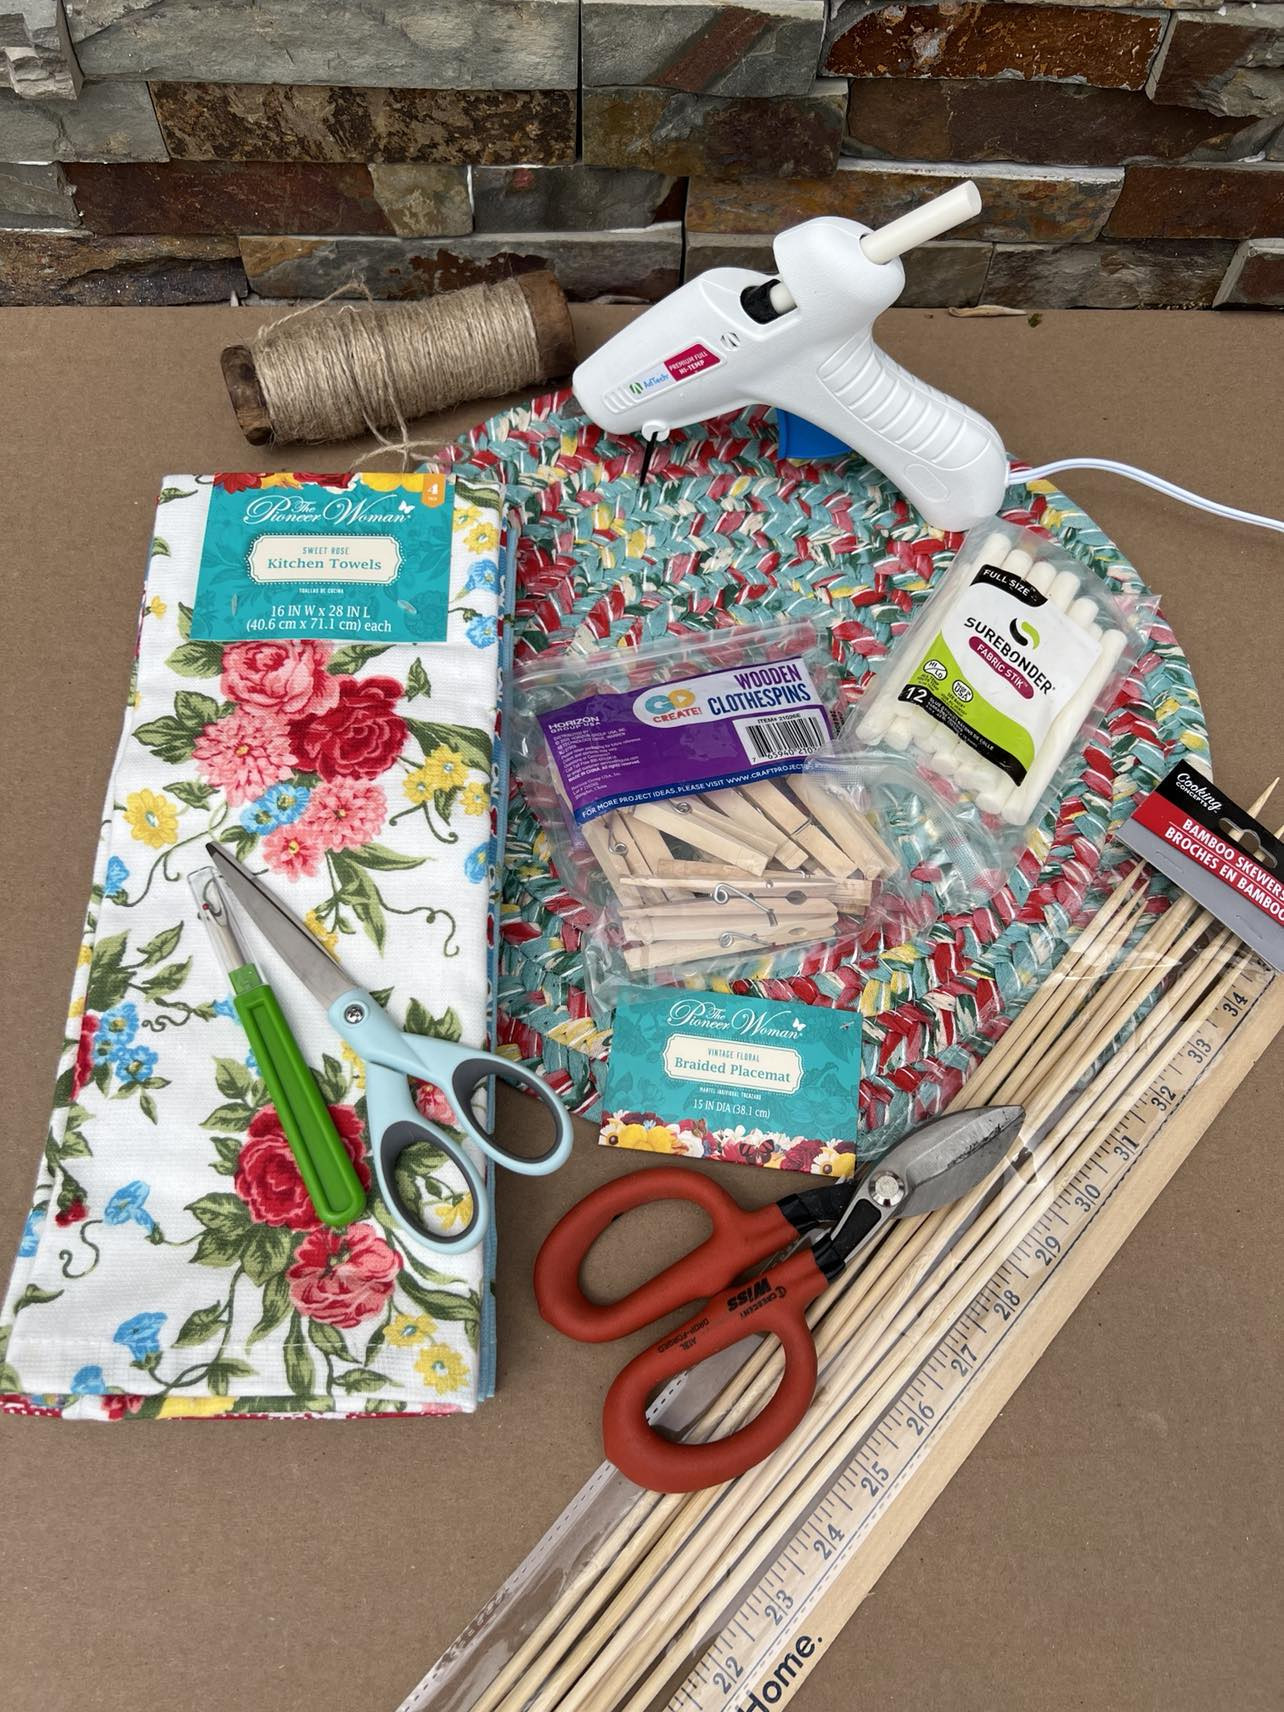
Here’s a list of the supplies you’ll need to get started on your Pioneer Woman dish towels kite:
- Pioneer Woman Dish Towel Set: Choose your favorite patterns from Walmart. You’ll need two dish towels for one kite.
- Pioneer Woman Braided Placemat: Also from Walmart, this will be used to create the kite’s tail.
- Fabric Glue: Surebonder fabric glue is recommended for its strong hold.
- Scissors: For cutting fabric and skewers.
- Seam Ripper: Essential for unraveling the placemat.
- Twine: To secure the kite frame.
- Clothes Pin (Optional): For easy attachment to garlands or other porch decor.
- Bamboo Skewers: Affordable and readily available at Dollar Tree, these will form the kite frame.
 Materials laid out for DIY Pioneer Woman dish towel kite project
Step-by-Step Guide to Crafting Your Pioneer Woman Dish Towel Kite
Let’s dive into the process of creating this delightful porch decoration.
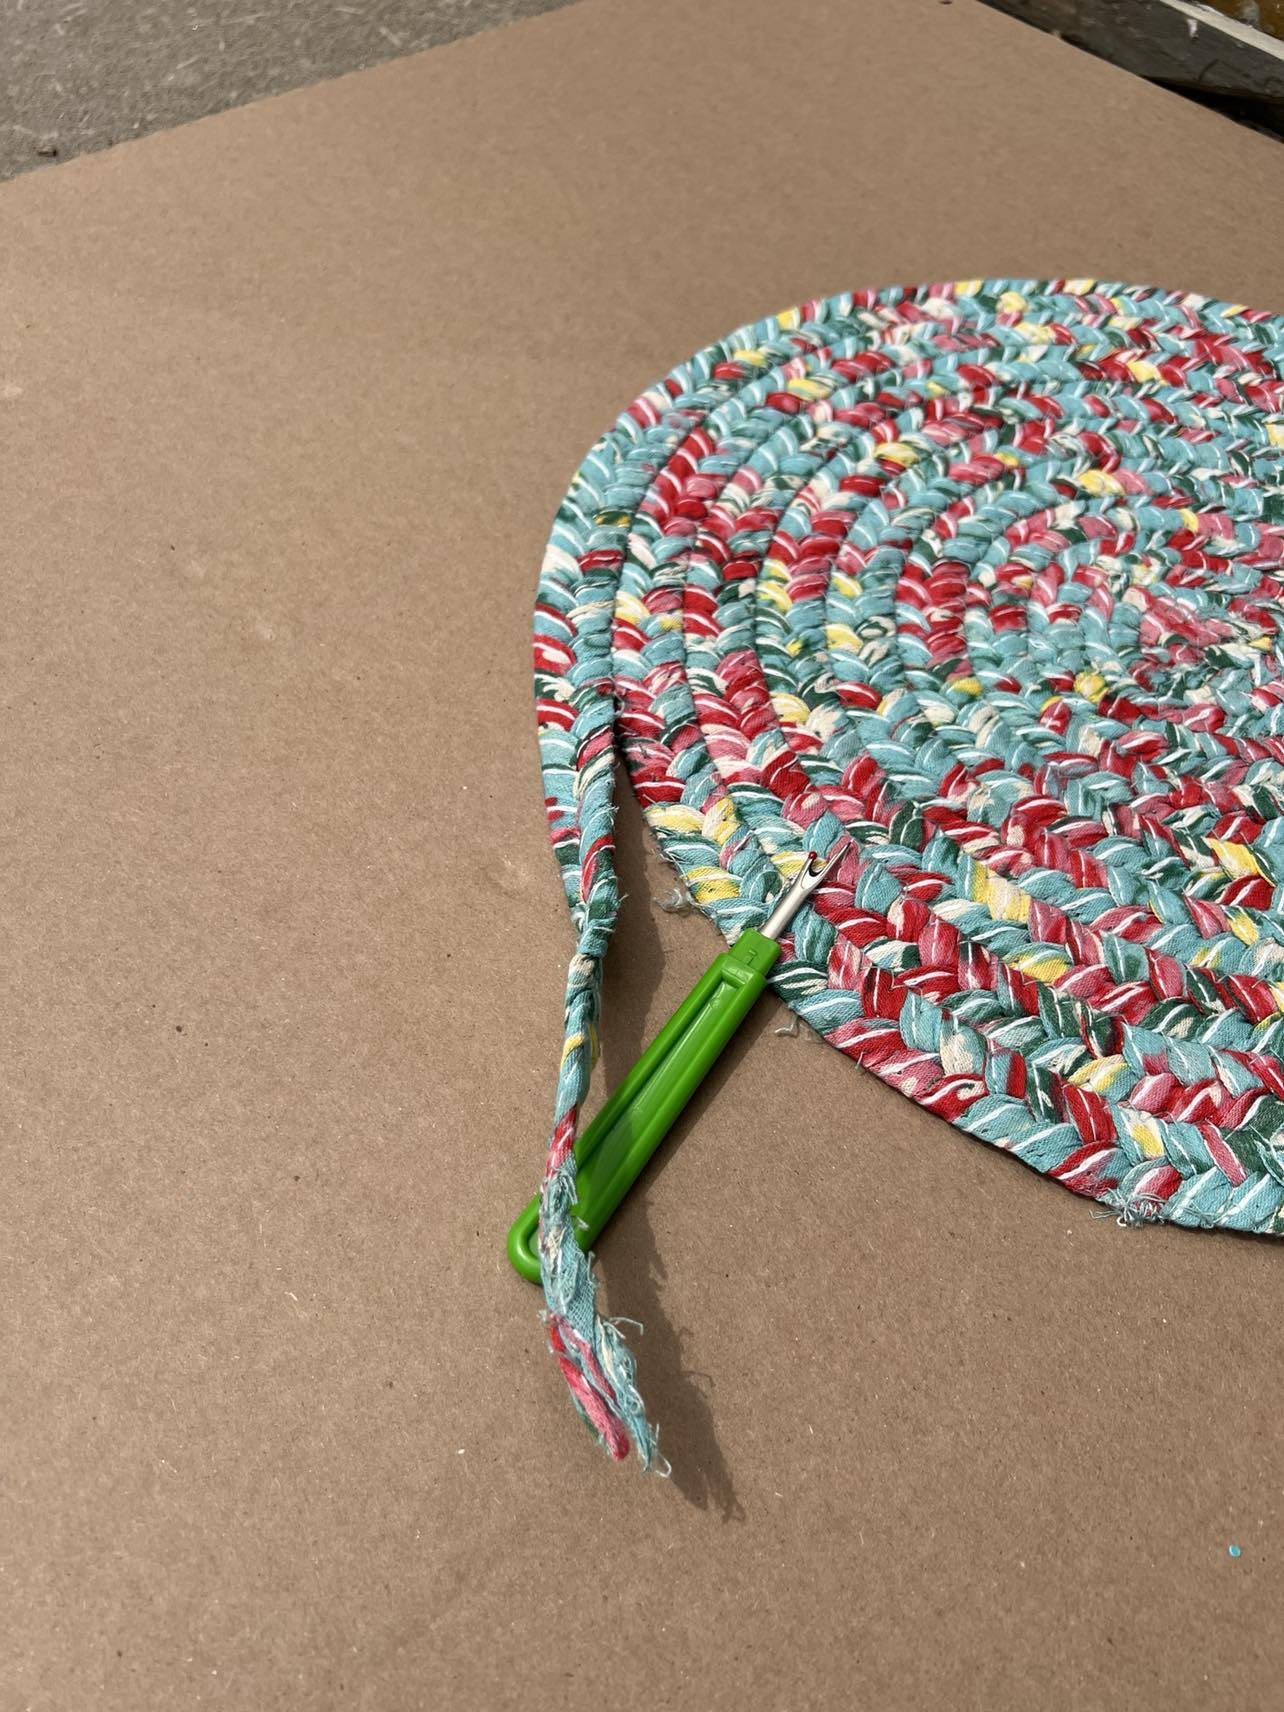
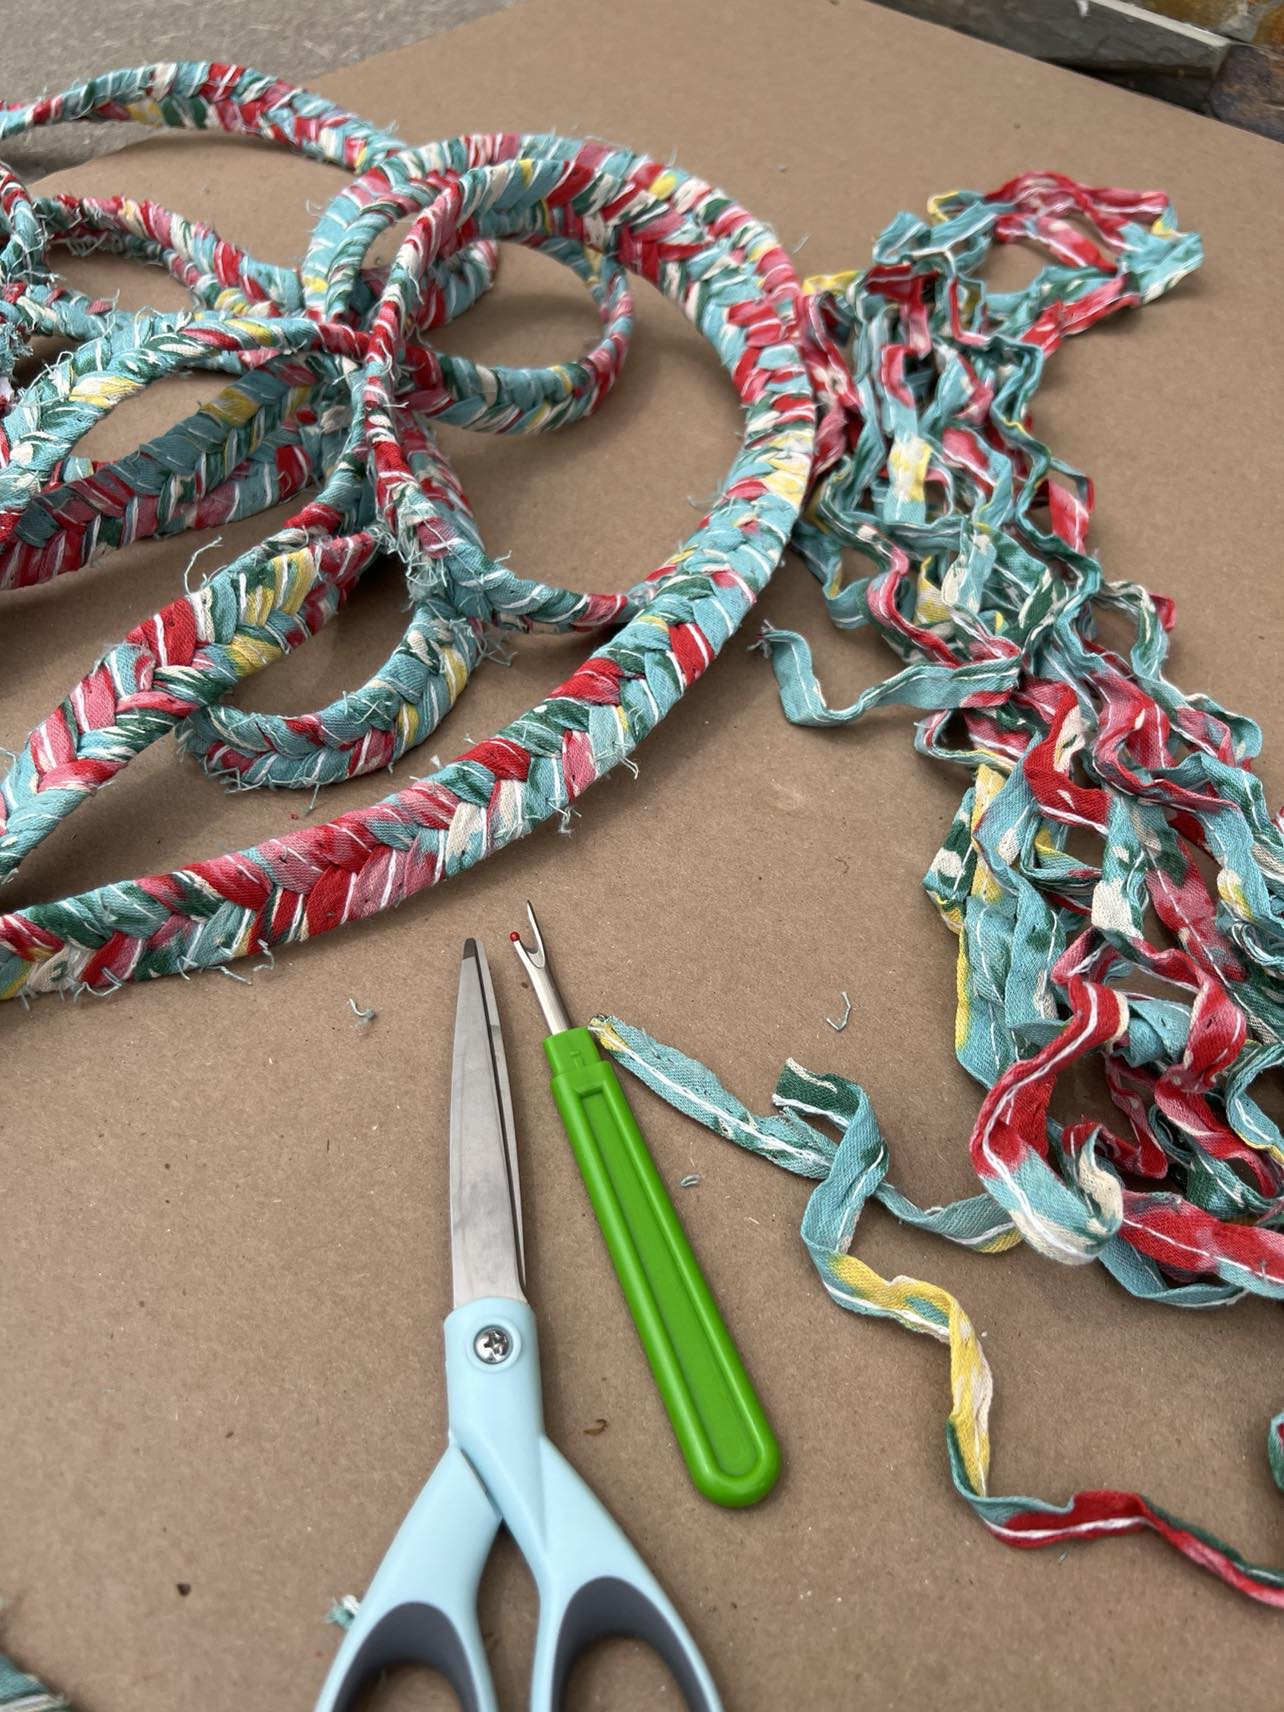
Step 1: Unravel the Braided Placemat
Begin by using your seam ripper to carefully unravel the Pioneer Woman braided placemat. This will provide you with long strips of fabric that will be perfect for creating the kite’s tail.
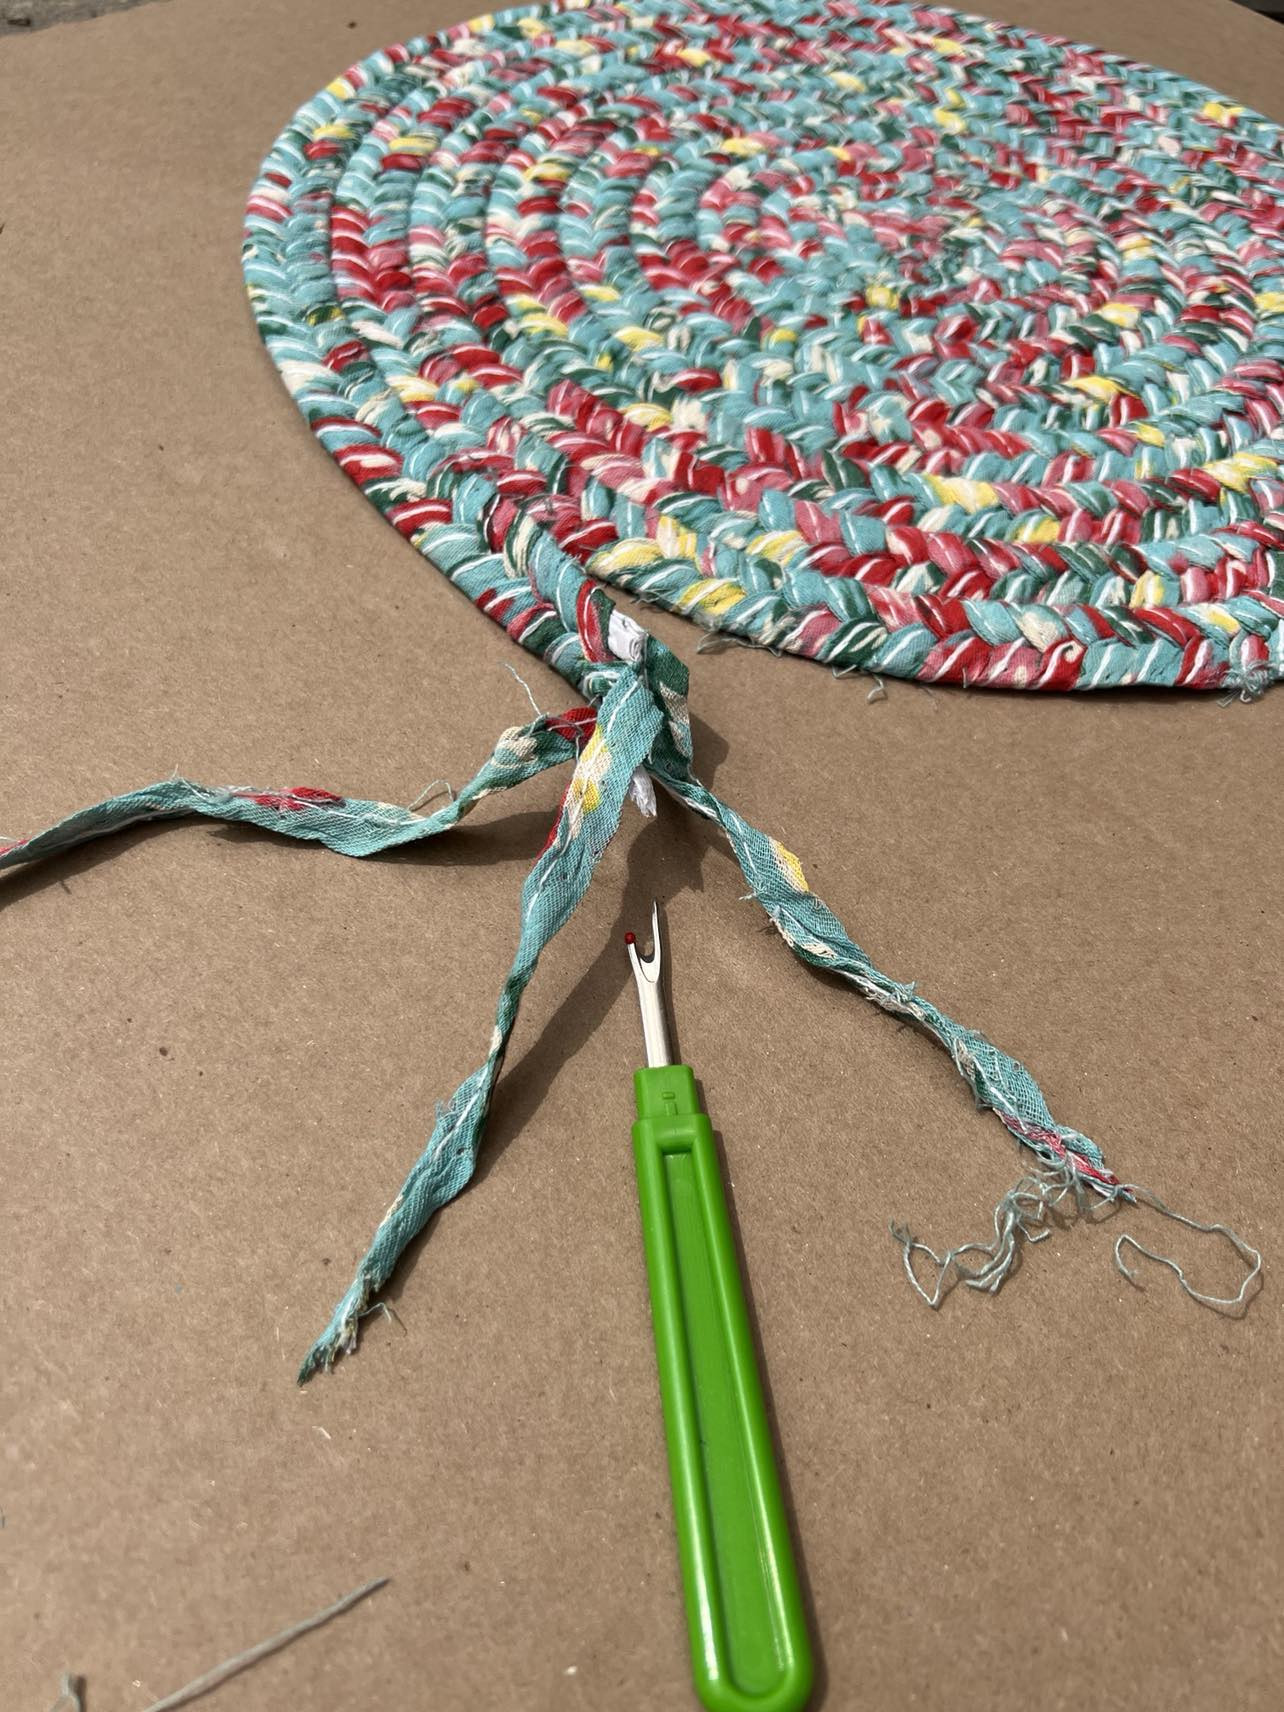 Using a seam ripper to unravel a Pioneer Woman braided placemat
 Close up of unraveling Pioneer Woman braided placemat into fabric strips
Unravel the entire placemat to ensure you have plenty of fabric strips for a long, flowing kite tail. These fabric strips from the placemat will add a charming rustic element to your DIY kite.
 Pile of fabric strips unraveled from Pioneer Woman placemat for kite tail
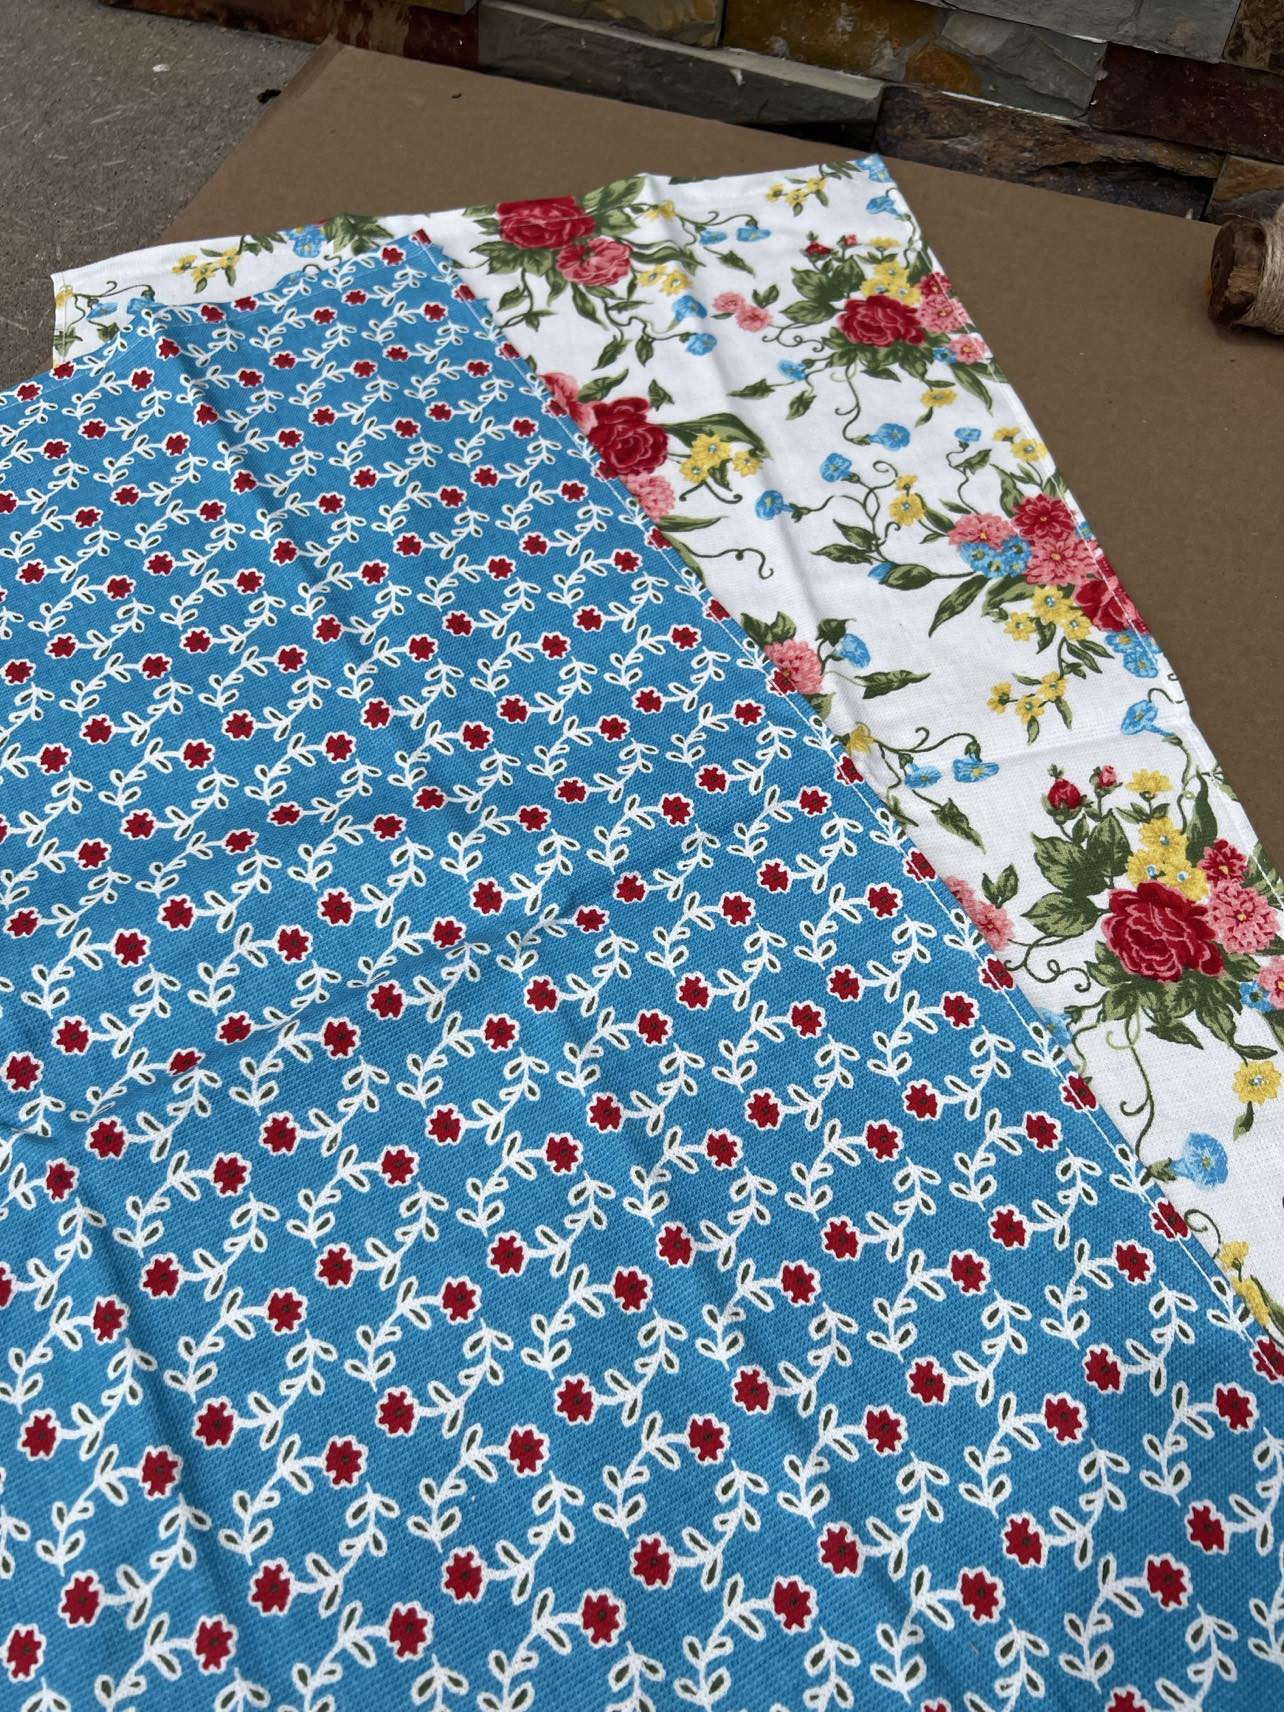
Step 2: Prepare Your Pioneer Woman Dish Towels
For each kite, you’ll need two Pioneer Woman dish towels. While these towels are ideal for this project due to their patterns and ease of use, feel free to experiment with other fabrics if you desire a different look. The dish towels, however, make this craft incredibly quick and easy to assemble.
 Selection of colorful Pioneer Woman dish towels for DIY craft
 Folded Pioneer Woman dish towels ready to be used for kite making
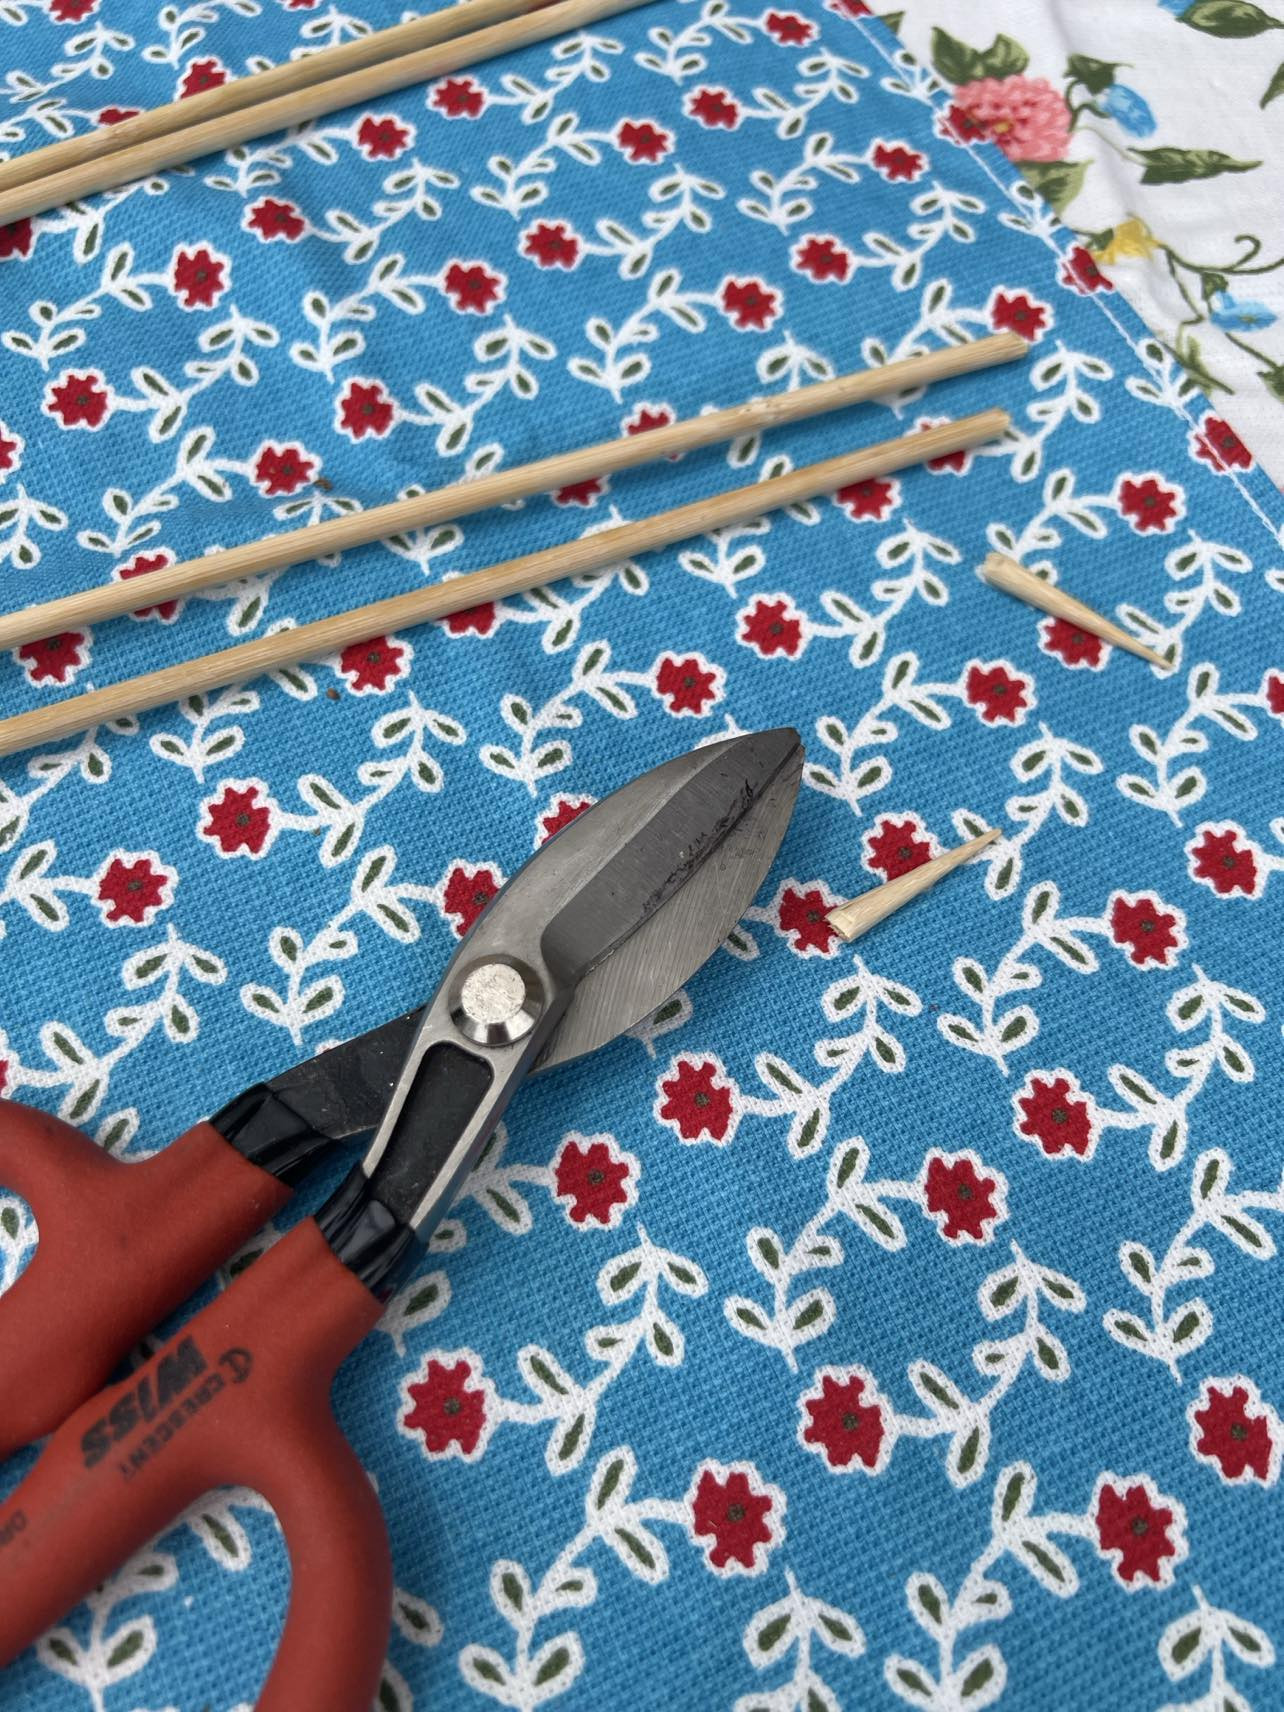
Step 3: Construct the Kite Frame with Bamboo Skewers
Now, it’s time to create the frame for your kite. You can utilize sticks from your yard, paint sticks, or even kabob skewers. For this tutorial, bamboo skewers from the Dollar Tree are being used as they are inexpensive and readily available.
 Bamboo skewers from Dollar Tree for DIY kite frame
Trim the pointed tips off of four bamboo skewers to prepare them for the frame construction.
 Cutting the tips off bamboo skewers for kite frame
Step 4: Assemble the Skewer Frame
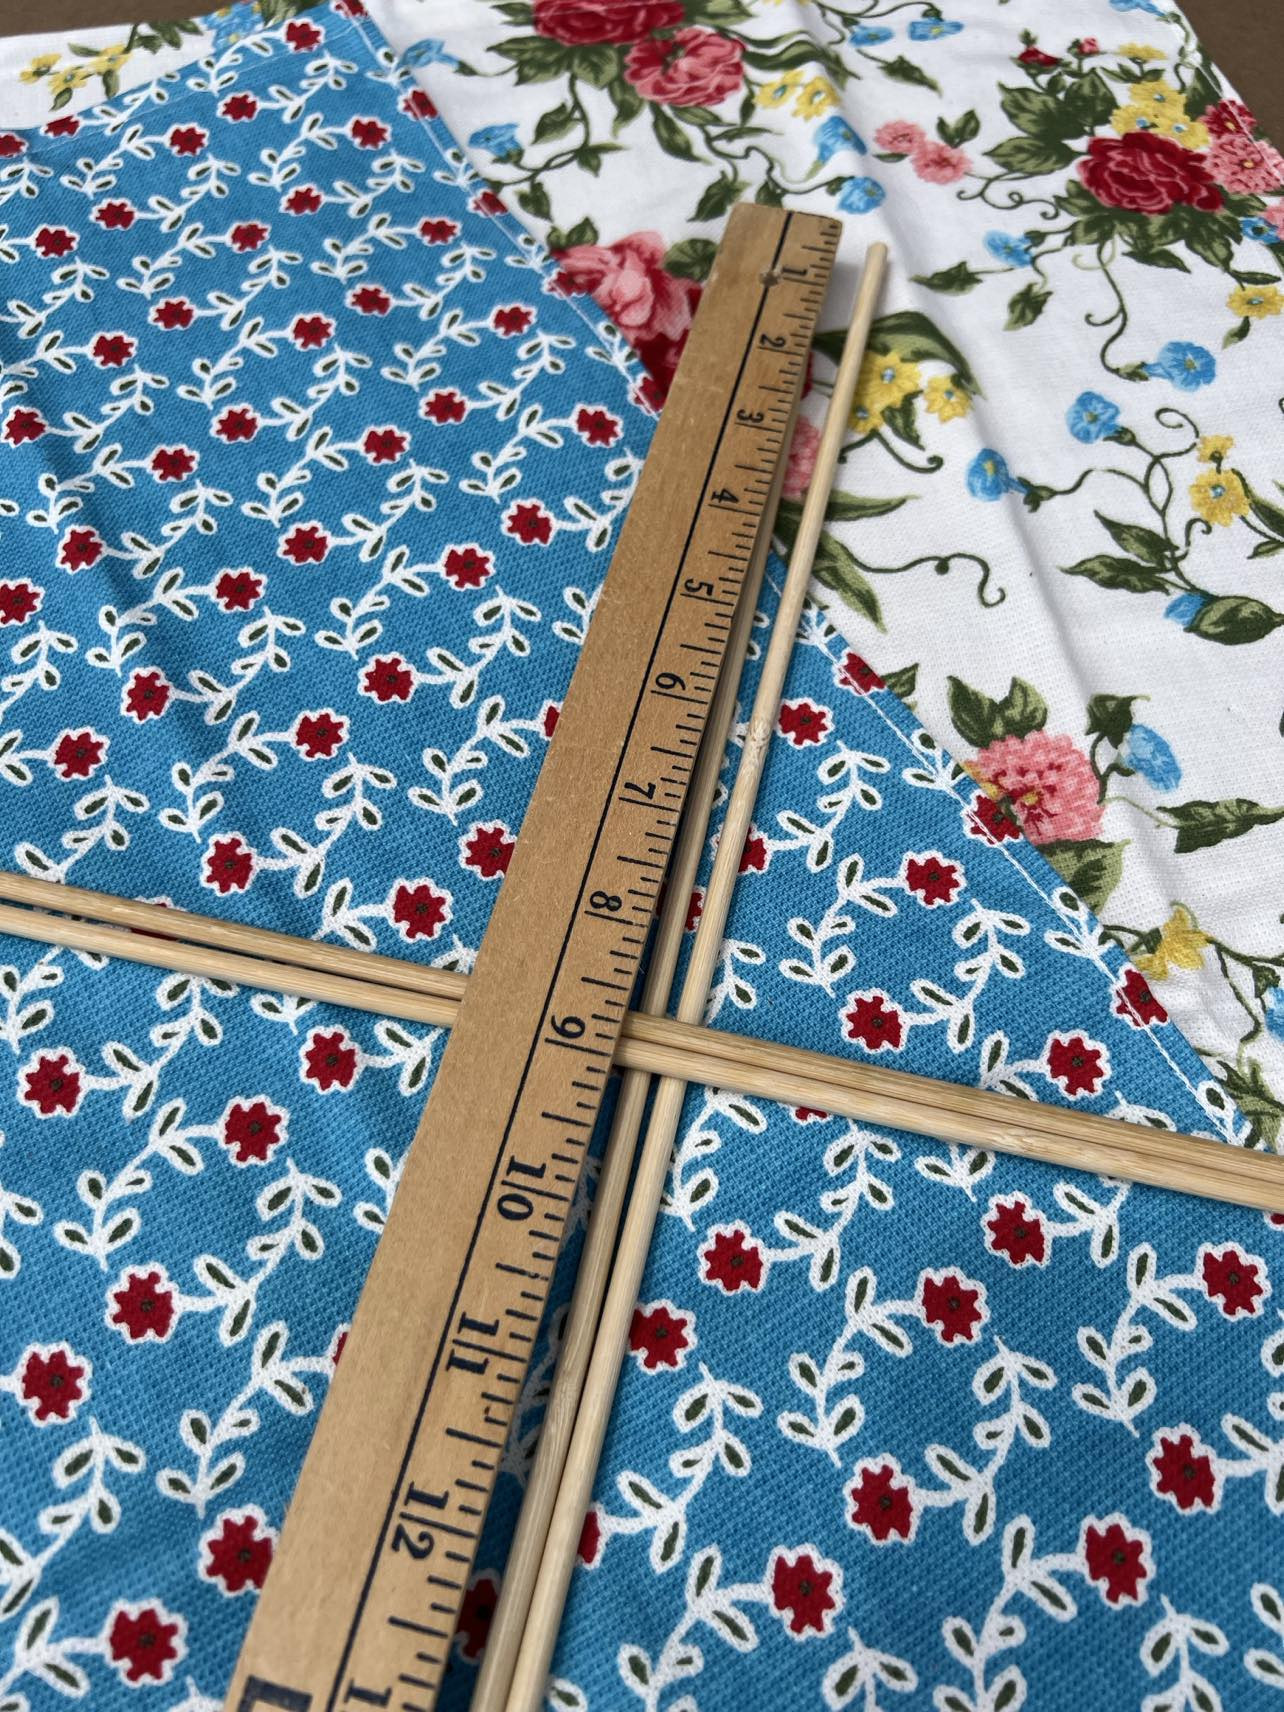
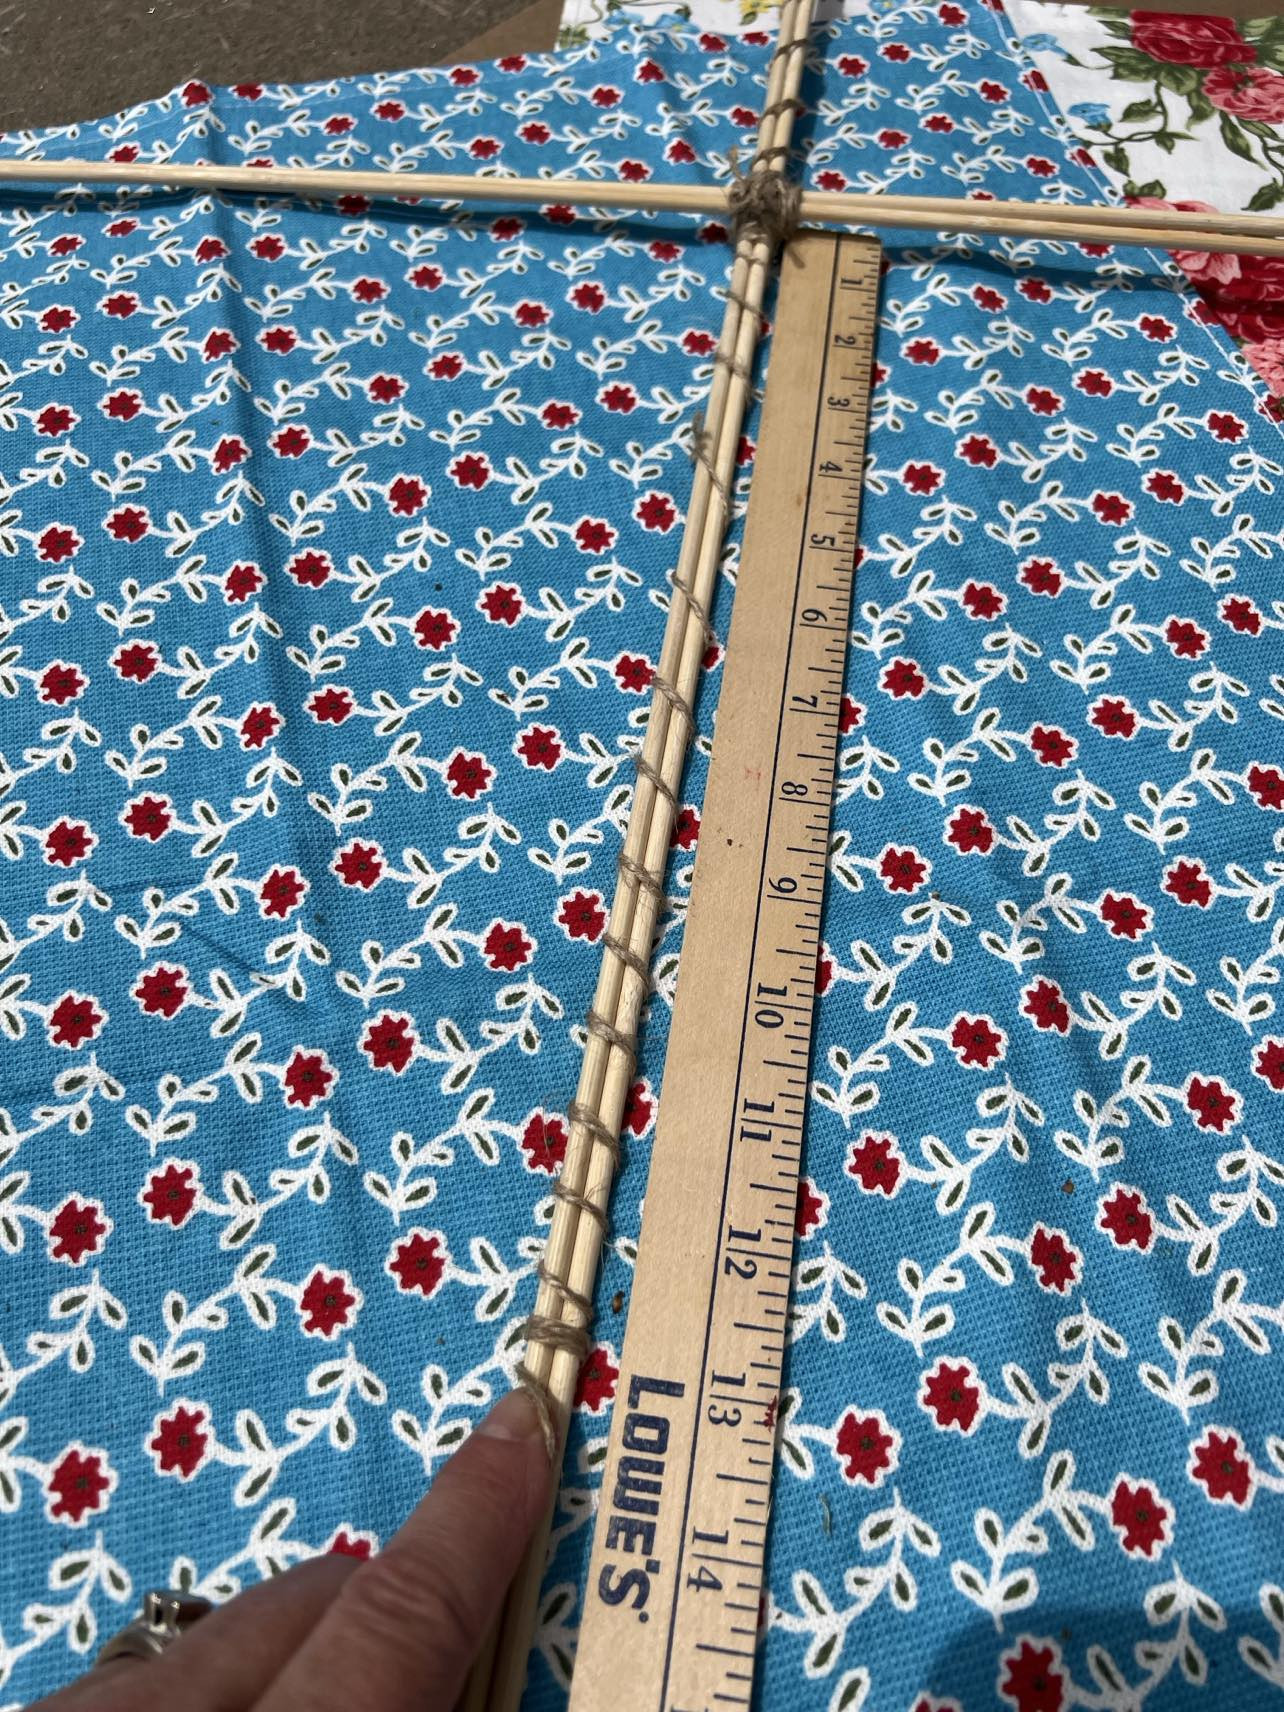
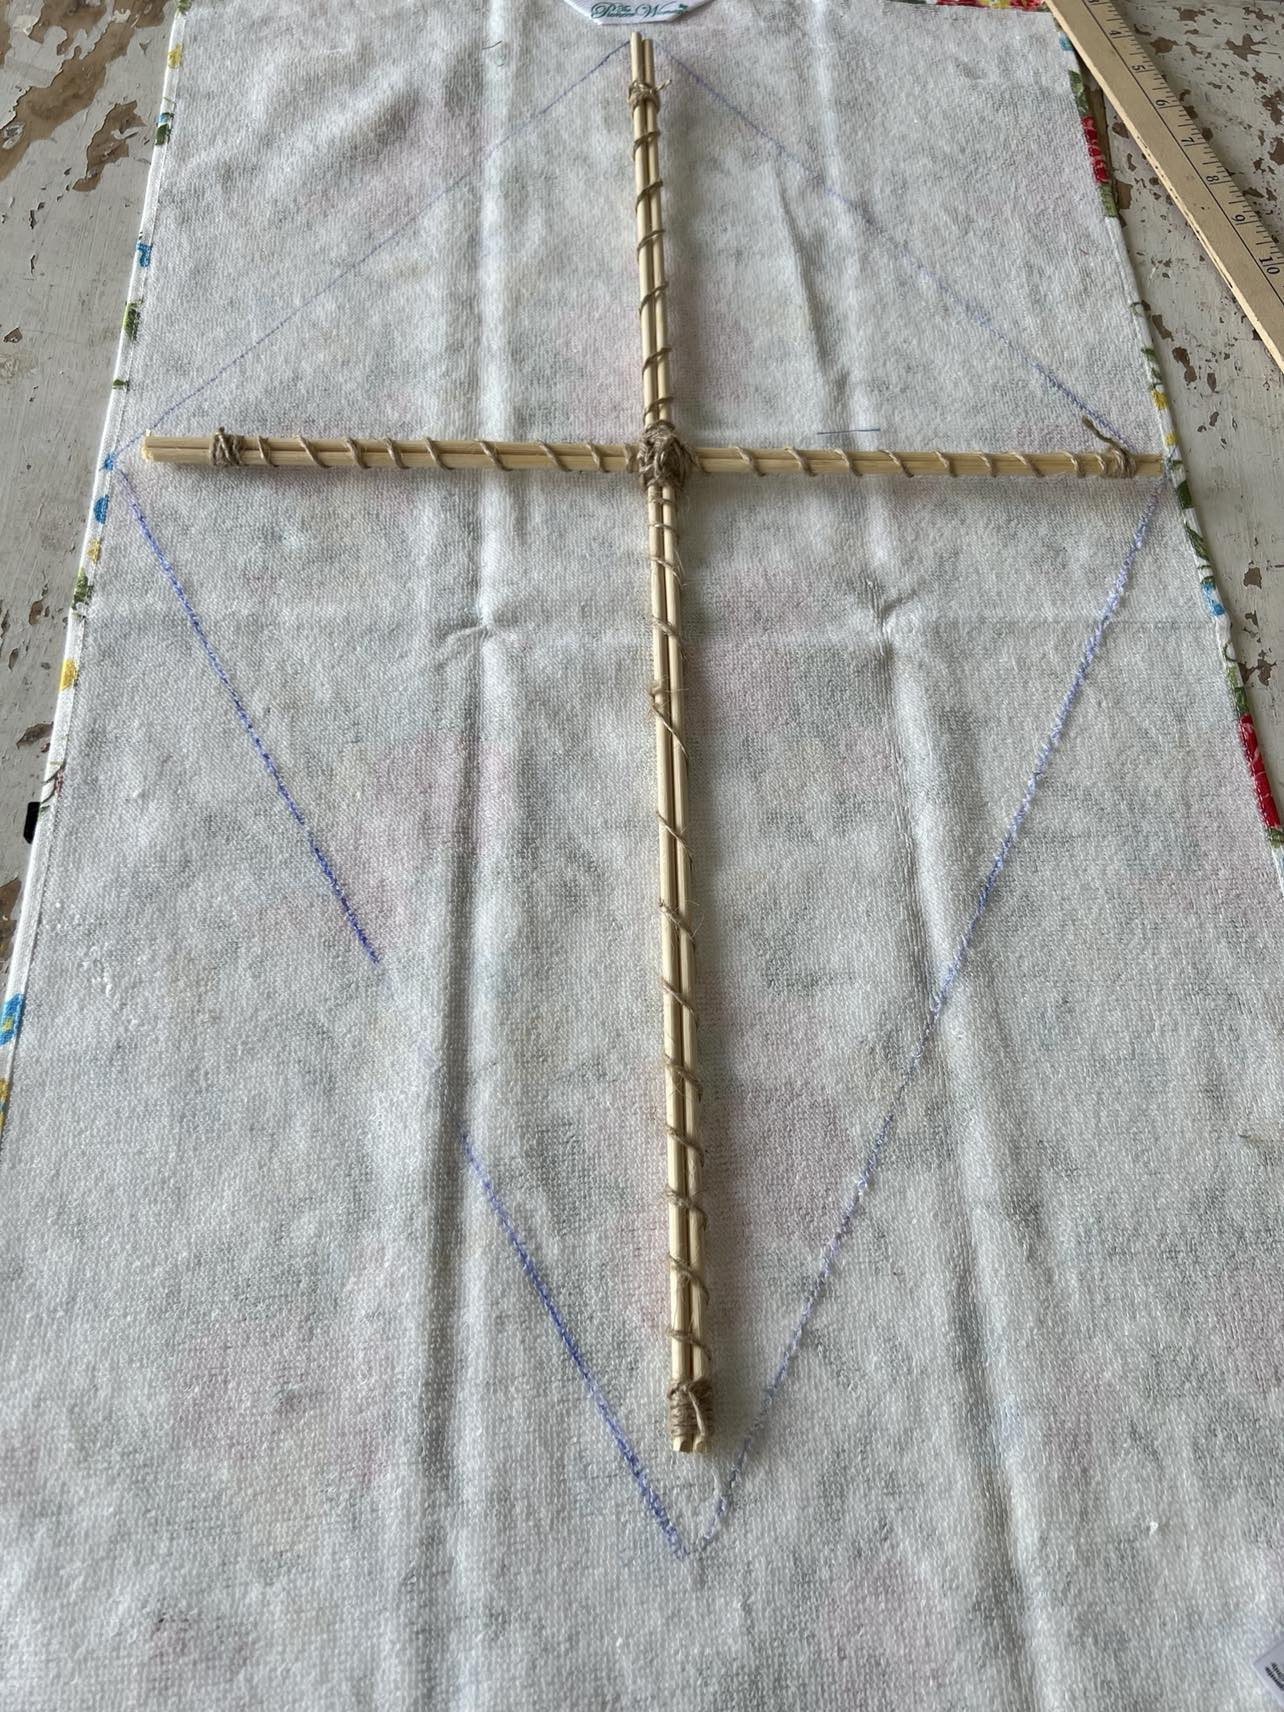
For added support, double up the skewers. Create a cross shape and then measure approximately 9 inches down from the top intersection point.
 Creating a cross shape with doubled bamboo skewers for kite frame
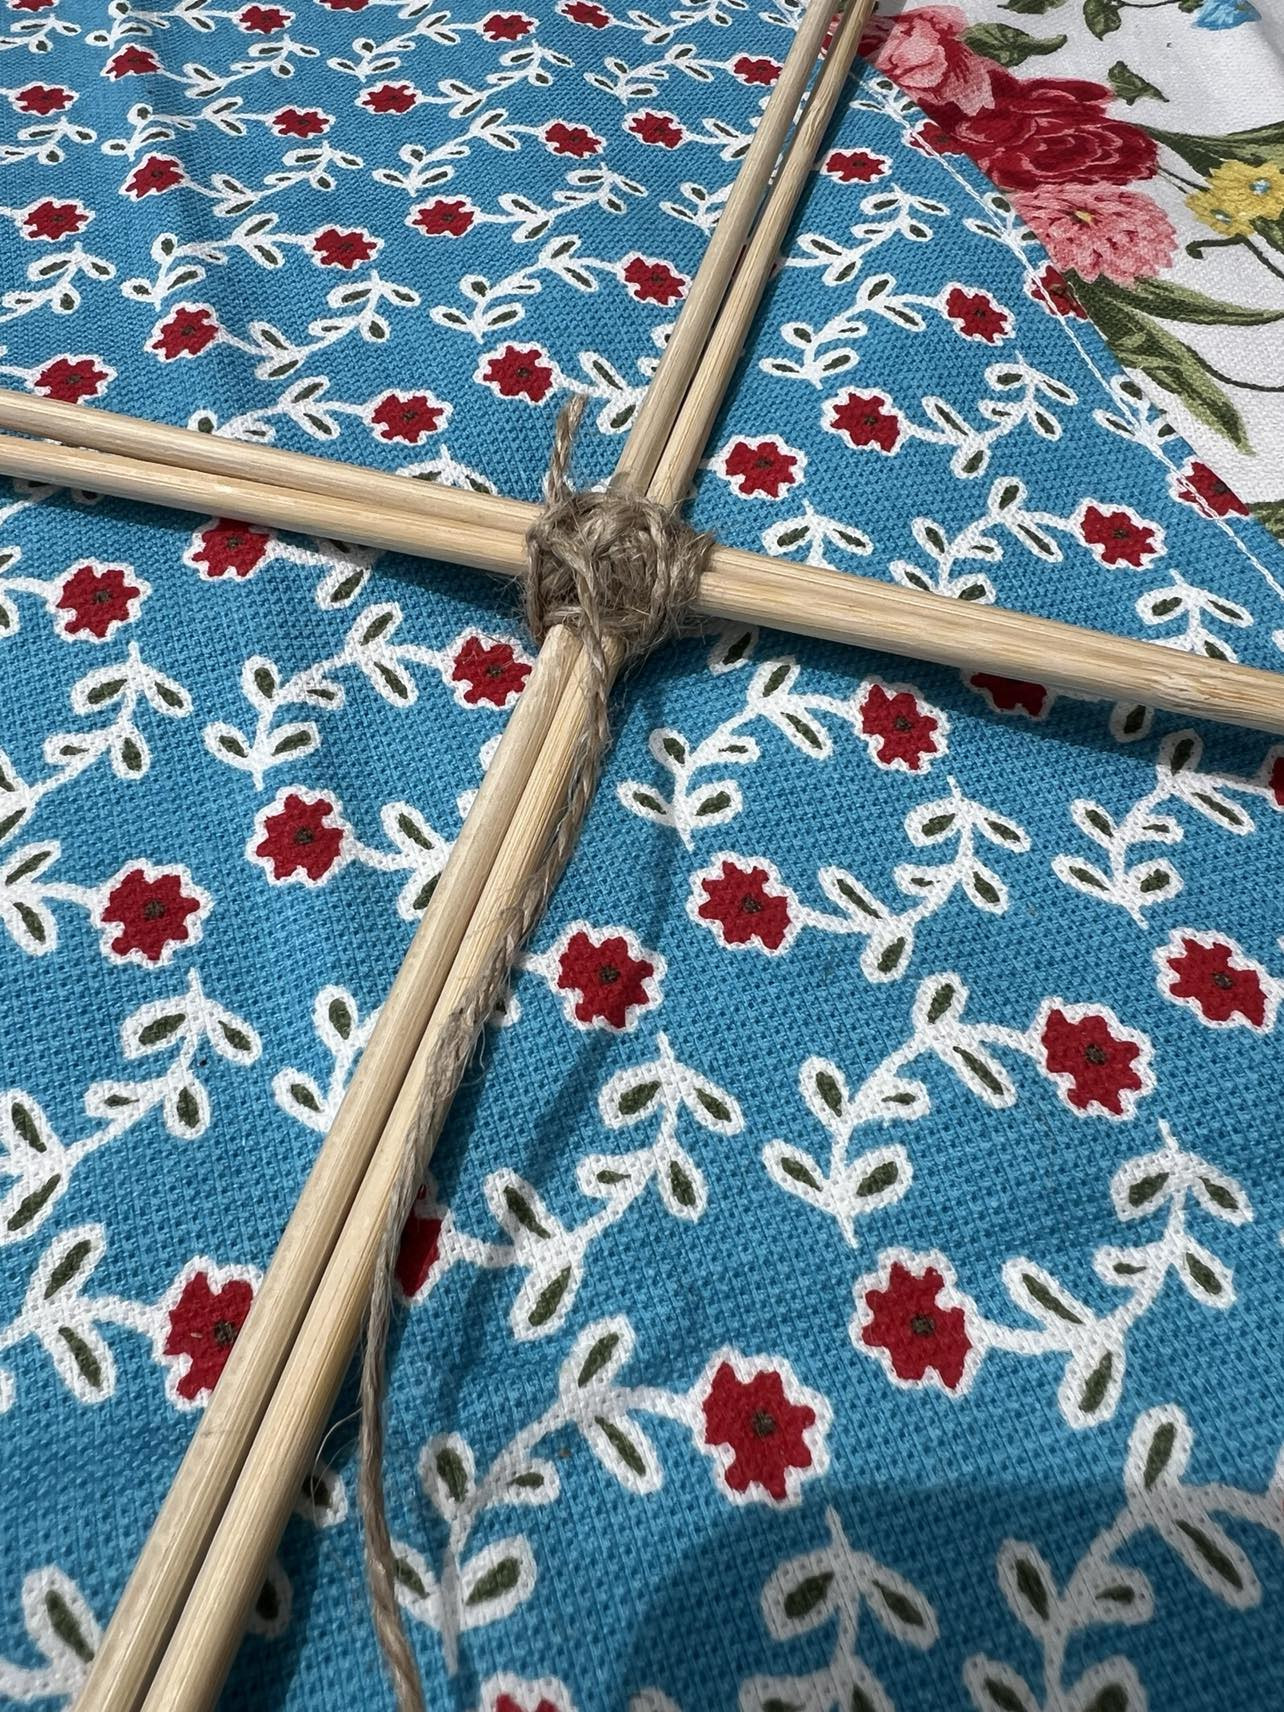
Use twine to firmly connect all the skewers at the center point where they intersect.
 Securing the center of the bamboo skewer kite frame with twine
Wrap the twine around the skewers in various directions, ensuring a secure hold, and then tie a knot to finish.
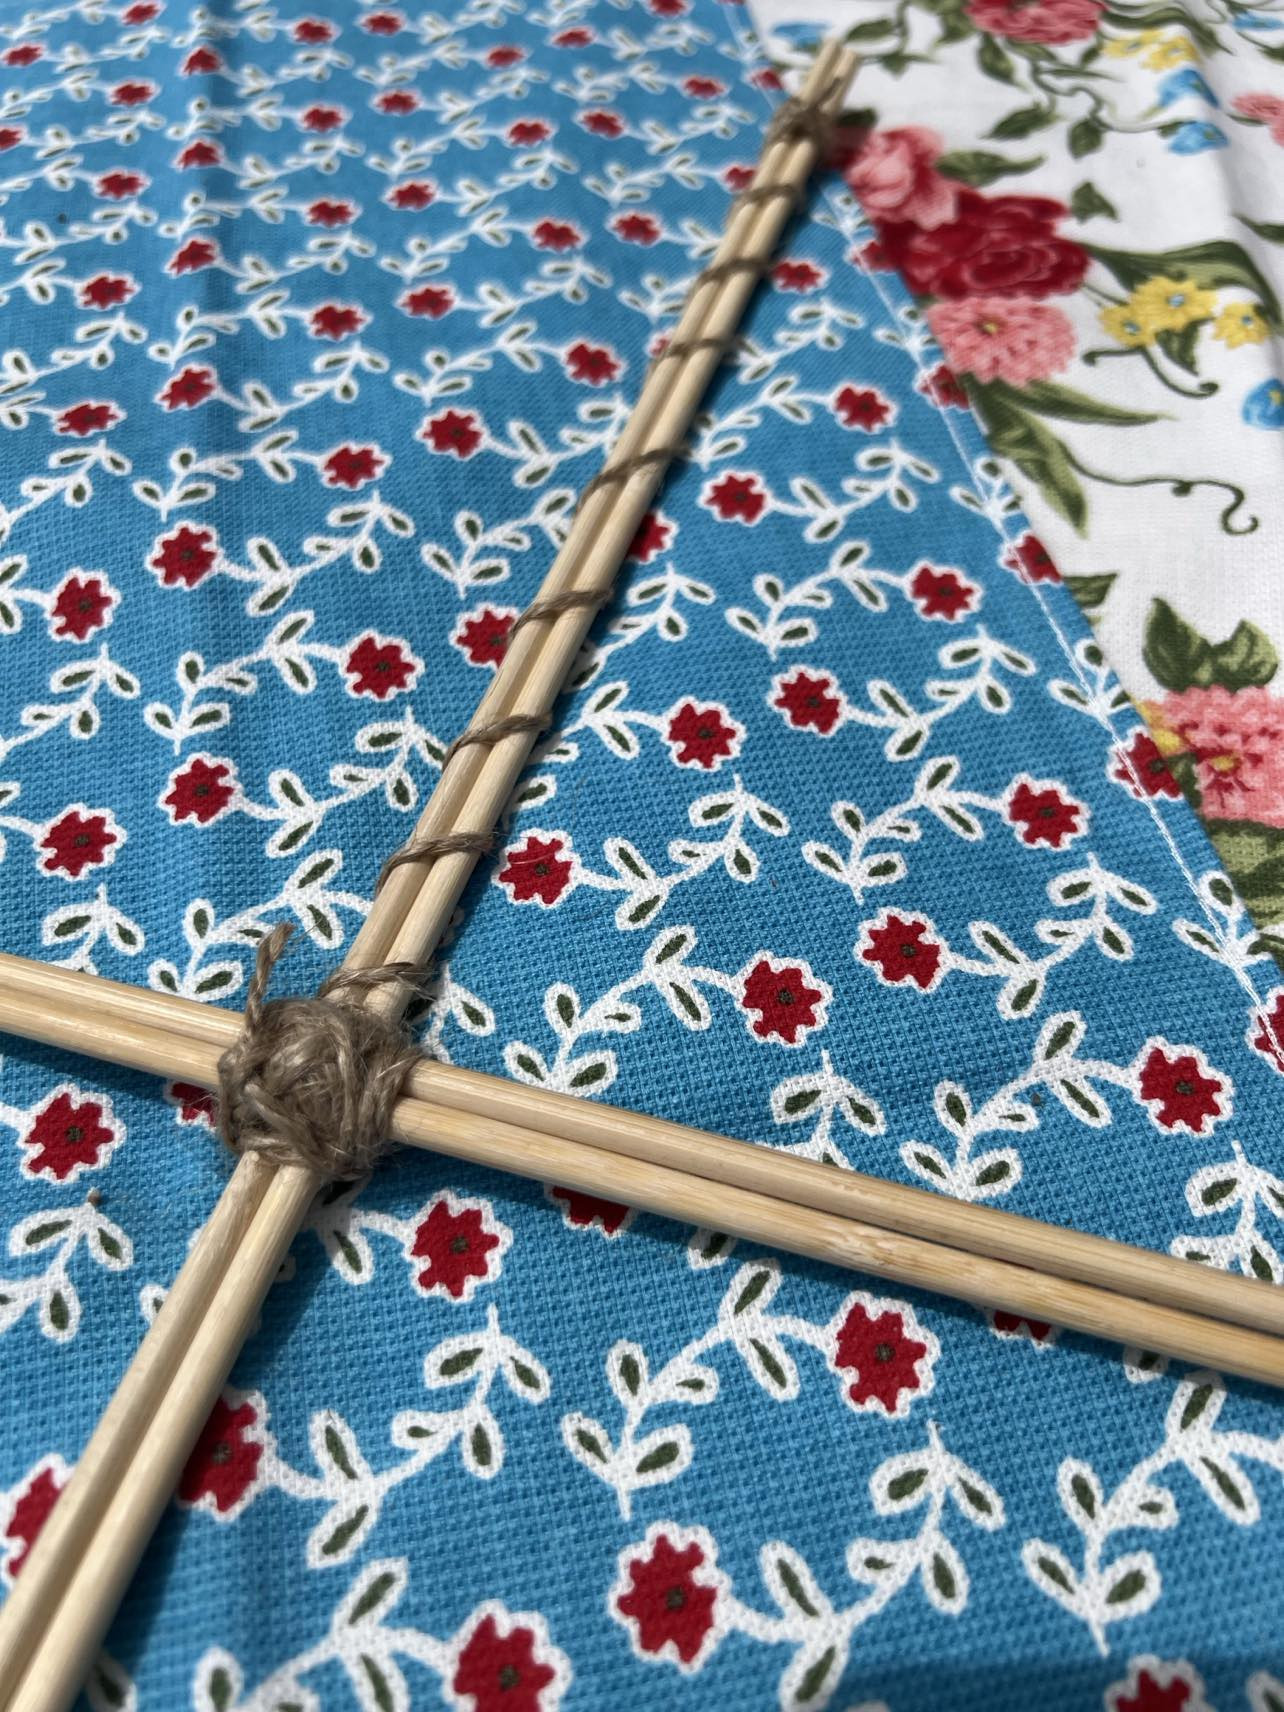 Close up of twine wrapped around the center of the kite frame
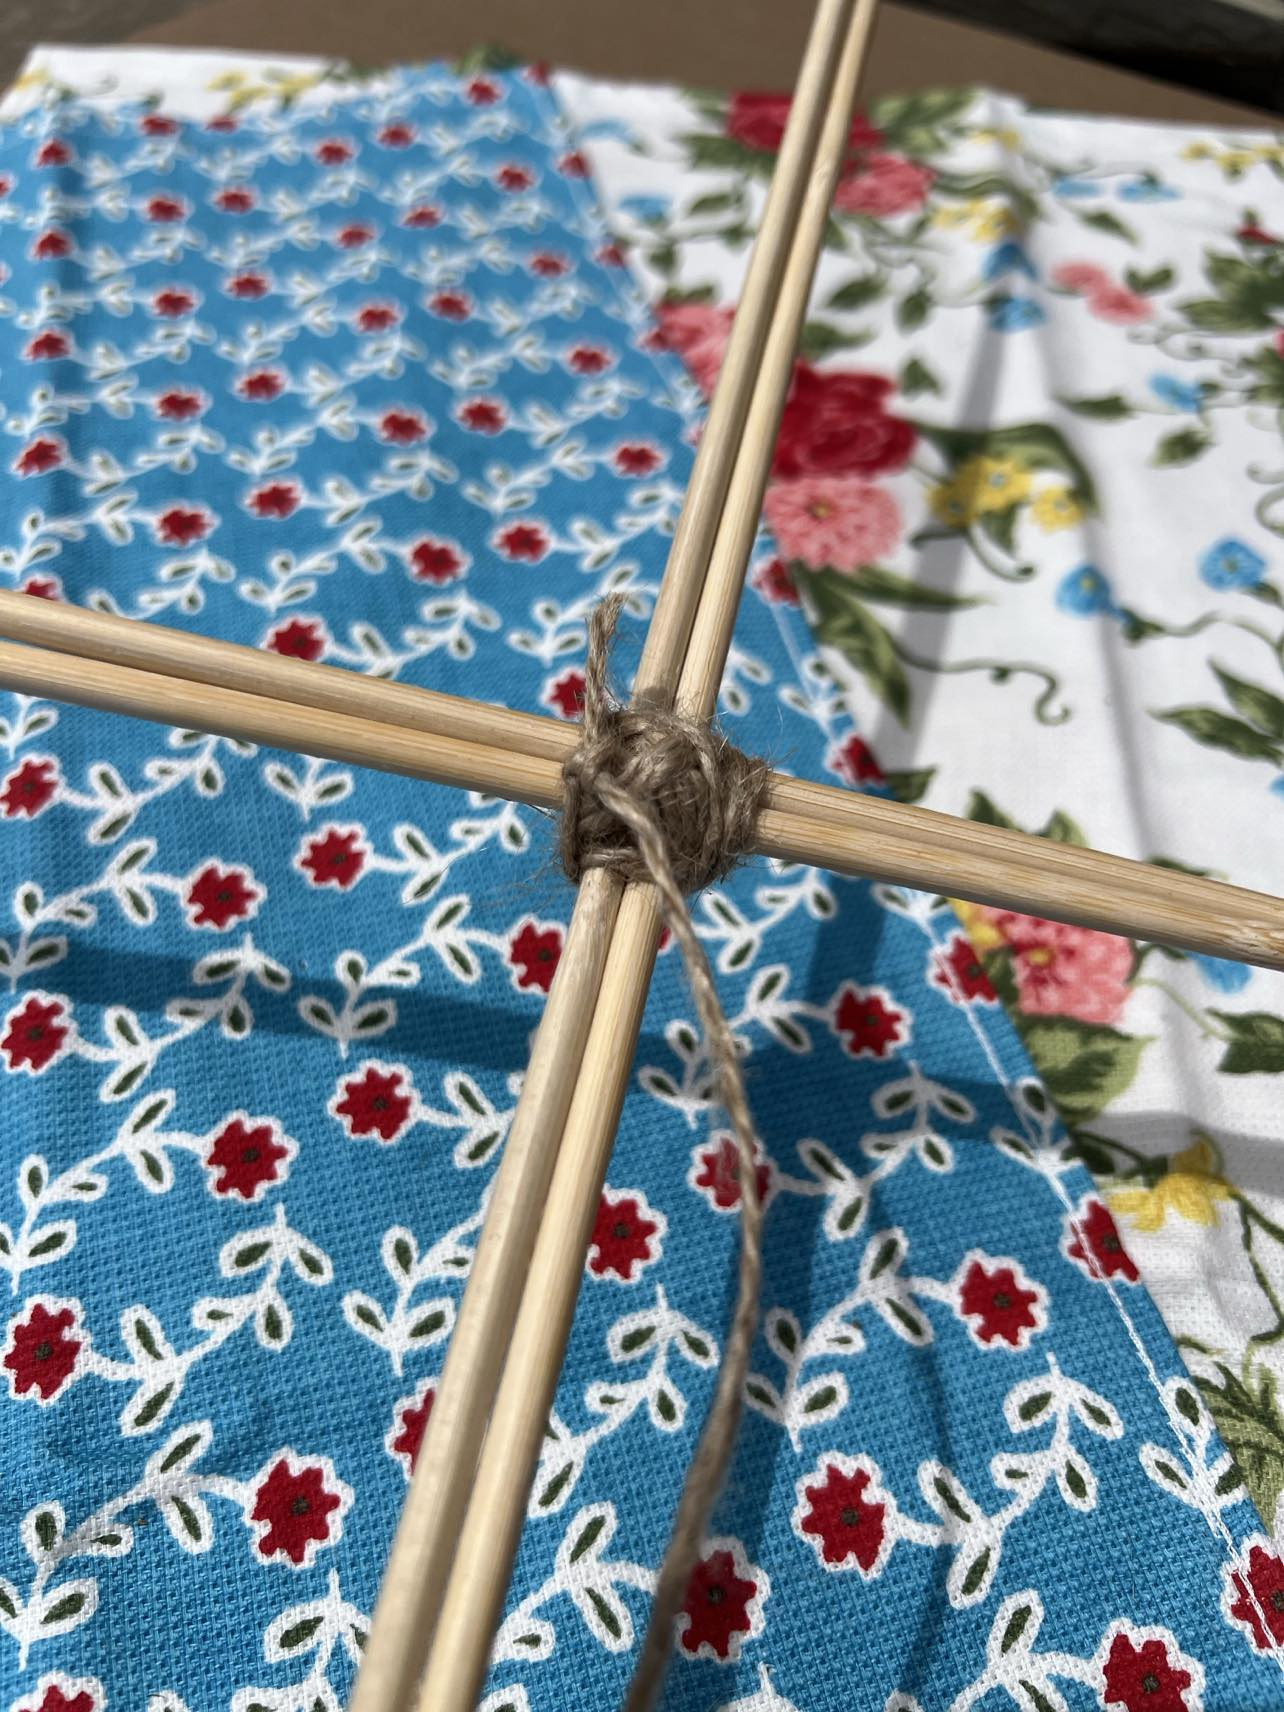
Wrap twine around the skewers again, going about 9 inches up from the center and then 13 inches down from the center, reinforcing the frame’s structure.
 Adding twine reinforcement to the bamboo skewer kite frame
 Completed bamboo skewer kite frame with twine reinforcements
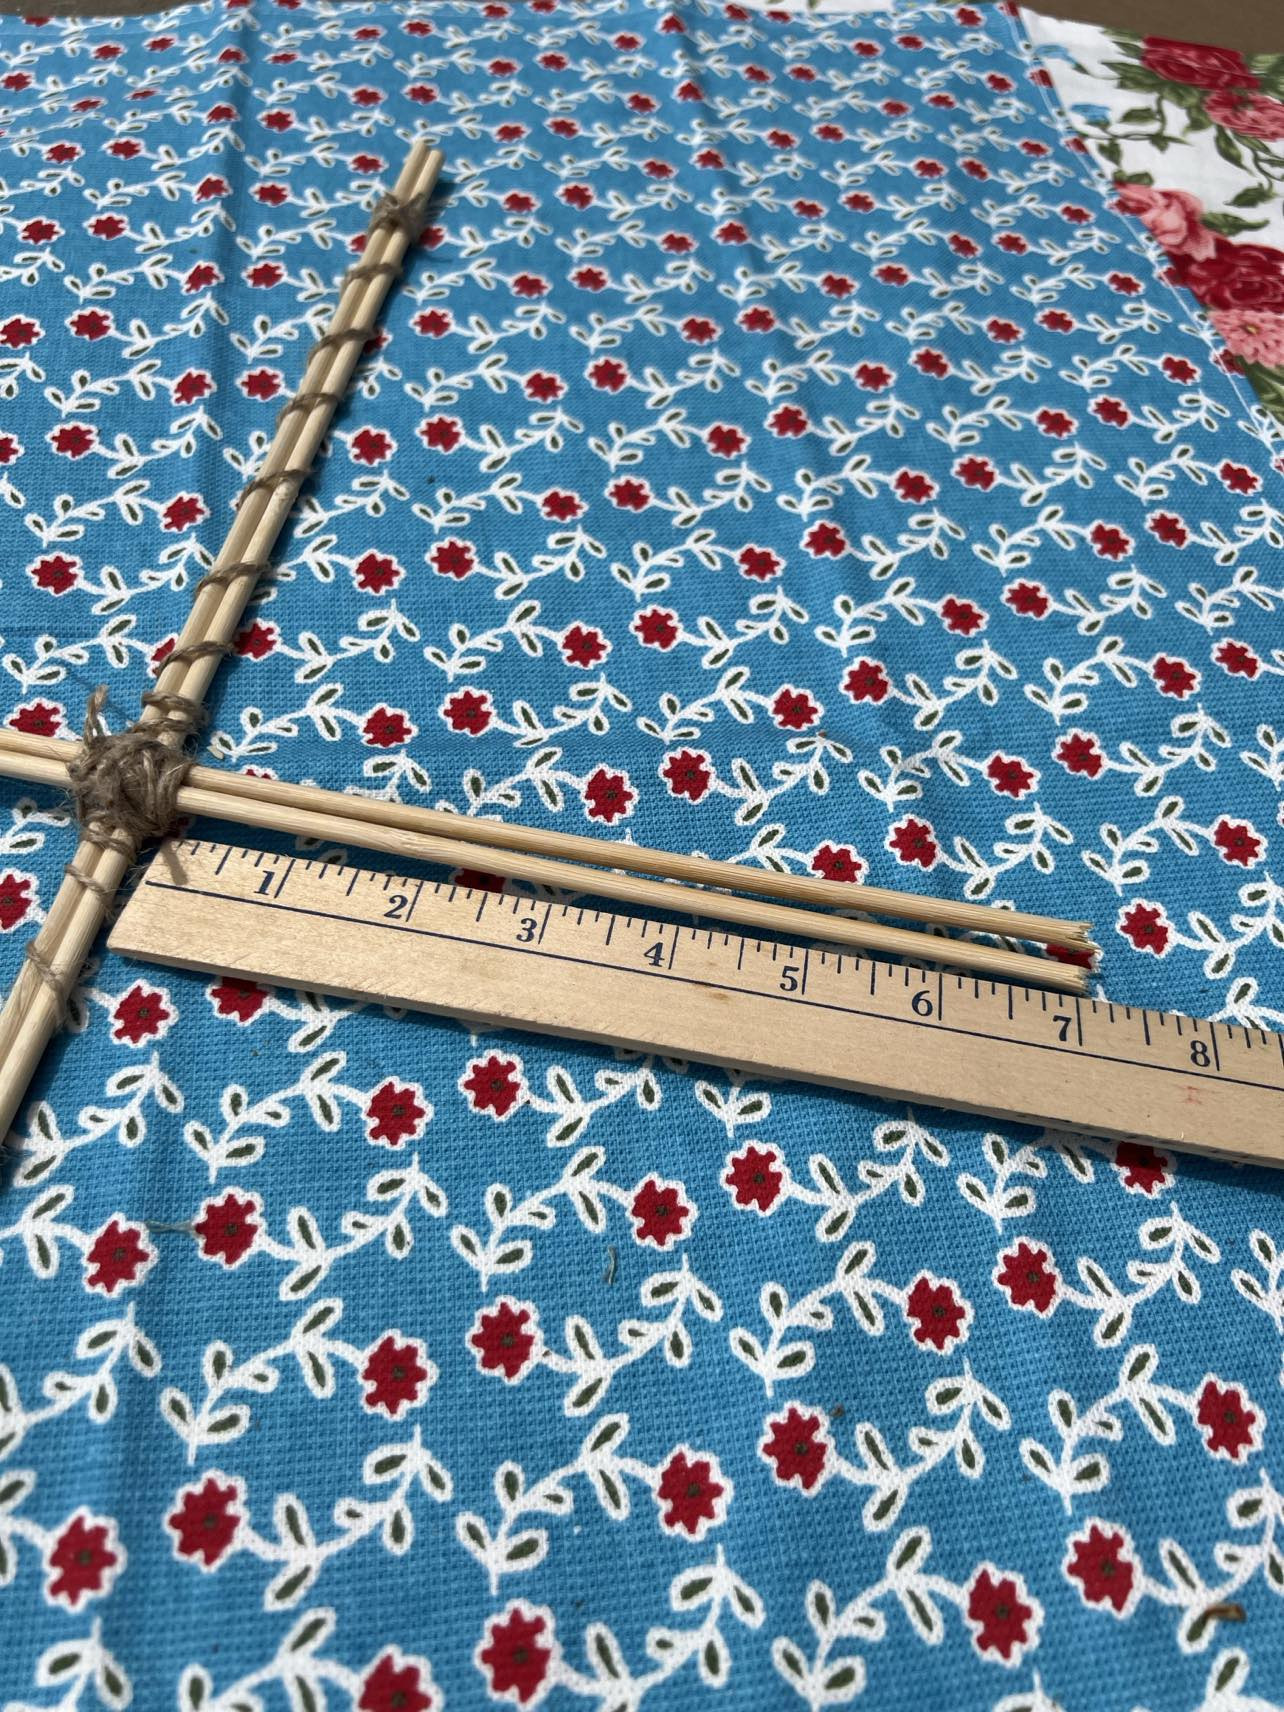
Cut the skewers extending outwards on each side to approximately 7 inches from the center point, shaping the kite frame.
 Cutting the edges of the bamboo skewer kite frame to shape
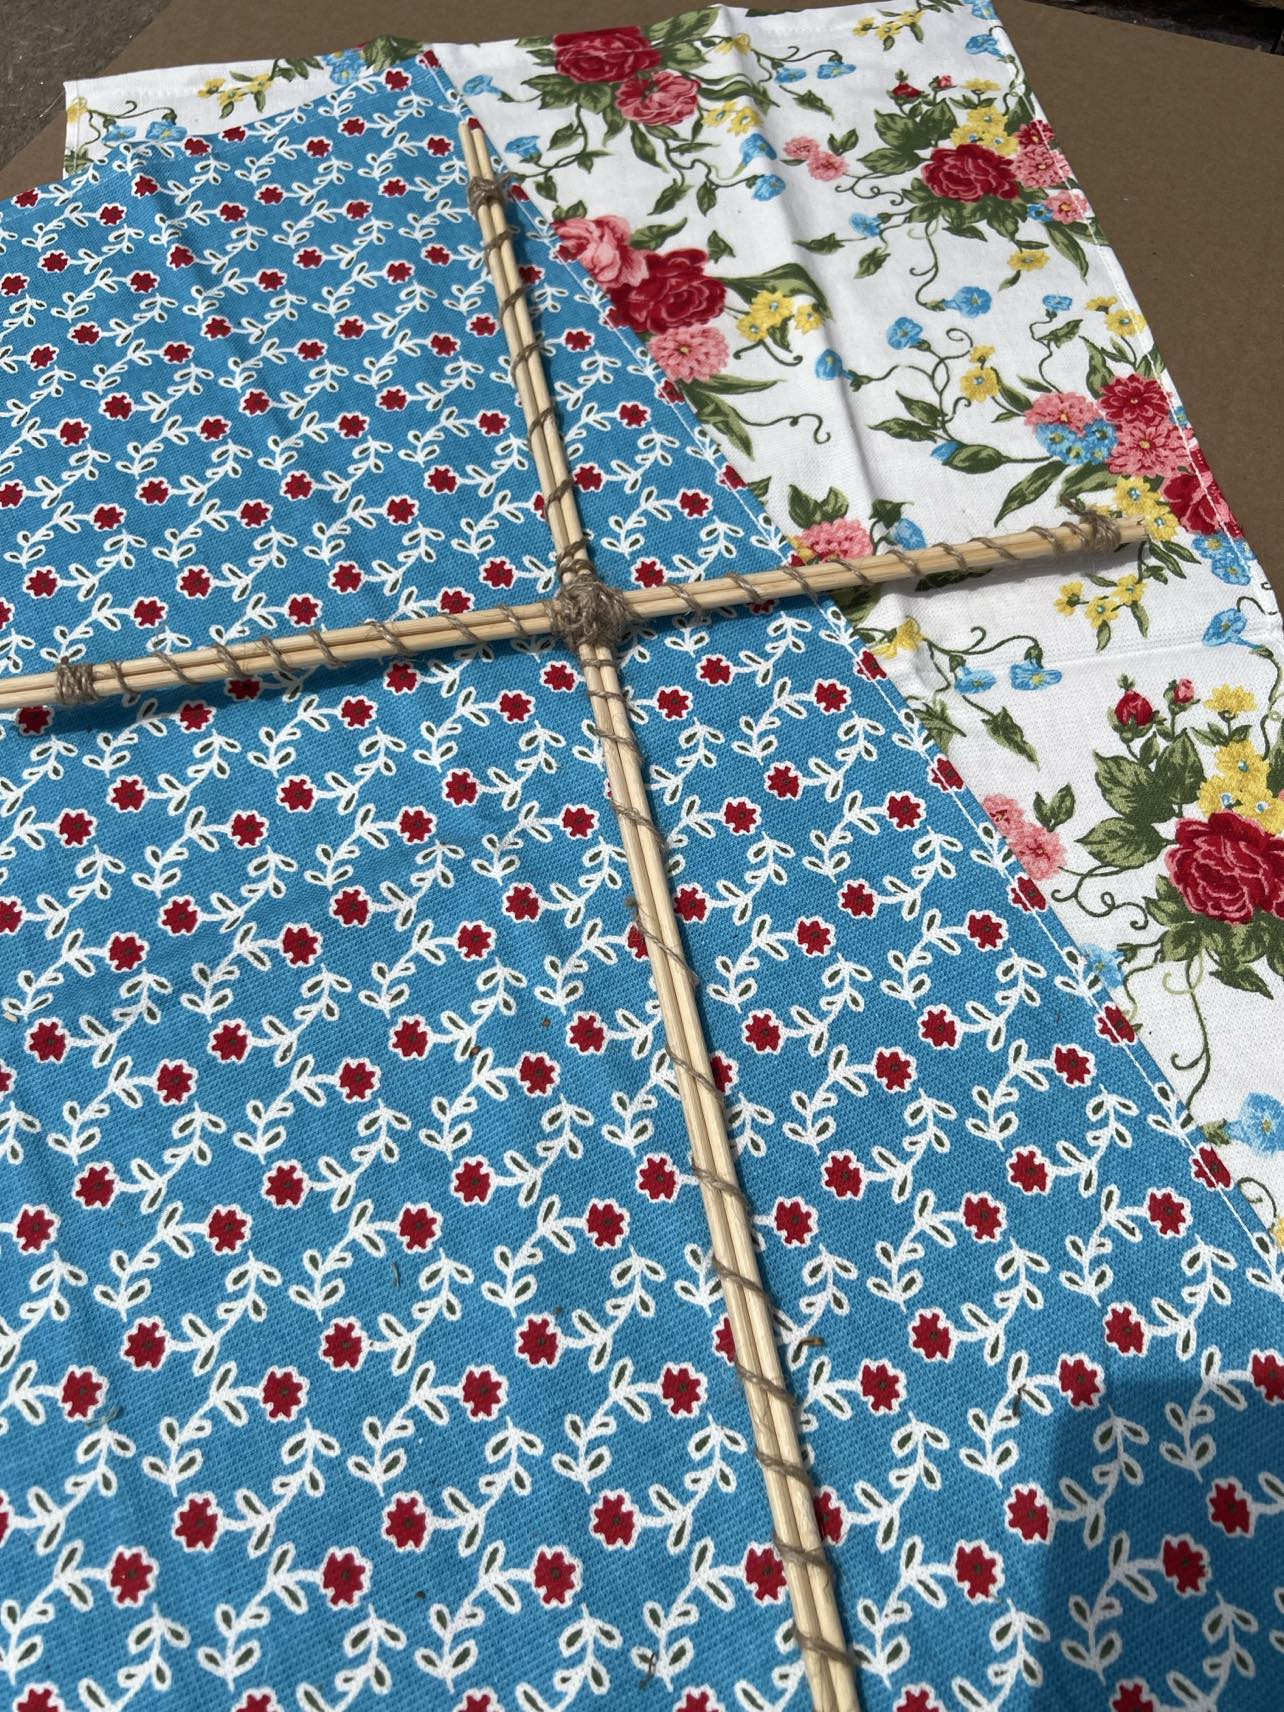
Your completed kite frame should resemble this shape, ready for fabric covering.
 Finished bamboo skewer kite frame ready for fabric
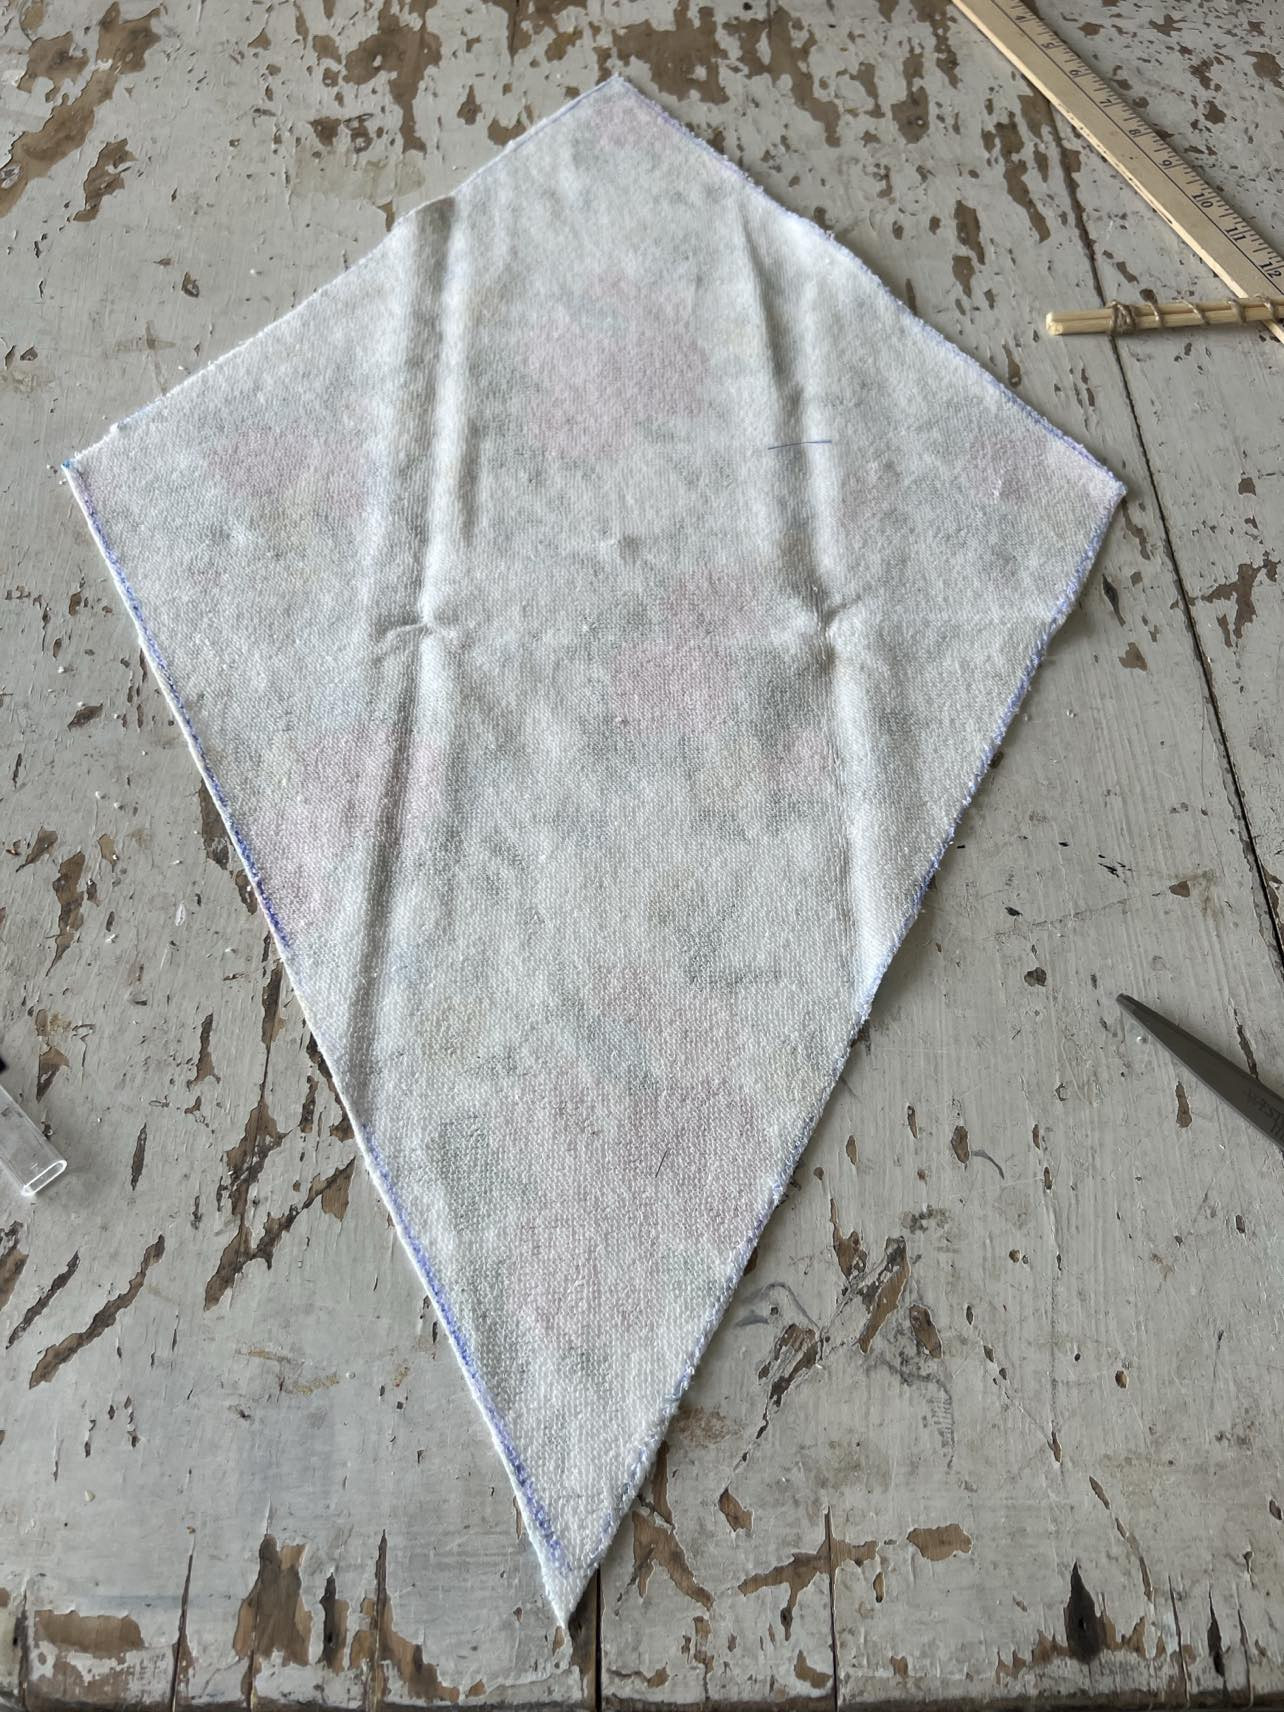
Step 5: Cut the Kite Shape from Pioneer Woman Dish Towels
Place your kite frame onto the back side of one of your Pioneer Woman dish towels and trace the kite shape onto the fabric.
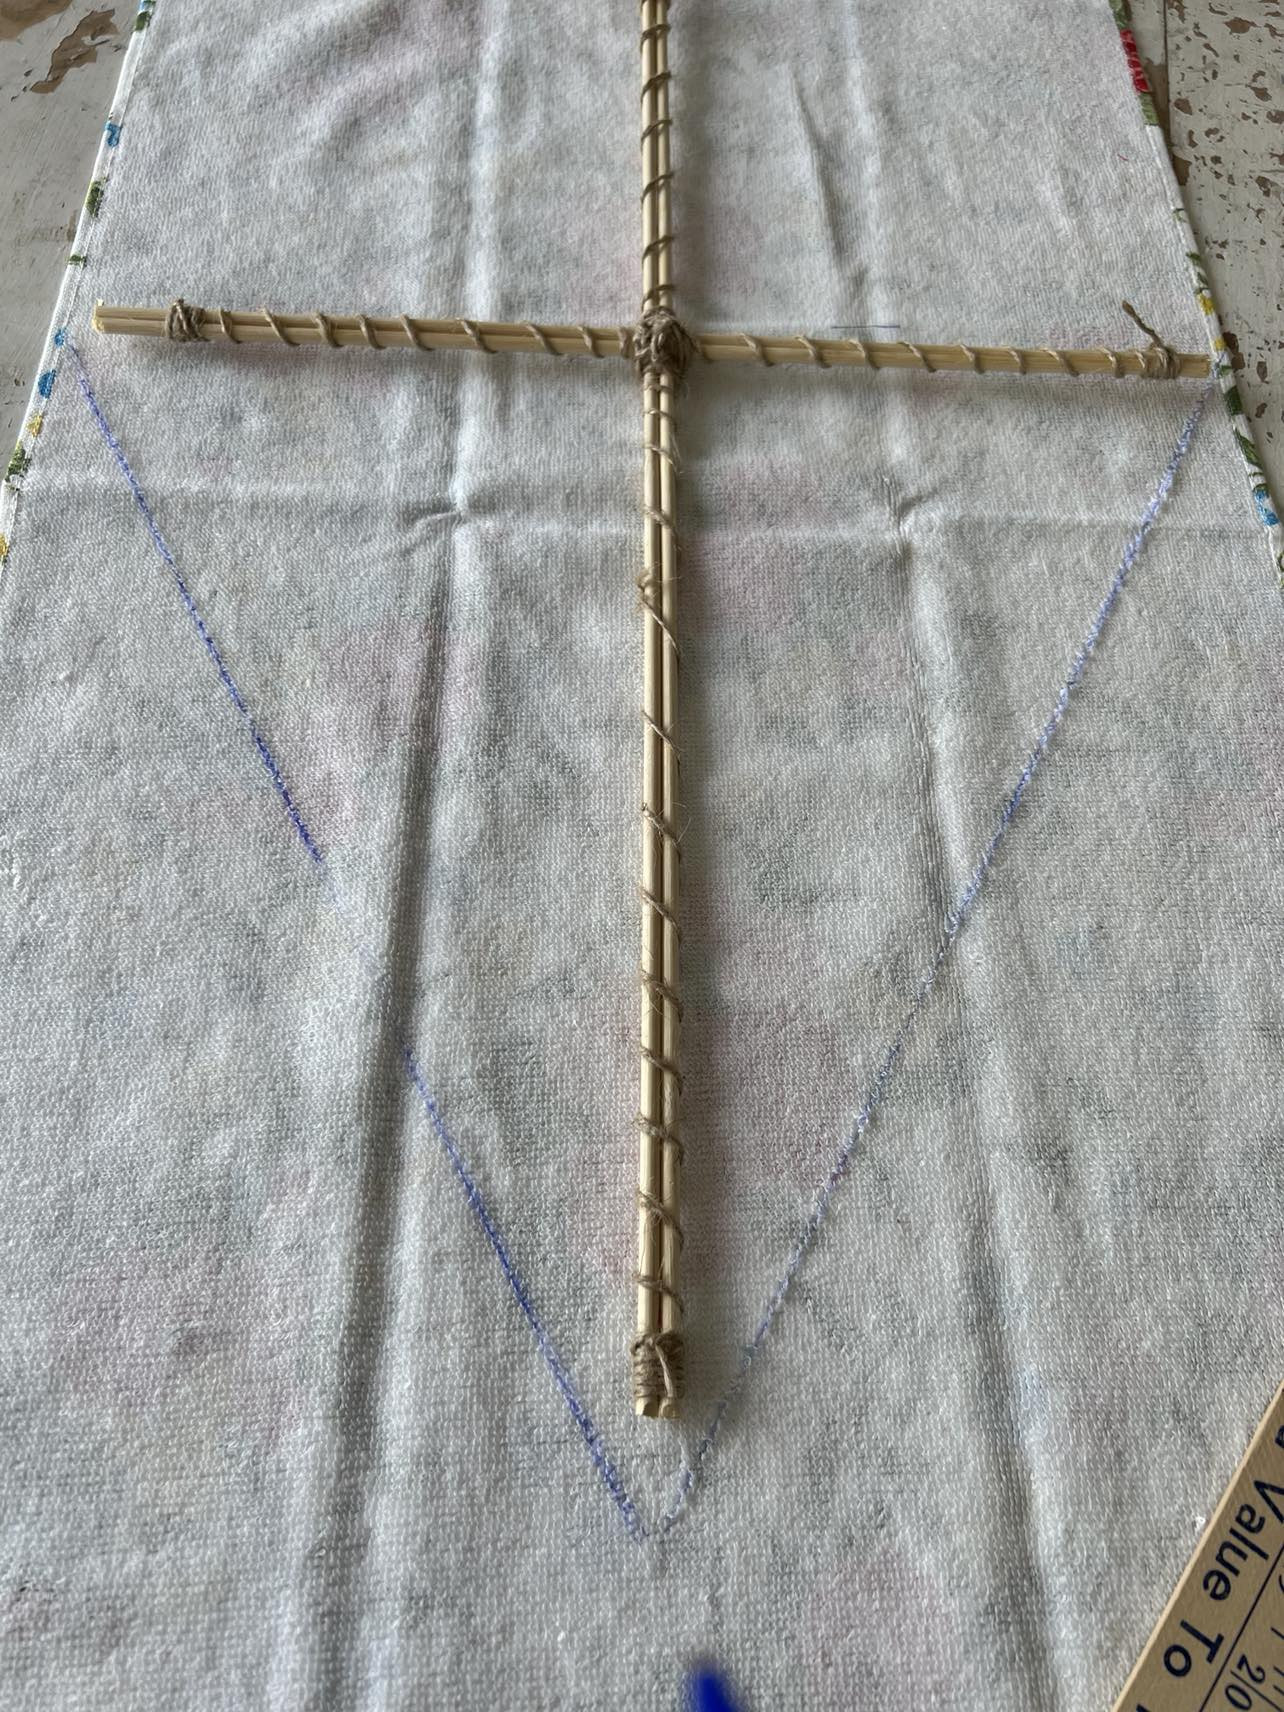 Tracing the kite frame shape onto the back of a Pioneer Woman dish towel
 Close up of traced kite shape on Pioneer Woman dish towel
Once you have the kite shape drawn, carefully cut it out from the dish towel fabric.
 Cutting out the kite shape from Pioneer Woman dish towel
 Cut out kite shape from Pioneer Woman dish towel fabric
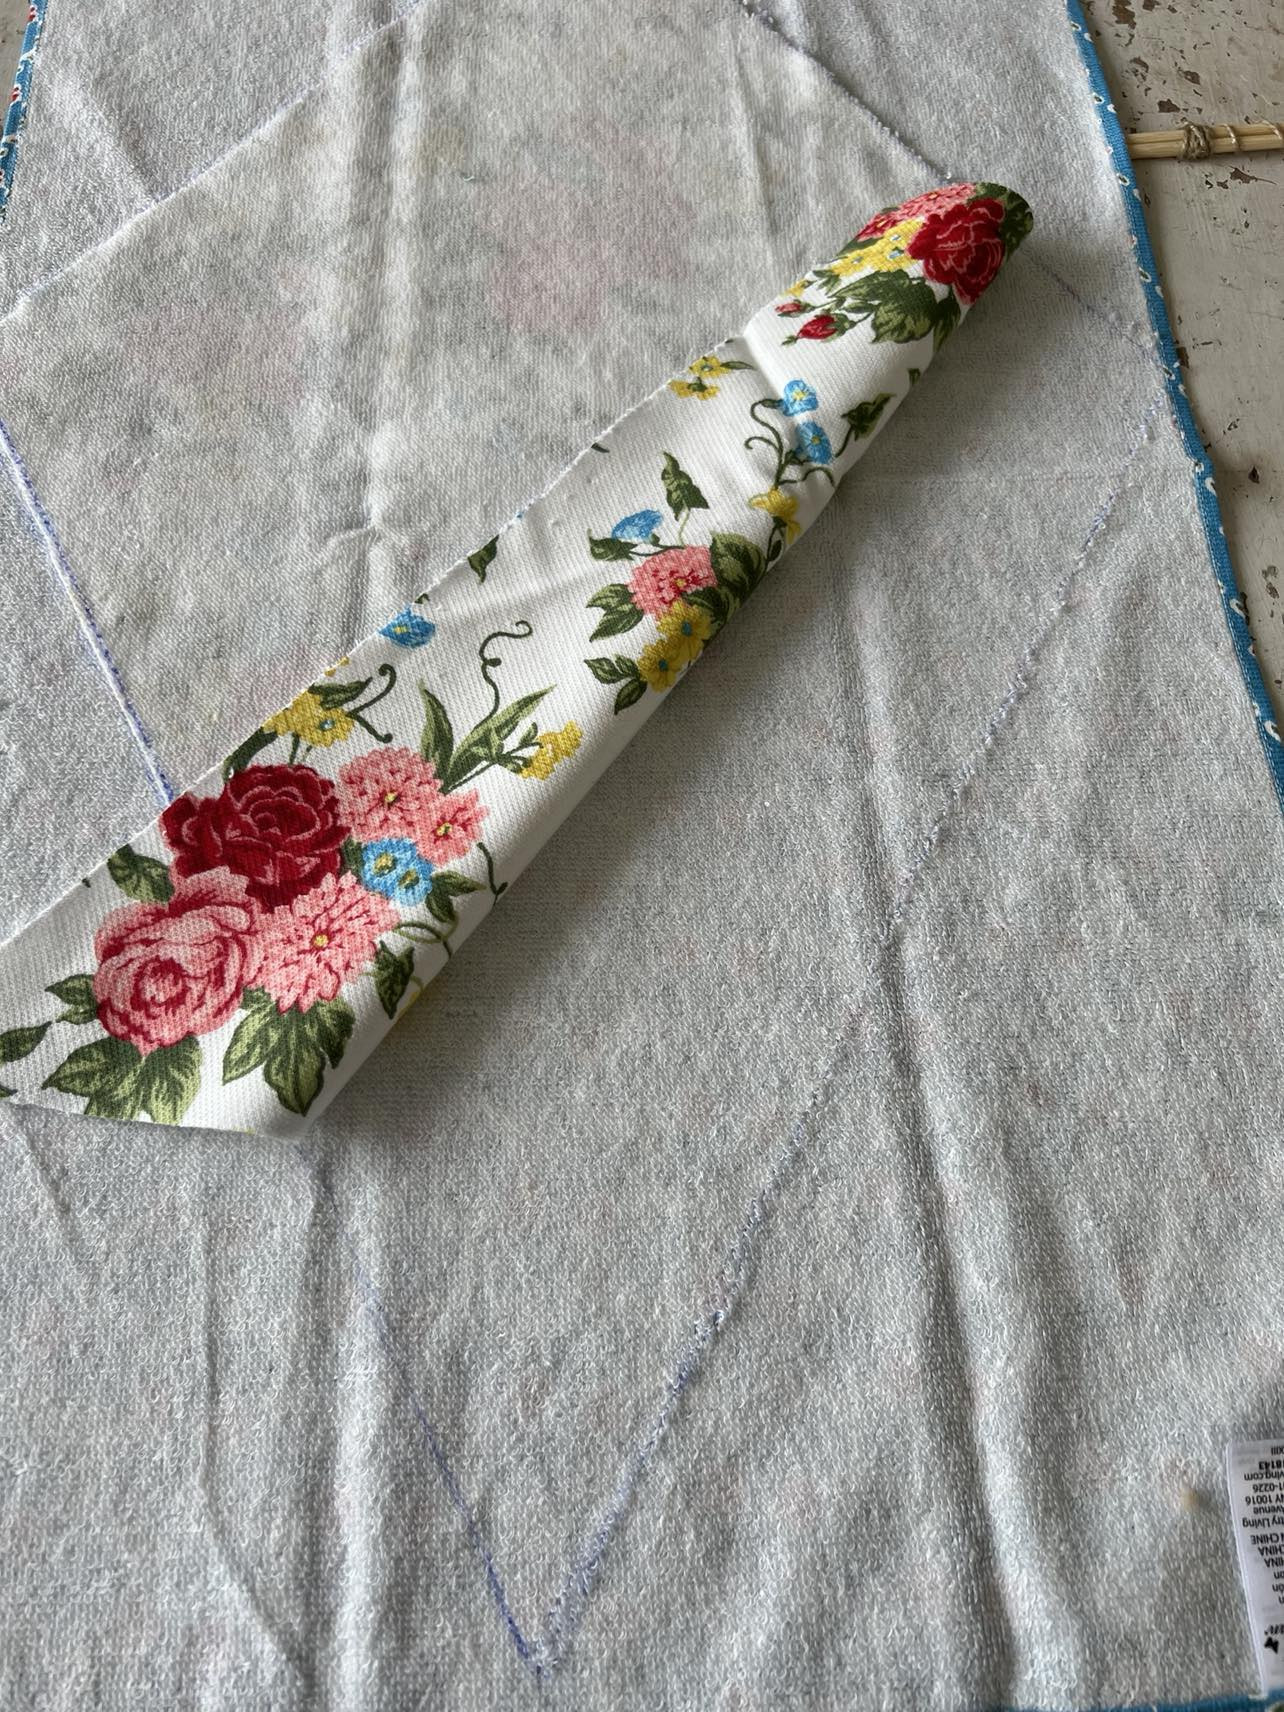
Use the first fabric kite cutout as a template to trace and cut an identical kite shape from the second Pioneer Woman dish towel. This ensures both sides of your kite are uniform.
 Tracing the first fabric kite cutout onto a second Pioneer Woman dish towel
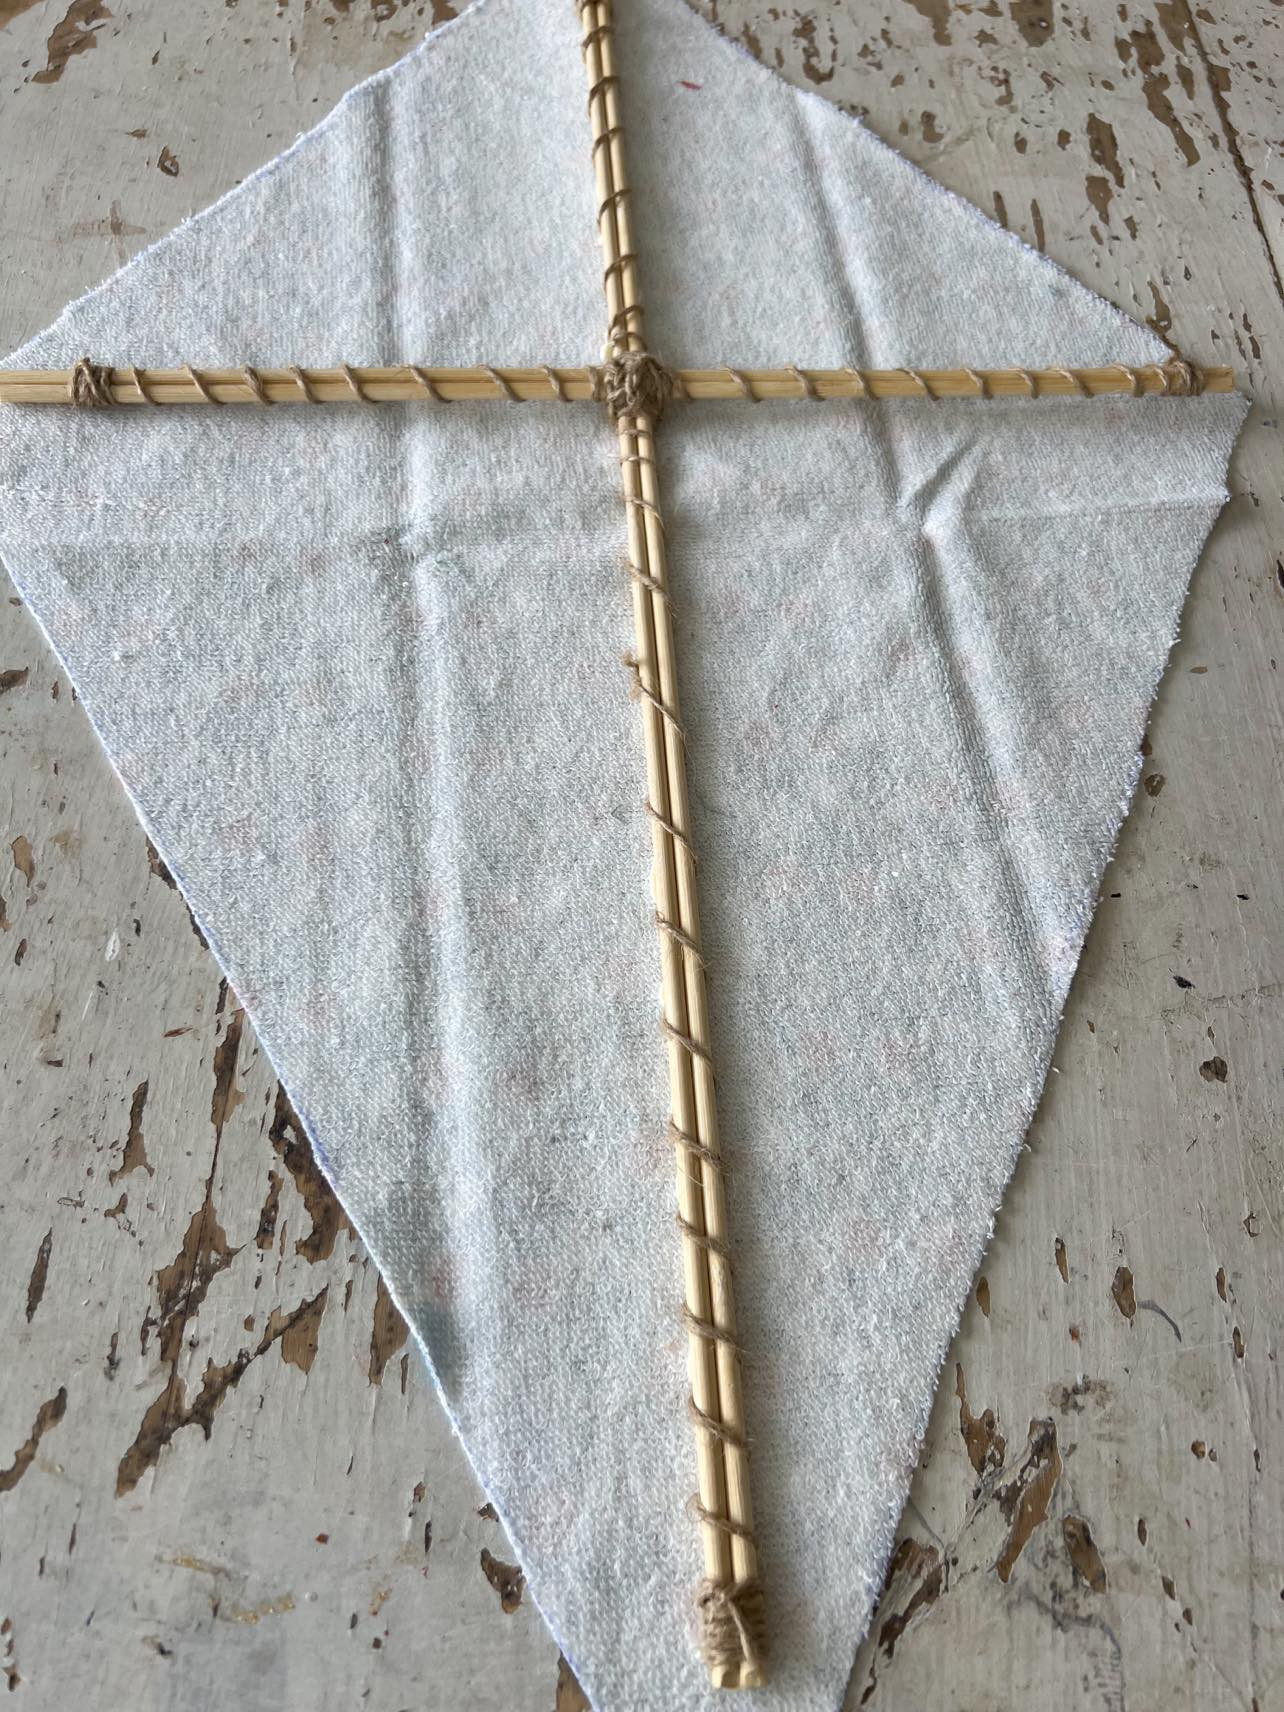
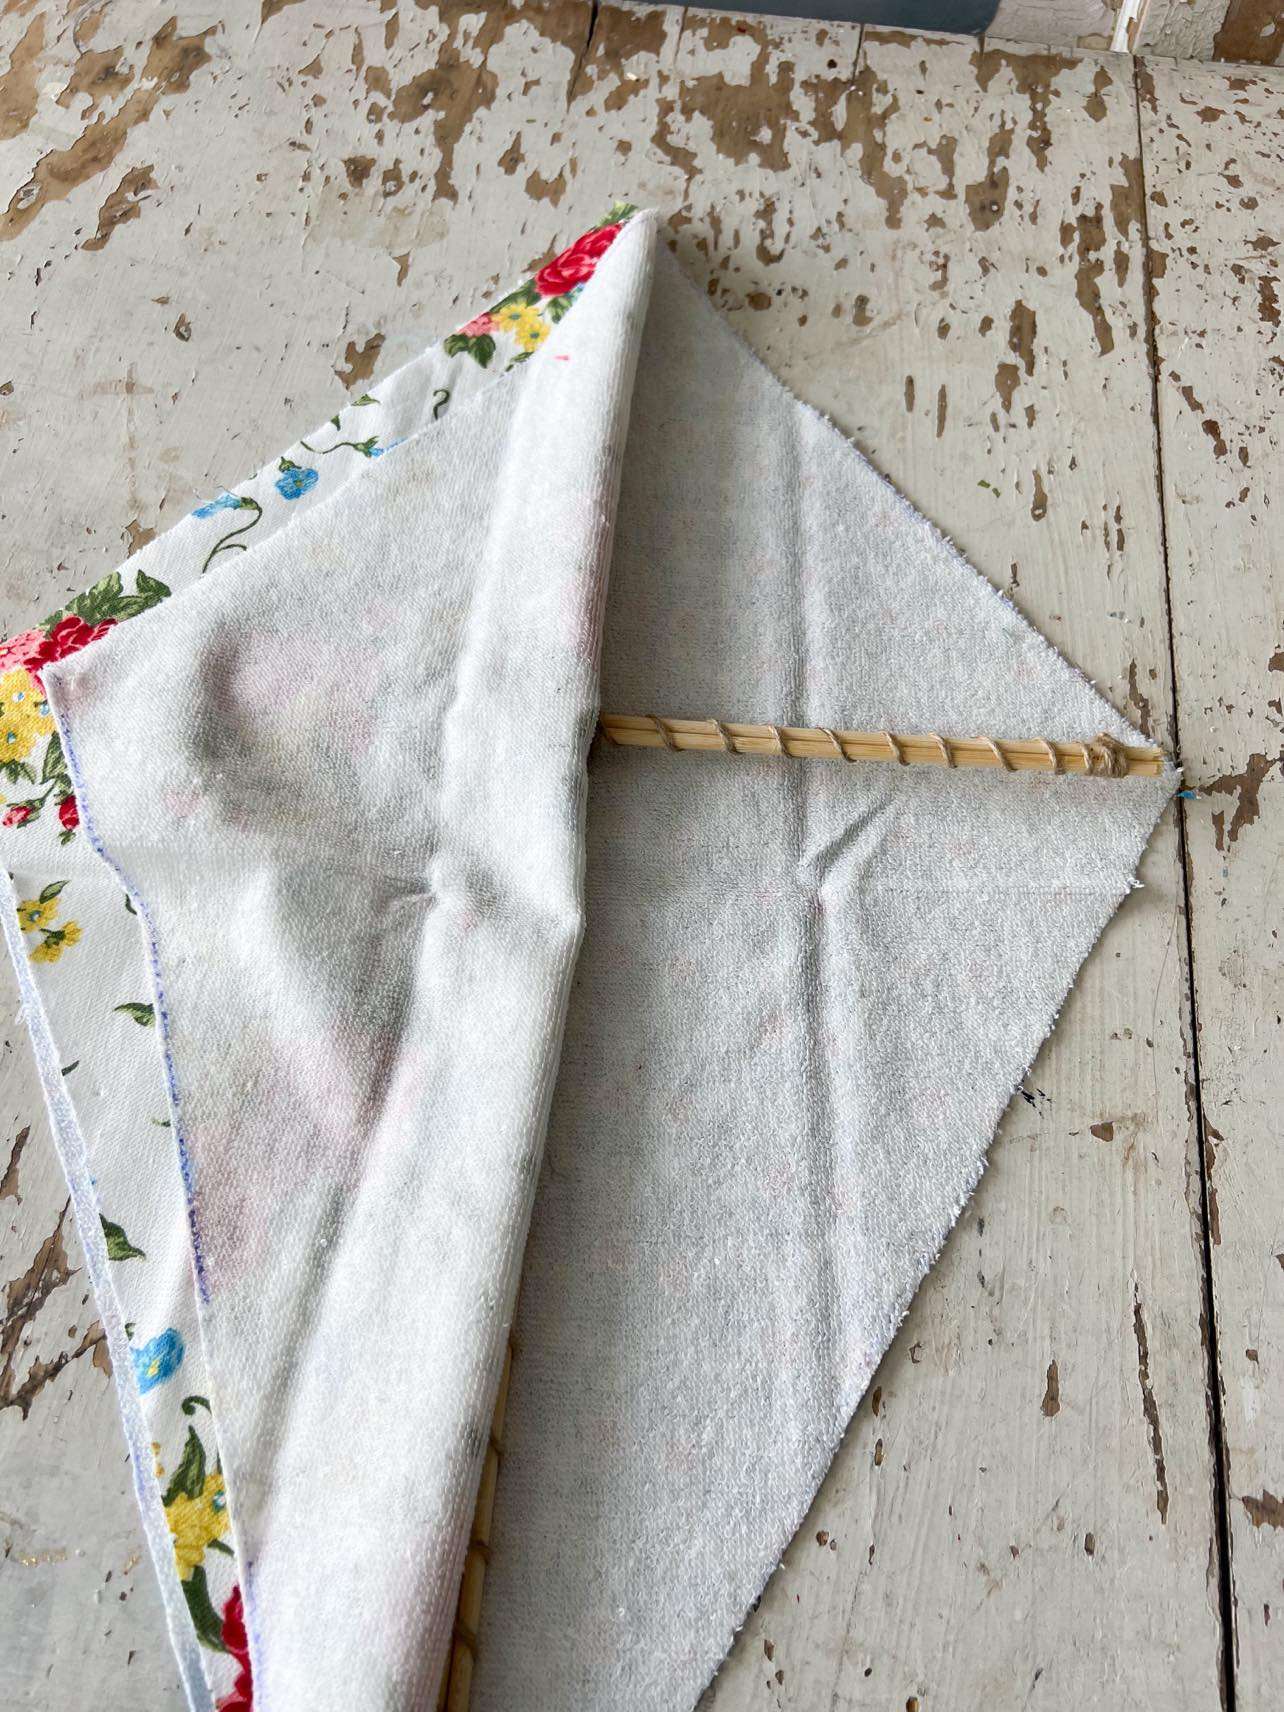
Step 6: Attach the Frame to the Dish Towel Fabric
With both towel pieces cut, it’s time to attach the frame. Apply fabric glue along the center skewers of your prepared bamboo frame, as shown.
 Applying fabric glue to the bamboo skewer kite frame
Carefully place the frame onto the back side of one of the dish towel kite cutouts, pressing gently to secure the glue.
 Attaching the bamboo skewer frame to the Pioneer Woman dish towel kite fabric
Position the second dish towel cutout on top, ensuring the good side of the fabric is facing outwards. Apply glue to one side of the skewers.
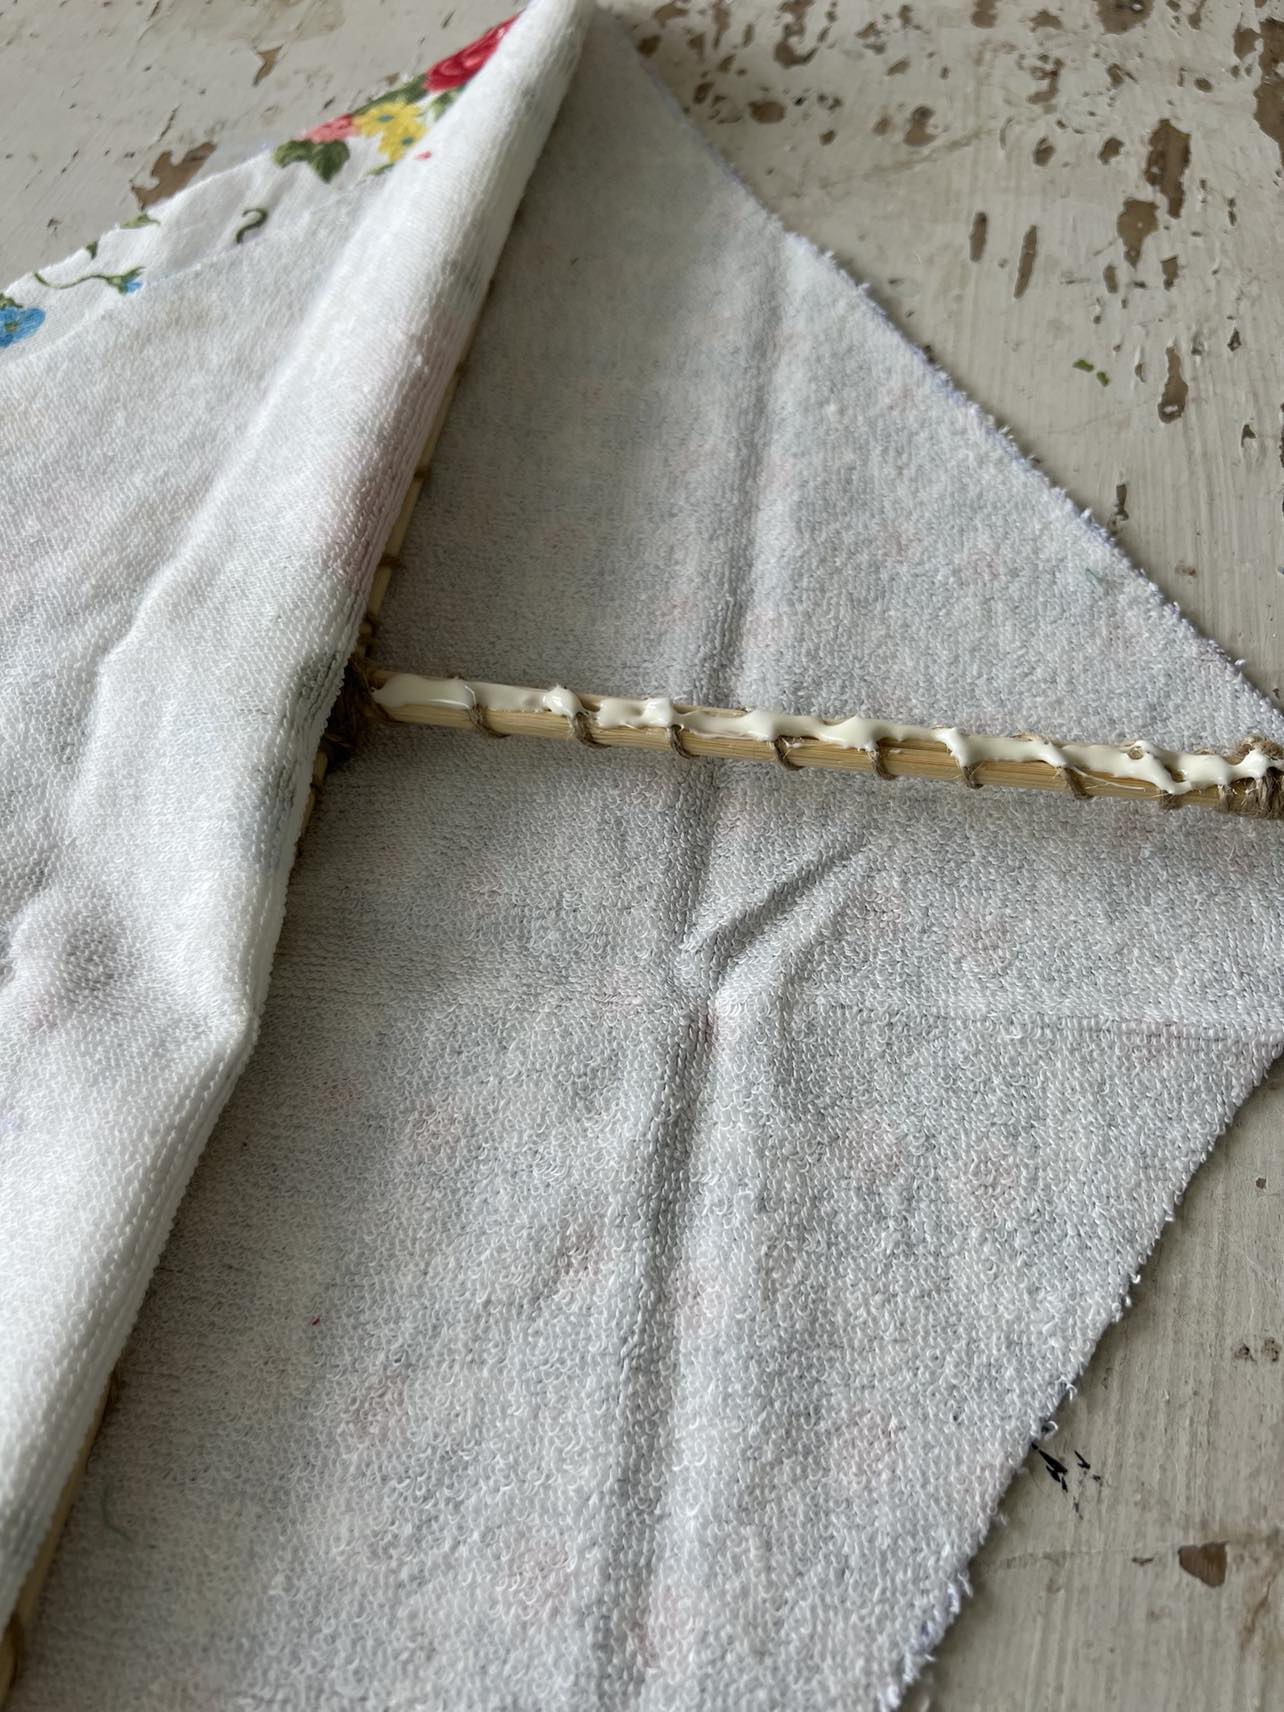 Adding fabric glue to the side of the bamboo skewer kite frame for the second fabric layer
Carefully lay the second dish towel piece onto the glued skewers and repeat for the other side. Once the towels are adhered to the skewers, apply fabric glue around the entire edges of the kite shape to seal the two fabric pieces together.
 Gluing the second Pioneer Woman dish towel layer onto the kite frame and first fabric layer
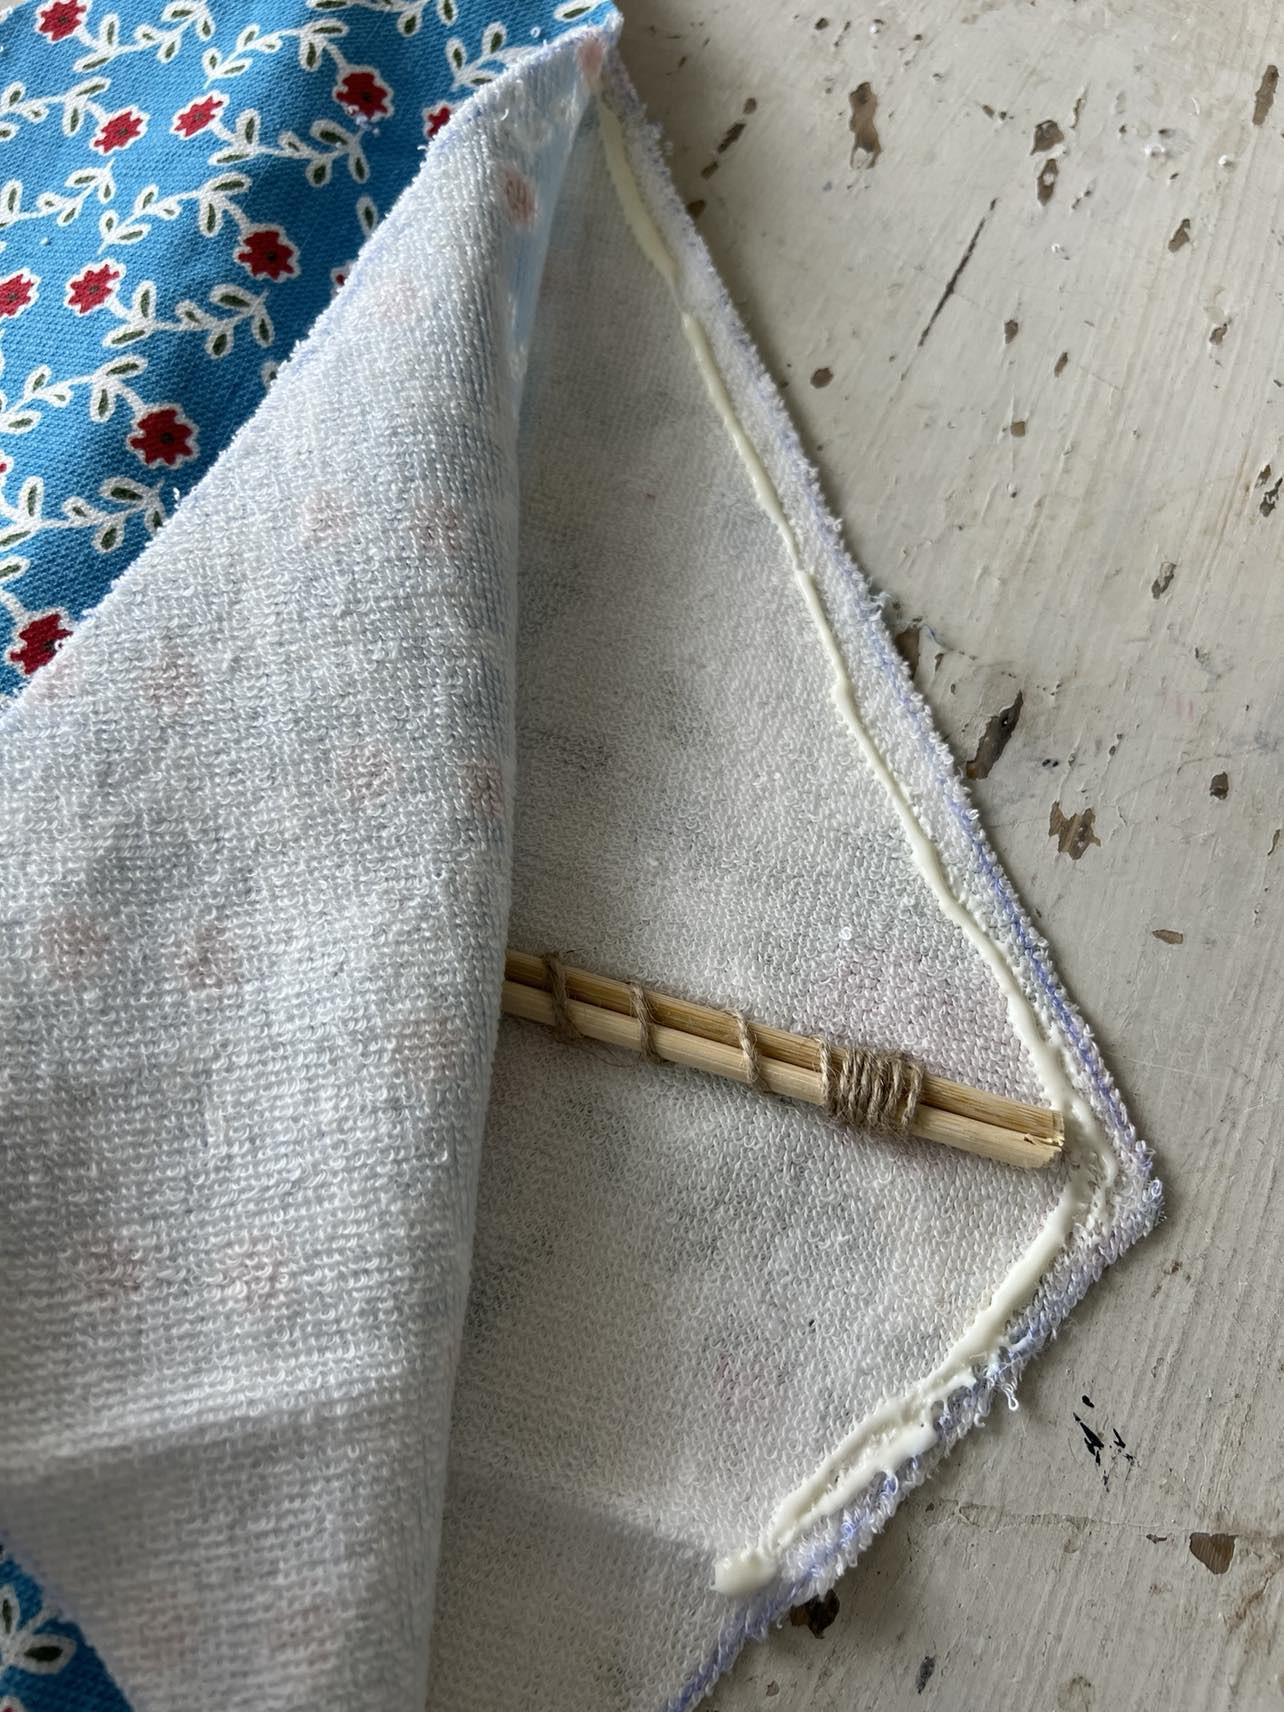 Sealing the edges of the Pioneer Woman dish towel kite with fabric glue
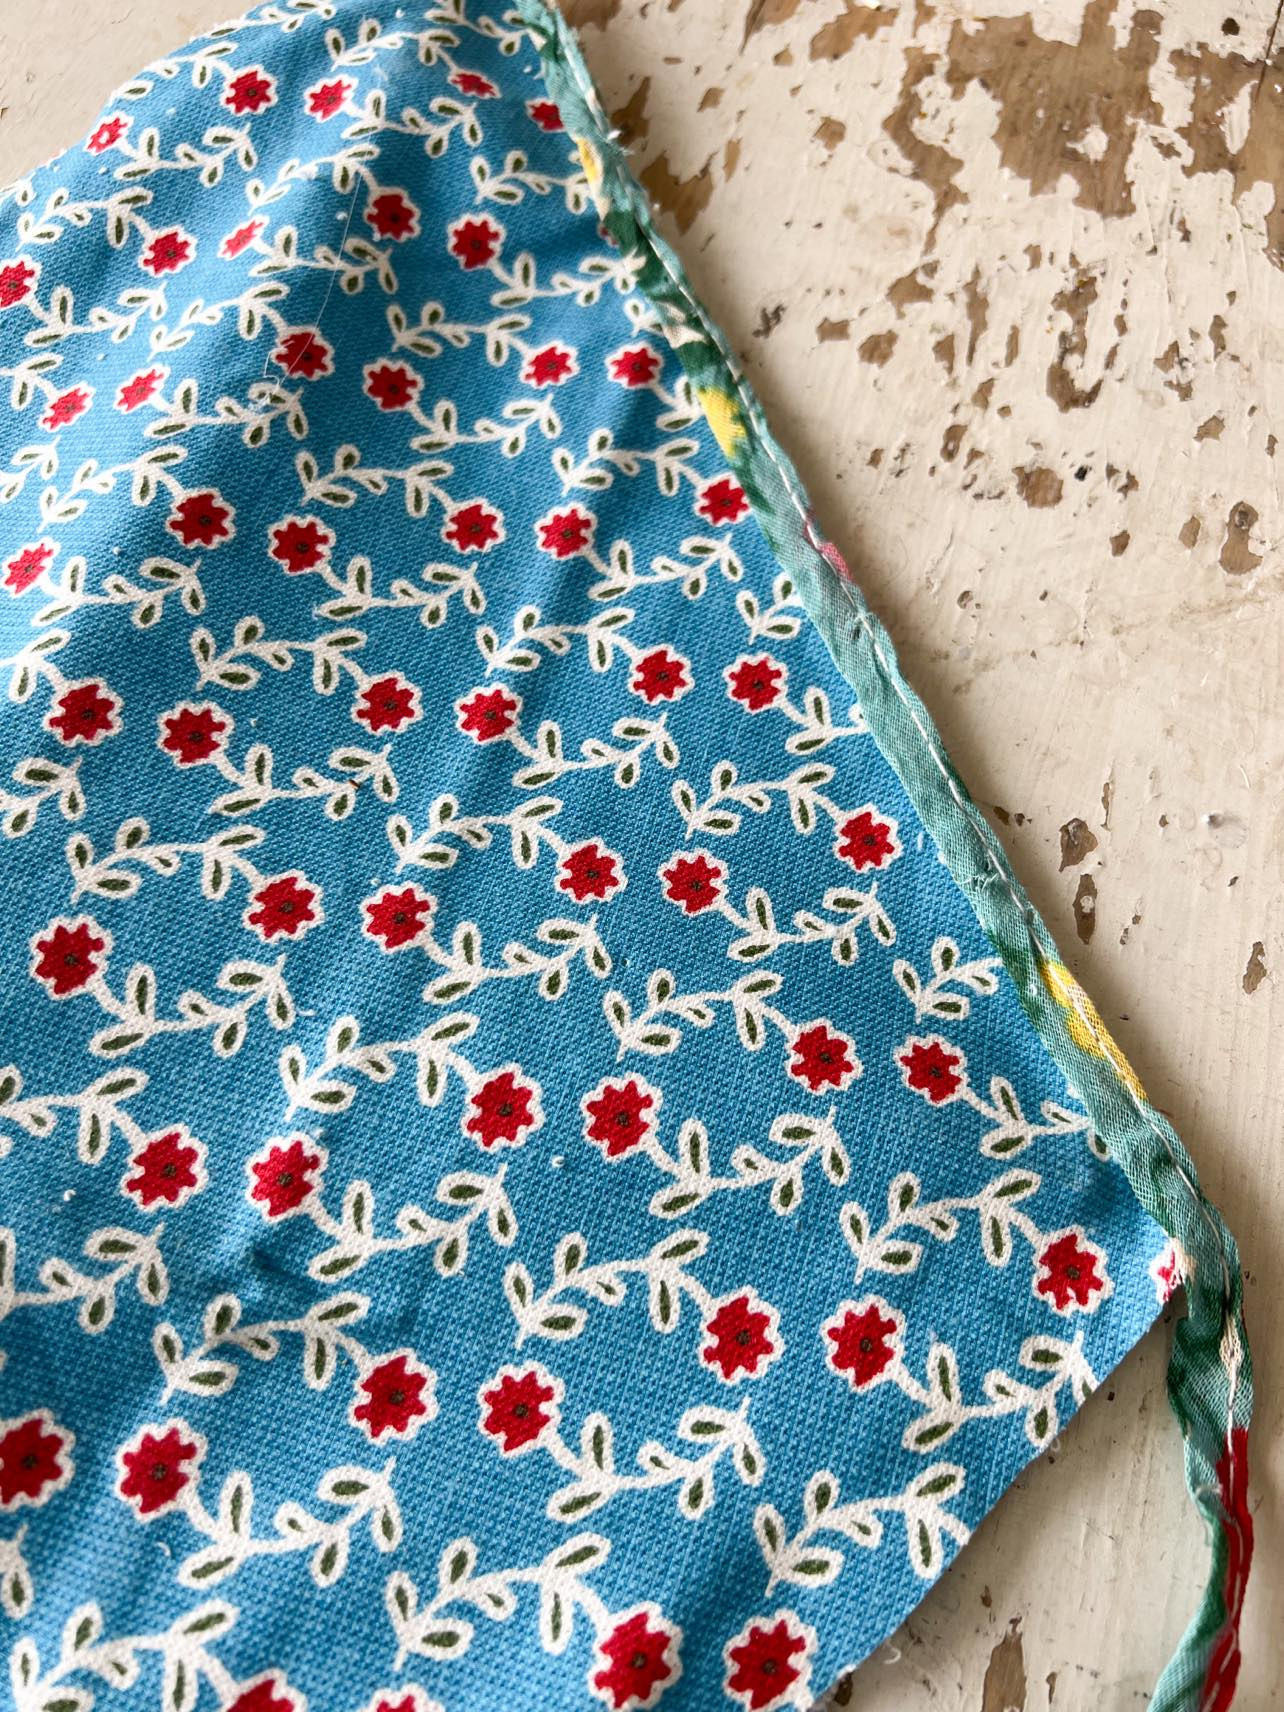 Close up of sealed edges of the DIY Pioneer Woman dish towel kite
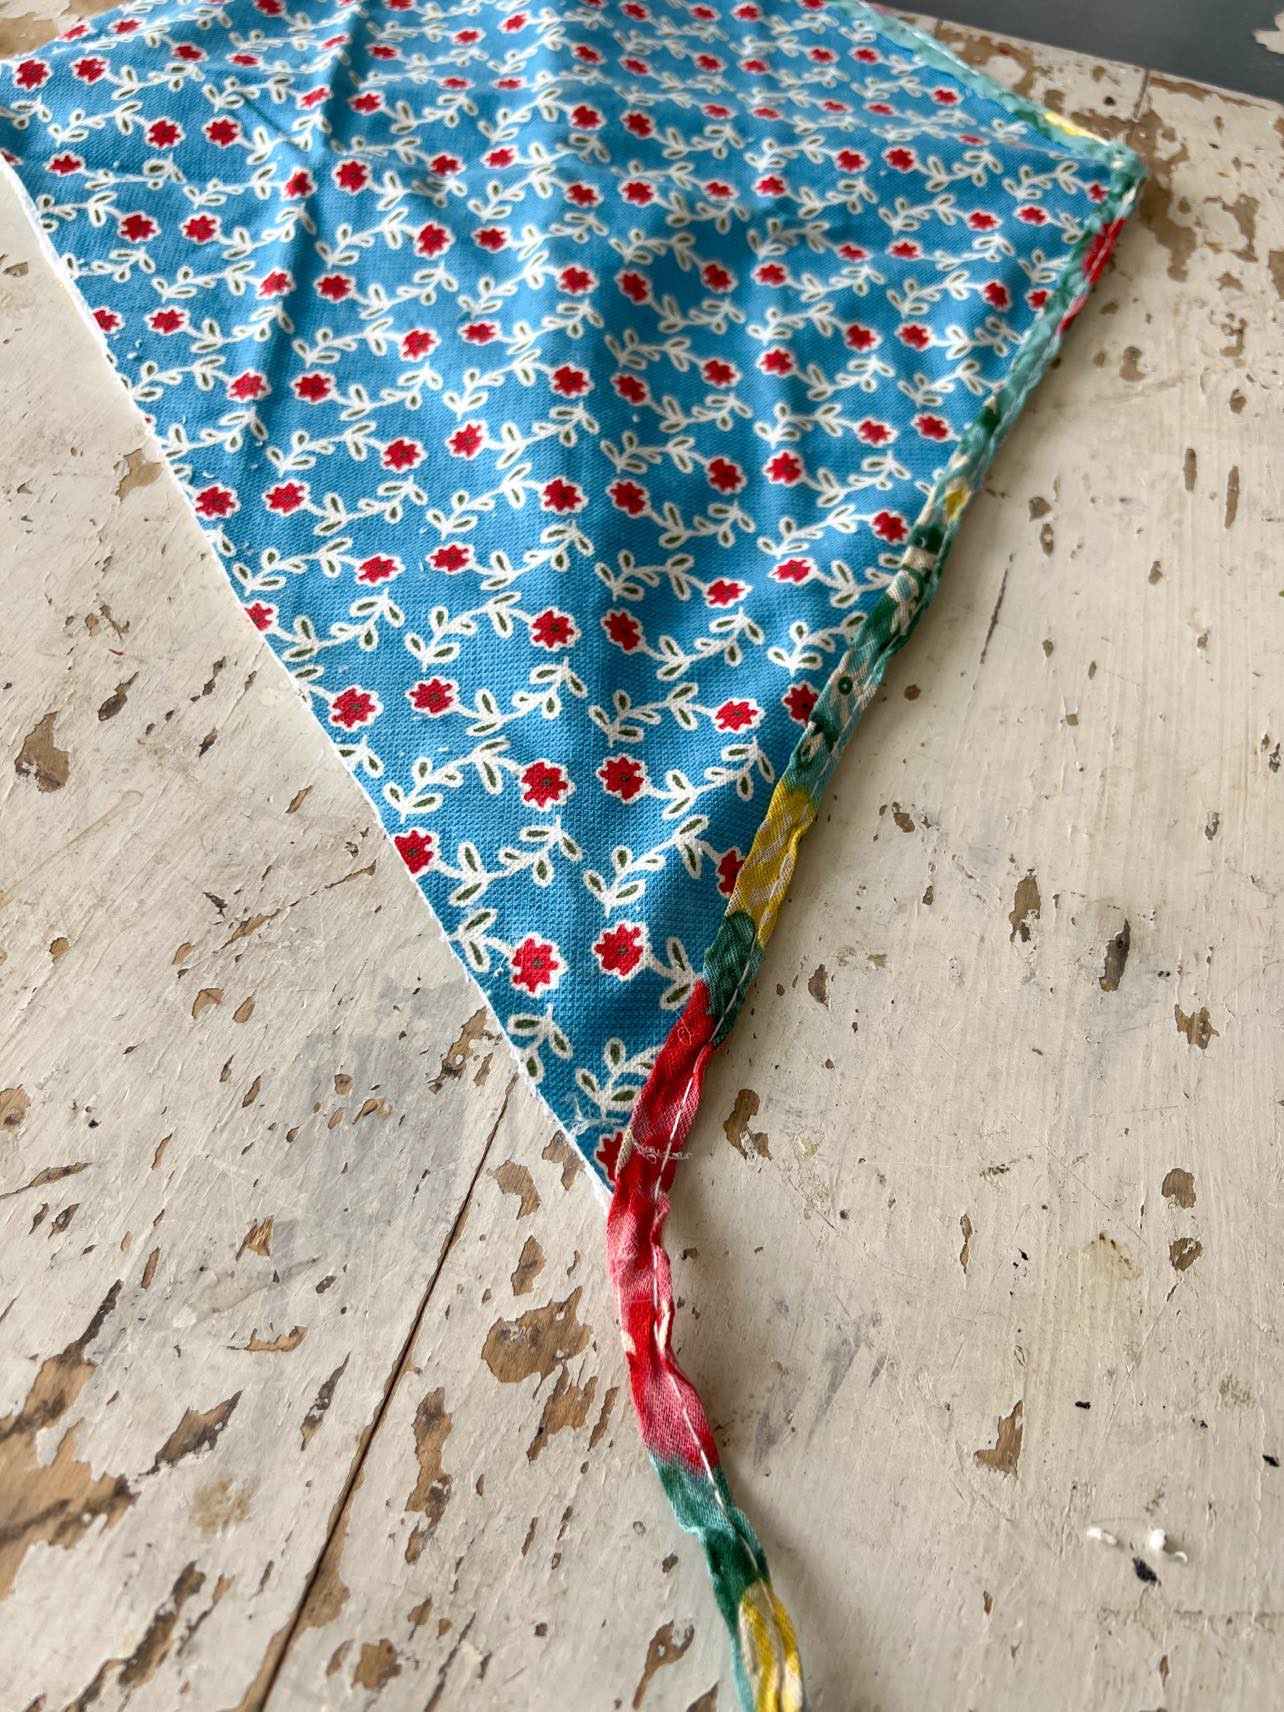
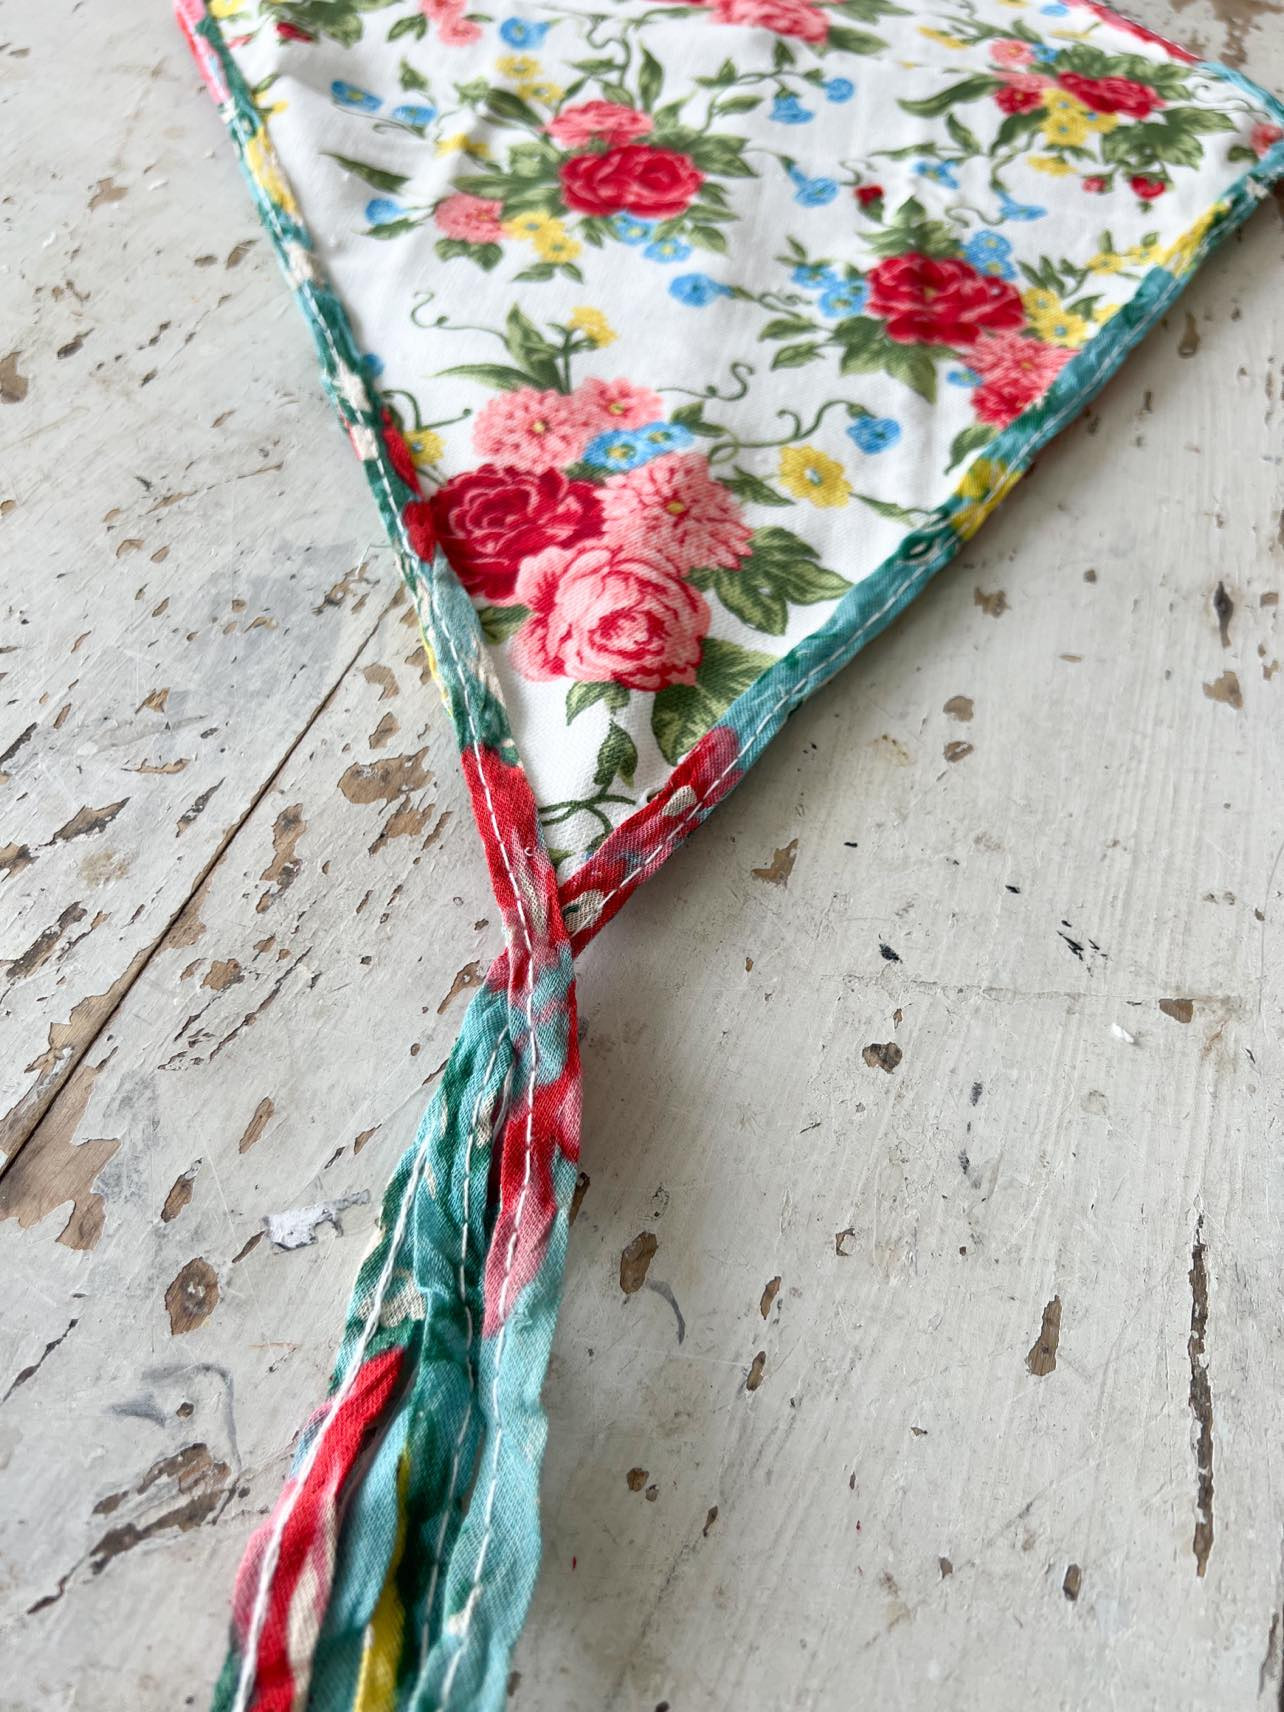
Step 7: Add the Braided Placemat Strips for the Kite Tail
Once the towels are securely glued together, begin adding the strips from the unraveled braided placemat to create the kite’s tail. Start at the top point of the kite and run a strip down one side.
 Attaching braided placemat strips to the side of the Pioneer Woman dish towel kite for tail
Make sure to leave a long strand extending at the bottom to form the tail. Go back to the top and repeat the process down the other side of the kite.
 Creating the kite tail with braided placemat strips on Pioneer Woman dish towel kite
Repeat this process on both sides of the kite, adding more strips for a fuller tail effect.
 Adding braided placemat strips to both sides of the Pioneer Woman dish towel kite
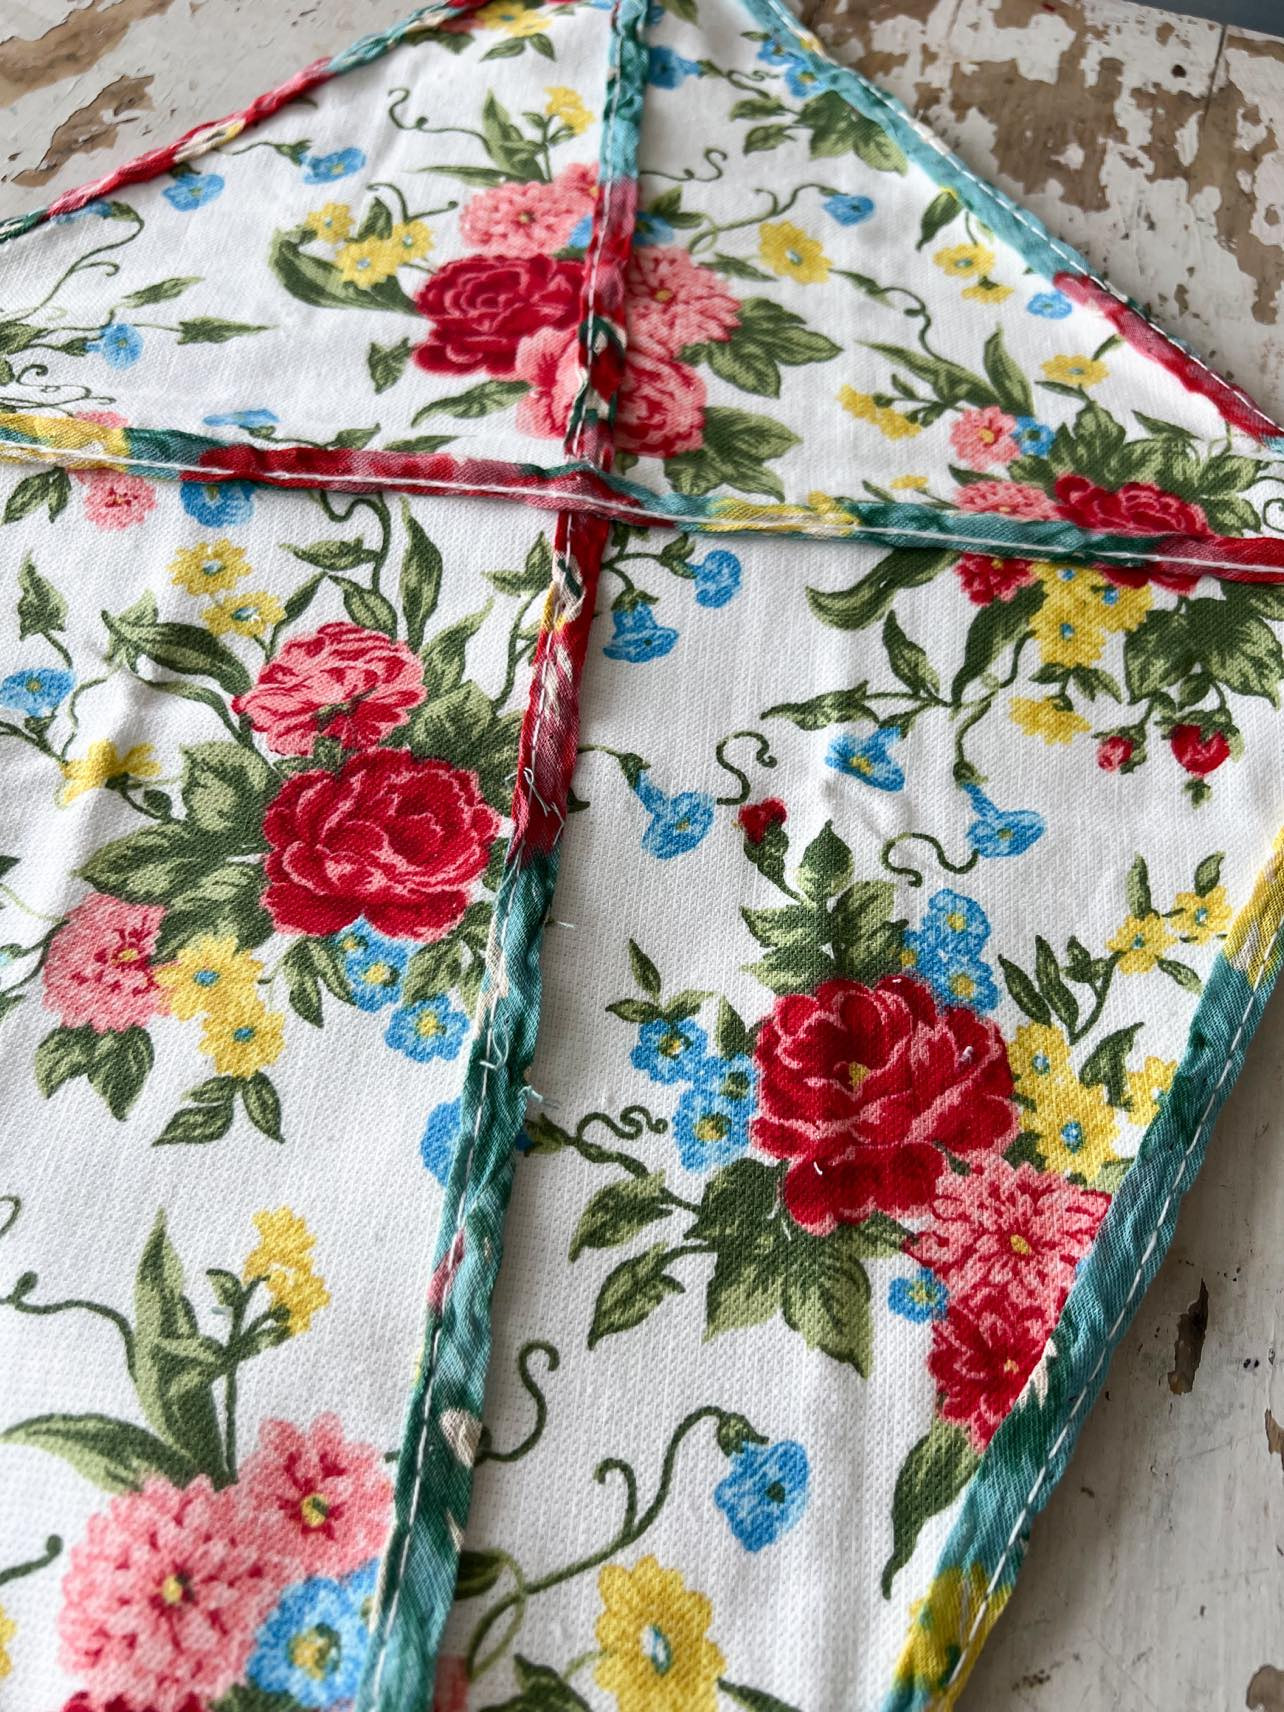
Step 8: Optional Front Fabric Strips and Clothespin
For an extra decorative touch, consider adding some fabric strips to the front side of your kite. This step is entirely optional and allows for further customization.
 Adding optional fabric strips to the front of the Pioneer Woman dish towel kite for decoration
 Close up of optional decorative fabric strips added to the Pioneer Woman dish towel kite
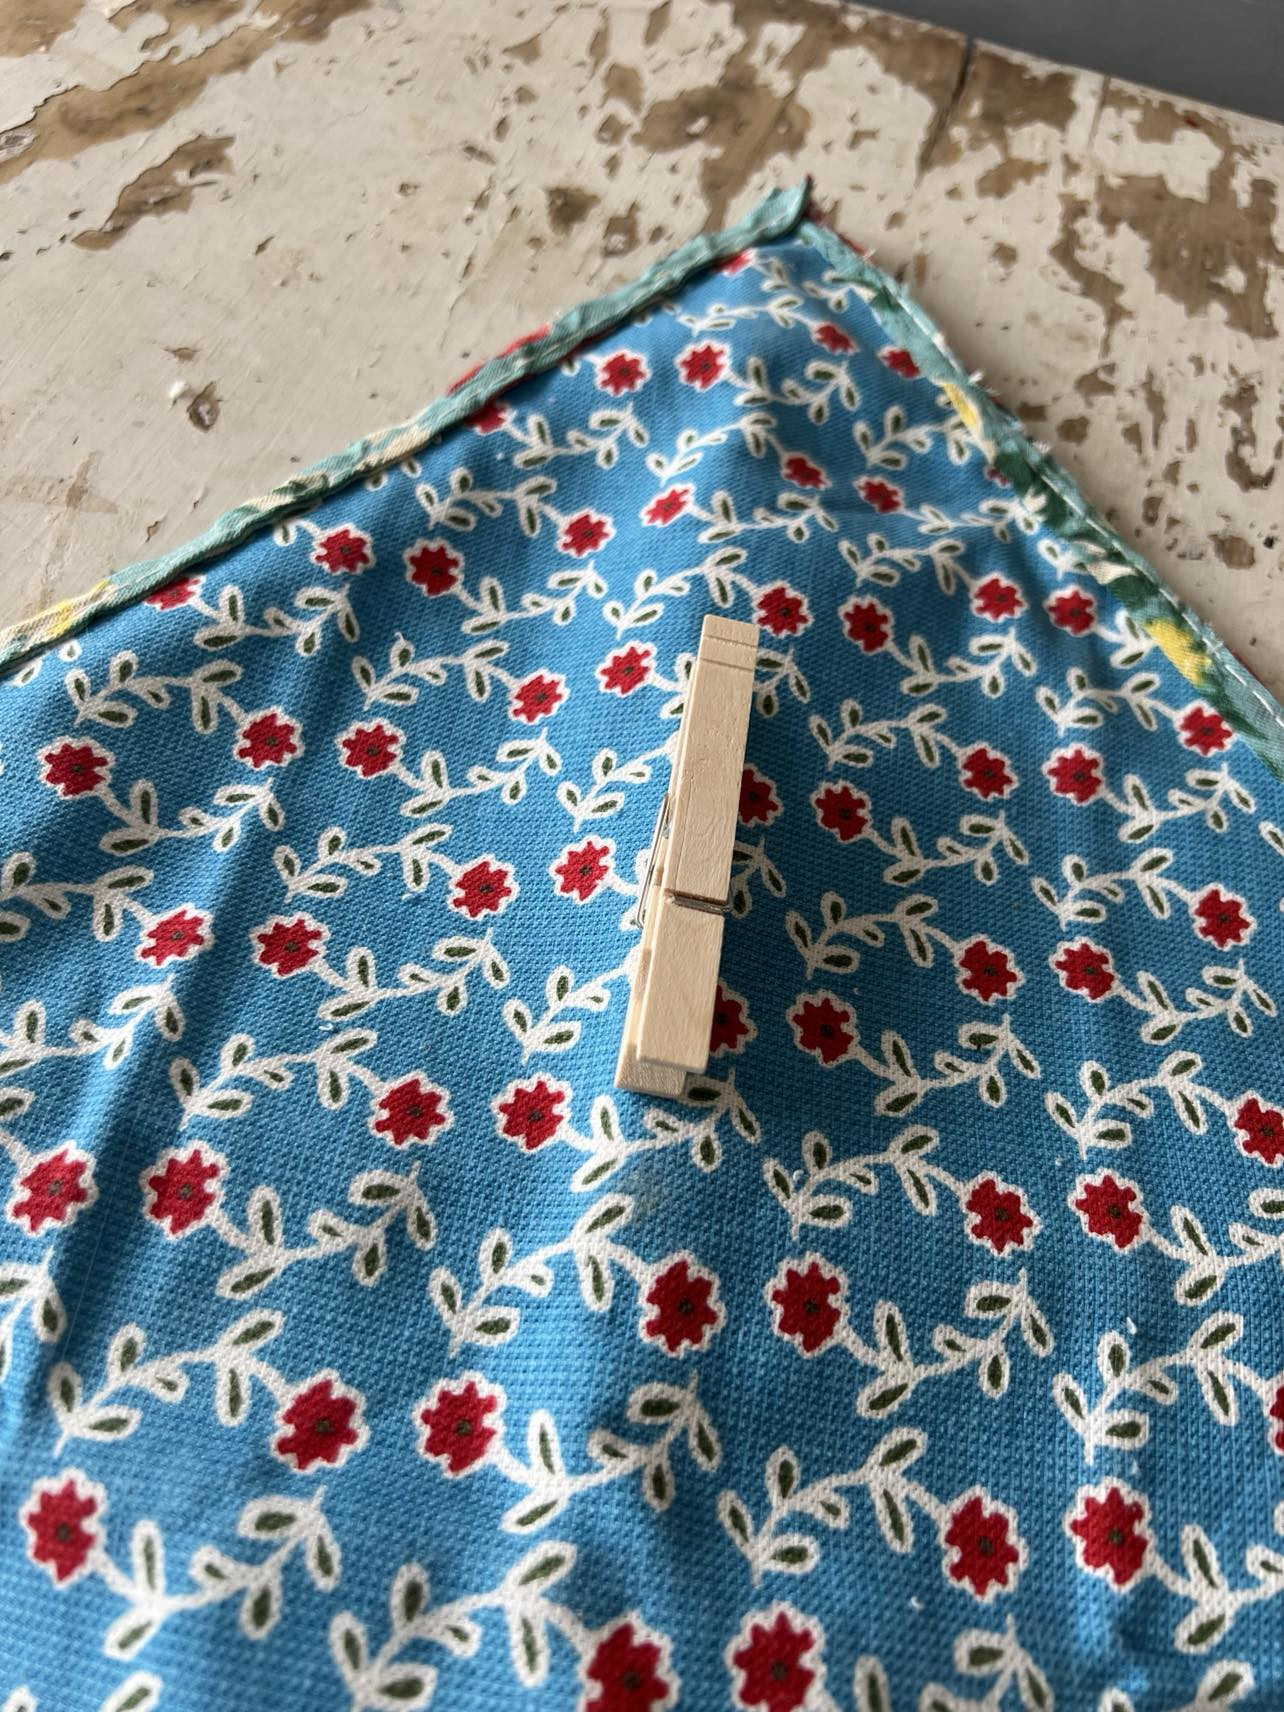
If you plan to hang your kite from a garland or wreath, gluing a clothespin to the back side makes attachment easy. This is an optional step for convenient porch display.
 Gluing a clothespin to the back of the Pioneer Woman dish towel kite for easy hanging
This DIY Pioneer Woman dish towel kite is a simple and enjoyable craft that adds a personalized touch to your summer porch decor.
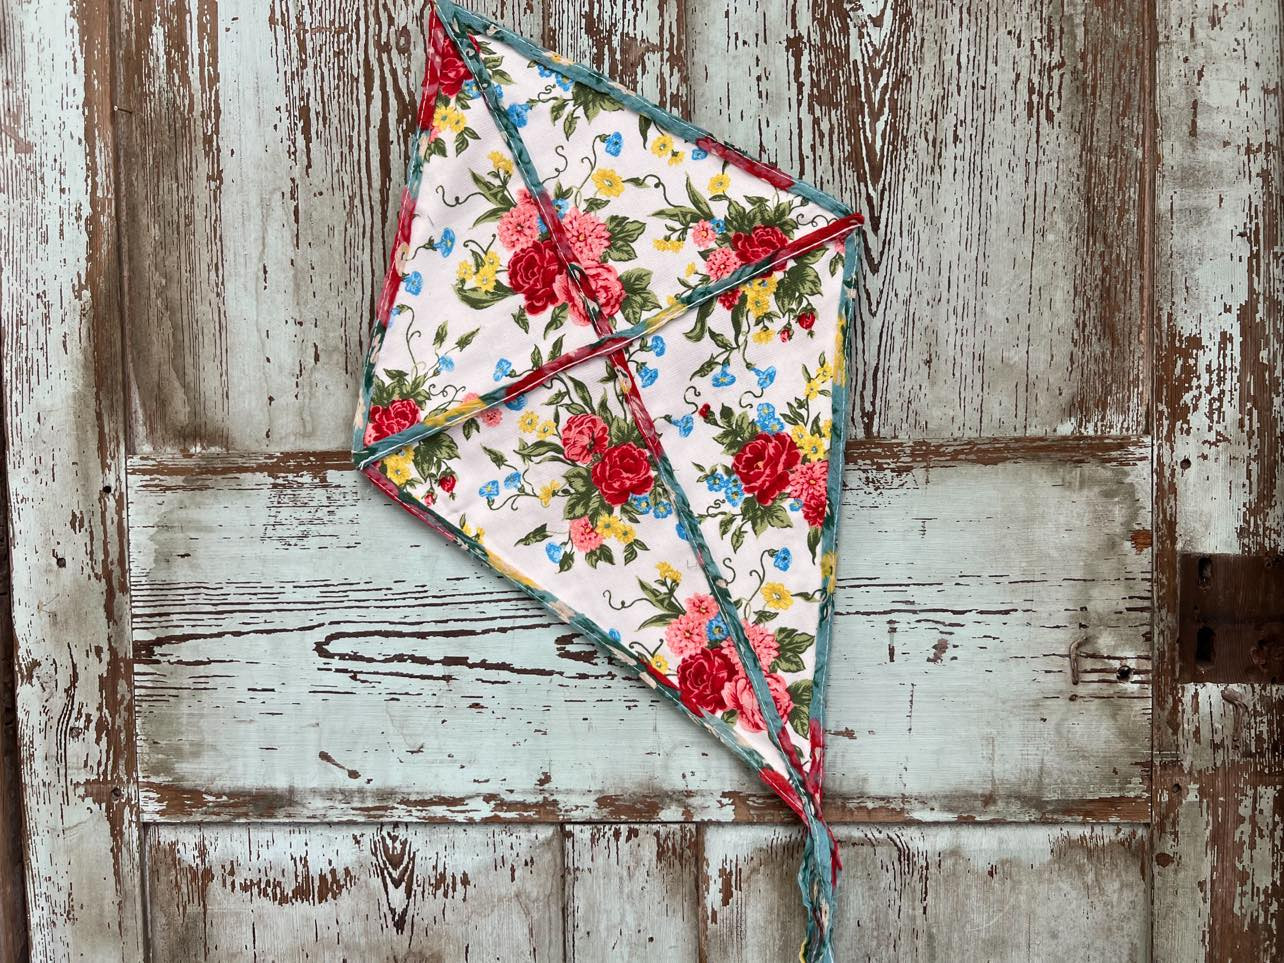 Finished DIY Pioneer Woman dish towel kite for porch decoration
Give this craft a try and bring a whimsical, handmade charm to your outdoor space this season using affordable and stylish Pioneer Woman dish towels!
