
Making perfect hard-boiled eggs might seem straightforward, but achieving consistently easy-to-peel results and yolks with no green ring can be a challenge. If you’re looking for a reliable method that delivers flawless hard-boiled eggs every time, look no further than this guide, inspired by the wisdom of home cooking experts like the Pioneer Woman. This method ensures your eggs are not only perfectly cooked but also incredibly easy to peel, making them ideal for a quick snack, breakfast, or your favorite recipes like egg salad and deviled eggs.
 Perfectly cooked hard boiled eggs sliced in half on a wooden board, highlighting bright yellow yolks and clean whites.
Just like many home cooks, I always keep a batch of hard-boiled eggs in my refrigerator. They are a healthy and convenient snack, and a crucial ingredient for dishes my family loves. Over years of making countless batches, I’ve refined a method that guarantees easy peeling and perfect cooking, drawing inspiration from tried-and-true techniques and tips shared by culinary icons like the Pioneer Woman.
If you’ve ever struggled with peeling hard-boiled eggs, you know the frustration of shells sticking stubbornly to the whites, tearing away chunks and leaving you with a mangled mess. This method addresses those common issues, ensuring smooth, frustration-free peeling. It’s a game-changer, especially if you’re preparing eggs for dishes where presentation matters, or simply want to enjoy a perfectly smooth hard-boiled egg without the peeling hassle.
Why This Hard Boiled Egg Method Works Wonders
This approach, echoing the practical and efficient style often associated with the Pioneer Woman, is designed for consistent success:
Effortless Peeling: By employing a combination of a hot start and a cold finish, this method consistently produces eggs that peel easily. The shells come off in large pieces, minimizing frustration and saving time.
Prevents Egg White Damage: The crucial step of shocking the eggs in an ice bath immediately after cooking is key. This rapid cooling helps to separate the egg white from the shell membrane, preventing the peel from ripping away precious pieces of the egg white. Say goodbye to mangled eggs!
Scalable for Any Quantity: Starting with boiling water means you can cook as few or as many eggs as you need without altering the cooking time. Whether you’re making a couple for a snack or a dozen for a potluck, this method remains reliable. Just ensure you use a pan large enough to accommodate the eggs in a single layer.
Conveniently Cook from Cold: No need to wait for your eggs to reach room temperature. This method works perfectly with eggs straight from the refrigerator, saving you time and planning.
Observe the satisfyingly large pieces of shell that effortlessly detach:
This method is inspired by time-tested techniques and aims to deliver the same dependable results that Ree Drummond, the Pioneer Woman, is known for in her own kitchen. While the original inspiration shared on the Pioneer Woman’s blog years ago highlighted the core principles, this updated guide incorporates further refinements for even better outcomes. If you’re looking for a simple yet effective way to make hard-boiled eggs, ditching complicated routines and embracing this method will revolutionize your egg game, whether you’re adding them to a hearty breakfast or preparing them for deviled eggs.
Essential Tips for Perfect Hard Boiled Eggs
To achieve truly perfect, easy-peel hard-boiled eggs, keep these tips in mind, drawing from the collective wisdom of experienced cooks:
Prioritize Older Eggs: While this method works well with eggs of any age, slightly older eggs are naturally easier to peel. As eggs age, the pH of the egg white increases, weakening the bond between the inner membrane and the egg white. Harold McGee’s book, “On Food and Cooking,” delves into this science in detail. Save your freshest eggs for frying or poaching, and use slightly older ones for boiling to maximize peel-ability.
Single Layer Boiling is Key: Avoid overcrowding the pan. For even cooking, and to prevent cracking, ensure your eggs are submerged in a single layer. If you’re cooking a large batch, opt for a wider pan like a skillet instead of a deep pot to maintain a single layer.
Peel Promptly for Best Results: The “magic window” for easy peeling is right after the ice bath, while the eggs are still slightly warm. If you leave the cooked eggs to cool completely before peeling, the membrane can re-adhere to the egg white, making peeling more difficult. For the easiest peeling experience, tackle the peeling task soon after the ice bath.
Now, let’s walk through the simple steps of this foolproof cooking process!
Step-by-Step Guide to Easy Peel Hard Boiled Eggs
Because we begin with boiling water, carefully lowering the eggs into the hot water is crucial to prevent cracking.
In the past, I used a wire basket, but occasionally eggs would crack if they dropped too quickly. Now, I’ve found a gentler and more effective method: using tongs.
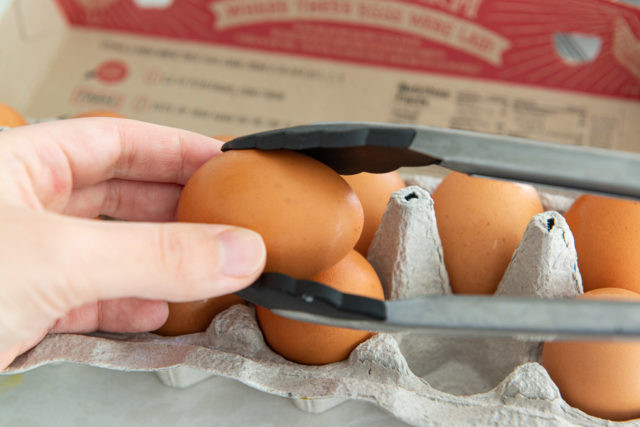 Close-up of a hand using nylon tongs to gently place a brown Vital Farms egg into a pot of boiling water.
A slotted spoon can also work if you don’t have tongs readily available.
Carefully place each egg into the boiling water, one at a time, using the tongs or slotted spoon.
It takes only about 30 seconds to gently place a dozen eggs into the water using this method, and it significantly reduces the risk of cracking. Plus, I find I can use less water this way compared to using a basket.
Once all the eggs are in the pot, set your timer for the appropriate cooking time (see below) and adjust the heat to maintain a gentle boil. The water should be actively simmering, but not boiling so vigorously that the eggs are bouncing around and potentially cracking against each other or the pot. A gentle boil is ideal for even cooking and preventing cracks.
Precise Cooking Times for Perfect Yolks
The cooking time depends on the size of your eggs. Use these guidelines for perfectly cooked yolks, from slightly soft to fully firm:
Large Eggs (most common): 13 minutes
Medium Eggs: 12 minutes
Extra Large/Jumbo Eggs: 14 minutes
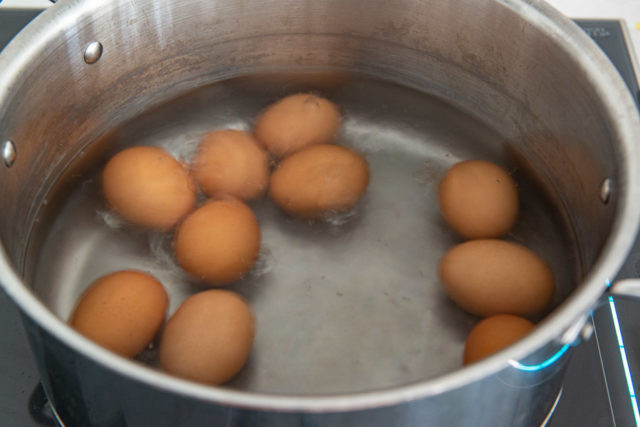 Overhead shot of eggs hard boiling in a saucepan with simmering water.
After the timer goes off, immediately drain the hot water from the pot and transfer the eggs to a large bowl filled with ice water for just one minute.
This short ice bath is sufficient to halt the cooking process and facilitate easy peeling, without chilling the eggs completely.
The Importance of the Ice Bath
Is the ice bath truly necessary? For the most consistently perfect and easy-to-peel hard-boiled eggs, the answer is a resounding yes. The ice bath performs two crucial functions:
Stops Carryover Cooking: Rapidly cooling the eggs in ice water immediately halts the cooking process. This prevents overcooking, which is the primary cause of the dreaded green ring around the yolk.
Facilitates Easy Peeling: The ice bath rapidly cools the shell while the egg white remains warm. This temperature difference creates a slight contraction, causing the egg white to pull away from the shell membrane, making peeling significantly easier.
If you don’t have ice readily available, you can use very cold running water. Drain the hot water and place the eggs in a bowl in the sink under a constant stream of cold running water for a few minutes. Ensure the water is continuously refreshed to maintain its cold temperature, similar to quick-thawing seafood.
While a longer ice bath was previously recommended, a short one-minute shock is truly all you need to stop the cooking and loosen the shells.
After the brief ice bath, peel the eggs right away. Peeling while the eggs are still slightly warm, but the shells are chilled, is when you’ll experience maximum ease in peeling. This is when the separation between the egg white and shell membrane is at its greatest.
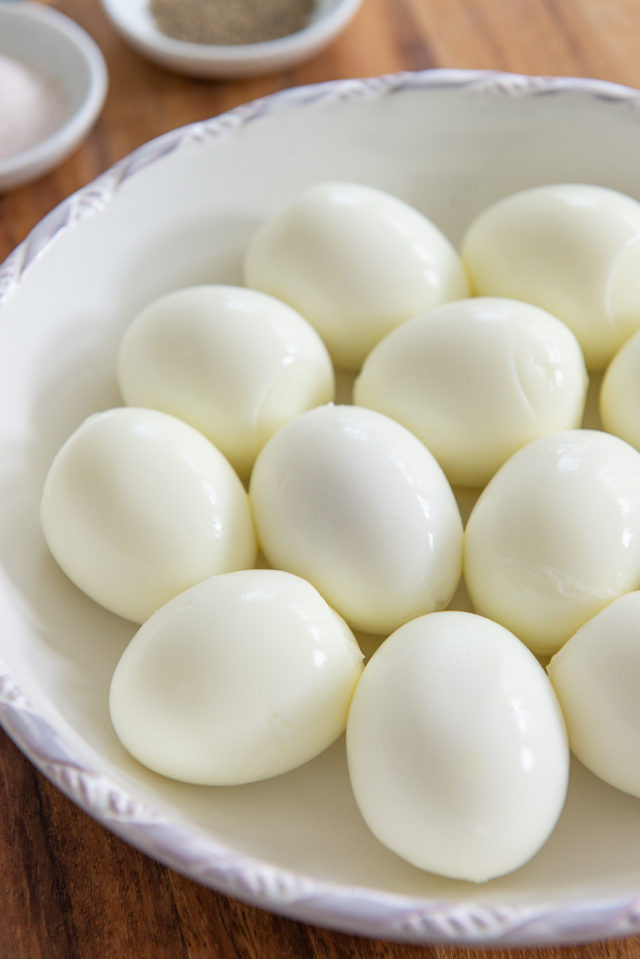 Close-up of peeled hard boiled eggs in a white ceramic bowl, showcasing smooth surfaces and easy peeling.
Creative Ways to Use Your Perfect Hard Boiled Eggs
Once peeled, your perfectly cooked hard-boiled eggs are ready to be enjoyed in countless ways:
Deviled Eggs: Transform them into elegant appetizers like Smoked Salmon Deviled Eggs, flavorful Bacon and Crispy Shallot Deviled Eggs, or zesty Chile Scallion Deviled Eggs.
Classic Egg Salad: Enjoy a simple and satisfying Egg Salad on its own or incorporate diced hard-boiled eggs into hearty salads like Red Potato Salad or Cranberry Chicken Salad.
Protein-Packed Green Salads: Add slices or wedges of hard-boiled egg to virtually any green salad to boost protein content. They are particularly delicious in Cobb Salad, nutritious Kale Salad, or flavorful Wild Rice Salad.
Breakfast Pairings: Create a balanced breakfast by pairing hard-boiled eggs with sides like crispy Hash Browns and savory Oven Bacon. For a heartier meal, serve them alongside Cheddar Scallion Biscuits or indulgent Bacon Cheddar Waffles.
Notice the vibrant yellow yolks, completely free of any green ring! These are truly perfect hard-boiled eggs, ready for snacking or your favorite recipes.
For more delicious egg preparations, explore guides on How to Poach an Egg, the iconic Croque Madame, and flavorful Herbed Baked Eggs. Enjoy your perfectly cooked eggs!
Hard Boiled Egg Recipe FAQs
How should I store hard-boiled eggs and for how long? Store cooked hard-boiled eggs in the refrigerator for up to 5 days in an airtight container. This prevents them from absorbing odors from other foods in the fridge. Never leave hard-boiled eggs at room temperature for more than two hours.
Can hard-boiled eggs be frozen? Freezing hard-boiled eggs is not recommended. The egg whites become rubbery and develop an unpleasant texture upon thawing. It’s best to cook only the quantity you anticipate using within a week.
How do I reheat hard-boiled eggs? If you wish to warm pre-cooked hard-boiled eggs, especially for breakfast, leave the shells on and submerge the desired number of eggs in boiling water for about 5 minutes to gently heat them through. Avoid microwaving hard-boiled eggs, as they are prone to exploding.
Are older eggs really better for easy peeling? Yes, slightly older eggs tend to peel more easily, although the difference is often subtle. Commercially sold eggs are typically not extremely fresh by the time they reach stores. This method works well even with fresher eggs, but older eggs might offer a slight advantage in peel-ability.
What’s the secret to making hard-boiled eggs that peel easily? For consistently easy peeling, the combination of a hot start (placing eggs into boiling water) and a cold finish (ice bath) is the most reliable technique.
What is the ideal boiling time for hard-boiled eggs? For large eggs, boil for 13 minutes. For medium eggs, 12 minutes. And for extra-large or jumbo eggs, 14 minutes.
How can I prevent the green ring around the yolk of hard-boiled eggs? The green ring is a sign of overcooking. Shocking the eggs in an ice bath immediately after boiling effectively stops the cooking process and prevents the formation of this harmless but visually unappealing ring.
Can I use an Instant Pot to make this recipe? Yes, Instant Pots are excellent for hard-boiled eggs. Add 1 cup of water to the Instant Pot, place a single layer of large eggs on the trivet, and cook at high pressure for 6 minutes. Perform a quick pressure release, then immediately transfer the eggs to an ice bath and peel. For softer yolks, reduce the cooking time to 4 minutes.
Did you find this recipe helpful? Please consider leaving a 5-star rating in the recipe card below and/or sharing your feedback in the comments section. You can also connect on Facebook, Instagram or Pinterest!
 Square thumbnail image of sliced hard boiled eggs on a wooden board.
Easy Peel Hard Boiled Eggs Recipe
Servings: 12 eggs
Prep Time: 0 minutes
Cook Time: 13 minutes
Ice Bath Time: 1 minute
Total Time: 14 minutes
These Hard Boiled Eggs are consistently easy to peel and perfectly cooked every time, using a method inspired by home cooking expertise.
Print Recipe Pin Recipe
6 reviews Leave a Review »
Ingredients
- 12 large eggs *
Instructions
- Bring a pot of water to a rolling boil over high heat. Ensure the water level is at least two inches above the bottom of the pot.
- Using tongs, gently and quickly place the eggs into the boiling water. To avoid splashing hot water, briefly shake off the tongs after each egg is placed.
- Adjust the heat to maintain a gentle but active boil. If cooking a large batch, you may need to slightly increase the heat. Conversely, if the boil is too vigorous and causing eggs to bounce excessively, reduce the heat slightly.
- Cook for precisely 13 minutes. Use a timer to ensure accuracy. While the eggs are cooking, prepare an ice bath (a bowl filled with ice and cold water).
- After 13 minutes, drain the boiling water and immediately transfer the eggs to the prepared ice bath. Let them sit in the ice bath for 1 minute to halt the cooking process.
- Promptly peel the eggs while they are still slightly warm for the easiest peeling experience. Enjoy immediately or store for later!
Recipe Notes
*This method works equally well for smaller or larger batches. The cooking time remains consistent regardless of the number of eggs, as long as the water is boiling and the heat is adjusted as described. Always start with cold eggs straight from the refrigerator. Bringing eggs to room temperature beforehand is unnecessary and may require adjusting the cooking time downwards.
Nutritional Information
Serving: 1g, Calories: 72kcal, Carbohydrates: 1g, Protein: 6g, Fat: 5g, Saturated Fat: 2g, Trans Fat: 1g, Cholesterol: 186mg, Sodium: 71mg, Potassium: 69mg, Sugar: 1g, Vitamin A: 270IU, Calcium: 28mg, Iron: 1mg
*Nutritional information is an estimate based on a food database and should be used as a general guideline.
Course: Breakfast
Cuisine: American
Author: Fifteen Spatulas
Posted in: All Recent Posts, Breakfast and Brunch, Dairy-free, Gluten-free, Low Carb, Snacks, Whole30 Compliant 8 comments