Pear preserves, especially when inspired by the warmth and tradition of the Pioneer Woman, bring a touch of homemade goodness to your table. Imagine the sweet, delicate flavor of ripe pears, perfectly preserved and ready to brighten up your breakfast, enhance a cheese board, or add a special touch to desserts. This guide will explore the charm of pear preserves, inspired by Ree Drummond’s signature style, and how you can bring this delightful treat into your own kitchen.
Pioneer Woman, Ree Drummond, is renowned for her heartwarming recipes that blend rustic charm with approachable techniques. While she may not have a specific “Pioneer Woman Pear Preserves” recipe explicitly labeled as such, her culinary ethos—emphasizing simple, flavorful, and homemade—perfectly embodies the spirit of crafting delicious pear preserves. Think of the comforting, home-style recipes she shares, often featuring fruits and seasonal produce, and you can envision pear preserves fitting right into her repertoire.
Why embark on making your own pear preserves? Beyond the unparalleled taste of homemade versus store-bought, creating your own preserves allows you to control the sweetness, spice levels, and overall flavor profile. You get to select the ripest, most fragrant pears, ensuring a final product bursting with natural pear essence. Plus, the process of preserving fruit is incredibly satisfying, filling your kitchen with delightful aromas and yielding jars of golden goodness that you can enjoy for months to come. It’s a rewarding experience that connects you to the tradition of home cooking and seasonal eating.
While a definitive “Pioneer Woman Pear Preserves” recipe might be elusive, we can craft a recipe inspired by her style – straightforward, delicious, and with a focus on simple, quality ingredients. Here’s a recipe that captures that Pioneer Woman spirit, designed to create pear preserves that are both easy to make and utterly delightful:
Pioneer Woman Inspired Pear Preserves Recipe
Ingredients:
- 4 lbs ripe but firm pears, peeled, cored, and diced
- 4 cups granulated sugar
- 1/2 cup lemon juice (freshly squeezed)
- 1 teaspoon ground cinnamon (optional, for warm spice)
- 1/2 teaspoon ground ginger (optional, for a zesty hint)
- Pinch of ground cloves (optional, for depth)
- 1/4 cup water (if needed to prevent sticking initially)
Equipment:
- Large, heavy-bottomed pot or preserving pan
- Sterilized jars and lids (pint or half-pint jars work well)
- Canning equipment (optional, for longer shelf life – water bath canner, jar lifter)
- Wooden spoon or heat-resistant spatula
- Ladle
- Clean damp cloths
Instructions:
-
Prepare the Pears: Wash, peel, core, and dice the pears into uniform pieces. The size is up to your preference, but smaller dice will cook down faster.
-
Combine Ingredients: In your large pot, combine the diced pears, sugar, lemon juice, and any spices you are using (cinnamon, ginger, cloves). Stir gently to combine. If the pears seem very dry initially, add 1/4 cup of water to prevent sticking before they release their juices.
-
Cook the Preserves: Place the pot over medium heat. Stir occasionally until the sugar dissolves and the pears begin to release their juices. Once it starts simmering, reduce the heat to medium-low to maintain a gentle simmer.
-
Simmer and Thicken: Cook, stirring frequently to prevent sticking and scorching, for about 45-60 minutes, or until the preserves have thickened to your desired consistency. To test for set, place a small spoonful of preserves on a chilled plate and refrigerate for a minute. If it wrinkles slightly when you push it with your finger, it’s ready. If it’s still runny, continue to simmer and test again.
-
Jarring and Preserving (Optional Canning):
- For Canning (Longer Shelf Life): While the preserves are simmering, sterilize your jars and lids according to canning guidelines. Keep jars hot until ready to fill. Once preserves are ready, ladle hot preserves into hot sterilized jars, leaving 1/4 inch headspace. Remove air bubbles, wipe jar rims clean, and seal with lids and rings. Process in a boiling water bath canner for 10 minutes (adjust for altitude if necessary).
- For Refrigerator Storage (Shorter Shelf Life): If you prefer not to can, ladle hot preserves into clean jars, leaving 1/4 inch headspace. Let cool completely, then store in the refrigerator for up to 3-4 weeks.
-
Cool and Enjoy: If canned, let jars cool completely undisturbed on a towel-lined surface for 12-24 hours to ensure seals have set. Check seals – lids should be concave and not flex when pressed. Unsealed jars should be refrigerated immediately. If refrigerated directly, let jars cool to room temperature before refrigerating.
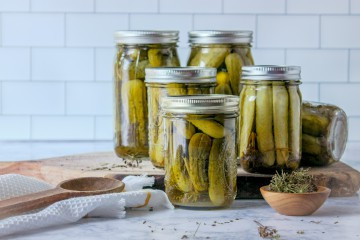
 Golden pear preserves in glass jars, ready to be enjoyed.
Tips for Perfect Pioneer Woman Inspired Pear Preserves:
- Pear Variety: Use firm-fleshed pears like Bartlett, Bosc, or Anjou. A mix can also add complexity. Avoid overly ripe pears as they can become mushy.
- Lemon Juice is Key: Lemon juice not only adds brightness but also helps with pectin activation for proper setting and acts as a natural preservative.
- Spice it Up (or Keep it Simple): The cinnamon, ginger, and cloves are optional but recommended for adding a warm, comforting depth reminiscent of Pioneer Woman recipes. Feel free to adjust spices to your liking or omit them for a pure pear flavor.
- Sugar Adjustments: While sugar is essential for preservation and set, you can slightly reduce the amount, but it may affect the set and shelf life. Do not drastically reduce sugar in canning recipes for safety.
- Consistency Control: Cooking time determines thickness. Simmer longer for thicker preserves. Remember preserves will thicken slightly as they cool.
- Sterilization is Crucial: For canned preserves, proper sterilization and processing are vital for food safety and preventing spoilage. Follow canning guidelines carefully.
- Label and Date: Don’t forget to label your jars with the contents and date made. This is especially important if canning for longer-term storage.
Serving Suggestions for Your Homemade Pear Preserves:
- Breakfast Staple: Spread generously on toast, biscuits, scones, or English muffins for a delightful breakfast treat.
- Yogurt and Oatmeal Topping: Swirl into yogurt or oatmeal for added sweetness and fruit flavor.
- Cheese Board Companion: Pair with creamy cheeses like brie, goat cheese, or ricotta on a cheese board for a sweet and savory appetizer.
- Dessert Enhancement: Use as a filling for thumbprint cookies, pastries, or serve alongside pound cake or ice cream.
- Glaze for Meats: Thin with a little water or juice and use as a glaze for roasted pork or chicken for a sweet and tangy flavor contrast.
- Gift Giving: Homemade pear preserves make a thoughtful and appreciated gift, especially during the holidays.
 Close up of pear preserves being spooned into a jar.
Embrace the spirit of home cooking and the comforting flavors of the Pioneer Woman with these delightful pear preserves. Whether you are a seasoned canner or new to preserving, this recipe is a wonderful way to capture the taste of fall pears and enjoy them throughout the year. The warmth of cinnamon and ginger, combined with the natural sweetness of pears, creates a preserve that is both versatile and utterly delicious. So gather your pears, channel your inner Pioneer Woman, and create jars of homemade goodness that your family and friends will adore.